The second part I'm responsible for on this Team Build are the connecting rods. This is a little more interesting and involved part than my flywheels. In this case I need to create the following fairly complex part:
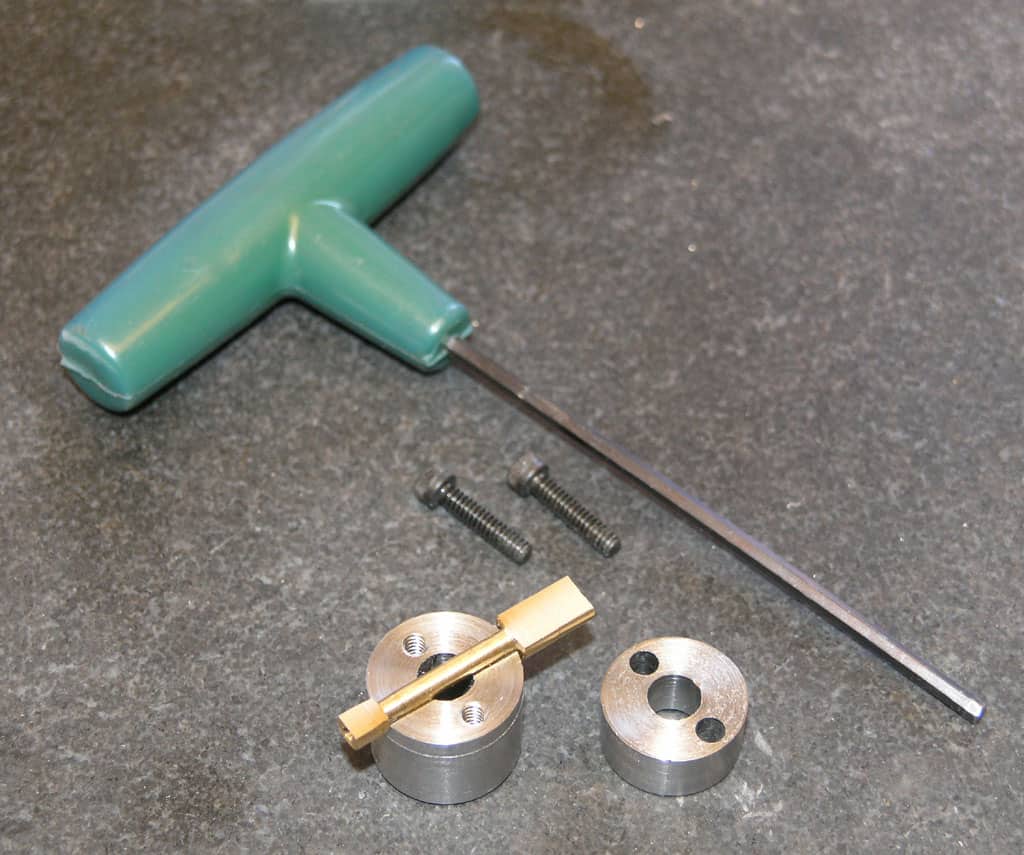
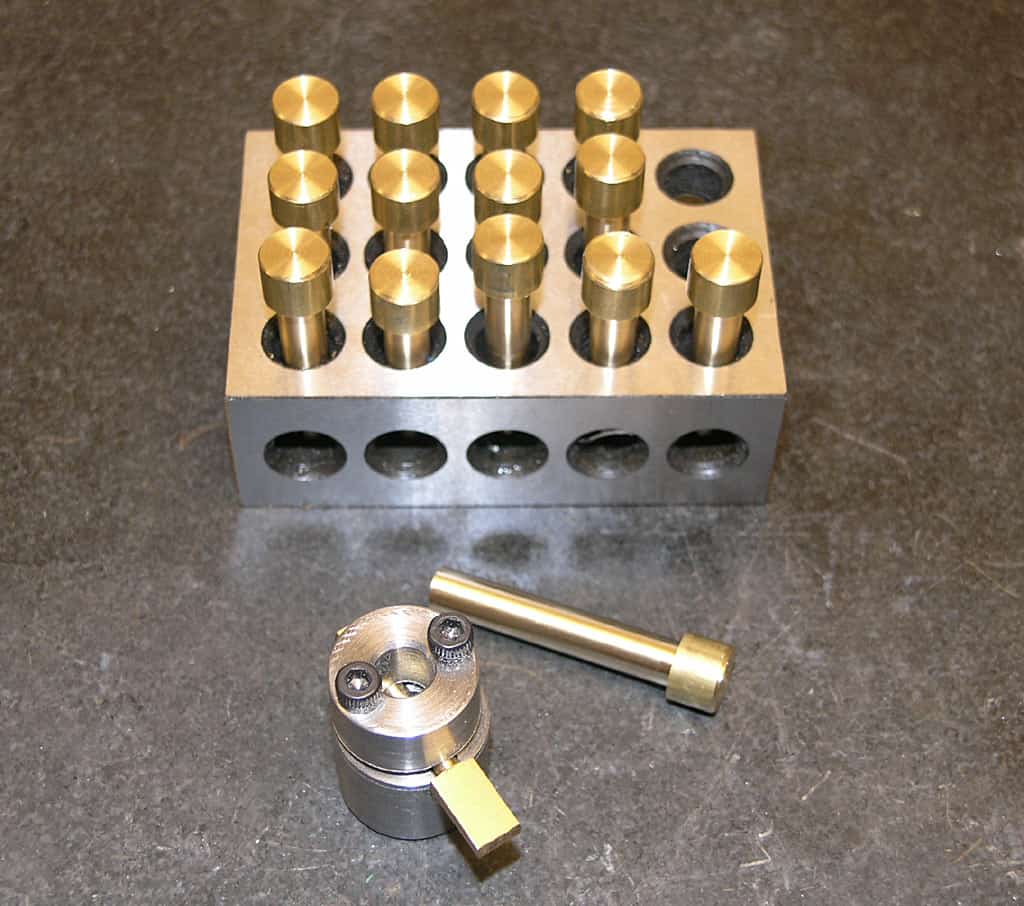
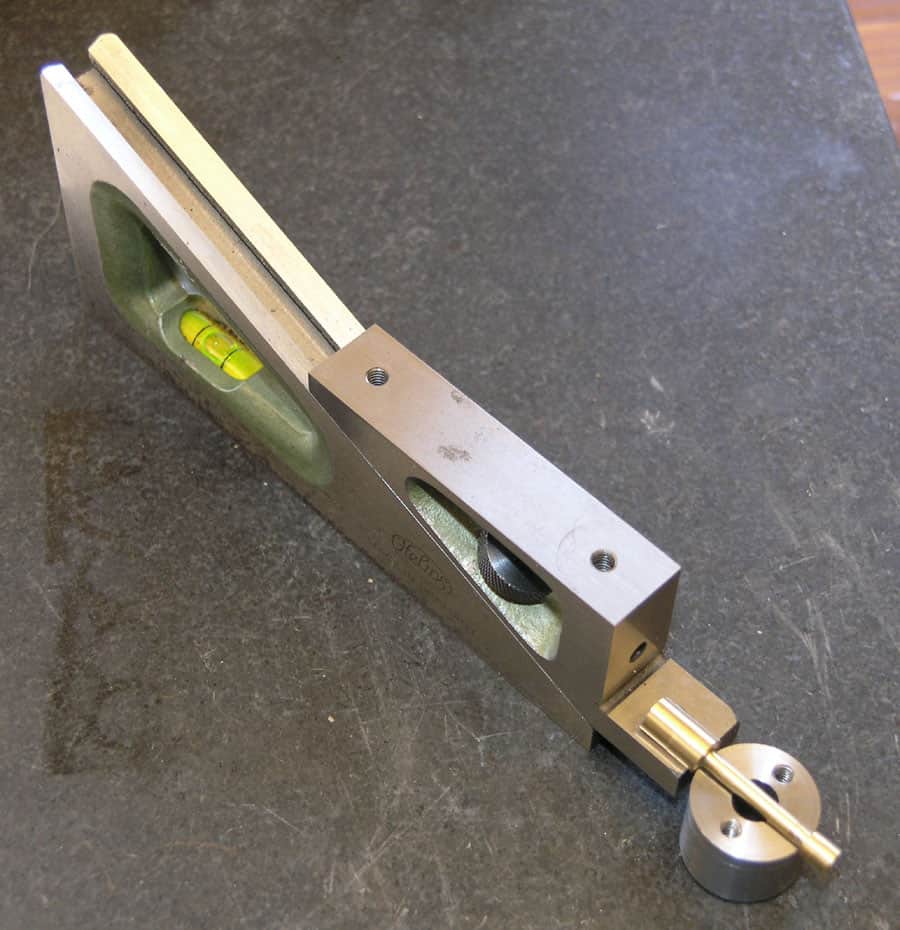
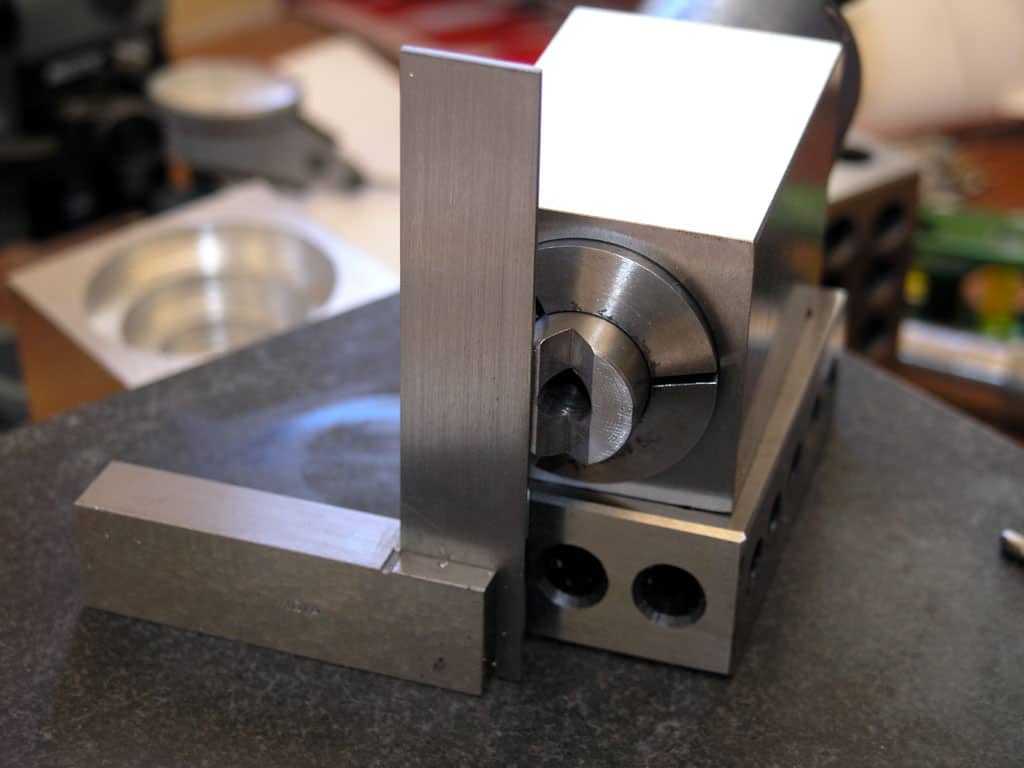
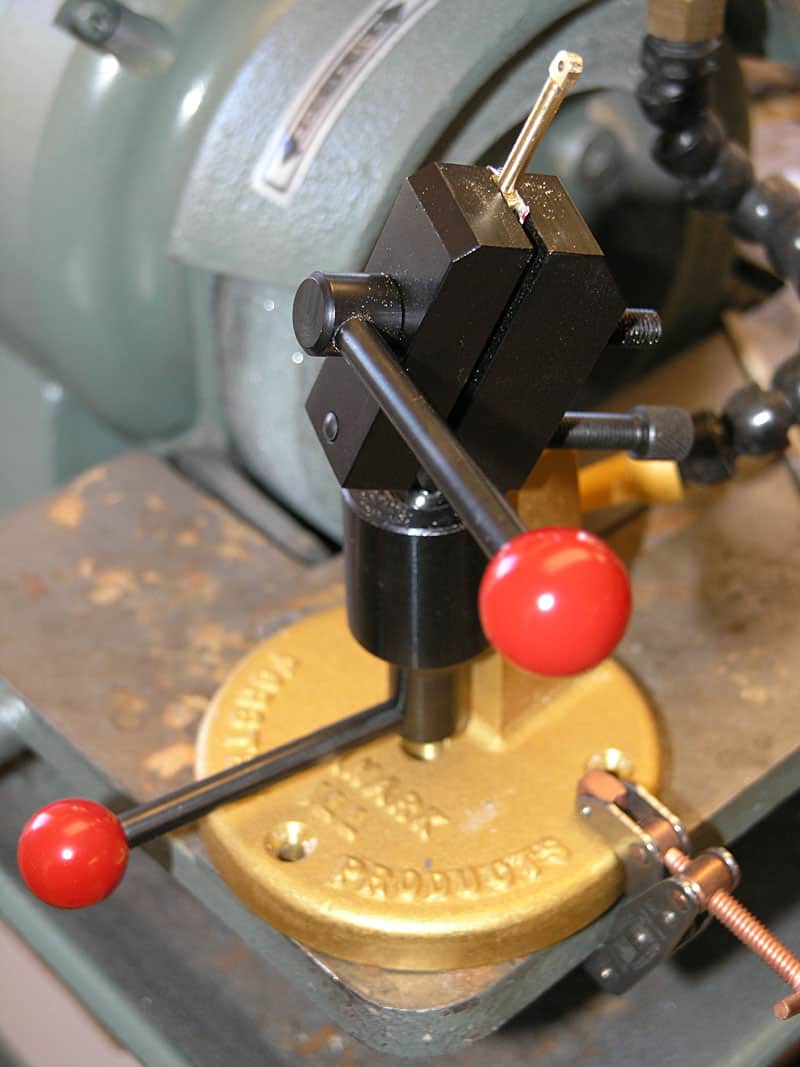
To assist, I will construct a fixture called a "Button V-Block". If you're curious about how to make one, be sure to visit my page on the subject. It's a wonderful little piece of tooling inspired by Ed Dubosky's article, which came to me via the Metalworking One book. Here's what mine looks like:
Parting Need Not Be Sweet Sorrow With Brass and a Good Stop
The first step in the production line is to part the raw stock to useful lengths. For this purpose, I'm doing something that's common practice but new to me. Specifically, I am using a technique that is the manual equivalent of the automated "bar pullers" used by CNC lathes. Follow along with my photos to see how this works:
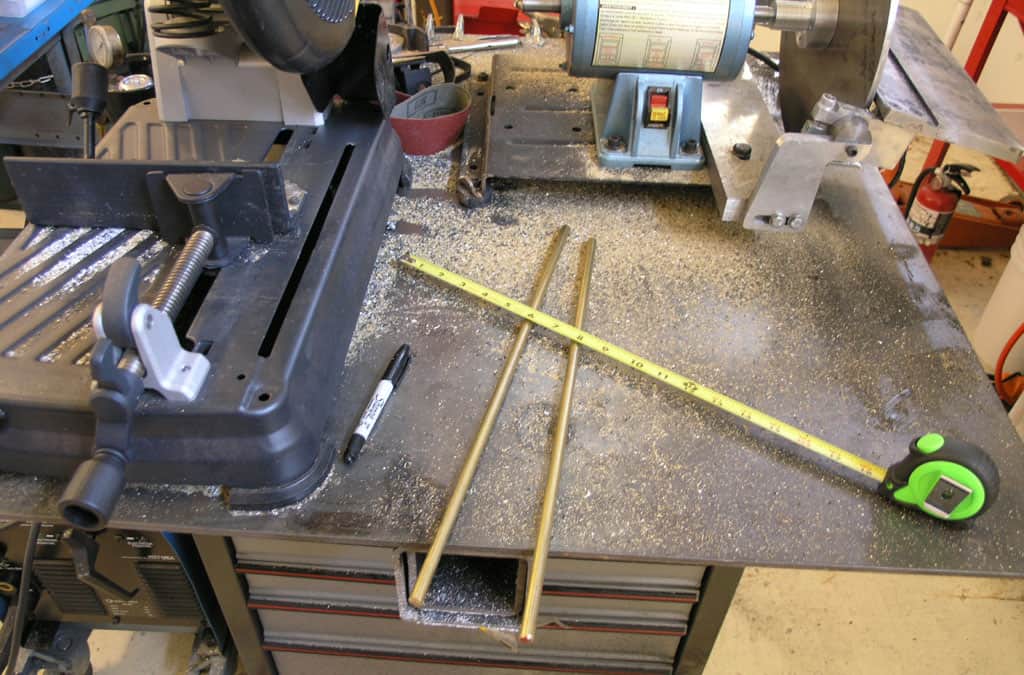
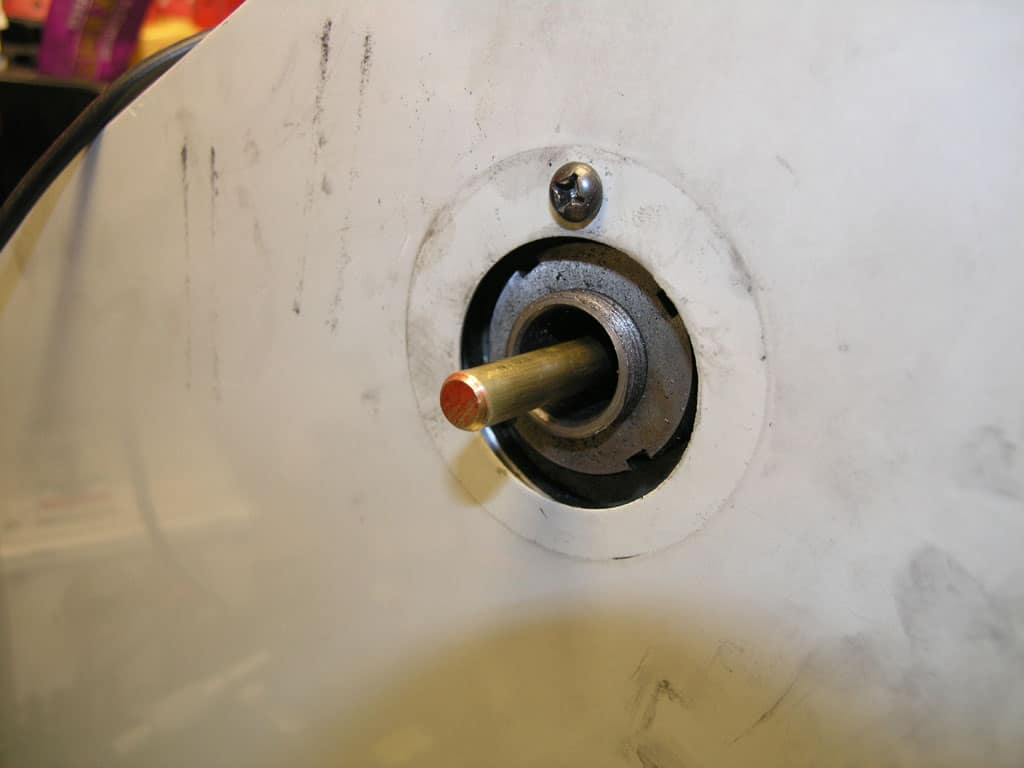
First thing I did was to cut my original long brass round stock to length. What length? I'm going to be inserting these pieces inside my lathe spindle, so I cut them so that no more than an inch would hang out the back end. That's about 18" for my Lathemaster 9×30 lathe...
Like I said: not too much hanging out the back end. A big long piece hanging out the back unsupported can be very dangerous. Think about the gyroscopic effects: as it spins it wants to throw out away from the axis, but the further it throws, the faster it is moving, making it want to bend even further. Very dangerous! So let's keep it inside ths spindle for the most part. I tested carefully once I had it in there even so to be sure it wouldn't have any tendencies to whip around. Sometimes it is advisable to make up a spindle liner or sleeve to help support the piece inside the spindle...
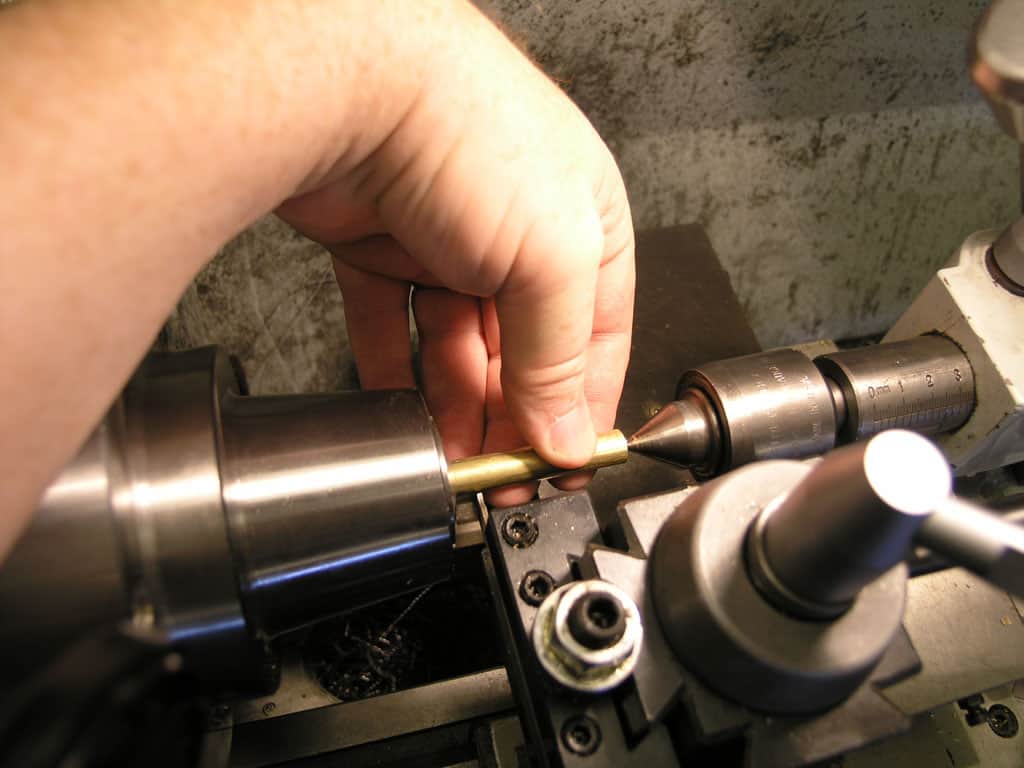
Next I set up the tailstock with my live center to act as a work stop. To begin, loosen the collet, grab the workpiee, and pull it out until it contacts the stop (live center)...
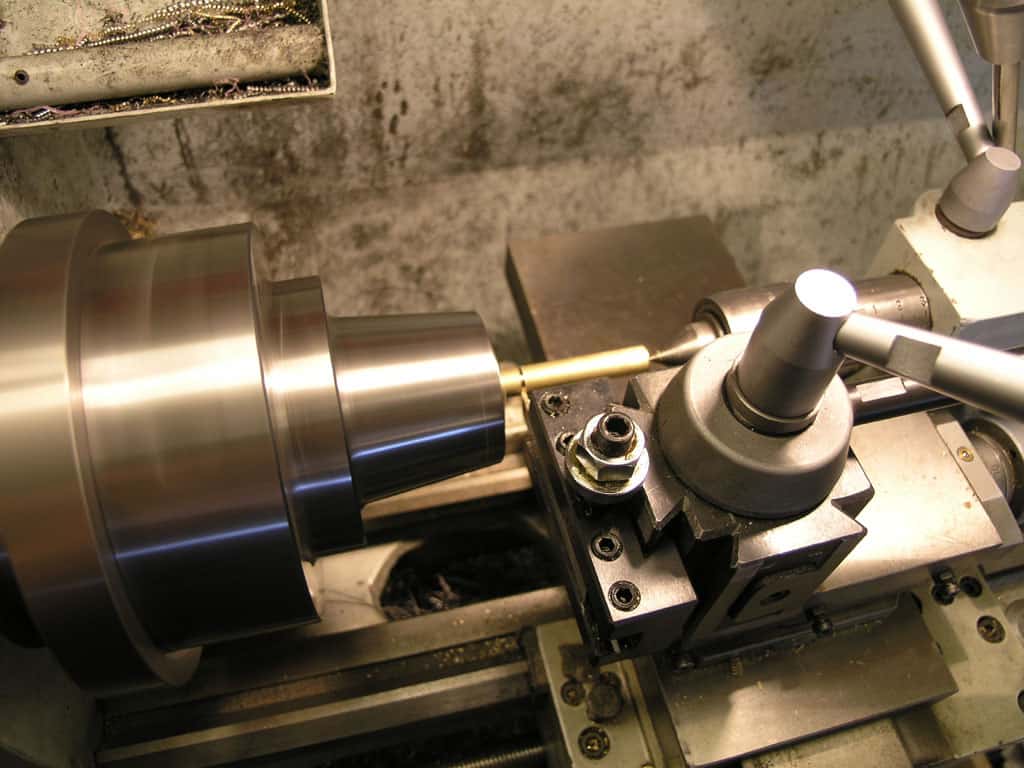
Tighten the collet, start the spindle, part it off, and do it again. As each part is finished there is a satisfying Klonk! as it drops into the tray below. Not quite as good as "Cha Ching", but it is a happy sound nonetheless...
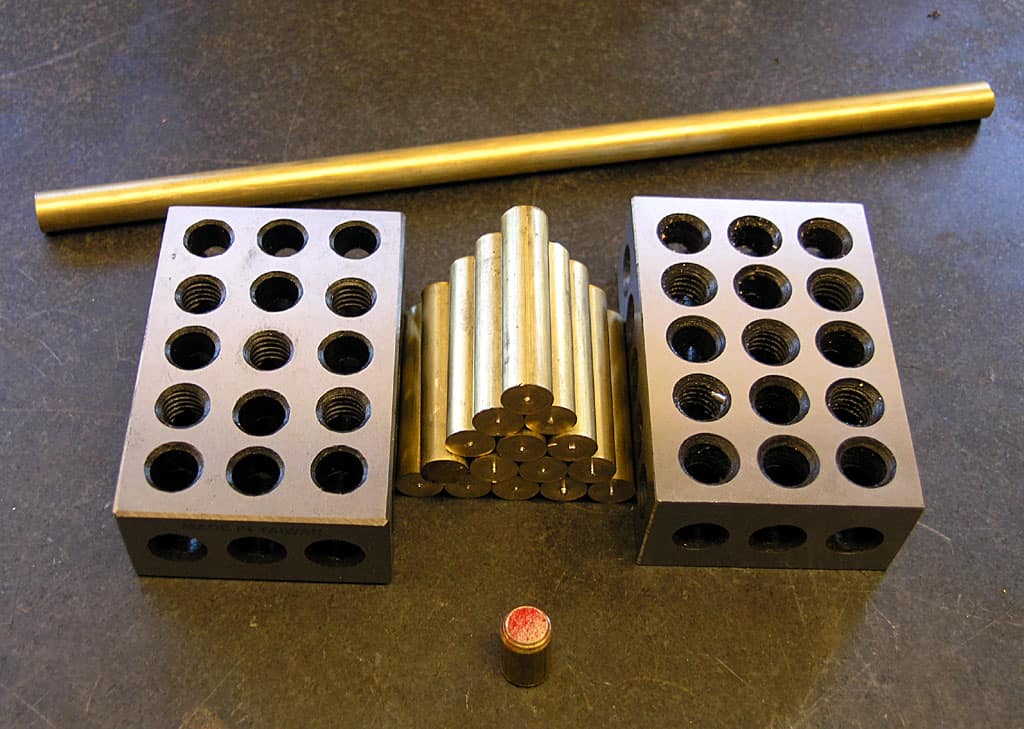
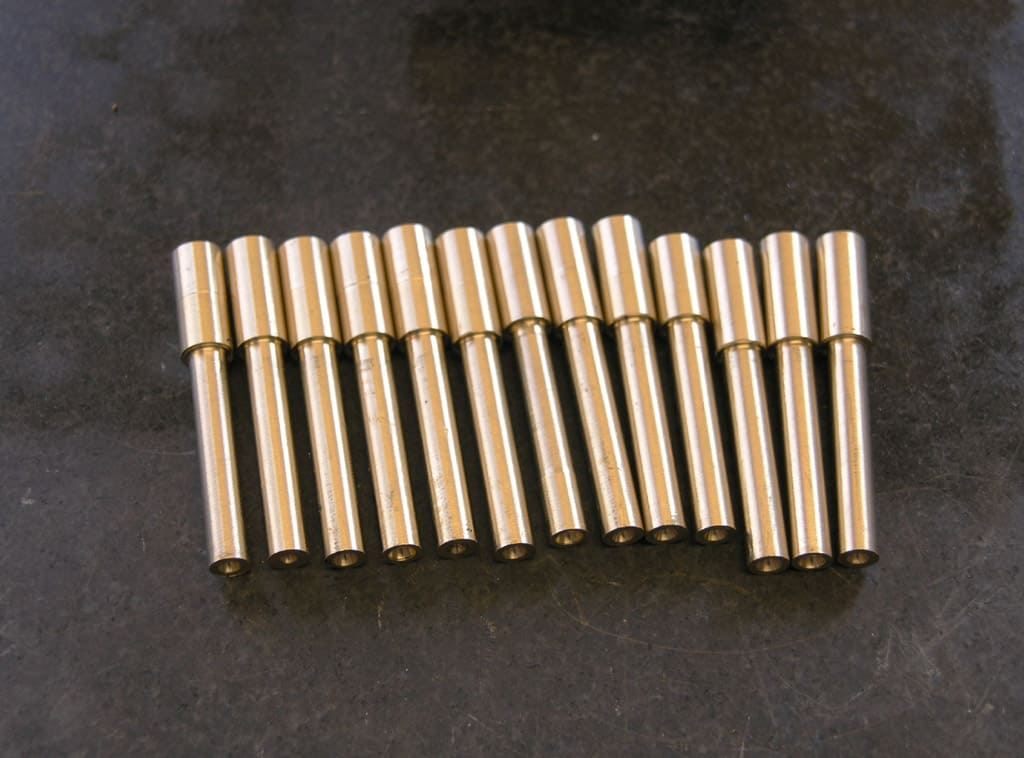
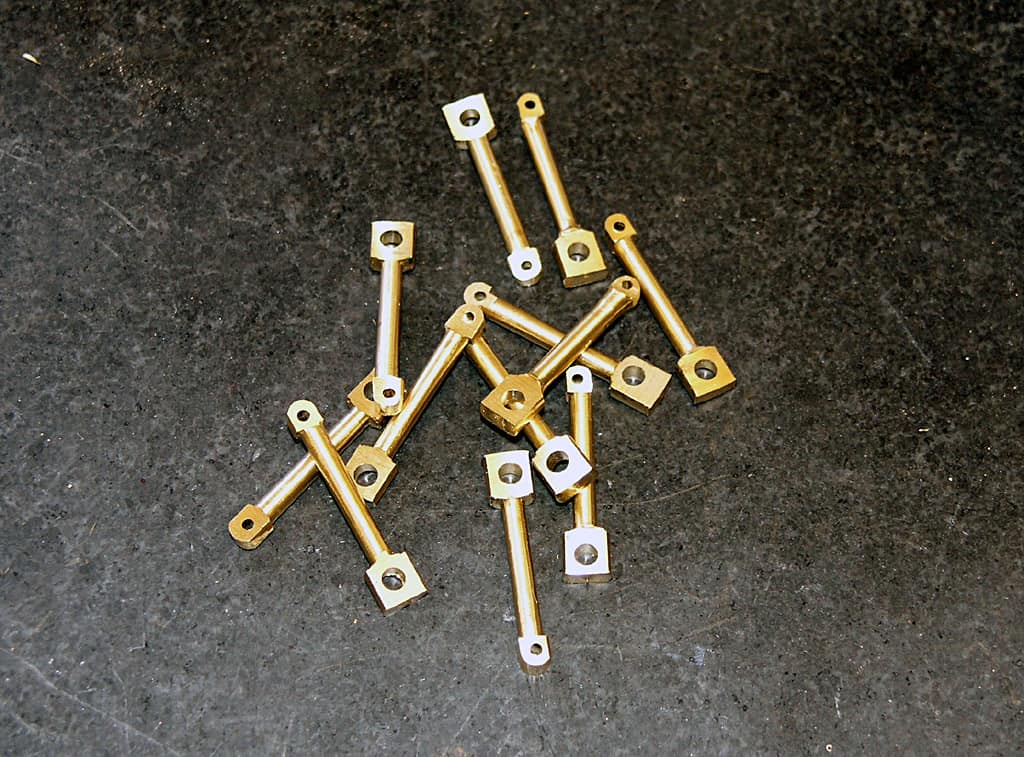
In a very short time, 15 or 20 seconds per piece, you'll have a stack of nearly equal length blanks ready to go. The stub from the first 18" piece is at the bottom, and the remainder of the 2nd piece is at the top. Although I am making 12 connecting rods, I cut 15 blanks just in case some have to be scrapped!
A Tale of Turning Three Diameters
The con rod has three diameters to be turned:
- "Big End" is 0.250"
- "Little End" is 0.188"
- "Skinny Middle" is 0.125"
The challenge is to do all three diameters with crisp shoulders and in the right places quickly and easily.
One thing I found early on is that there basically is not enough room to use the tailstock. Even sticking the tool way out of the holder, switching from my 1/2" to 3/8" shank holders, and angling the holder, I couldn't get all the way there. Scratch the tailstock!
The good news is I don't have much material to remove, and so hogging isn't required. I can take 0.020" with a < 0.010" finish pass and life is good with my CCMT turning tool and a sharp CCGT insert...
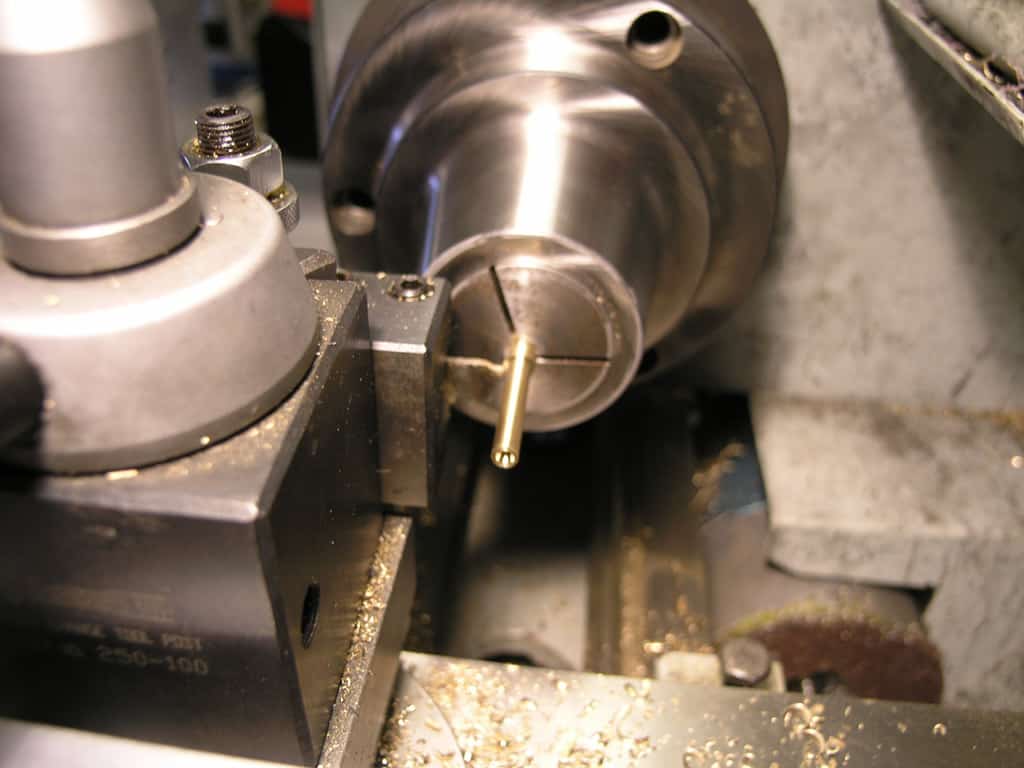
So the first phase was turning to the big diameter: 0.250". The button on the end is from the portion of the original blank held in the collet. We'll flip it around and get that too!
Okay, all the parts have had their big diameter turned, flipped around to finish the big diameter, and then the small end diameter (0.188") was turned. I used a collet stop and turned to the end of the collet. They're not exactly the same length, but we can true that up later...
Next up is the hard part: the skinny section between the big end and small end of the connecting rod. I'm going to use a parting blade to do the job. Before I got going with the parting blade, I tuned it up for the purpose. This involved a radius cut on the grinder to get some positive rake (not needed for brass, but I had done it earlier, and it didn't seem to hurt, so I went ahead and listed it here), honing with a diamond hone, and then using the hone to slightly radius the cutting side. More details on the Parting and Cutoff page.
Now we have to accurately "mark out" where the skinny section goes. I'll use my compound DRO to do that. First touch off the big end shoulder...
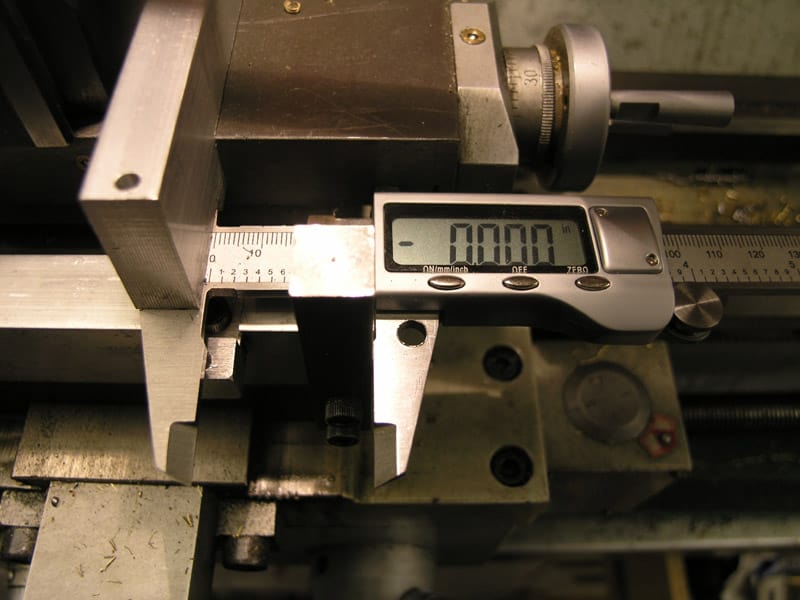
Zero DRO...
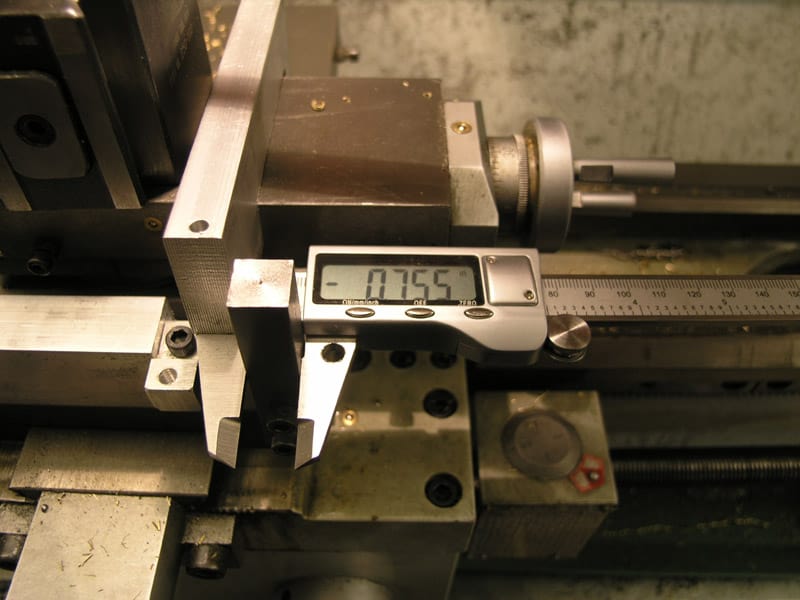
Crank back the desired distance. Remember to allow for the thickness of the parting blade...
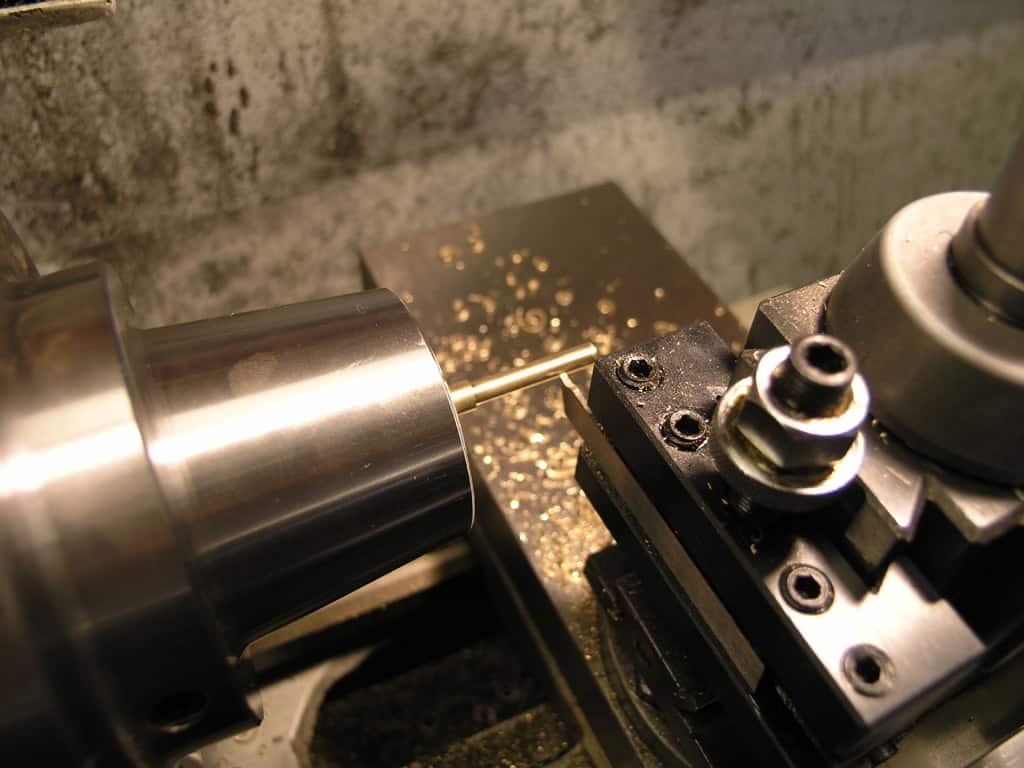
Now we can plunge the blade. Be careful plunging! Gently turn the cross slide handwheel until you're cutting 0.010". Engage the power feed...

This was a sensitive operation. If you see material buildling up on the cutting edge, stop!!! Reduce depth of cut! 0.020" broke the part handily the first time I tried. I was wearing a 4x magnification head loupe, which really helps when working on parts this small...
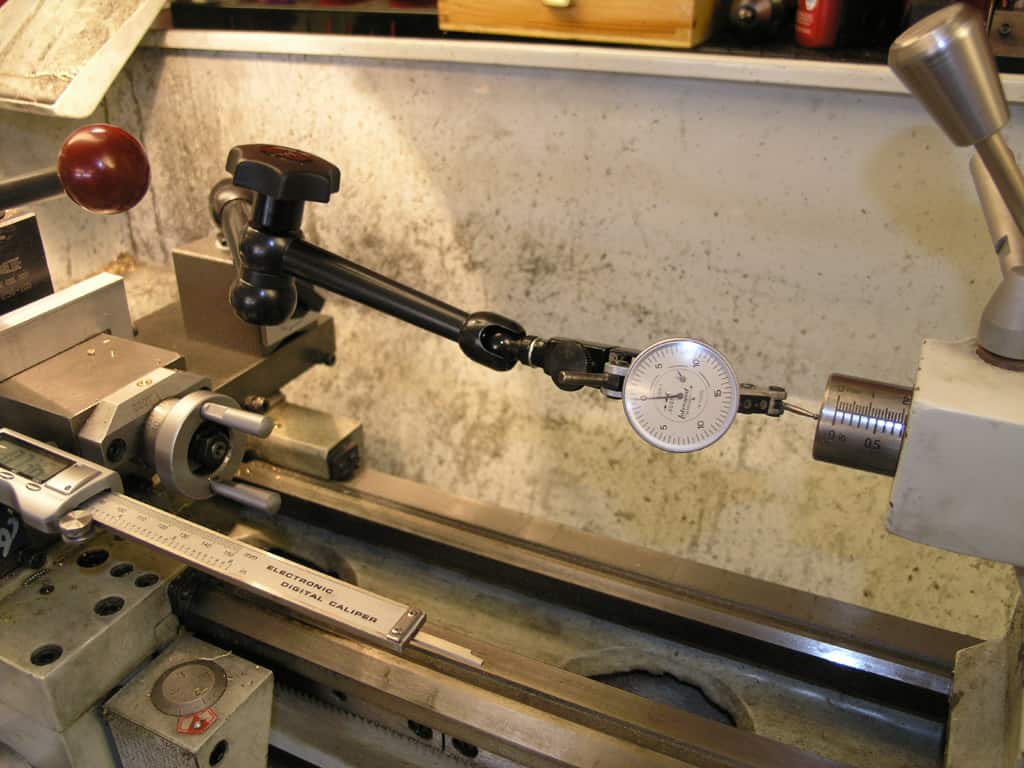
I couldn't find my normal Mighty Mite mag base indicator, so I just set up my DTI against the tail stock and zeroed it when at the left shoulder. This tells me how far to return the carriage for a second pass...
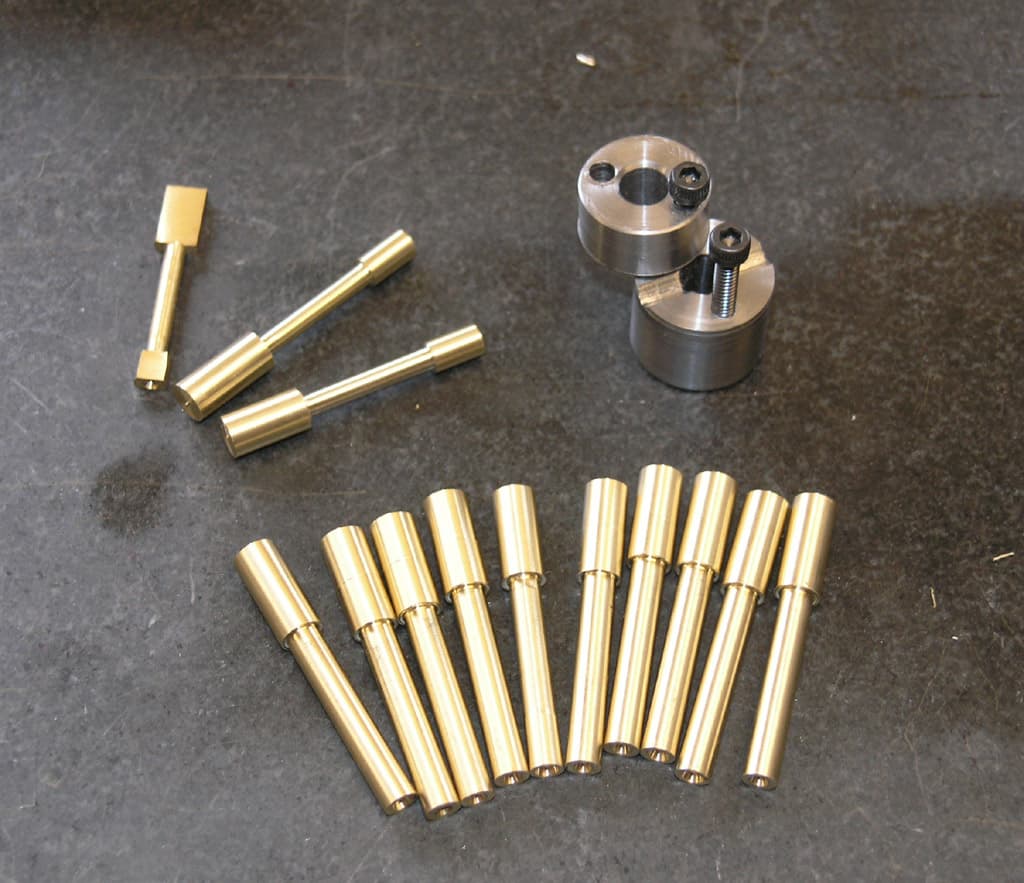
The result is a con rod blank with nice square shoulders for a minimum of effort. I still got a few more to do this afternoon!
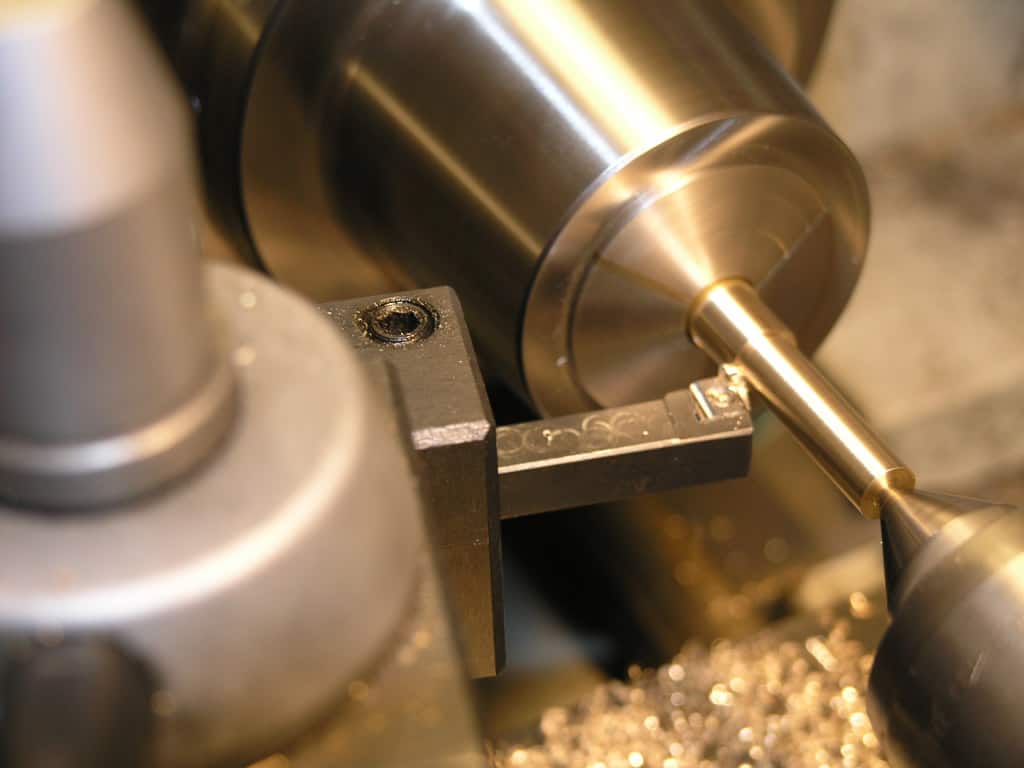
Flattened Ends
I made a button v-block (per Ed Dubosky) specifically for this operation. It's a perfect little gizmo for holding these con rods on the lathe:
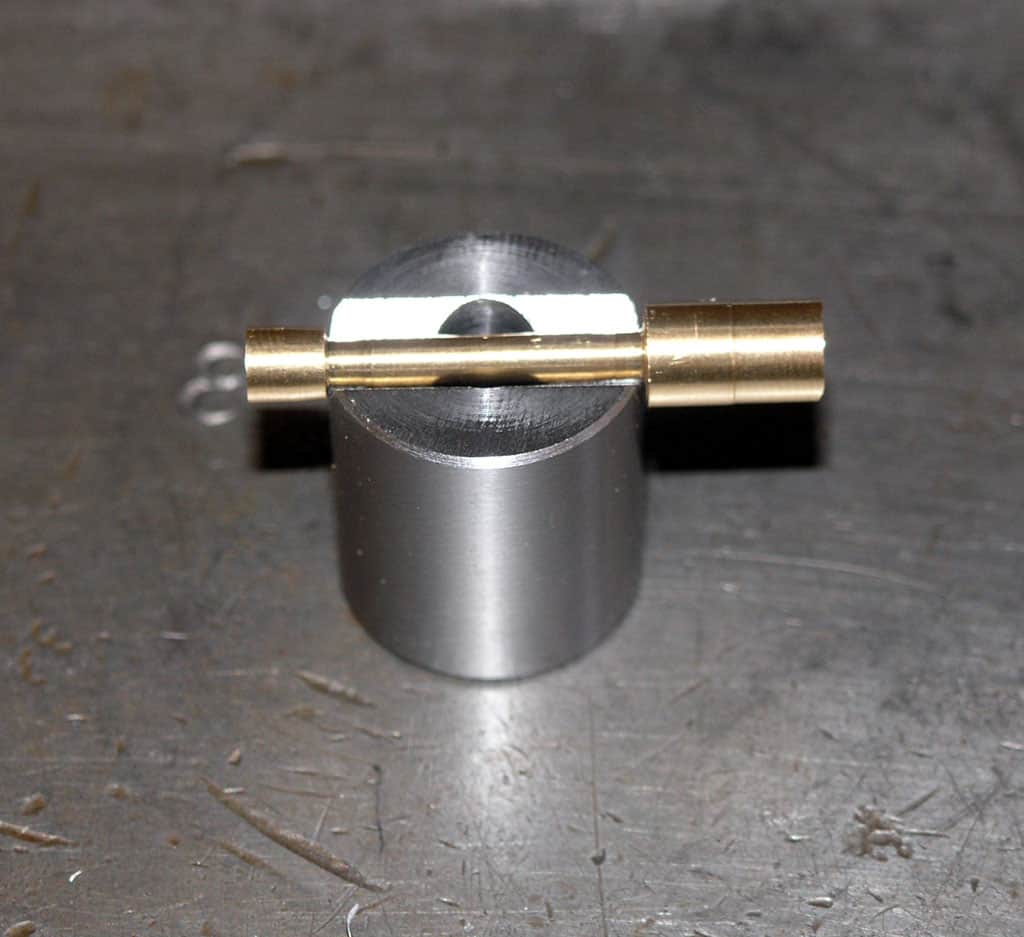
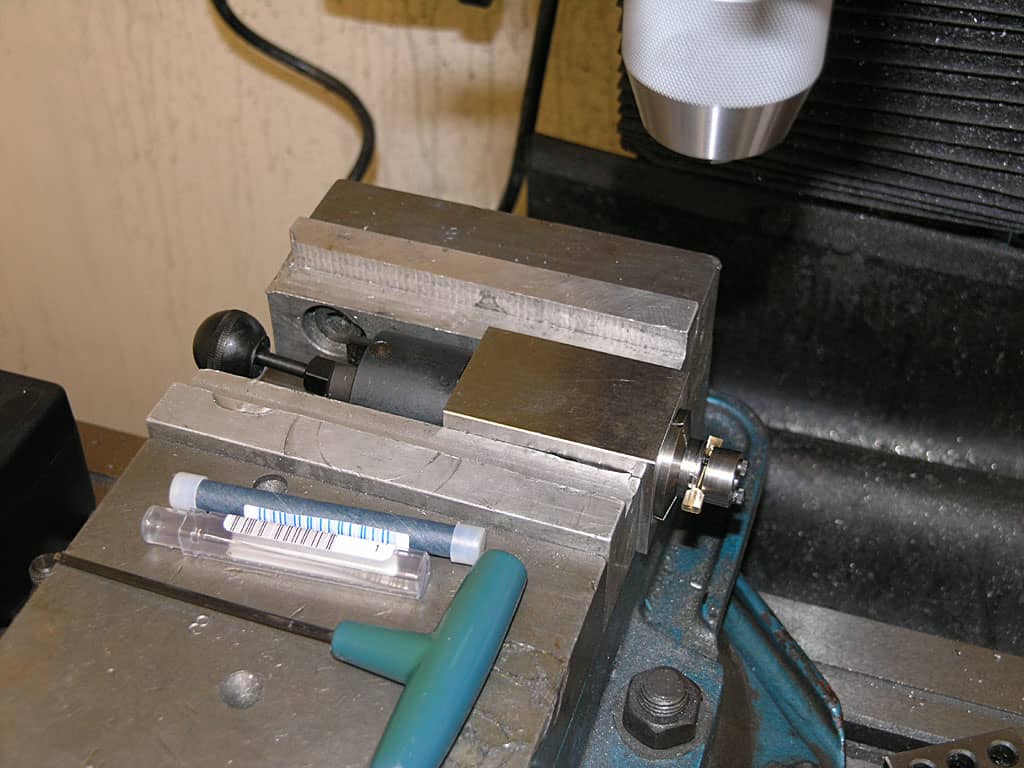
Here is how a con rod blank sits in the v-groove of the button v-block...
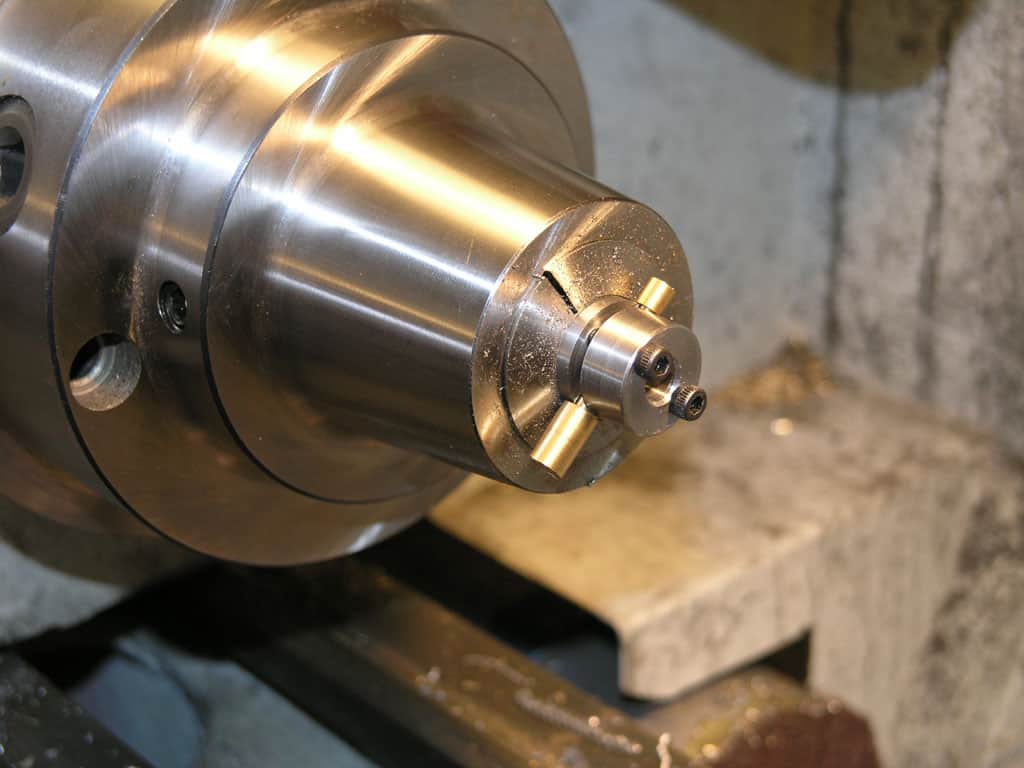
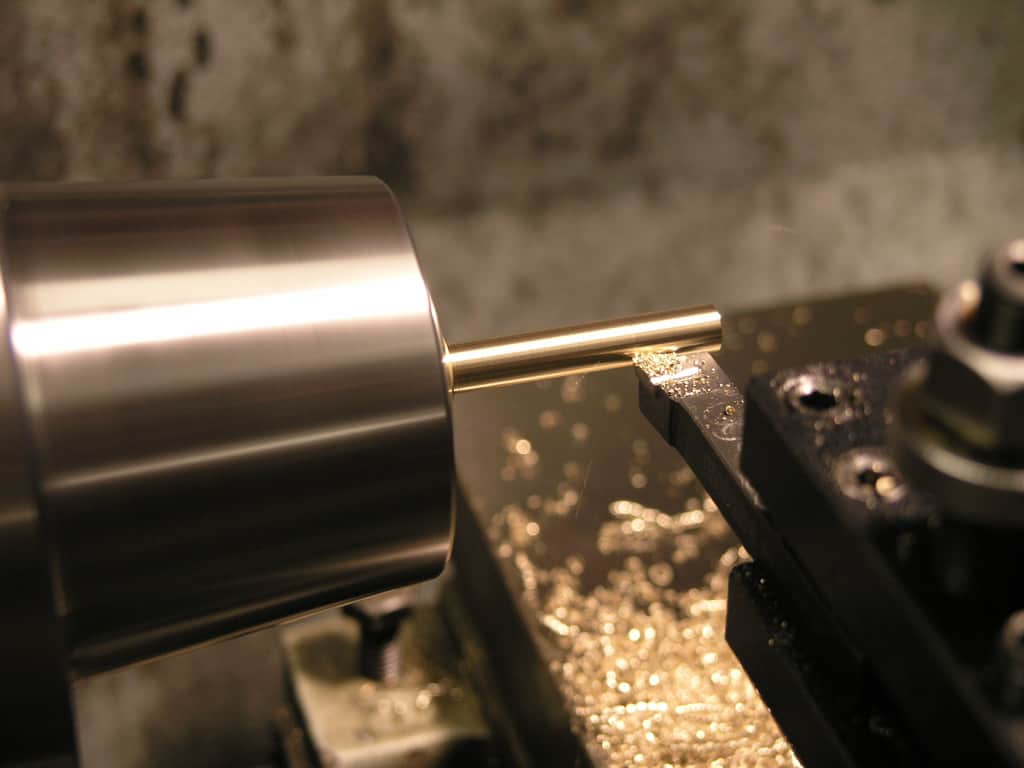
Put the clamping top in place, tighten, and insert the assembly in the collet chuck (or other chuck if you prefer)...
CCMT turning tool makes short work of putting a flat on one side, taking care of both ends at once in a facing operation. This is much easier than mucking around on the mill!
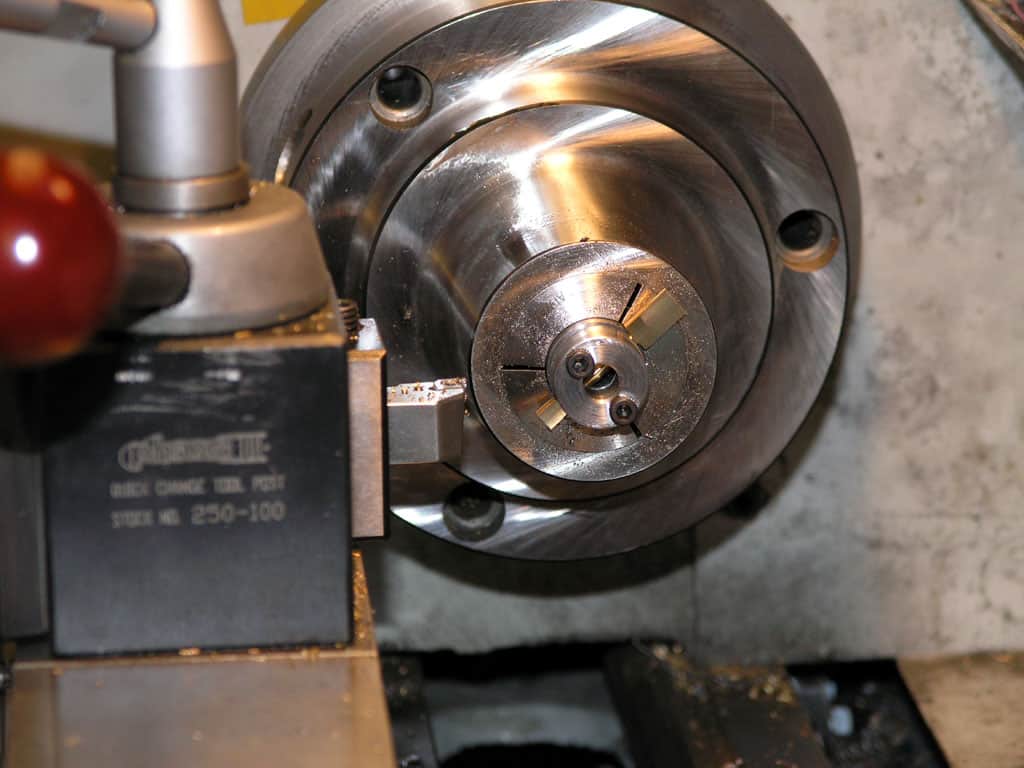
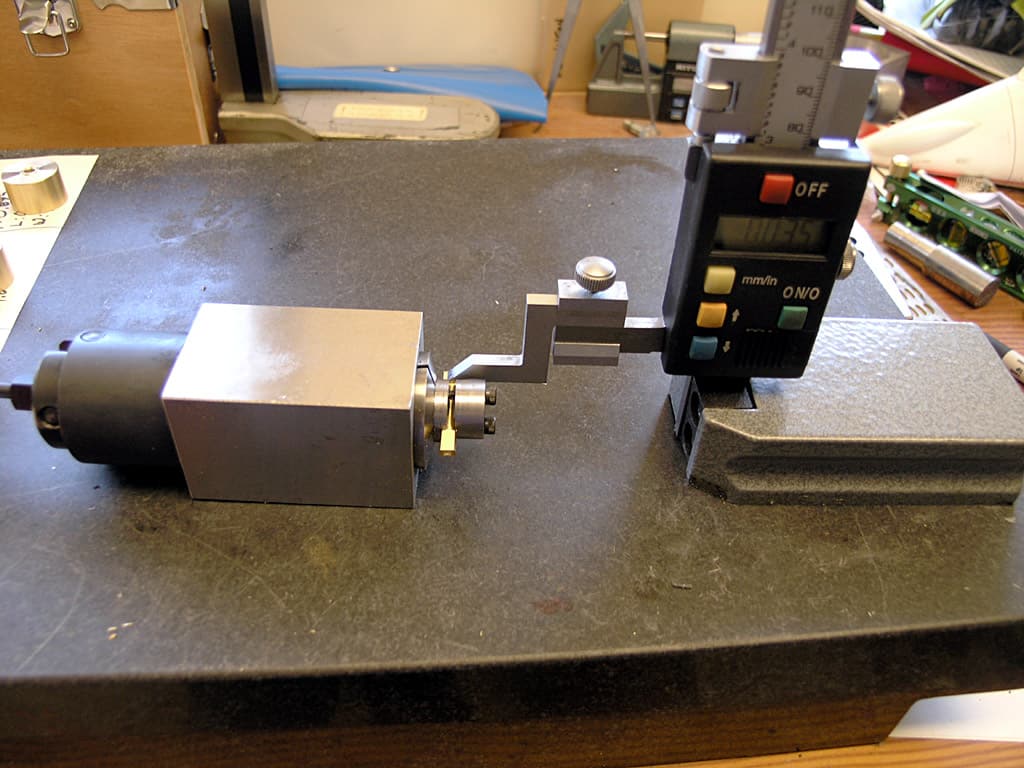
To do the other side, I used a planer gage to "flip" the part so the flat end registers against the gage and stays aligned with the axis. It didn't take too long to do all 12 con rods this way...
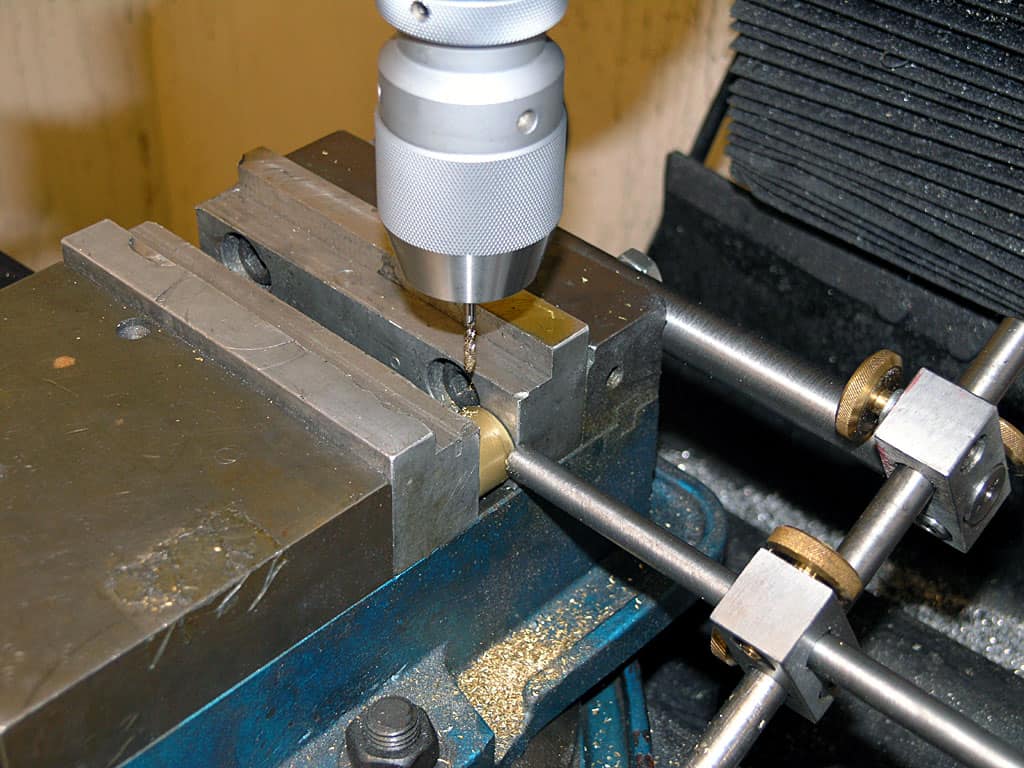
Drilling and Reaming Holes at Either Rod End
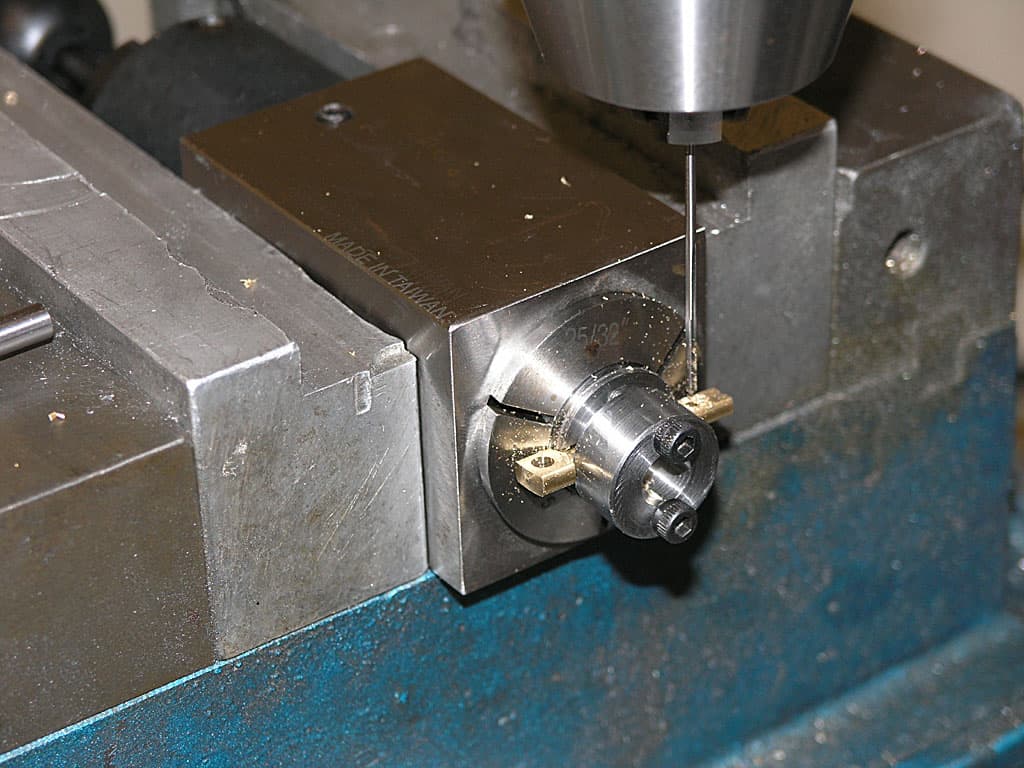
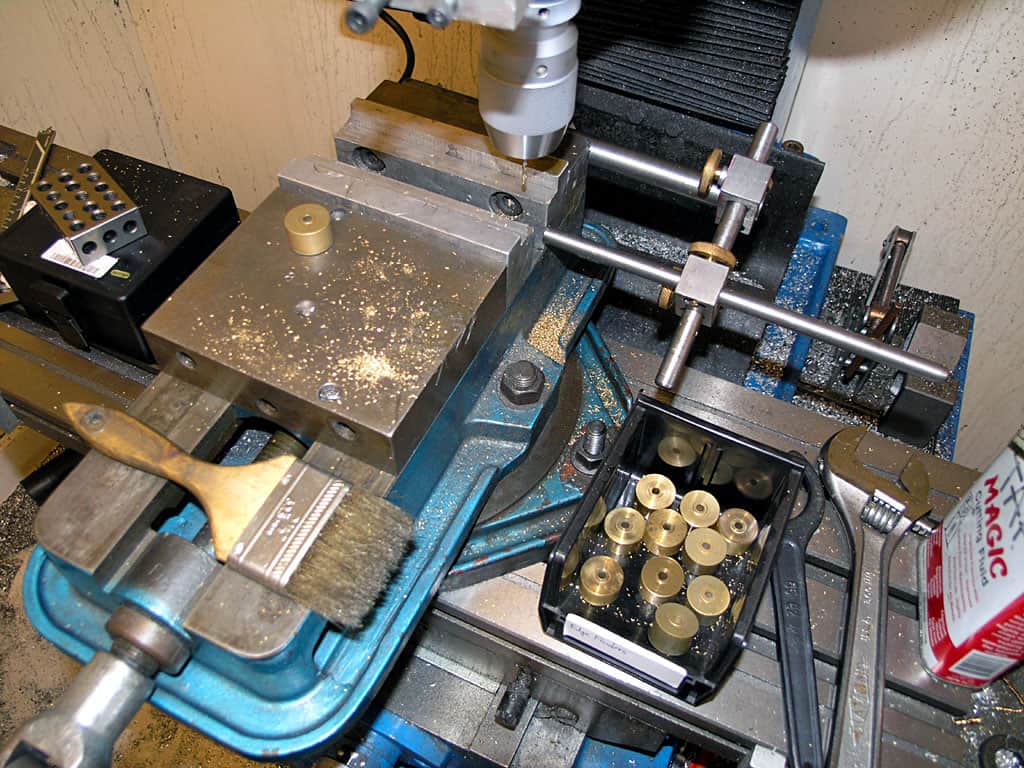
The con rods are very close now, and starting to look the part. Next up is drilling and reaming the big and small ends. I used the button v-block as a fixture again, only this time I will be on the mill:
Making sure the v-block slot is aligned with the collet block...
Here is the block installed in the Kurt vise on the mill...
The aligned ‘V" takes care of one axis, but we have to use another method to align the second axis. I found it easy to just drop the height gage down to square it, but the planer gage would work too...
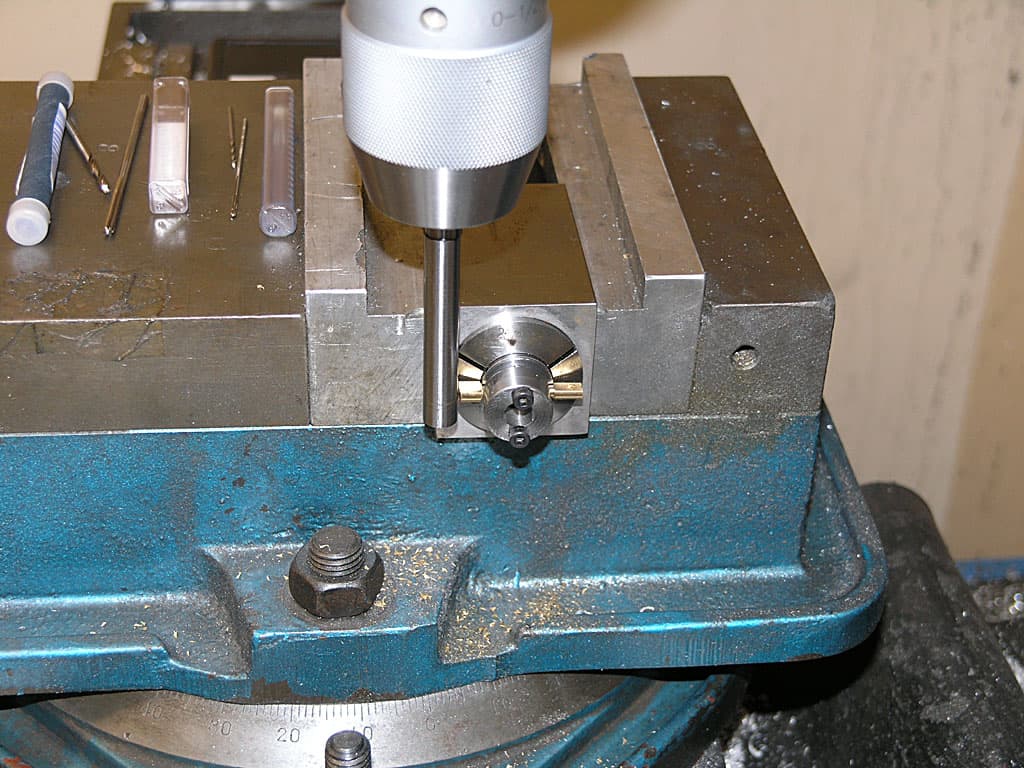
Next we have to precisely locate the axis of the mill over the correct spot for the hole. For starters, I'm using a Starret edge finder to go at the part first in Y (shown here)...
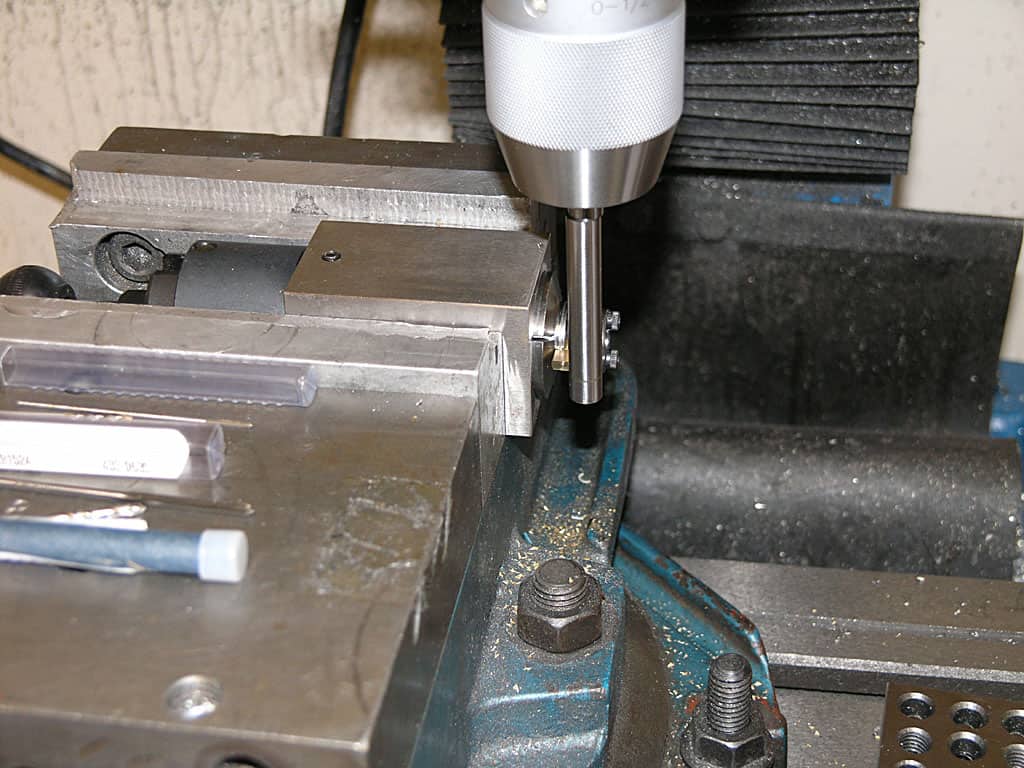
And then in X. You can see the edge finder "kicks" as soon as it touches the edge of the part. It is spinning at the mill's slowest speed. At the point, I accurately know where the front and right edge of the part are located. I can now remove the edge finder, and use the handwheels to center exactly where the hole in the big end needs to be...
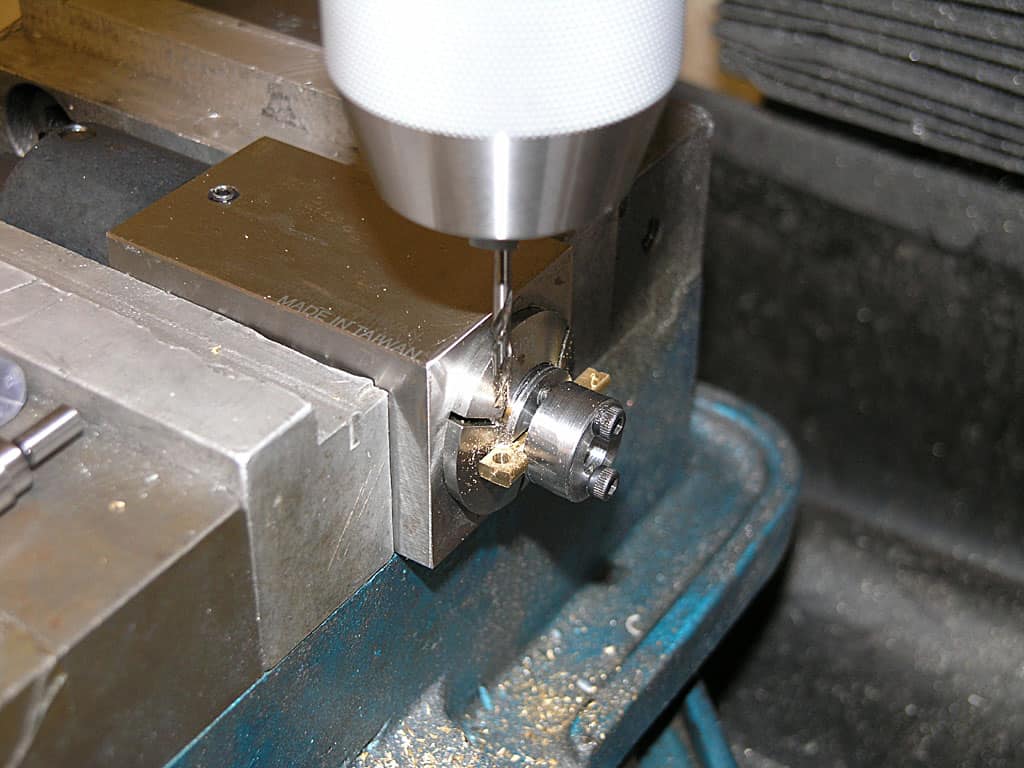
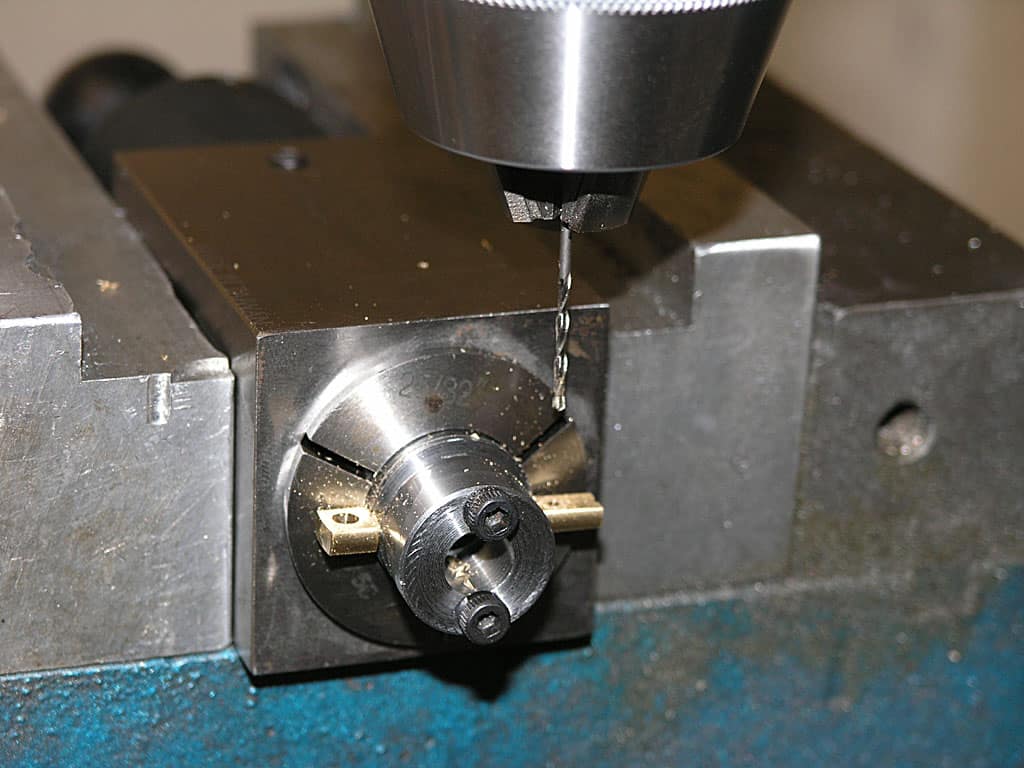
Insert the proper twist drill and make a hole...
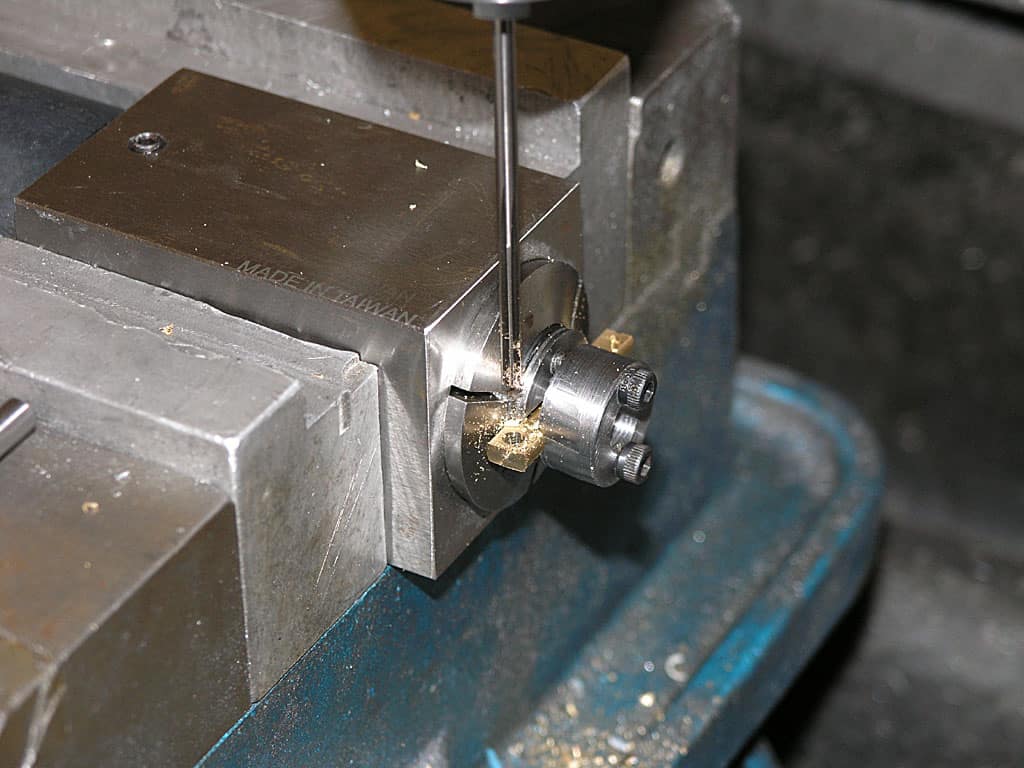
Clean up the hole with a reamer. I run my reamers at about 1/3 the recommended twist drill speed and with a hole already nearly as big as I'm reaming...
10 revolutions of my handwheel and I'm positioned exactly 1.000" down the rod and ready to drill the small end...
This end is reamed as well. The reamer makes the hole accurate and leaves a better surface finish than a twist drill. I have a cheap set of imported reamers, but for these tiny holes I went ahead and ordered 2 new US-made reamers from Enco...
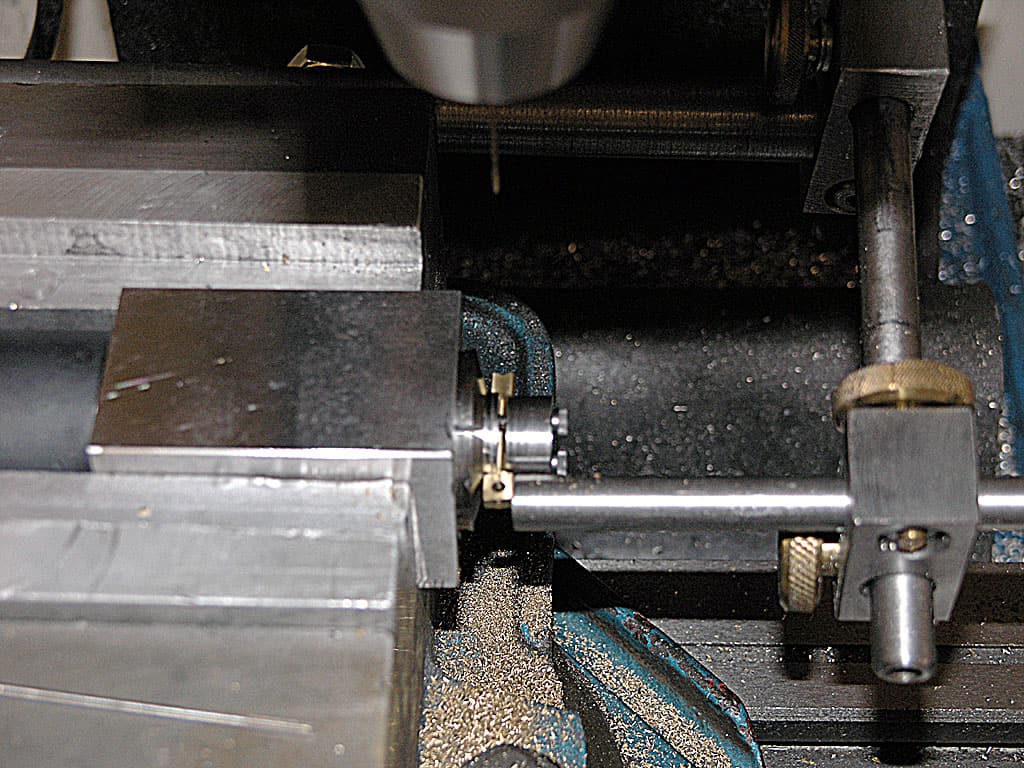
Having checked the first part was good by eyeball, I put my Kurt vise stop (shopmade) into place. Now I install a new con rod into the v-block, drop it in the Kurt vise, advance until I hit the work stop, and tighten the vise. The mill is already lined up front or back (whichever I did last). This makes doing another 11 con rods go really fast!
Rounding Over the Small End
The final rough machining job is to round over the small end. I do this on my mill with a little fixture that came to me in a flash of inspiration as I was prowling the shop thinking about how to approach the problem.
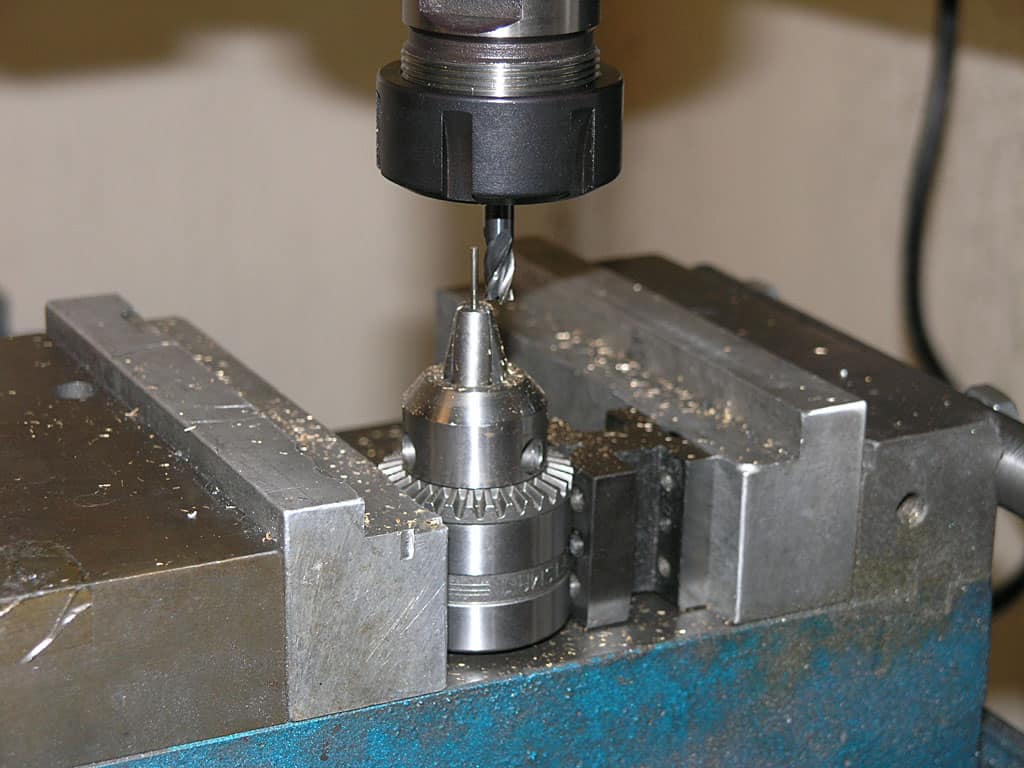
Here is my rounding over fixture. Take an unused drill chuck, a v-block, your mill vise, and an upside down twist drill of appropriate pin size. This assembly operates at a convenient height for my Kurt vise. I've centtered the pin relative to the milling cutter on the X-axis. Y is far enough back not to cut so I can get the part in place before starting the mill. It pays to keep track of this location for subsequent parts!
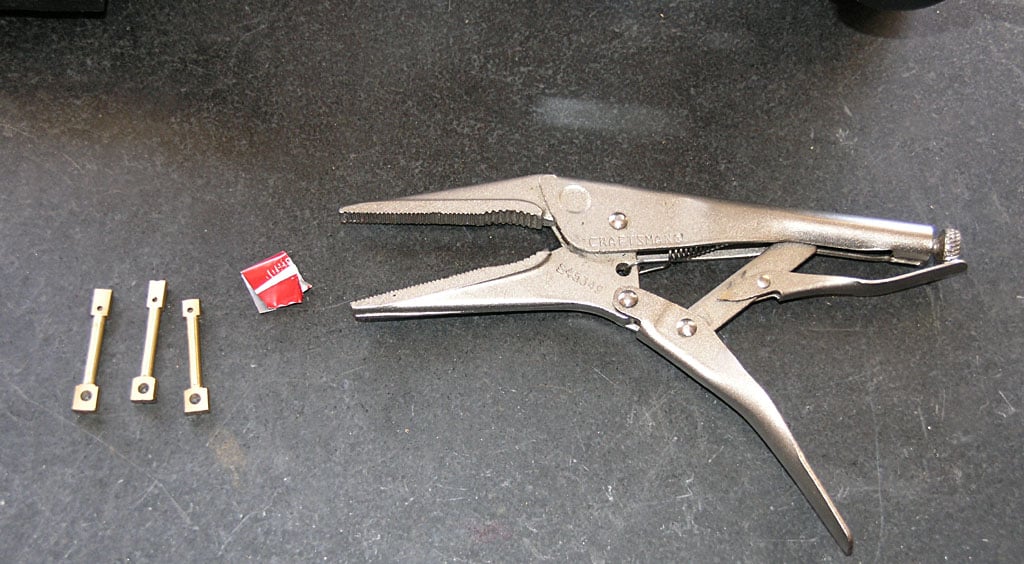
I'm going to use that little bit of aluminum soda can to make sure I don't damage my con rods holding them with the vise grips....
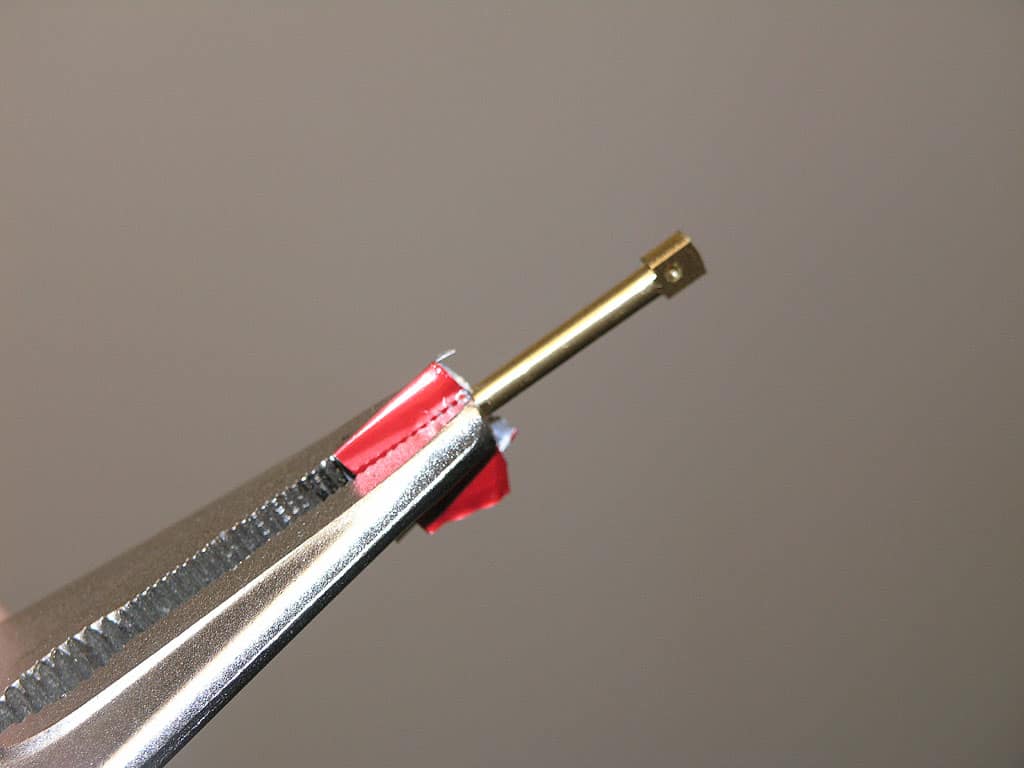
We just clamp the big end using the soda can as protection from the vise grip's serrated jaws...
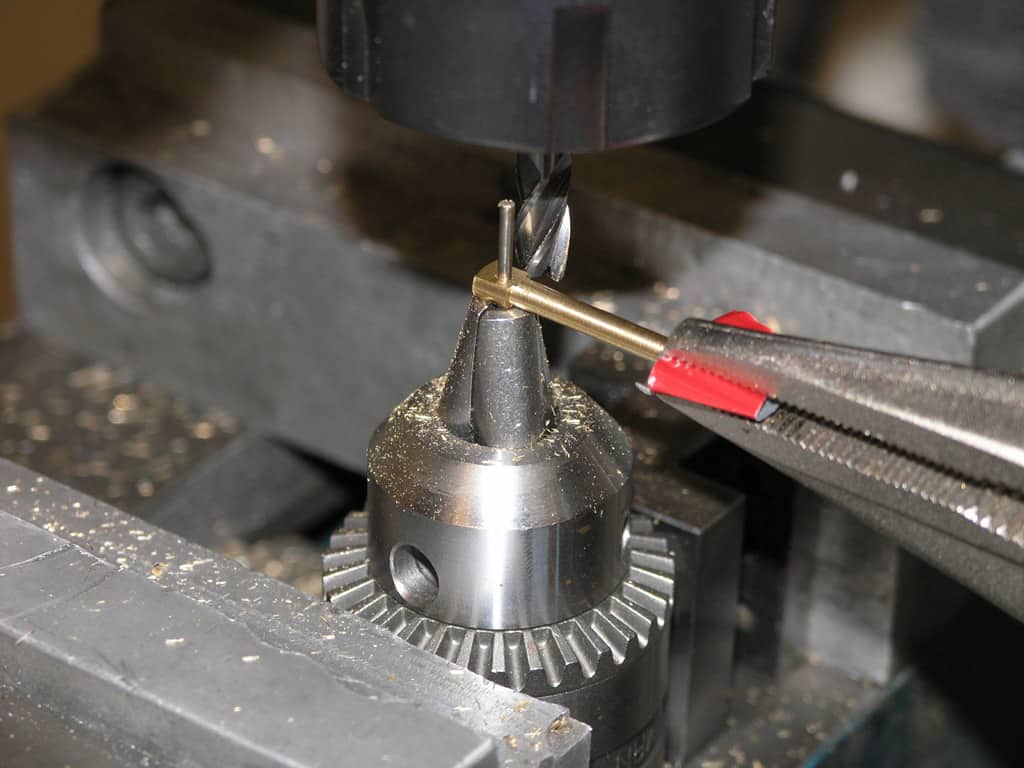
Place the small end on the pin of the fixture. I am using a 1/4" 4 flute end mill running at my mill's fastest speed...
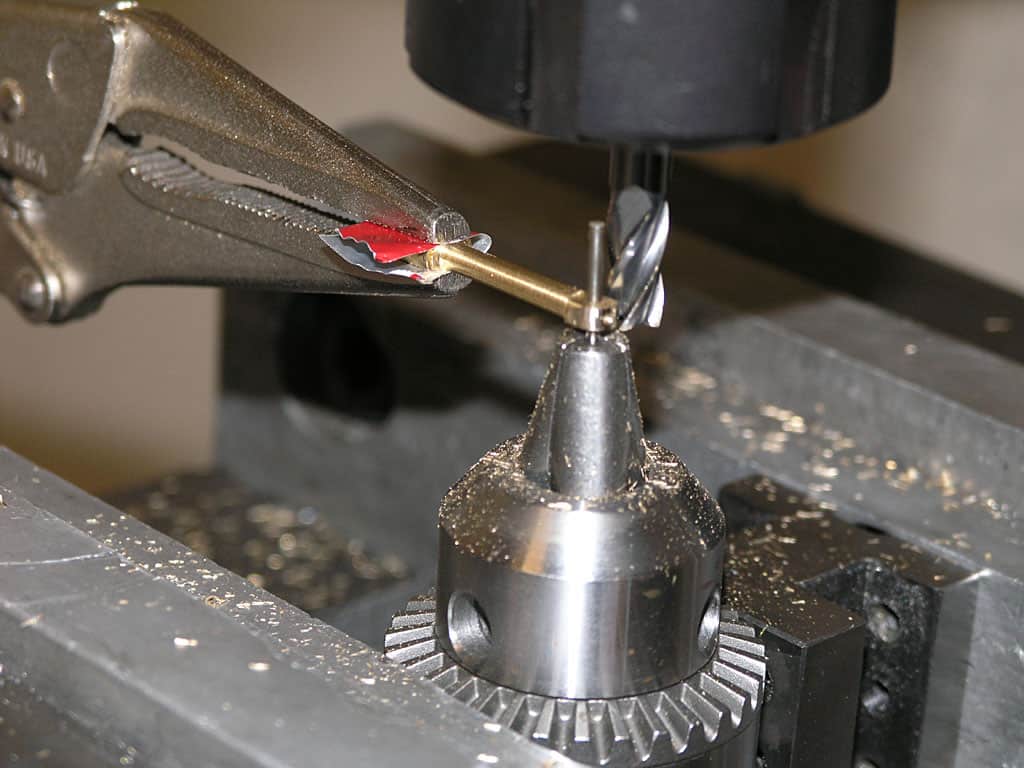
I work the con rod from right to left because this ensures I am not climb milling. If I go the other way, the end mill tries to suck the work in and also tries to pull it up. I'm feeding about 0.015-0.020" per pass using the Y handwheel to feed.
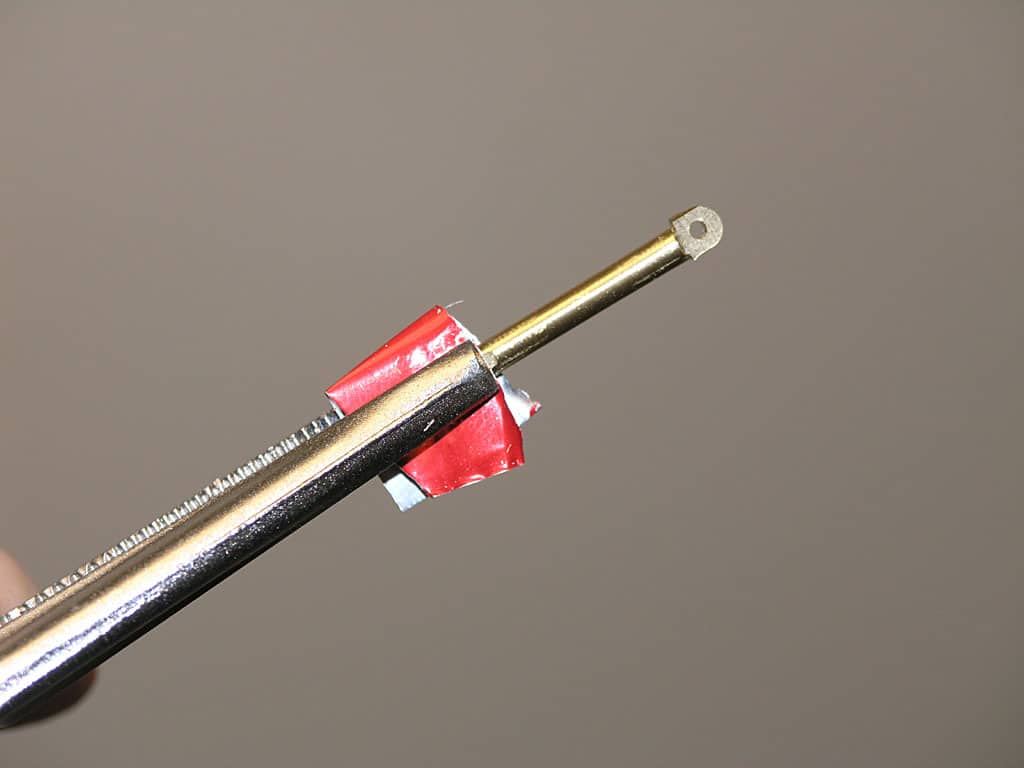
There's the rounded over end. I'll give that little bump near the bottom a little file work to clean it up...
Here is my filing rig, a gunsmith's Swiv-o-ling vise and a needle file. I clamp it to my tool grinder table because it's a comfortable height to work on while standing....
here are the finished con rods. Not perfect, but not bad. This is about 2.5x magnification. They look even better to the naked eye...
At this point, all that's left would be perhaps some minor fine tuning file work, and I'll have to decide whether to polish them or not.
Last Flywheel Step: Set Screws
At this point, all that was left was to drill and tap the flywheels for set screws. That was easily accomplished by setting up the vise stop so I could just run them all through very quickly. I used my Starrett edge finder to line up exactly on the center, drilled each one, and then I power tapped the set screws. Piece of cake!
Here you can see I'm making use of my Kurt vise stop...
I just made a little production run out of it...
Be the first to know about updates at CNC Cookbook
Join our newsletter to get updates on what's next at CNC Cookbook.