I get this question from time to time, and all beginners are going to have it when they first start out:
How can I figure out which tool to use?
For this article, let's stick to CNC Mills and Routers, and be aware that a Router is really just another name for a particular type of mill. I'm also not going to delve into every situation, I'm going to stick to the most common situations and the most widely used tools. Beginners should too!
The Basics
Here are the basic factors that will influence which tool to use:
- What kind of feature are you machining?
- What are the capabilities of your CNC machine?
- What material are you machining?
- Cost, efficiency, and other premature optimizations.
We can do a lot with just those four areas and the interactions between them. Factor #1, what kind of feature are you machining, is the most important, because it's going to determine the general category and perhaps the size of tool you'll use. Questions 2 and 3 will limit the overall choices from #1 to more specific tools. Factor #4 deals with cost, efficiency, and similar considerations. I am suggesting we leave it aside for beginners as a "premature optimization". As a beginner, you're not ready to delve into all those trade offs and special tricks. You'll get there, and you won't miss much by waiting. So let's dive into these one-by-one.
What kind of feature are you machining?
This is going to be your most important factor in determining what kind of tool to use, so let's hit it first. The term "feature" refers to features on the part you're trying to make. A hole is a feature, for example. Here are the basic feature types we want to concern ourselves with:
- Holes and hole-related features
- Pockets with Islands
- 2D Profiles and Bosses
- 3D Profiles
- Cutting outlines
- Edge treatements such as Chamfers and Rounding
- Surfacing
- Engraving
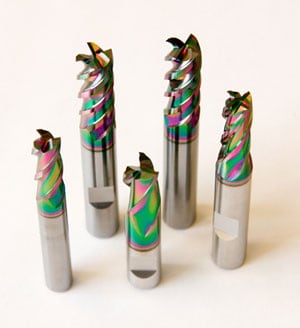
Some good news-the majority of these features use an endmill of one kind or another with just a few exceptions. But lets get into each feature and see about that.
Holes
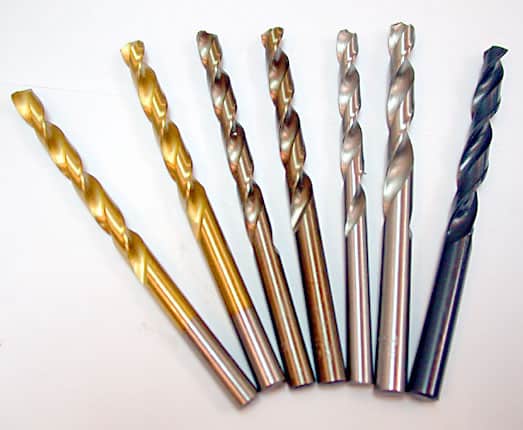
Twist drills can remove material faster than almost any other cutter...
Holes are by far the most common feature you'll come across. The most common way to make a hole is to use a twist drill. It may surprise you to know this, but the common twist drill can also remove material faster than almost any other cutter you will use. There are some complications that arise, however. The two cases to be aware of are really deep holes and really large diameter holes. As in so many things, depth and diameter are relative.
For diameter, you'll be limited by the maximum diameter twist drill your machine can accomodate. This may be a function of collet size, or machine spindle. The spindle can limit things in terms of its maximum power-twist drills use a lot of power, moreso as they get larger in diameter. The spindle's minimum rpm will also limit things. The larger the diameter twist drill, the slower it must spin. The actual rpm will be determined by the feeds and speeds calculations you'll be making for your cutter.
Assuming your spindle has the power and can turn slowly enough, you can sometimes use larger twist drill by resorting to silver and deming bits. These bits have a smaller shank than the twist drill's diameter:
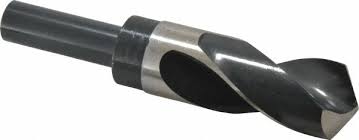
Silver and Deming bits have a smaller shank than their drilling diameter...
These larger twist drills will really soak up some power. According to our G-Wizard Feeds and Speeds Calculator, a 1" bit in 6061 aluminum will use almost 6 HP and can only turn about 1900 rpm. That's pretty far from typical hobby CNC router capacity, and even from many stouter milling machines. The larger Tormach mill only has 1.5 HP, for example.
So how do we drill bigger holes?
CNC's can perform a clever trick called interpolating a hole using an endmill. Let's take our 1" hole. Let's say we are going to interpolate the hole with a 1/4" endmill. Using that endmill, we spiral down a ways, and then spiral out to a 1" diameter. This operation can be done with less than 1/4 HP on the spindle and at much higher rpms. Interpolation is handy!
So, to make a hole, you'll use a Twist Drill up to the limits of your machine, at which point you'll use an endmill to interpolate the hole. How large an endmill? About 1/3 of the hole's diameter is best, but you can use a smaller one too if need be.
Question:
- Should I drill a pilot hole? Most of the time, the answer is, "No." Pilot holes can help for large holes. For accuracy, you may want to "Spot Drill." This article tells when and if you'll need to spot drill. You'll need a special "Spot Drill" cutter to perform the spot drilling. Some will use a center drill, but a spot drill is the right tool as it is sturdier than the center drill.
One last tidbit-use the shortest twist drills you can. In fact, buy yourself a set of "screw machine length" twist drills. You'll seldom need longer ones and they'll work so much better for you. After you've been at it for a bit, you're going to dull some bits. Consider picking up a Drill Doctor so you always have sharp twist drills.
Hole-Related Features: Tapping
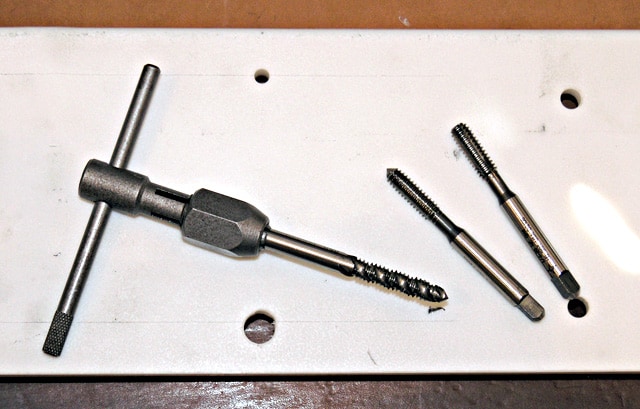
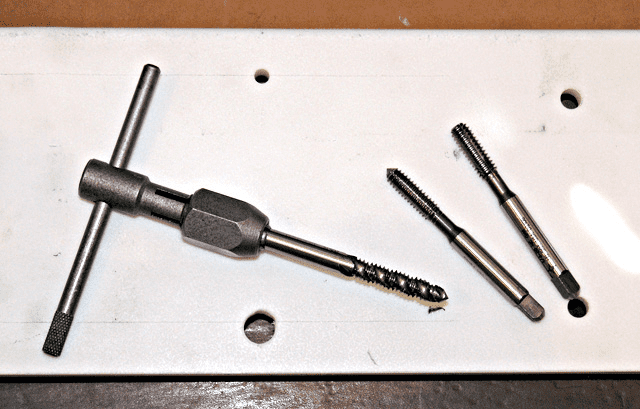
Left to right: Spiral flute tap, thread forming plug tap, thread forming bottoming tap...
Holes themselves have features. For example, a hole might be threaded, or it might have a counterbore. We're not going to delve too deeply into this, since I want to keep this article simple and not incredibly long.
To thread the hole, use a tap. As a beginner, you'll need to do this manually without using your CNC. Yes, your CNC may have the ability to tap, but trust me, you want to get a few parts under your belt before delving into all that. Just use the tap manually. There are a variety of different taps available, see our article on types of taps for the details. The first thing you need to know is that all the taps start with a hole of appropriate size. Read the article we've written on hole sizes for tapping to help in determining what size hole, and you'll likely be using a twist drill to make that hole.
Now given a hole of the correct size, which type of tap should you use? I prefer to use Form Taps where possible. The taps are stronger and so are the threads they make. When I can't use a forming tap, I use a regular cutting tap. For the details on these taps, when to choose each type, and more, read our round up article on tapping. Some folks will tell you that form taps can't be used except in soft materials like aluminum or brass. That's not strictly true, and for extra credit, we'll tell you exactly how to tell if you can use a form tap.
One last thing-the one kind of tap you don't want to use is a hardware store tap. You know, the kind you buy at the local hardware store or that came in a kit with a set of threading dies too. You're a machinist now, and you can purchase much higher quality cutters than your local hardware store carries.
Hole-Related Features: Counterbores
Counterbores let your bolt nestle down into the hole so you have a flush surface. They may also be needed to accomodate a bolt shoulder. They're typically either cylindrical or conical.
In a pinch, you can use a twist drill to make a cylindrical counterbore, but its not the right way to do it because twist drills don't create flat bottomed holes. Instead, you should be using an endmill to make the counterbore. Drill the hole first, then do the counterbore second.
For conical counterbores, I tend to like spot drills. They work well and it's good to have one around anyway.
By the way, G-Wizard Calculator has a handy reference section that'll give you the dimensions needed to counterbore for various fasteners:
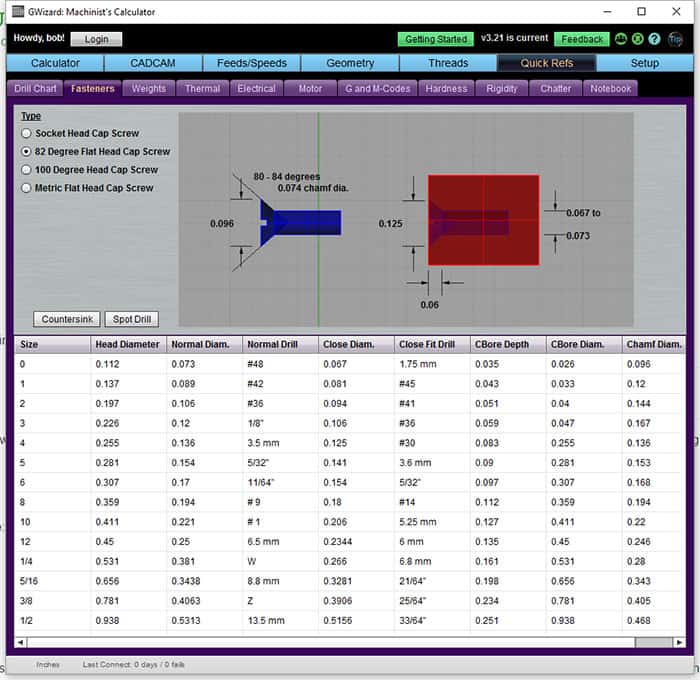
G-Wizard Calculator has a handy reference section that'll give you the dimensions needed to counterbore for various fasteners...
Hole-Related Features: Chamfer
A chamfer is what machinists call taking the edge off a sharp corner. Imagine two surfaces coming together at 90 degrees. It's much nicer to cut a little 45 degree angle to break the sharp 90 degree edge. In fact, many consider the work unfinished unless we chamfer all the edges. I'm going to ask you to hold the thought on chamfering until we get to writing about it specifically. Chamfering holes is not really any different than chamfering any other edge.
Using G-Wizard Calculator to Help Choose Tools
We've got a lot more ground to cover and I didn't want to put it all into one humongously long article. In this article, you've got the overview on how we go about choosing tools as well as the specifics for making holes. Before I go on, I want to mention that our G-Wizard Calculator can really help with these kinds of tool choices. Specifically, it even has a feature called "CADCAM Wizards" that will figure out which tool is best. Let's see how that works.
When you start G-Wizard and click the CADCAM tab, here's what you'll see:
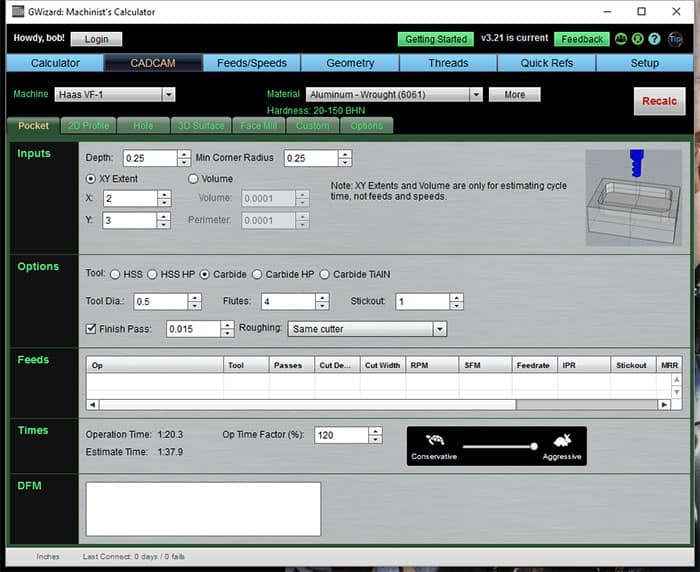
The CADCAM Wizard tab in G-Wizard Calculator...
Note that you choose your machine and the material you're cutting (2 of the 4 criteria we mentioned above for choosing the right tool) and then there's a row of tabs that say things like "Pocket", "2D Profile", and "Hole". Those tabs correspond to the features we're talking about, and since we're on the subject of "Holes" let's choose the "Holes" tab:
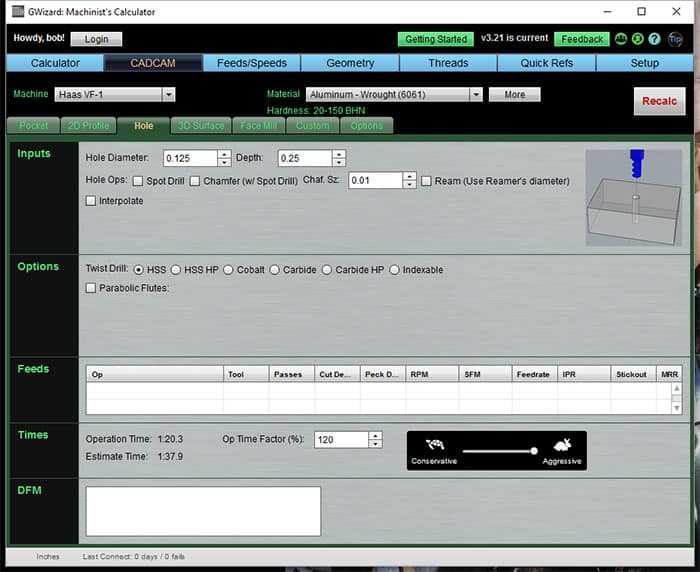
The "Holes" tab is all about making holes with your CNC...
The "Holes" tab is all about making holes with your CNC. You just enter the Inputs and then press "Recalc" to get a complete recipe back for making your hole. In this case, it doesn't need to know an awful lot. Skip all the check boxes and we're down to just the Hole Diameter and Depth. Now let's try an experiment. Suppose I have a Shapeoko hobby CNC router and I plug in a 1" hole diameter. What does G-Wizard Calculator do?
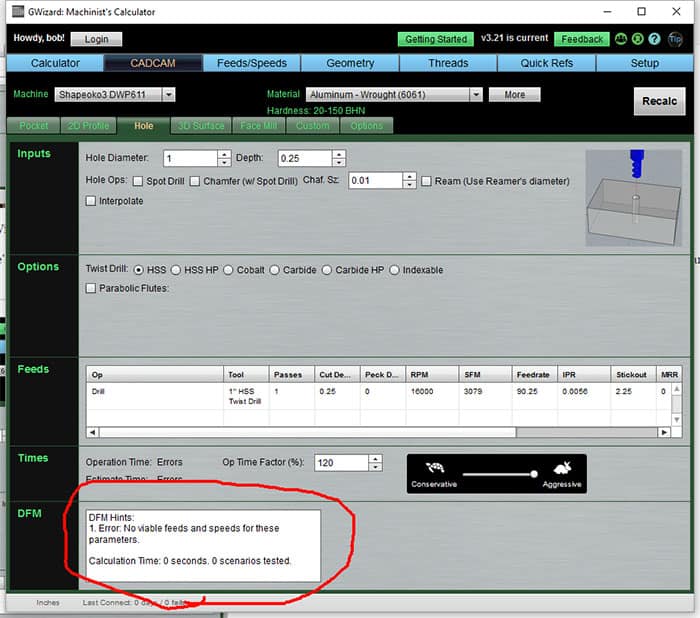
G-Wizard knows a 1" Twist Drill in a Shapeoko will never work!
G-Wizard knows a 1" Twist Drill in a Shapeoko will never work! That twist drill is going to use too much power and will have to be turning too slowly. The Shapeoko can't deal with either requirement. So G-Wizard gives the error I've circled in red, "Error: No viable feeds and speeds for these parameters."
We'll talk more about using G-Wizard to recommend tools as we go along in this series. In our next installment, we're going to get into 2D profiling with endmills.
Be the first to know about updates at CNC Cookbook
Join our newsletter to get updates on what's next at CNC Cookbook.