Parting or cutoff is the operation of cutting a piece off by slicing a groove all the way through it with a special parting tool or cut off tool. These lathe cutting tools are generally thin blades of HSS, but there are also carbide insert parting tools available for the task or you can grind a cutoff tool out of HSS. 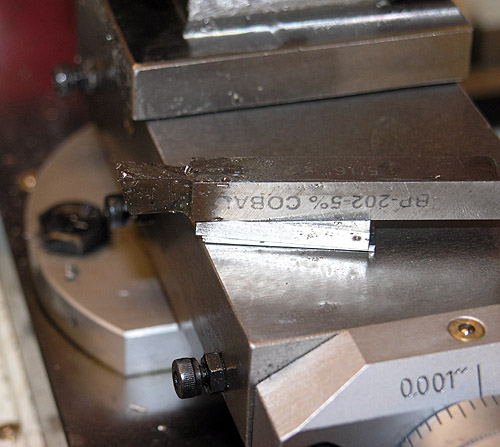
A cutoff tool ground from HSS...
I ground one parting tool from HSS-Cobalt, which is shown above. It is about 1/8" wide, which is pretty wide. A thinner parting tool would have been better. You have to remove more material to make a parting tool than most any of the other blade types. This was on a 1/4" blank and it probably took me a good 15 to 20 minutes of grinding to get it right. Notice there is a lot of positive back rake on the tool as well as plenty of side relief.
Keep in mind that parting off is a fairly demanding operation on any lathe. Rigidity is extremely important. I find that locking my carriage is an essential step to take in order to maximize rigidity. Another important step is to make sure the cutting tip of your parting tool is right on the center line of the piece you are parting. Make sure your tool is exactly perpendicular to the axis of rotation as well. Another thought on parting is to try to do your parting as close to the chuck jaws as possible. This is another way to maximize the rigidity and make things go smoother. I have heard some authorities suggest you can't part more than 1/2" from the chuck jaws, but I've had no trouble parting 1" or 2" out at all.
Some machinist's like to cut with the parting parting tool upside down and behind the work piece. This is a more rigid configuration plus the tool will tend to pull away instead of digging in with this arrangement.
I have also heard the recommendation that you have to do parting operations at extremely slow spindle speeds, but this is not true. It comes from the tendency of many machinists to be a little afraid of parting.
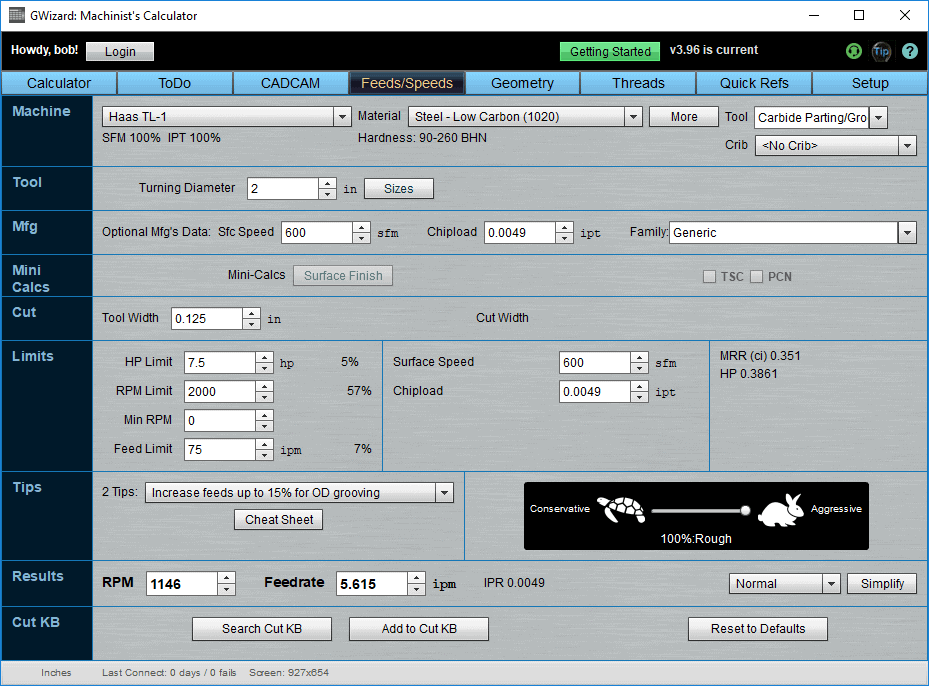
For proper parting tool feeds and speeds, refer to our G-Wizard Feeds and Speeds Calculator. It fully supports lathes and turning operations and will give you great feeds and speeds for all your turning jobs.
Here's a typical parting tool feeds and speeds calculation for a carbide insert parting tool in mild steel:

Mini-Review: Aloris No. 71 Carbide Insert Cutoff and Parting Tool
My favorite cutoff tool is made by Aloris. Being an avid devotee of carbide tools, you shouldn't be surprised to see that it is similar to the HSS blades except that it is uses carbide inserts. This whole thing then fits into an AXA-series QCTP toolholder. I got mine at Enco, and it wasn't cheap. Boy does it work good though! 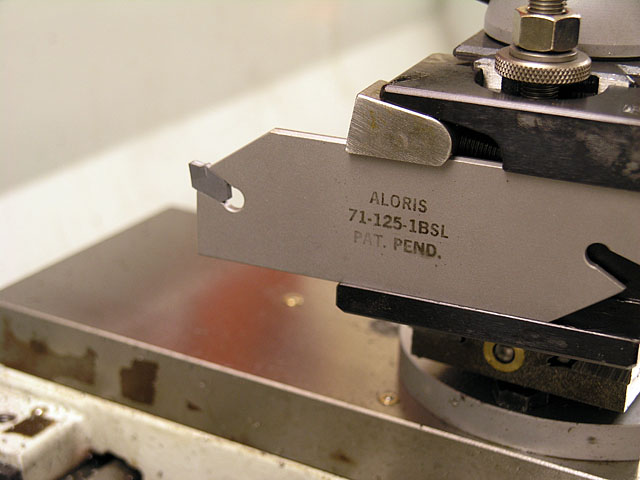
An Aloris Carbide Insert Cutoff Tool: My Favorite!
Slices through stainless like butter: 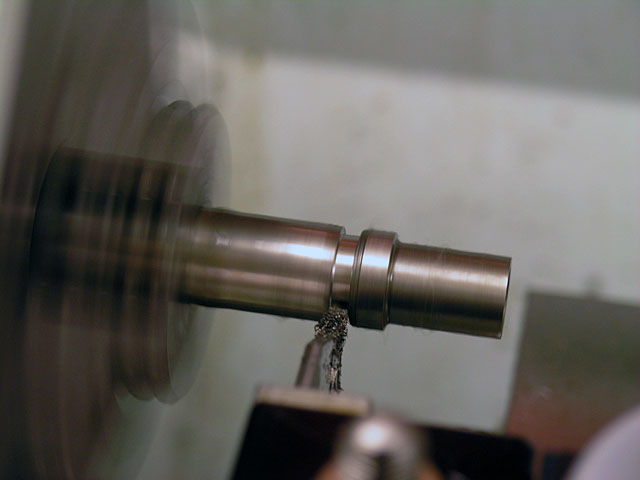
Parting off a piece of stainless steel with the Aloris...
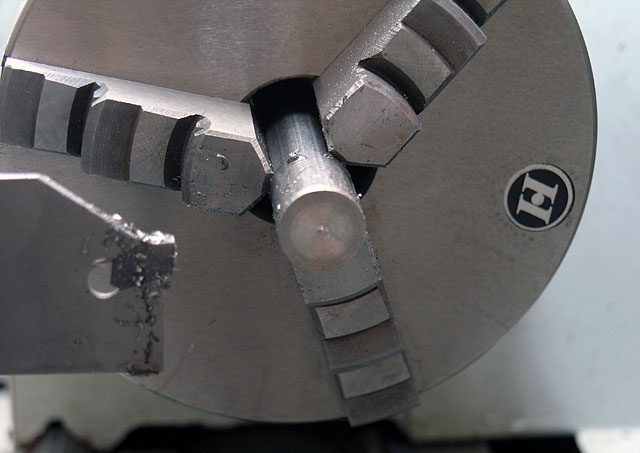
Leaves a Good Surface Finish...
Parting off always leaves a little nub. Minimize it by proper adjustment of tool height!
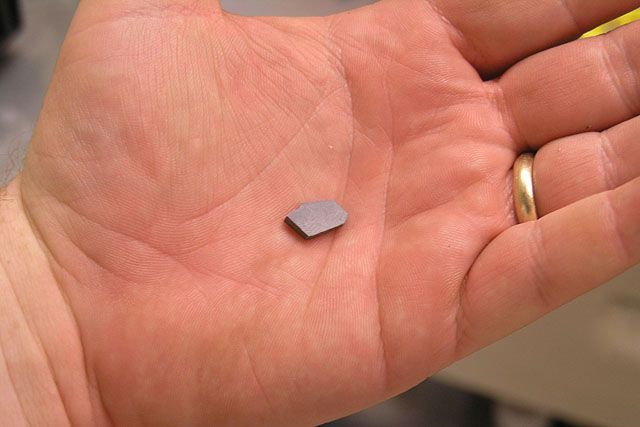
The GTN-3 Carbide Parting Tool Inserts are odd looking little gizmos...
This tooling works great, achieving rapid cutting speeds and good surface finish. As usual, when I first started out, my biggest problem was that I wasn't cutting at quite the right speed. I've developed a habit of really boosting the feed speed when I don't like the way the swarf is forming to see if carbide cuts better. It often does, which is an indication I need to increase speed. In the parting off example in the pictures, the cutting got progressively smoother as the cut deepened. This was an indication I was spinning too fast. As the cut got deeper, the diameter was less and hence the surface speed was also less. Someday I will have a true variable speed DC motor set up and it will be easy to try faster or slower speeds to really dial things in. Meanwhile, be experimental and just try some different speeds until things settle in.
When the Aloris is running at its optimal speeds and feeds, the swarf peels off like nice fine ribbons (sorry, didn't get a good photo there) and it is a real thing of beauty to see. This is a pretty expensive gadget (cost more than the QCTP), but it sure is nice not to have to grind any more parting tools! If you want one of your own, here are the pieces I picked up:
- Aloris No. 71 Holder. This was the most expensive part, and some enterprising amateur could surely make a holder that would take the blade.
- Aloris No. 71 Self-Locking Throwaway Insert Blade. Others make similar blades, but this one is nice and small for the 9×30 lathe I own. Most of the others are pretty large.
- GTN-3 Carbide Inserts. I ordered 10 so I would have spares on hand.
Mini-Review: Handy Pre-ground Parting Off Tools from eBay
found these great pre-ground parting off tools one day on eBay: 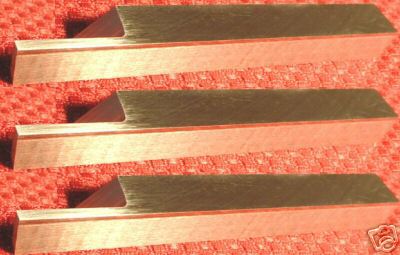
Tune Up Your Parting Blade
While I love the little parting blades mentioned above, I find they benefit from a little "tuning up." Here's how I do the tune up: 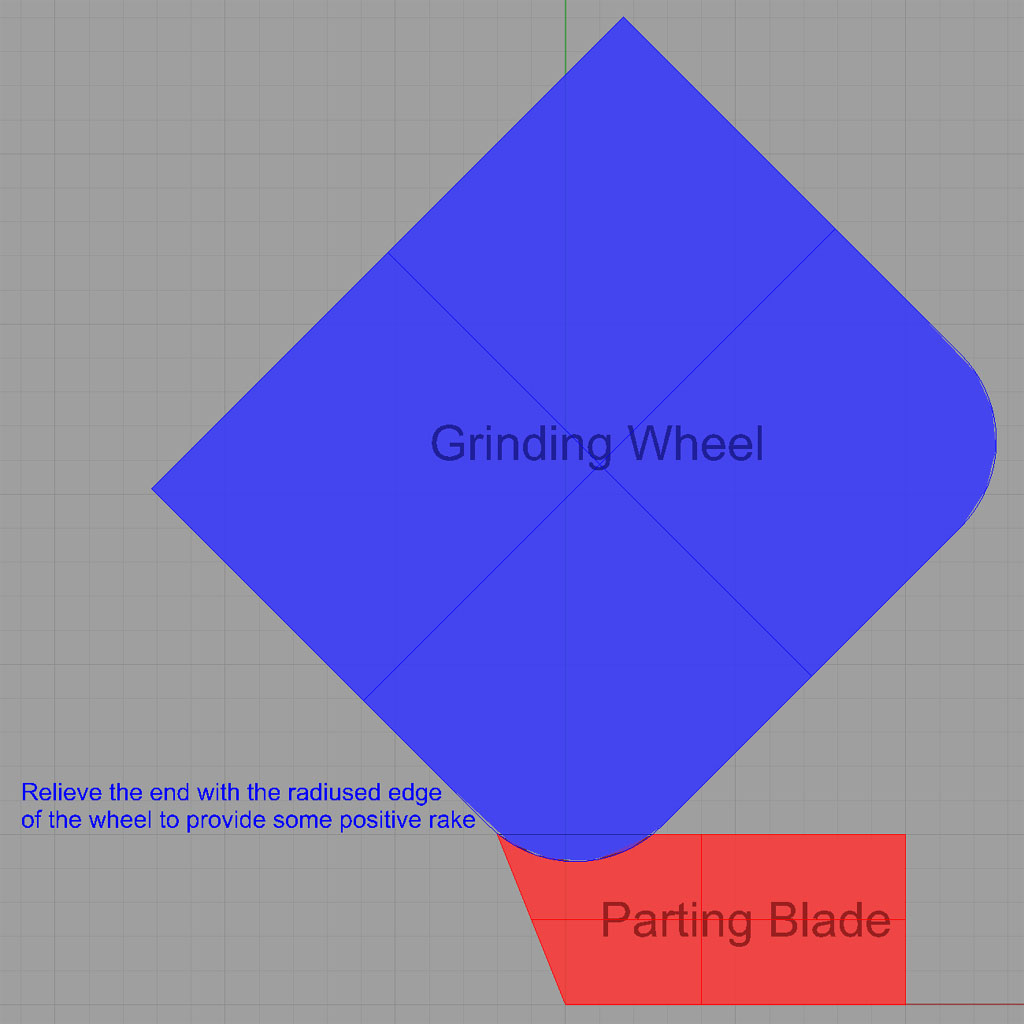
First, use the radius on the edge of your grinding wheel to put a little positive rake in the blade. This greatly reduces chatter on a lot of materials. Easy does it, don't take too much off!
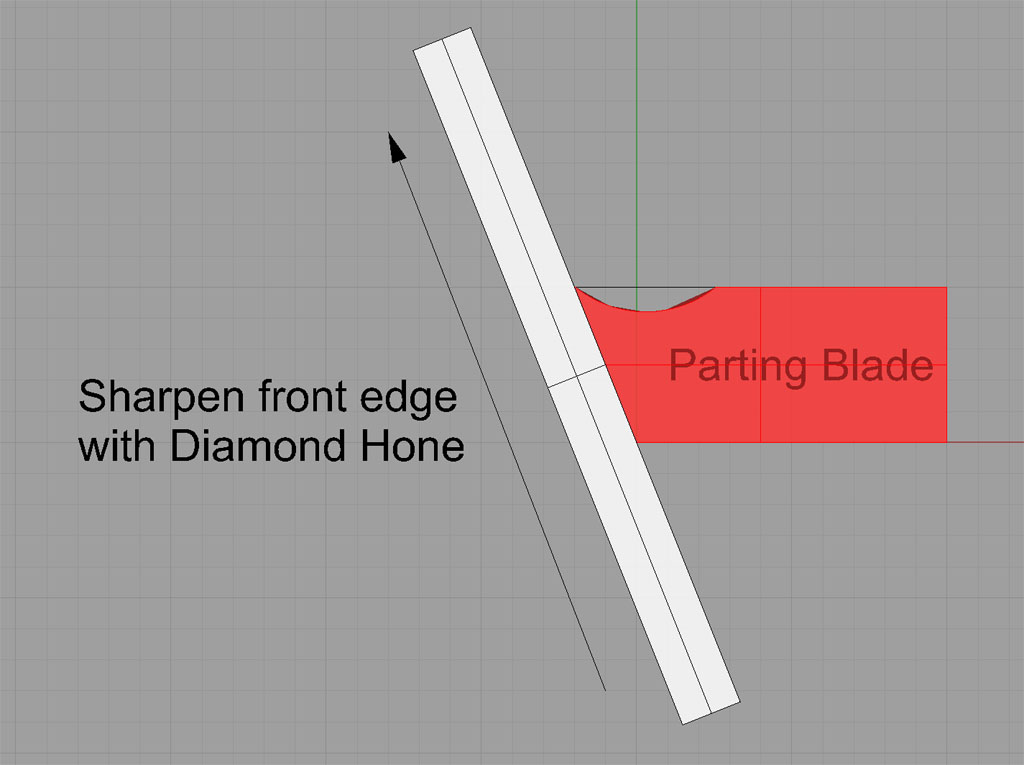
Next, take on of those inexpensive pocket diamond hones and use it to make the tool really sharp. I QCTP holder with the tool on its side on a flat surface, and stand the hone up on it's side. A couple of swipes as shown are all it takes to make the blade really sharp!
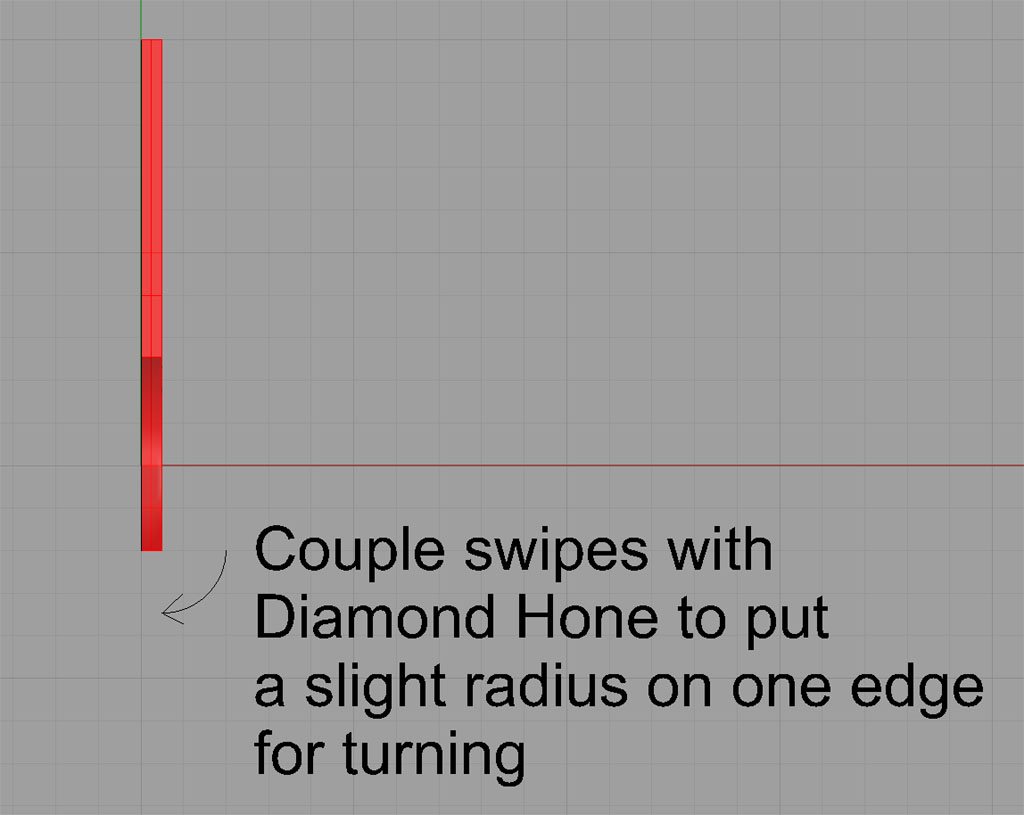
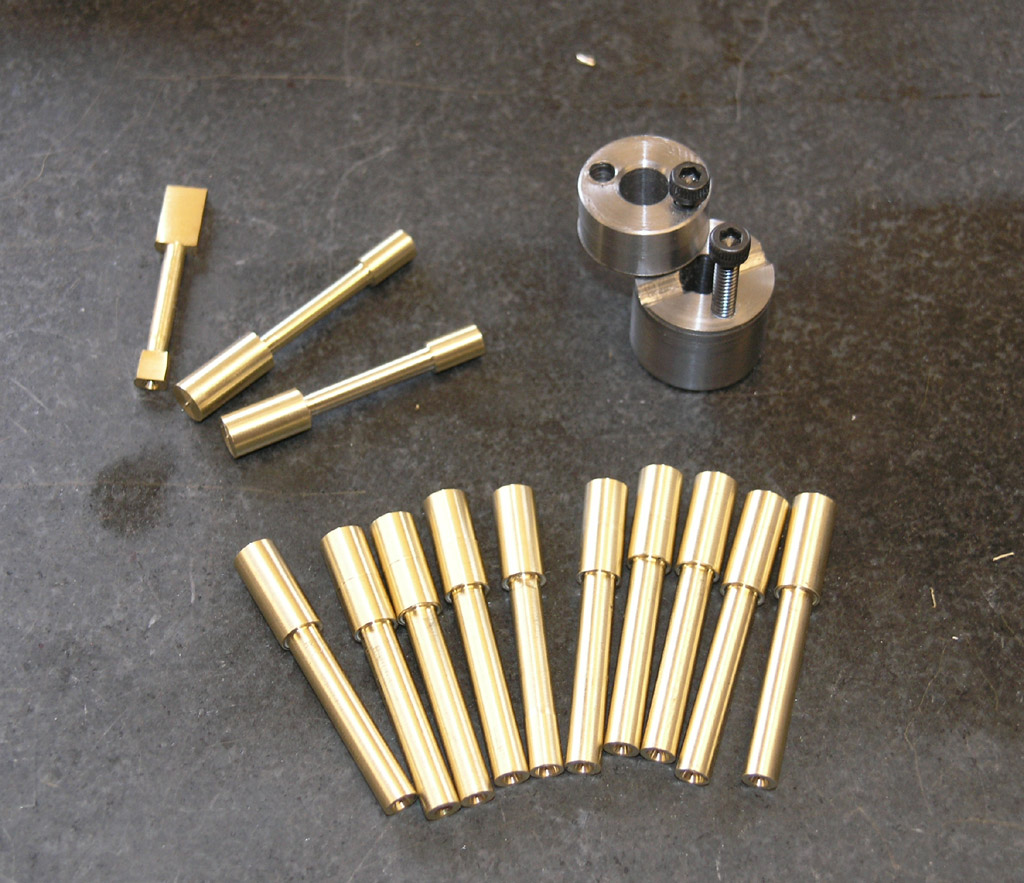
This last tip is not really necessary for parting, but I somethings use my parting blade as a turning tool, for example on myVerburg Steam Engine Team Build connecting rods. A radius like this is essential for such cuts. Put the radius on the side you'll be moving into the cut. The radius shown gives you a tool that can take shallow turning cuts moving from tailstock to spindle...

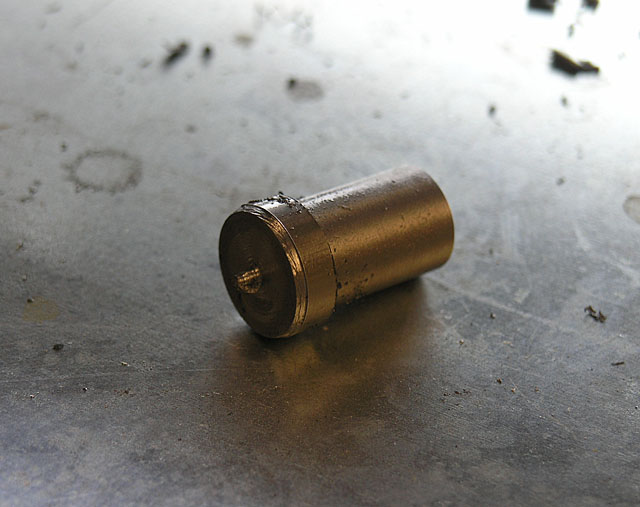
Turning with a parting blade makes it easy to get nice square shoulders if you need your smallest OD between two larger OD's. Here, we are about to plunge the blade and we'll be turning to the left shoulder that's visible. Don't try too much depth of cut. A sure sign of trouble is a build up of material on the part at the cutting point. Eventually something will break if that's happening-take a shallower cut! For this little brass part 0.010 to 0.015 on the dial (0.005 to 0.0075 actual DOC) worked well and gave a decent surface finish...
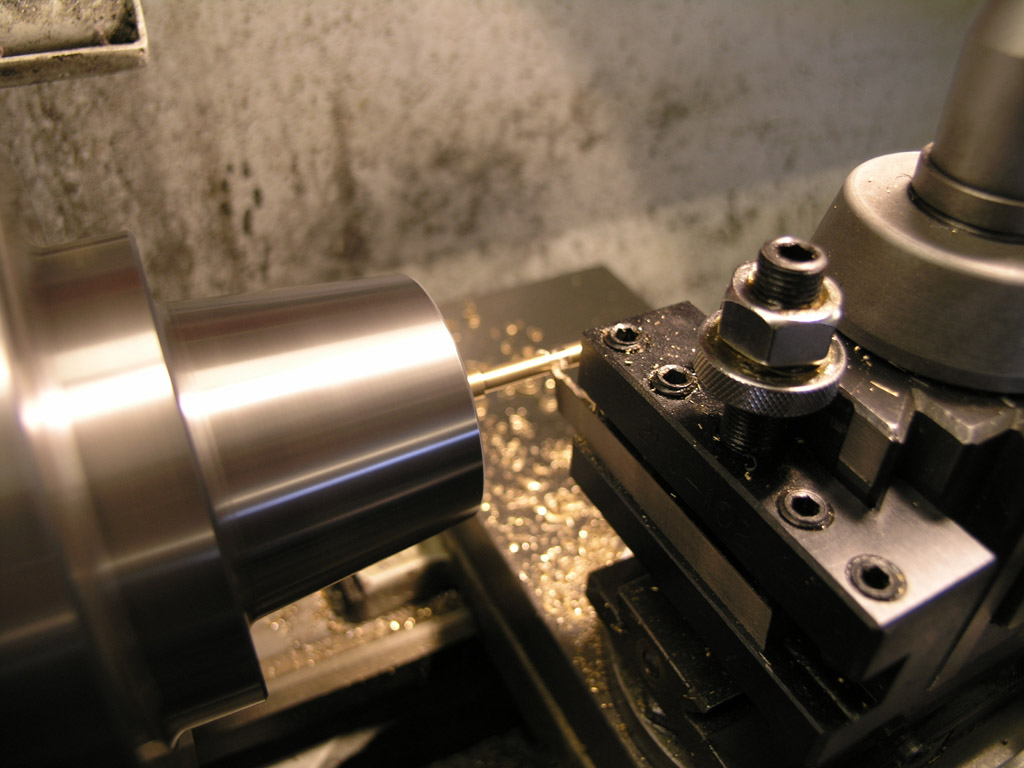
Here we are starting a pass. You can see the positive rake radius in these two pictures...
Nice square shoulders thanks to the parting blade!
How to Minimize the Nib / Nipple When Parting
There are several options:
First, setting proper tool height will minimize the nib.
Second, if the tip of the parting tool is ground at an angle, it will minimize the nib further. Often enough to avoid having to face it off in a second op.
Of course, the nibs can be removed via belt or disc sander, and there are even special shearing tools for the purpose. One such is the “Beere Tip Shear:”
More Lathe Articles...
9 Essentials to Think About When Setting Up Your CNC Lathe Tooling
Be the first to know about updates at CNC Cookbook
Join our newsletter to get updates on what's next at CNC Cookbook.