Note: This is a project I did many years ago as a manual machinist. It turned out great and I still use it to this day. I learned some clever tricks on this one, so it's worth going through the whole project just to see if there's anything you can borrow.
I've wanted a nice large disc sander since using one in welding class. The class had a big 20" sander with a 3 phase motor. A big disk sander like this is perfect as a deburring tool for metal.
The impetus to go forward came when I got a deal on a shipping damaged Palmgren Belt/Disc sander: It only cost $60, and my thinking was that even if it was damaged beyond usability, the parts would simplify building my own belt sander. It turns out to have been a good buy, but the unit was not usable as it stood. I disassembled it to scavenge the parts, tested the motor, and concluded it was a good basis from which to build a disc sander. The nice 2" wide belt sander wheels would be set aside for a later project. The motor and base would form the foundation for my new disc sander.
DIY Disk Sander Design Features
Here are the design features I settled on before diving in:
3/4 HP 3400 rpm Motor: Dictated by my scavenged base. Note: web opinions vary on whether 3/4 HP is enough. I can always slap something bigger on!
12" Aluminum Disc: I started out wanting larger, but after researching costs of sanding disc media, this was the biggest size for which abrasive discs are commonly available cheaply.
Pivoting Table:
- Pivot axis is in line with spindle axis so the table's height doesn't vary when it's tilted.
- Guide slot on the table matches my Harbor Freight tool grinder so I can exchange tooling between the two.
Images
Below is the photo essay of the construction. Not much to a disc sander. In terms of how long it all took, I started in mid-January 2008. I was working on it maybe as much as 8 hours a week, but typically 4-6. It was finished mid-Feb, so figure the sander took on the order of 20-34 hours.
The Original Donor Machine for My Homemade Disc Sander
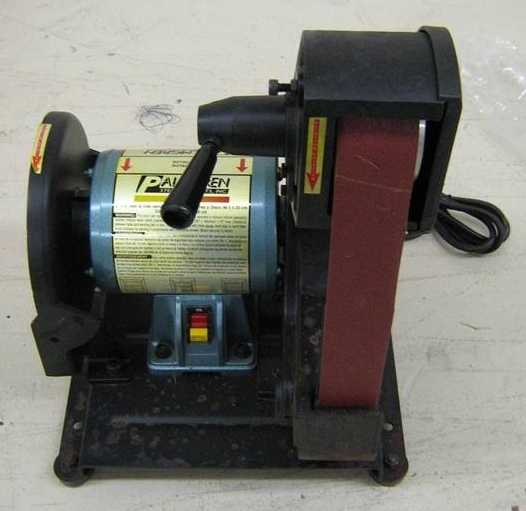
Palmgren 81081: 9" disc + 2"x40" belt
Lots of good donor parts: 3/4 HP motor, 3 nice wheels w/ bearings already crowned for a belt sander, nice spring loaded tensioner, sheet base. I'm just using the motor and base for the disc sander. The other parts are being held in reserve for a belt sander...
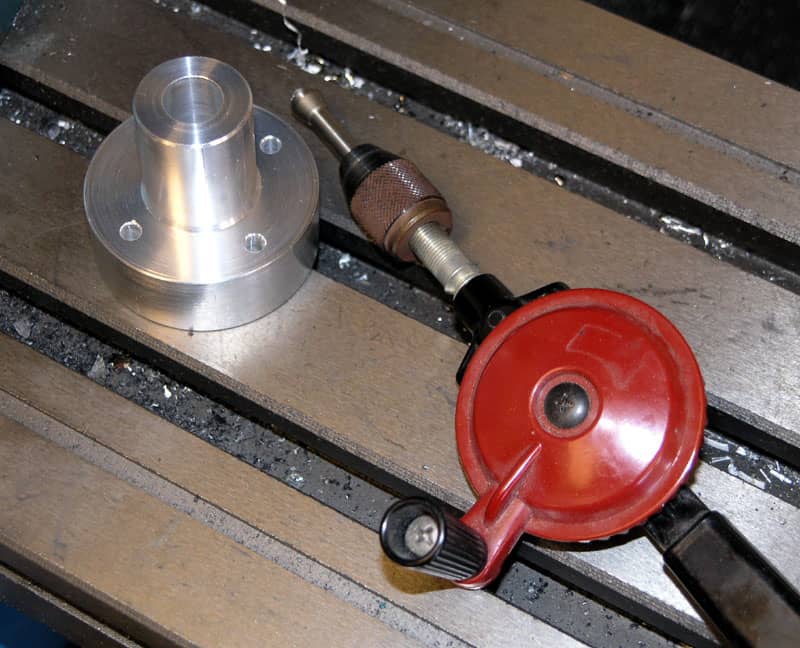
Building the Hub to Mate the Disc Sander Plate to the Motor
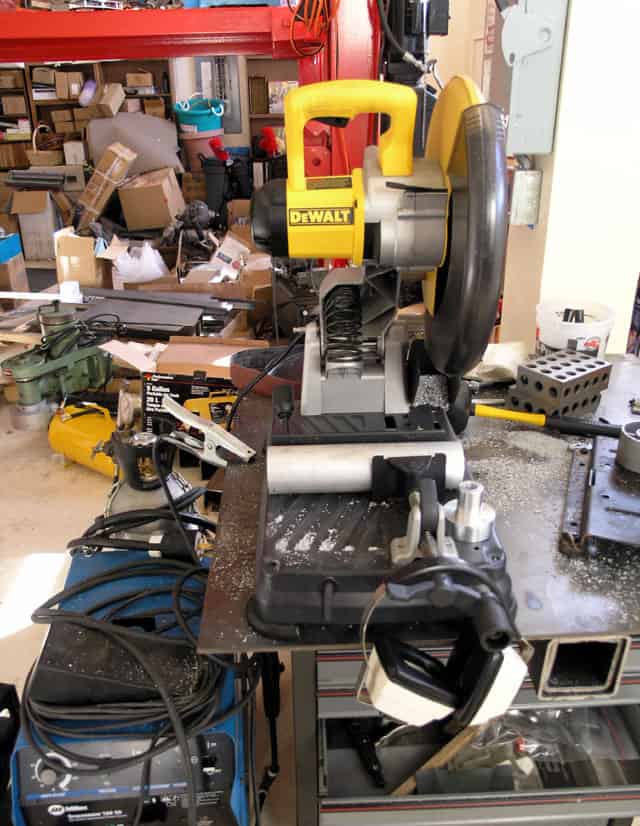
Liberate a chunk from the stock to start machining. Pic is taken after the fact as the part is sitting on my DeWalt Multicutter...
A word about the DeWalt Multicutter:
It's my favorite way to cut small pieces of rough stock for machining. So much faster and handier than a bandsaw!
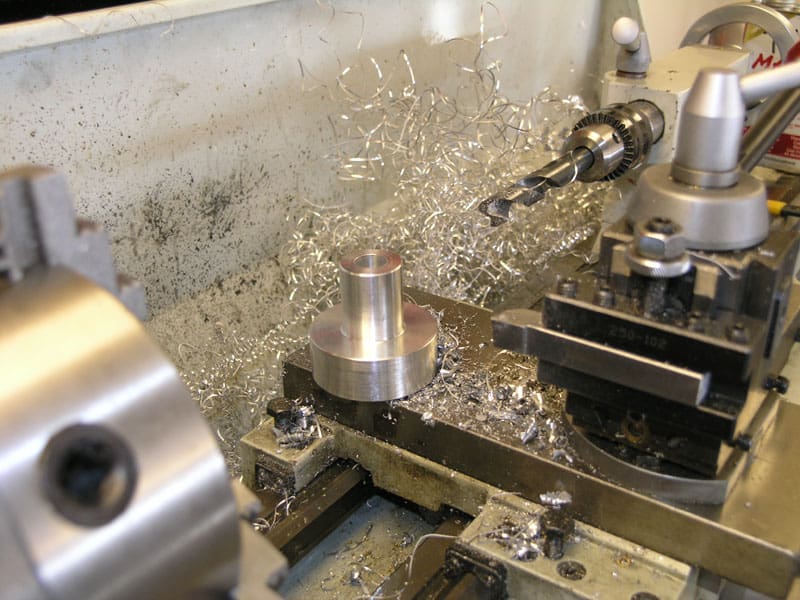
Next you take some 2" round stock and separate the chips from the part. The finish came out nice, but I hate the long stringy chips. I could not run my spindle fast enough to get rid of them on either my carbide insert or hand ground HSS tooling....
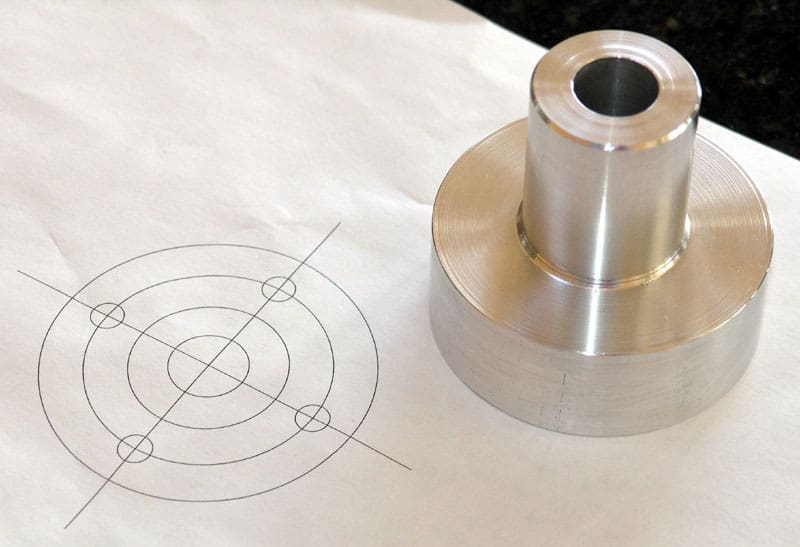
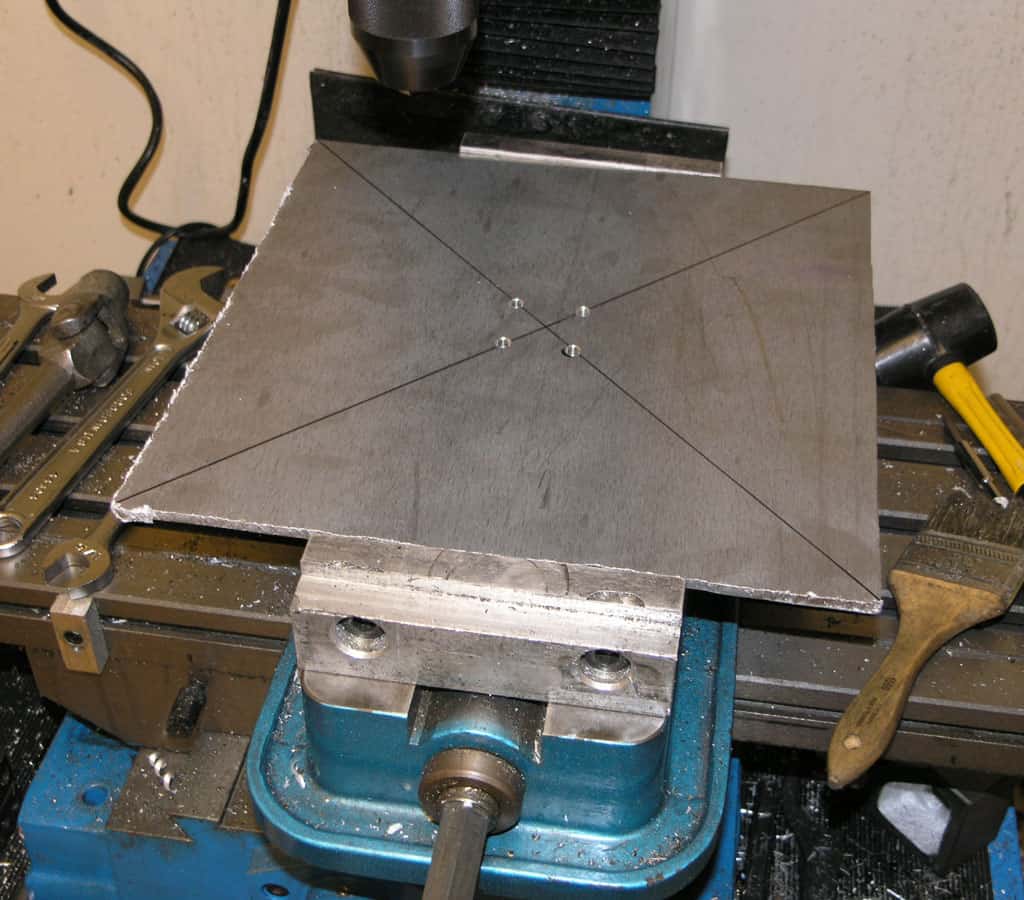
Now the bolt circle. I drew it up actual size in my CAD program Rhino 3D...
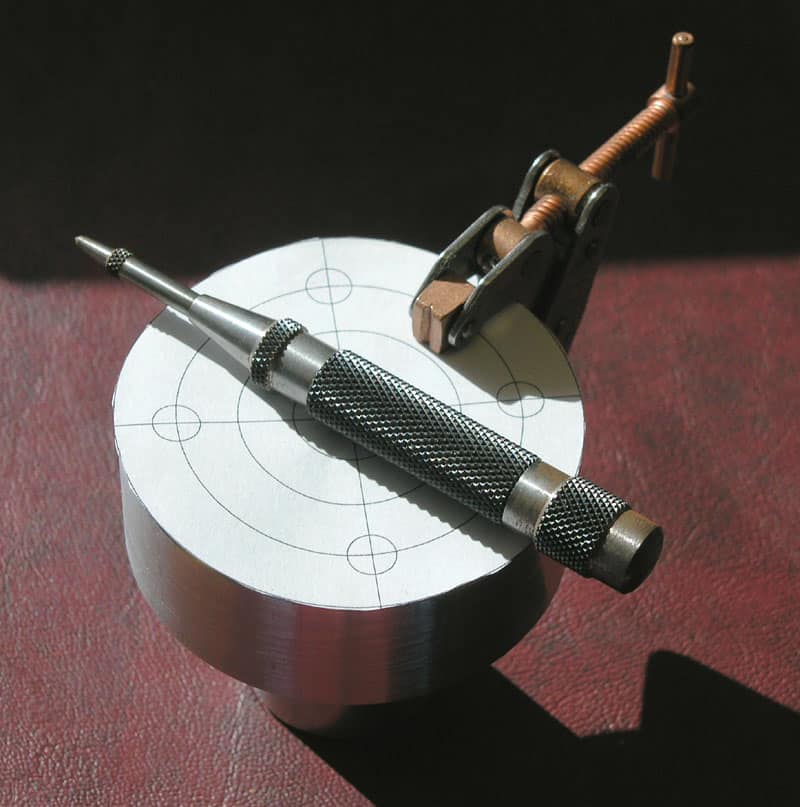
Template clamped to part and trusty Starret prick punch at the ready...
Hole centers are marked. Took longer to photograph than to do it...
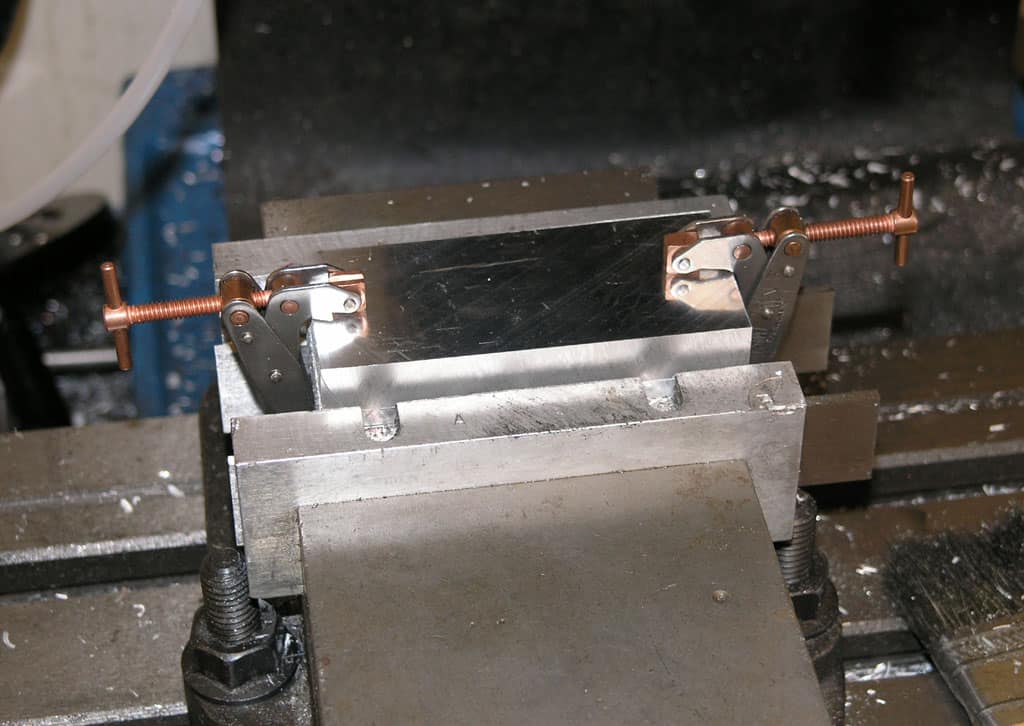
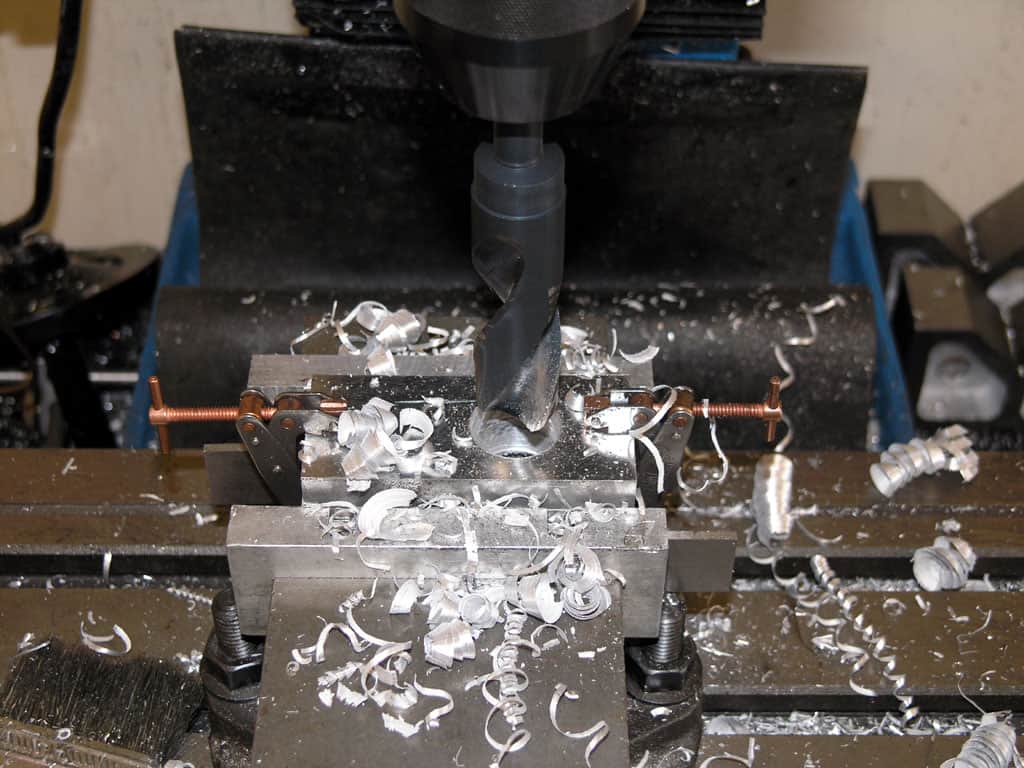
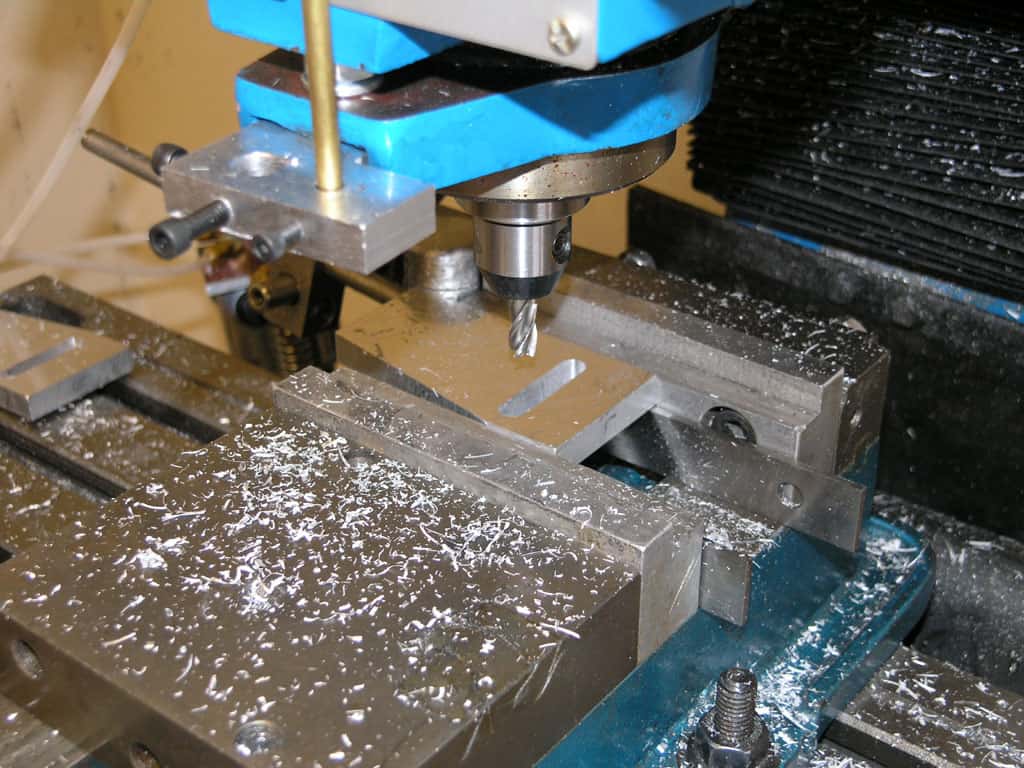
Part is clamped against a V-block in the Kurt Vise and I'm using a screw-machine length bit. I plan on 1/4-20 hardware and I'll tap these holes to fit. If they strip, I can always use longer bolts and nylock nuts.
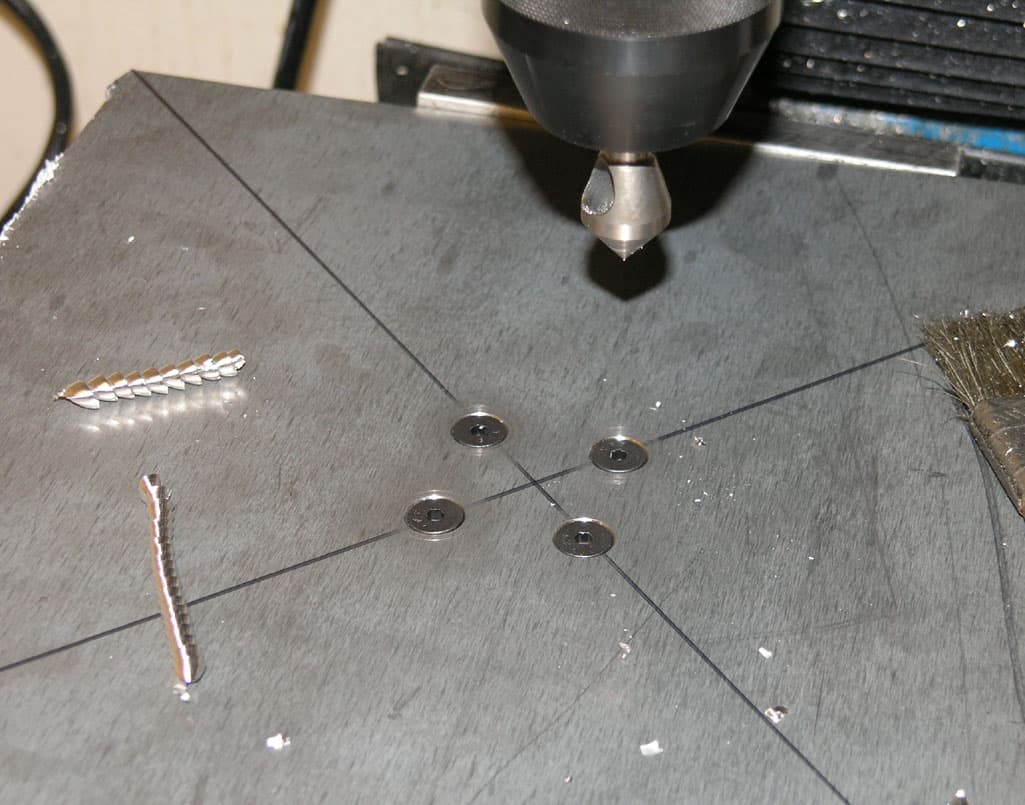
Deburring the holes is easy with a Keo Zero Flute deburring tool and a little hand drill. I picked that tip up from Frank Ford I think. BTW, it wasn't longer after this was taken that I moved that deburring tool over to an air drill. Even handier!
Machining the Steel Table
Start by cutting a piece of stock on the DeWalt Multicutter. Great tool!
Next, we have to surface the stock so it is square and flat. What setup to use?
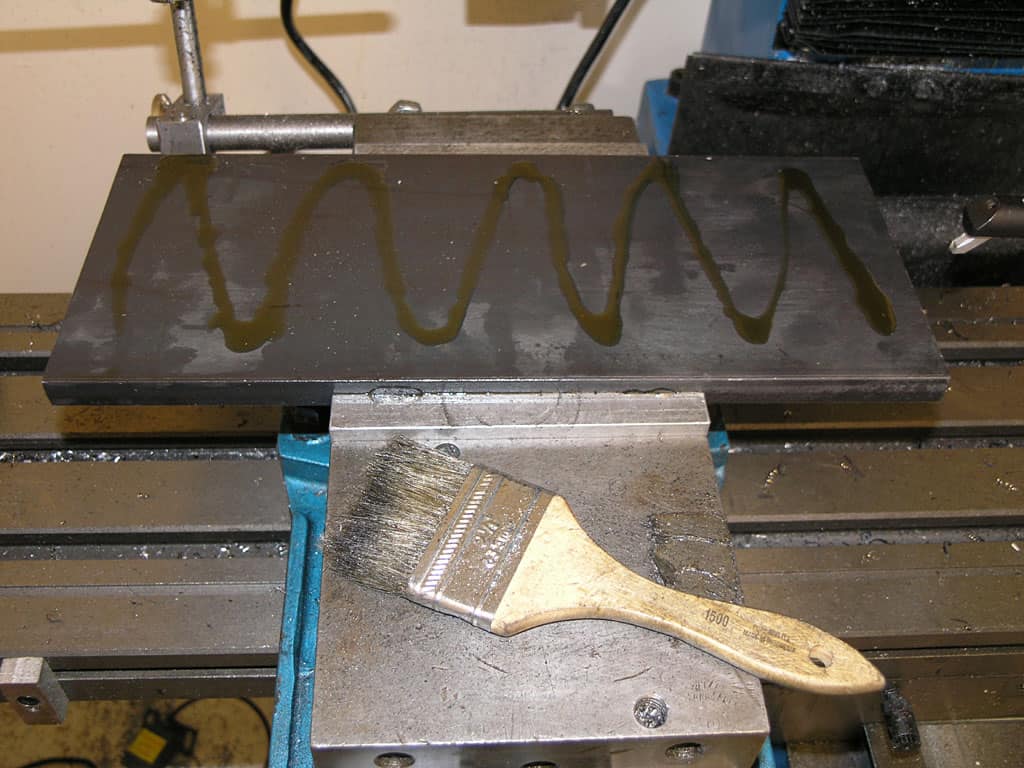
Kurt vise works. I've laid down some heavy cutting oil to help things along. You can actually feel it get easier to feed when you add oil...
Flycutting. Cough, cough, the oil throws off smoke! Be sure to ventilate!
Blue chips: I guess I'm going fast enough!
After a pass you can see the sort of Moire pattern you get. If the head is properly trammed square, both sides of the cutter evenly cut. They're not quite even here, so my head is slightly out of tram. Also note that I have to make two passes to get the whole width of the plate surfaced. BTW, doesn't that finish look terrible? Goudged out by a beaver with bad teeth, LOL. The brazed carbide tool I used was the reason. In later years my fly cutter technique got a LOT better.
Here is the result. Not bad, but gee, I hate that seam in the middle. What's the answer?
Get a bigger fly cutter! For the best finish, you want to cut in a single pass. That's why you probably want several fly cutters.
One minor bump in the road: my cutter came loose (just the little cutter or it could have been nasty), dropped, and jammed, gouging the plate. No matter, I have a plan for that edge as you will see. Already the finish is better with a different cutter.
Here's what the new cutter did. Much nicer. Note that it is MUCH more sensitive to tram because it is longer. Now you can see I am out of tram as the tool marks are showing I'm cutting on only one side. This is fine for making this table, but if I need super accuracy I'll need to retram the head soon!
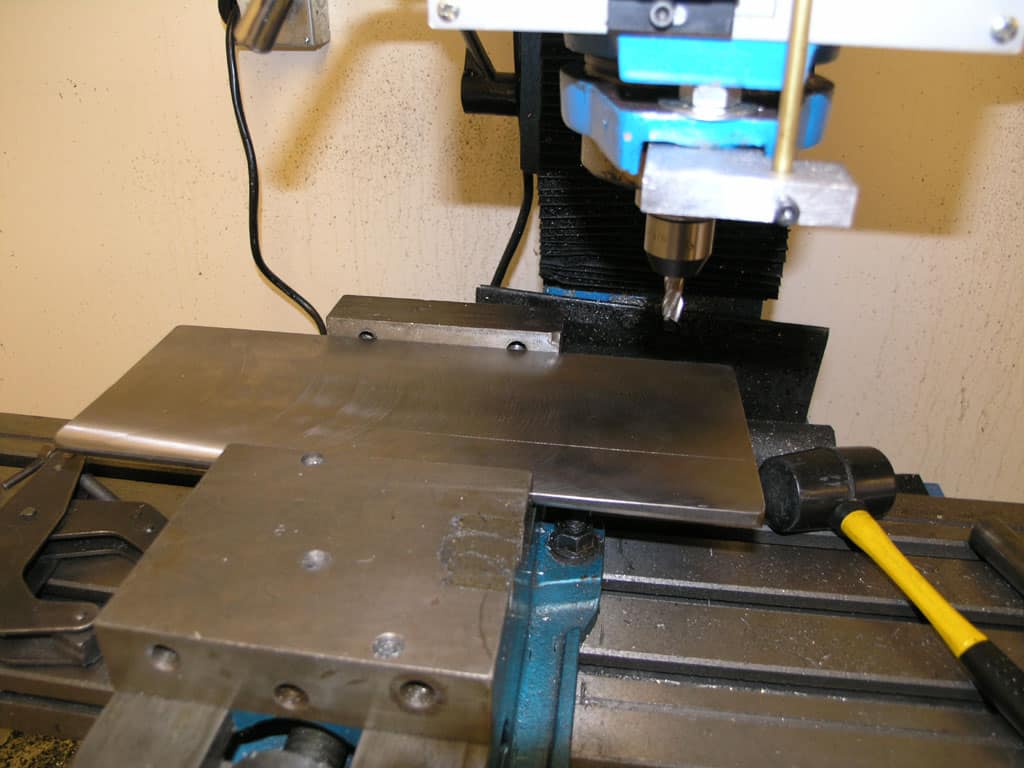
Finishing the Table's Edges
With the table sitting on the soft jaw steps, I used a 1/2" end mill to finish the edges...
I had to turn the table up to do the long edges: not enough Y travel. The 2-4-6 blocks add rigidity. I'm going to use an Iscar Helimill carbide insert mill. It isn't quite wide enough for the thickness of the plate, so I trammed the plate/vise to make sure the line between the passes would look straight. Probably an unnecessary detail, but I find frequent tramming is a good thing lest I forget. That's an Indicol indicator holder with an Interapid DTI...
Now I mill each long edge with 2 passes of the cutter...
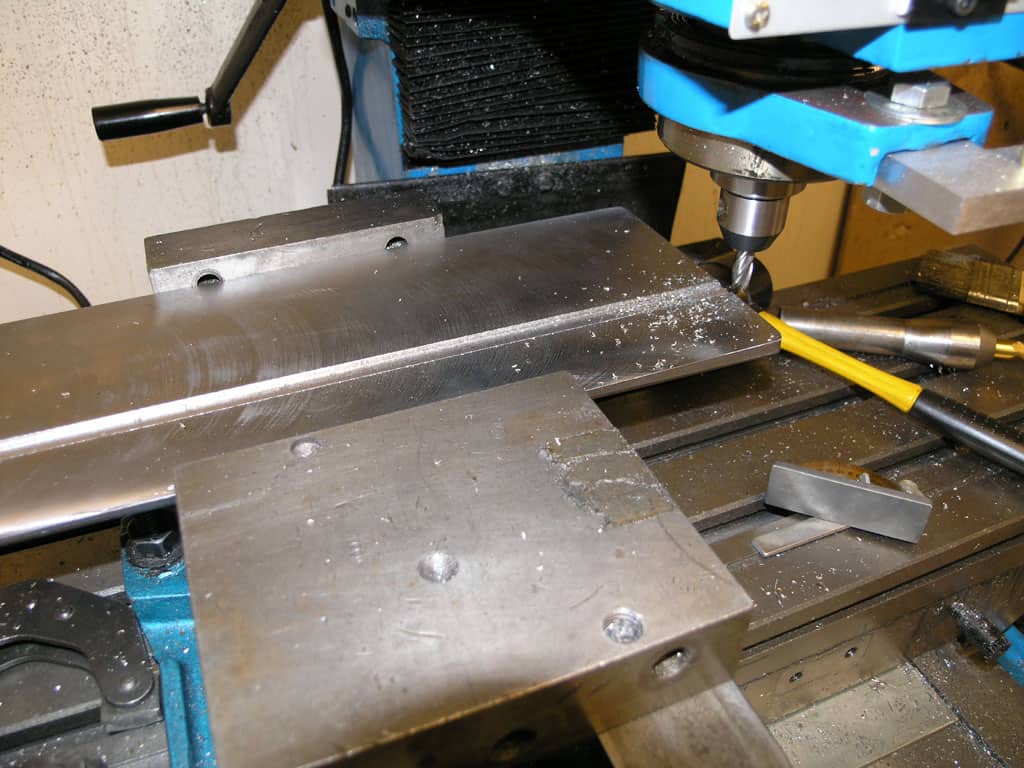
Bevelling the Long Edge
I wanted to bevel the long edge for clearance when the table tilts. The problem is I don't really have the right tooling for the job. I could tram the head to 45 degrees off vertical, but I don't have the Y travel to do it in one pass and it is a hassle to mess with the head. I actually made an attempt with a carbide insert chamfering tool:
Carbide insert chamfering tool gave poor results. Spotty finish. It was really not what the tool is intended for...
My next stop was to use a couple of giant V-blocks and some Kant-Twist clamps:
This setup proved inadequate. The Kant-Twist clamps couldn't lock down hard enough to hold the plate while I milled the edge. It slipped twice...
How many things are wrong with this picture? First, you can see the gouges that were the immediate result when the setup came apart. But check the edge: the plate was riding up and I didn't see it until I'd made a full pass. Remember, the endmill can act as a screw and exert upward force on the plate. Given poor enough clamping and enough cutting force, the result is: DOH!
I was able to clean this up quite a bit, but it is still not really right the way I'd like it.
How should this have been done? Ideally, I needed a tilting table or vise for the job. They aren't that expensive, but I didn't want to wait for delivery as I had the day off and thought I could get on with it. Here is Dickeybird having much better success with a more rigid setup and better clamping:
I had a couple of other crazy ideas I did not pursue. One was to drill and tap those V-blocks so I could bolt the blate down to them. That probably would have worked out well. Another was to build some special "plate clamping" vise jaws in aluminum. These jaws would have faces already angled to grip the plate at the right angle. This latter seemed particularly appealing, but I had no aluminum stock available of the right dimensions to try it. In any event, I left things as "good enough" so I could move on. The scarred face will give the needed clearance, and won't be visible, but it's annoying nonetheless. I will go back and fix things if I get the right tool in the shop.
Cutting the Tool Holder Slot
I wanted a slot cut into the table that matches the slot on my Harbor Freight tool grinder. The idea being that I could make tooling and swap it between the machines. I measured the distance from the slot to the cutting wheel as 45mm and the width of the slot as 12mm. I used a 3/8" end mill and a couple of passes to cut my slot:
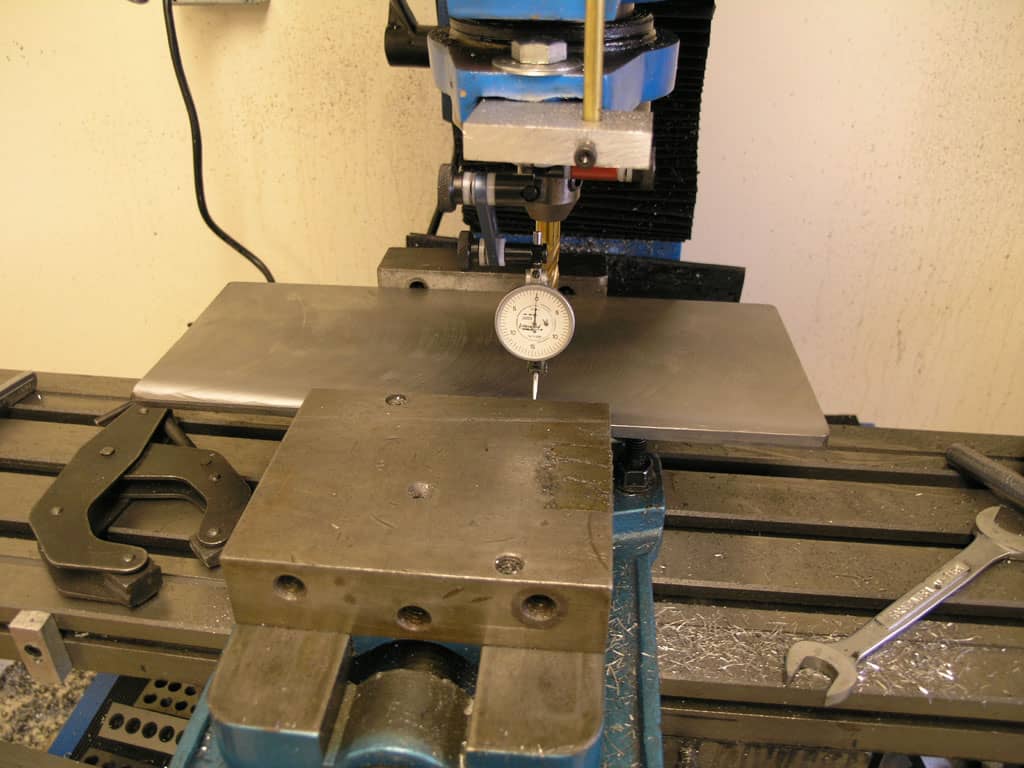
I had to pull the softjaws to get a wide enough opening to hold the plate. It's sitting on some wide parallels. The Indicol came back out and I trammed the vise again since I was on a different surface. It was only off slightly, but it pays to be vigilant...
I used my digital height gage and surface plate to scribe a line where the front edge of the slot was to be. I then lined up the mill visually-it didn't need that much precision on that feature...
And there is the slot being cut. I used 2 passes and a narrow end mill rather than cutting in one pass with an endmill just wide enough. This yields a better finish and a more accurate cut. I was running the end mill at 1000 rpm or so and about 30 thousandths depth of cut. Feedrate was pretty fast, and I had a little air gun to blow away the chips. It felt like it was loafing along.
And here you can see the finished slot. The edges had a little burr that I cleaned up with a small 220 grit stone and a file. When I had the edges just to the point they felt smooth to the touch I stopped messing with it. The mitre from the tool grinder fits just great. My slot is slightly deeper than the grinder's intentionally. The radiused corners were done by hand and eye on the same tool grinder. It didn't take very long either.
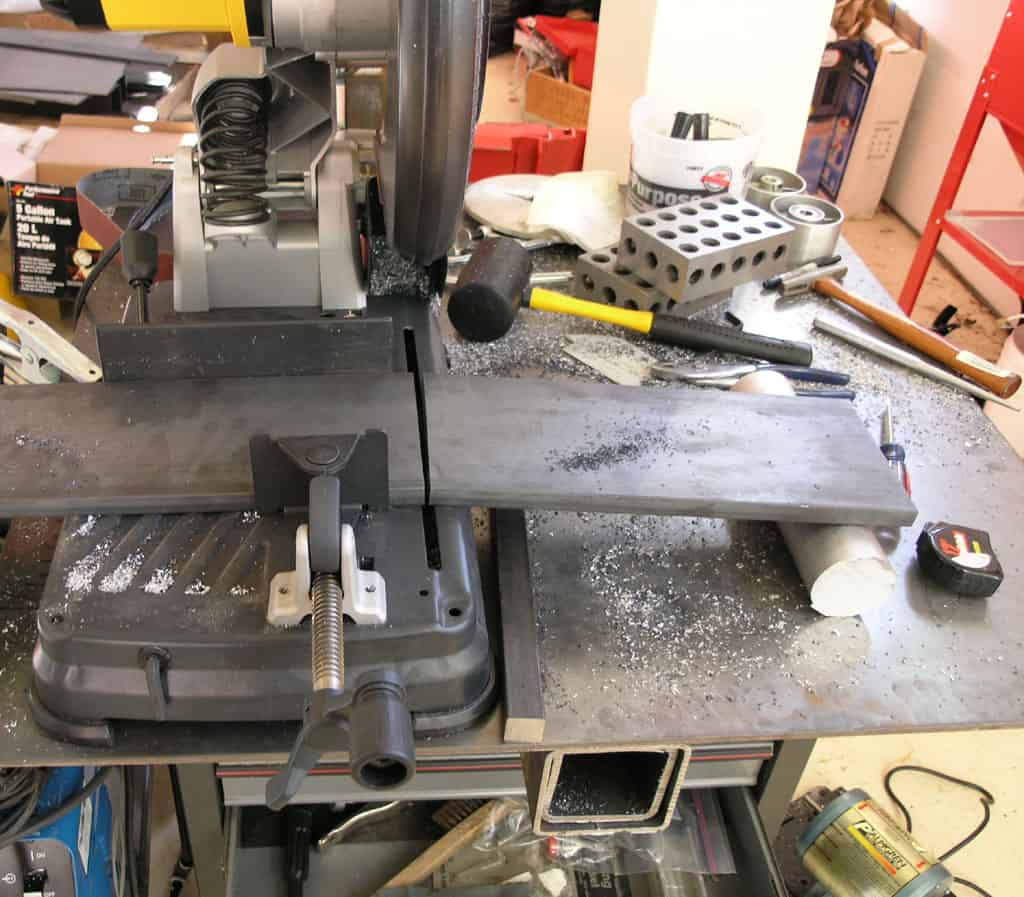
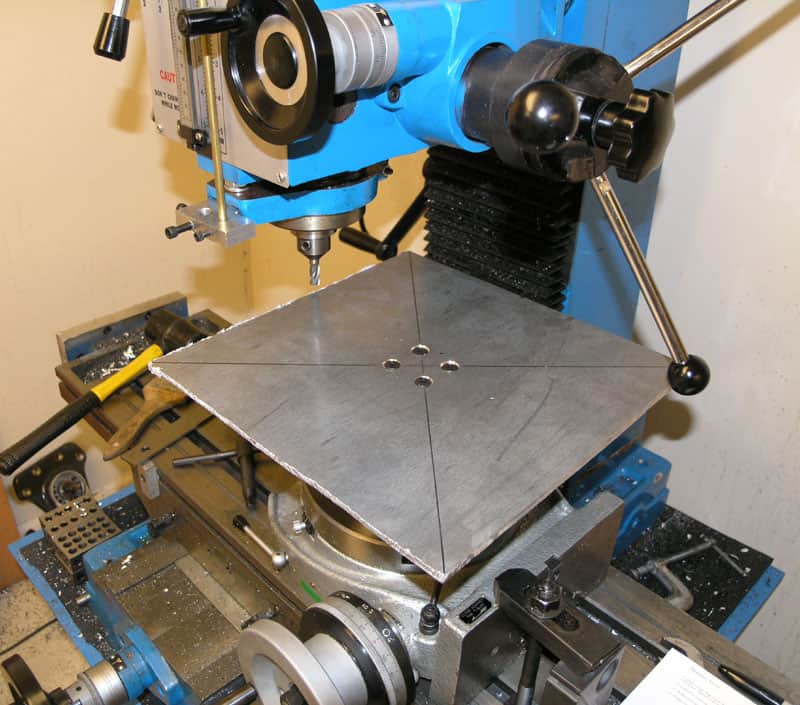
Cutting the Diss Sander Plate
A nice big piece of eBay aluminum plate arrived late yesterday, so this fine Saturday morning I wanted to get started making chips out of it. Can't stand to leave a good piece of metal alone! My first task was to cut it down to size. I am building a 12" disc sander, so I wanted a piece that was about 12 1/2" square to make life easier. Several ways I could have gone about cutting out the plate. It's too big for my Multicutter, but I could have used an air cut-off tool, a sabre saw with a metal cutting blade, or the mighty Milwaukee Sawzall that lurks in one corner of the garage. Feeling a bit playful this morning, I dragged out my plasma cutter instead:
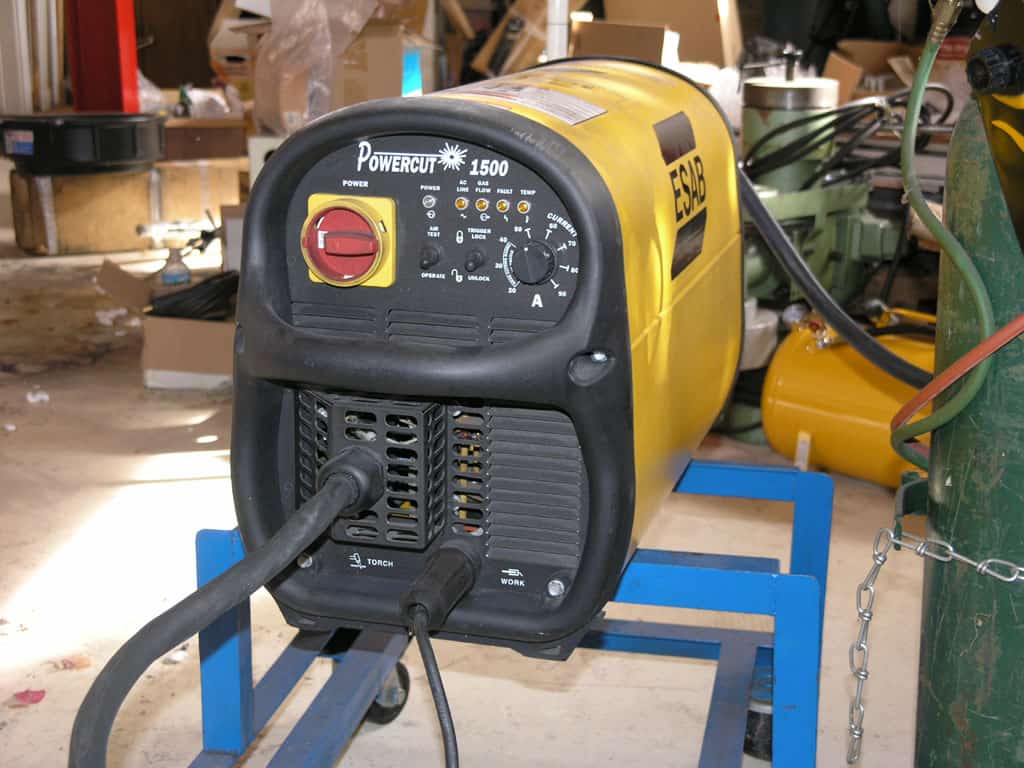
This is another of my many eBay deals. Industrial grade heavy capacity ESAB Powercut 1500 plasma purchased for an embarassingly low price. Cool looking unit isn't it?
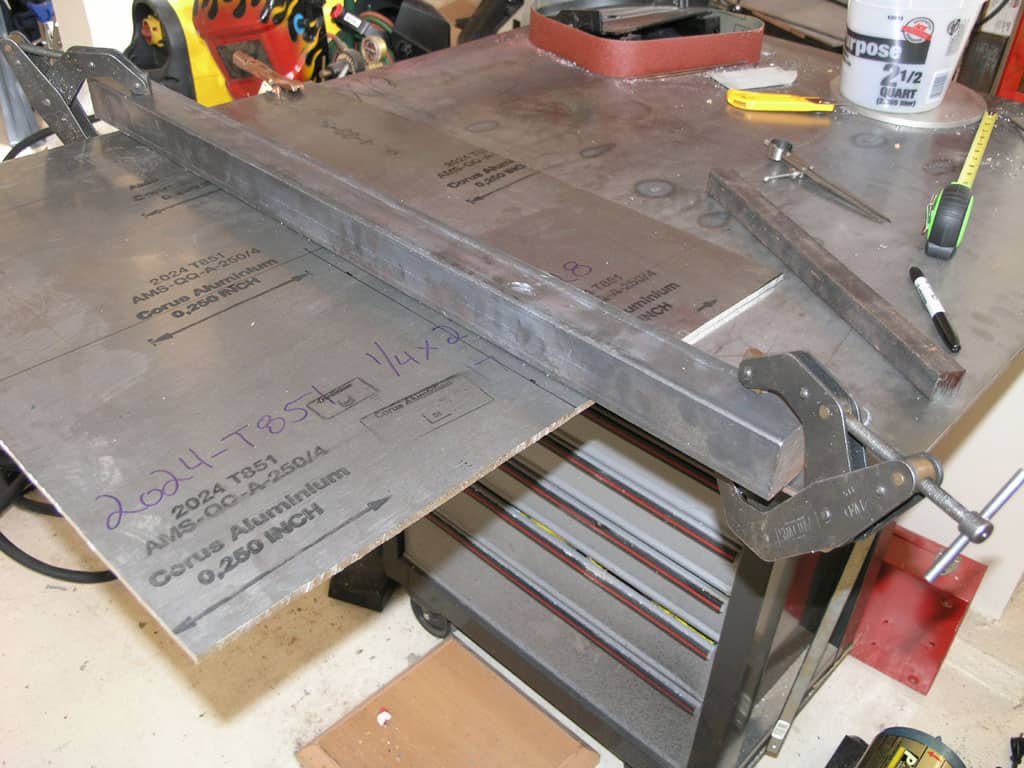
It will take longer to set up a fence to guide the plasma torch than to make the cut. A big piece of stock and a couple of Kant-Twist clamps plus calibrated eyeballs will do. You'll soon see the plasma isn't all that accurate, so my eyeballs are good enough for layout!
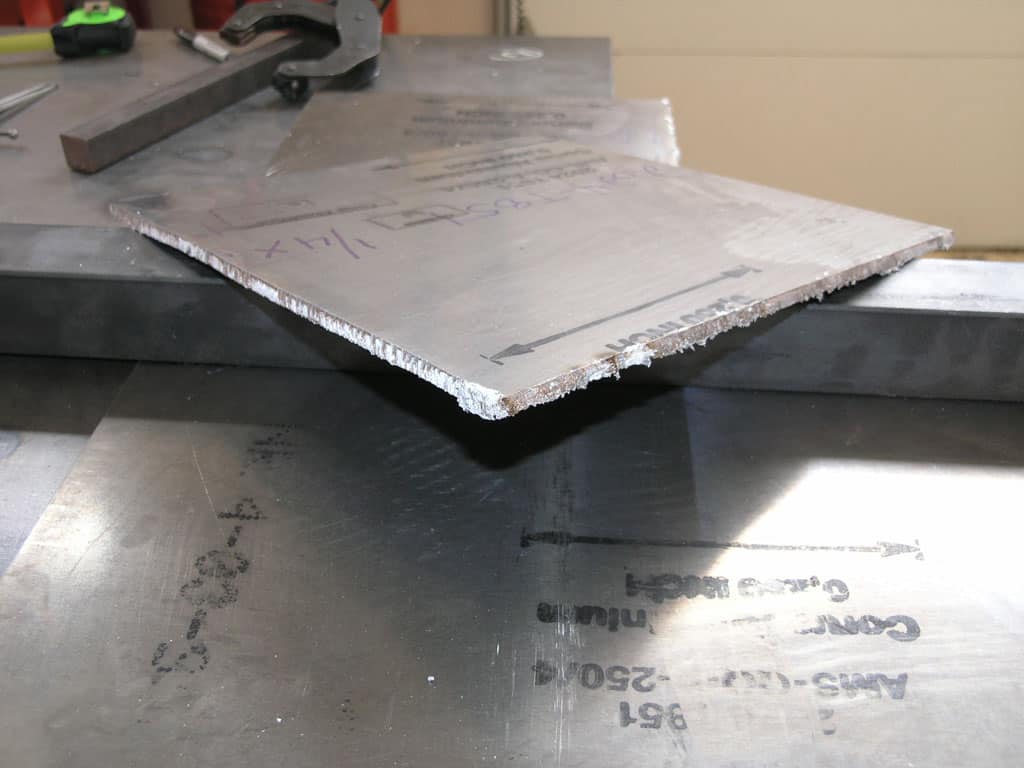
As you can see, this is 2024 aluminum. The web had this to say about its properties:
Good machinability and surface finish capabilities. A high strength material of adequate workability. Has largely superceded 2017 for structural applications. Uses: Aircraft fittings, gears and shafts, bolts, clock parts, computer parts, couplings, fuse parts, hydraulic valve bodies, missile parts, munitions, nuts, pistons, rectifier parts, worm gears, fastening devices, veterinary and orthopedic equipment, structures.
That oughta do it, though I'm not planning any veterinary applications for the sander!
I walk the torch through in air to get used to the motion, make sure the hose doesn't bind, and so on. I'm cutting from here...

...to about here. The plan is one continuous motion, but it never works out for me that way. Hands are just not smooth enough...
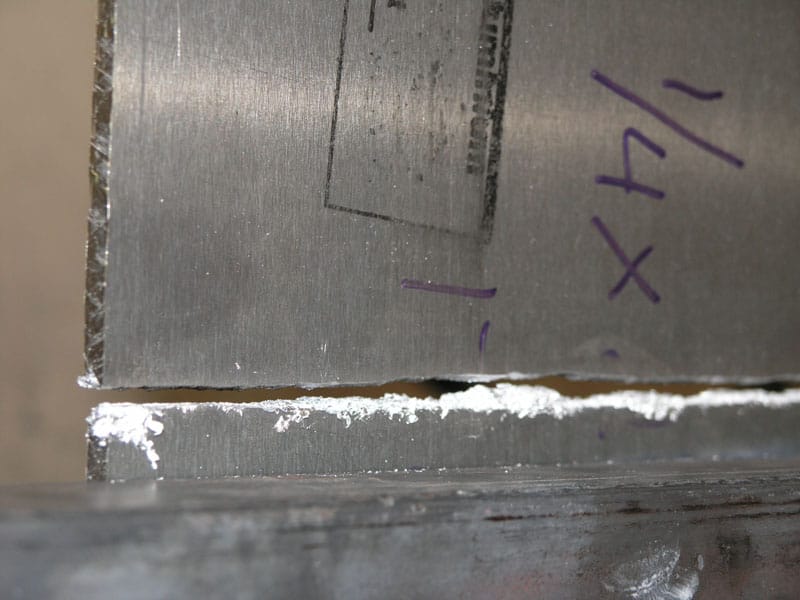
See what I mean about the precision? Kind of a nasty slaggy cut. Just so you know, that's all me. A plasma being run at optimal feed speeds, fed smoothly and precisely, with good torch height control, and the right amperage (phew!) can make a very clean cut. Since I had no idea the right parameters and poor ability to execute them if I did, I cranked the amps and tried to keep the torch moving fairly quickly and smoothly. I think I was too slow!
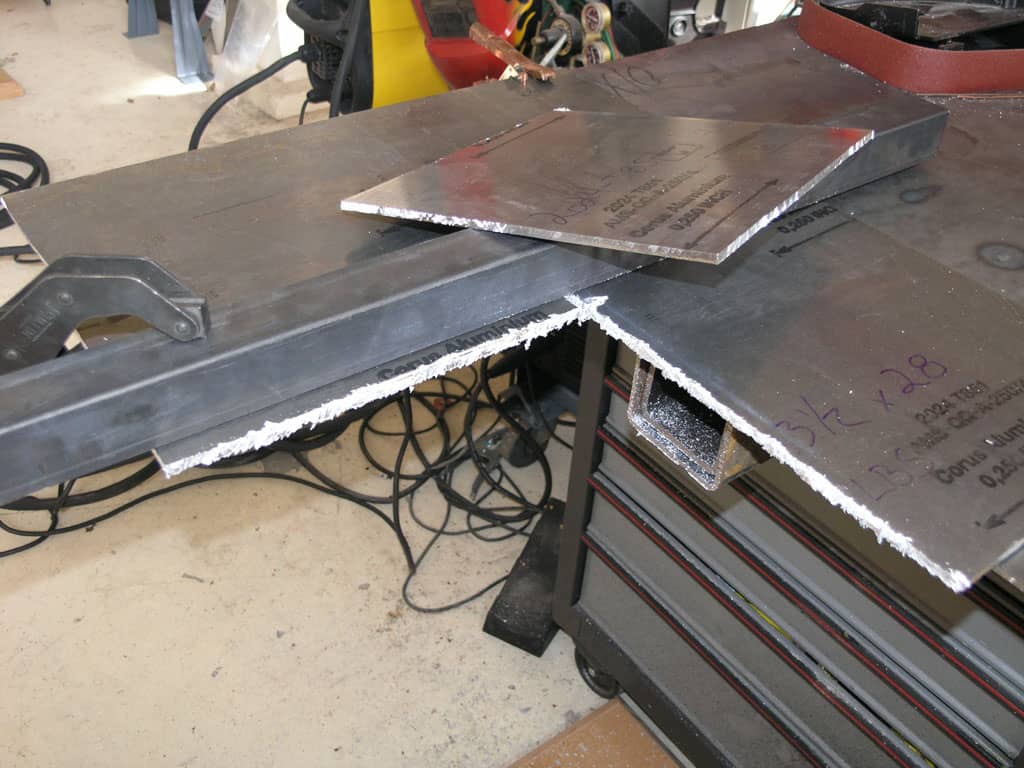
Here is the whole piece cut out...
Another view of the edges. This is fine. I'll be using more refined methods to cut a disc from that square of plate.
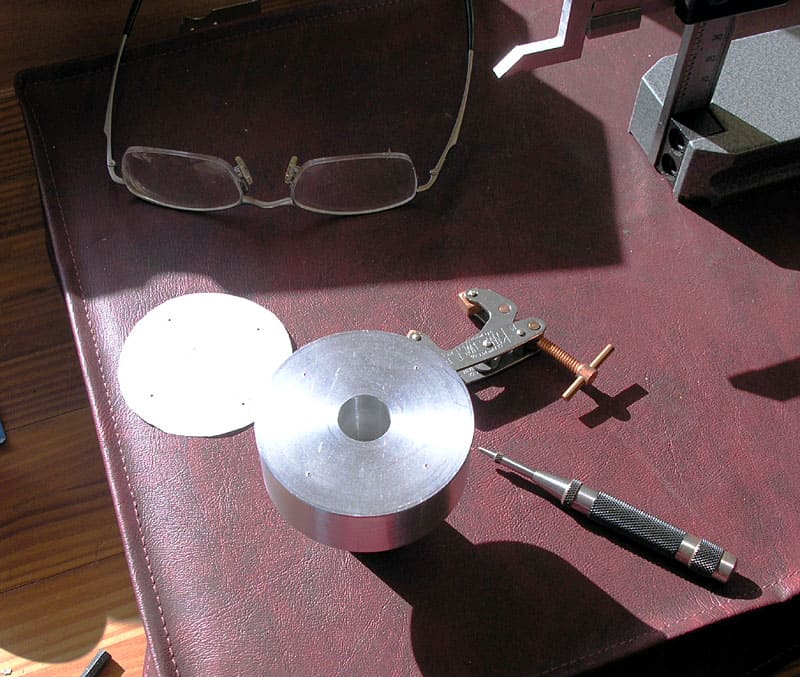
Mounting the Hub to the Disc
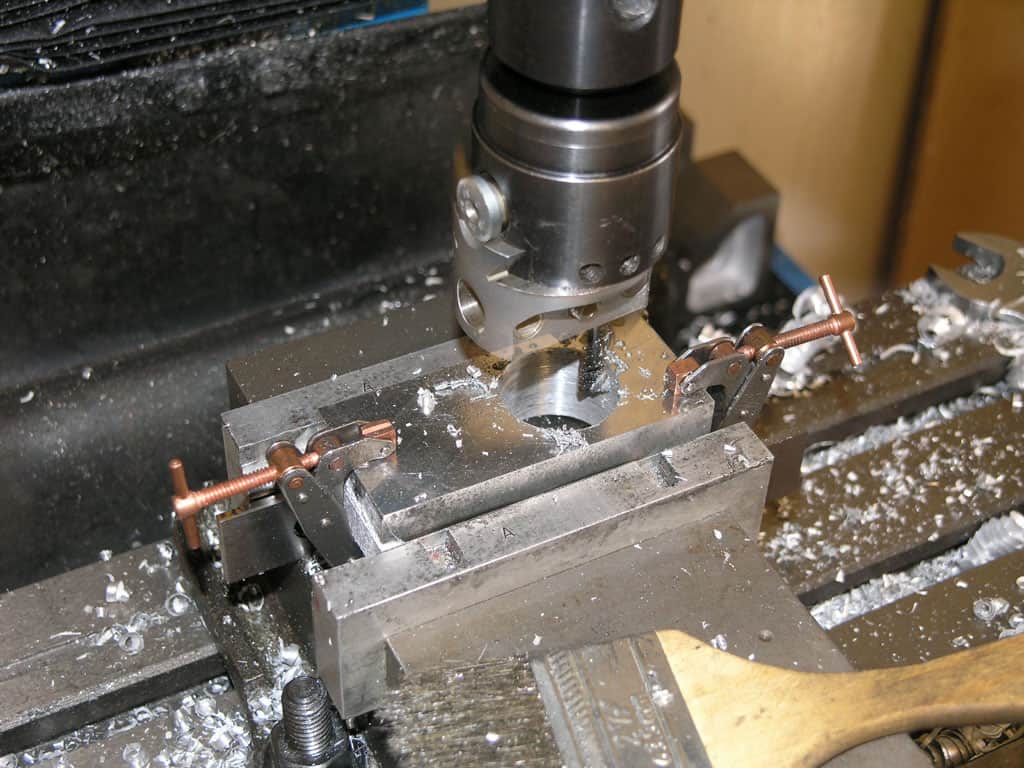
The holes were drilled in the hub, so now we use transfer punches to find the holes on the plate...
Prick marks show where to drill. Transfer punches are one of the most indispensible gadgets in my shop, and they are cheap! Another handy thing are transfer screws. If you need to transfer blind holes and the hole is threaded, these are inserts with a sharp point that screw into the holes...
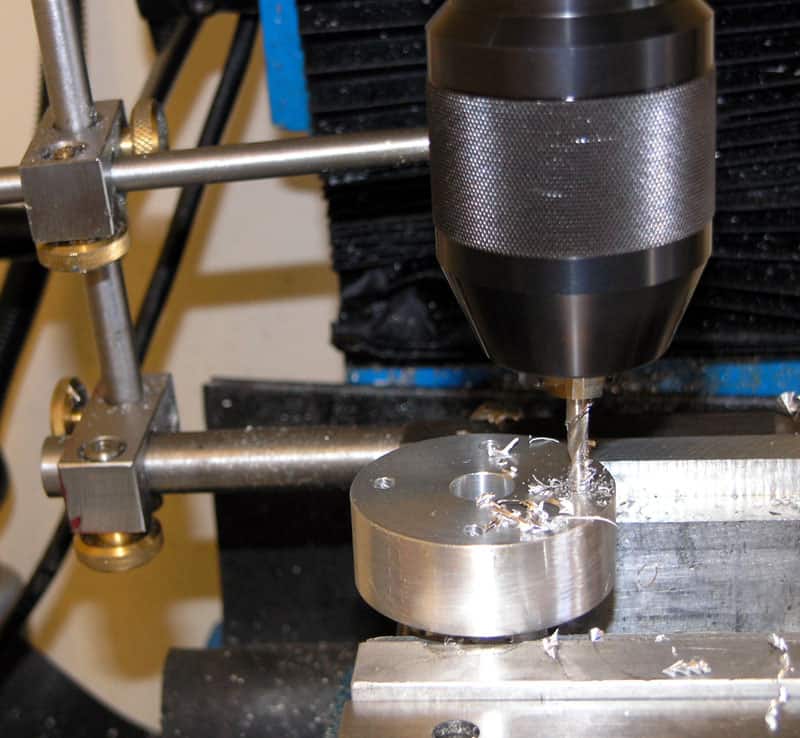
Holding the plate in even a 6" Kurt vise could have been scary, but you can mount the jaws on the outside and make plenty of room for a job like this. Note that the plate is resting on top of the permanent vise jaws and the aluminum outer jaws just apply clamping force...
Holes are drilled and countersunk for some flat head socket screws. I used my Keo zero flute debur to do the countersinking, but it is really not the right tool for the job. Nevertheless, it worked find in this alumnium. You just need to take care the flute hole is kept clear of the big curly chips...
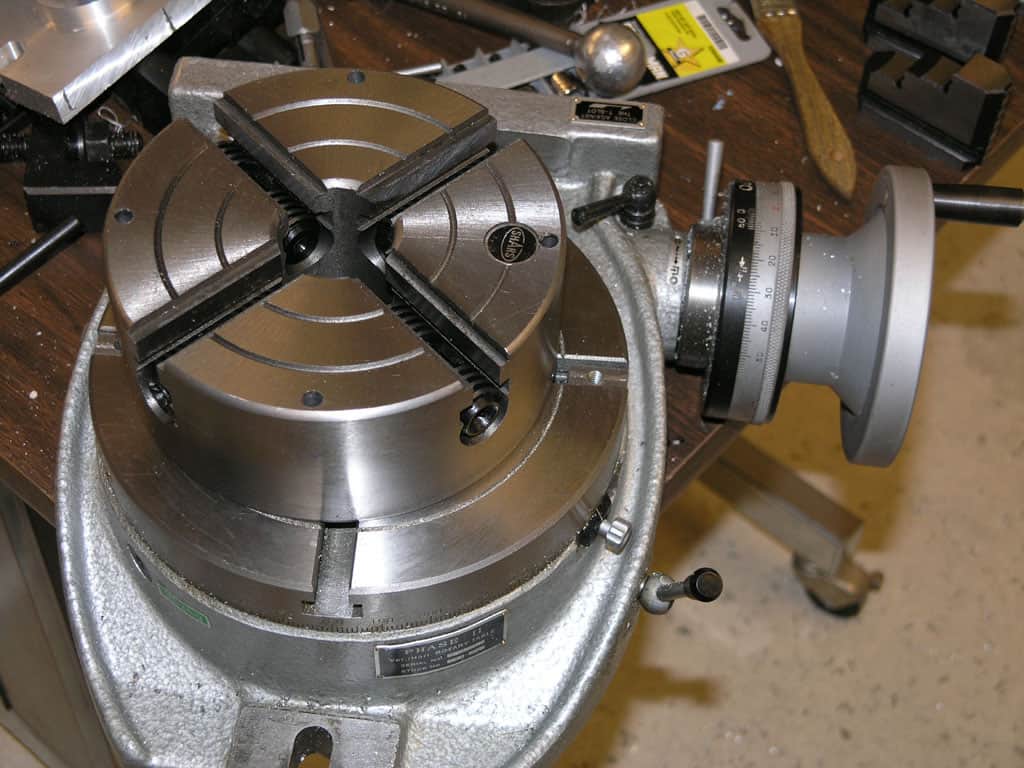
Mounting a 4-Jaw Chuck on the Rotary Table
Now that I can mount the hub to the plate, we need to make the plate round. Moreover, the circle must be concentric with the motor shaft. To accomplish that, I will mount the hub on my rotary table in a 4-jaw chuck, center the hub in the chuck so that when the table rotates the shaft hole is concentric with the rotation, and then I will mount the plate and turn it with the rotab to machine the square plate into a circular disc that is concentric with the hub. Unfortunately, I have not yet mounted a 4-jaw chuck on my rotab, so I'm ahead of myself. First we need to mount the chuck. I've just gotten a nice new 6" 4-jaw from Shars very cheaply. It's a nice cast iron piece that looks well machined. Definitely worth what I paid, but I need to get it mounted.
The ideal approach would be an adaptor plate like this:
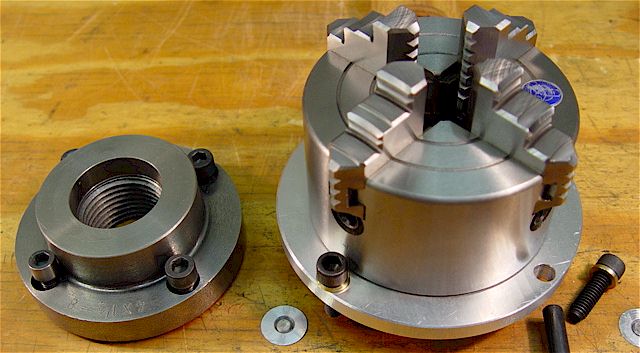
A proper adaptor plate...
I don't want to stop and make up a proper plate though, so I'm going to bore through the mounting bolts to the face of the chuck and bolt through the chuck to a T-Nut on the table. That should be quicker. Here I am caught in the act:
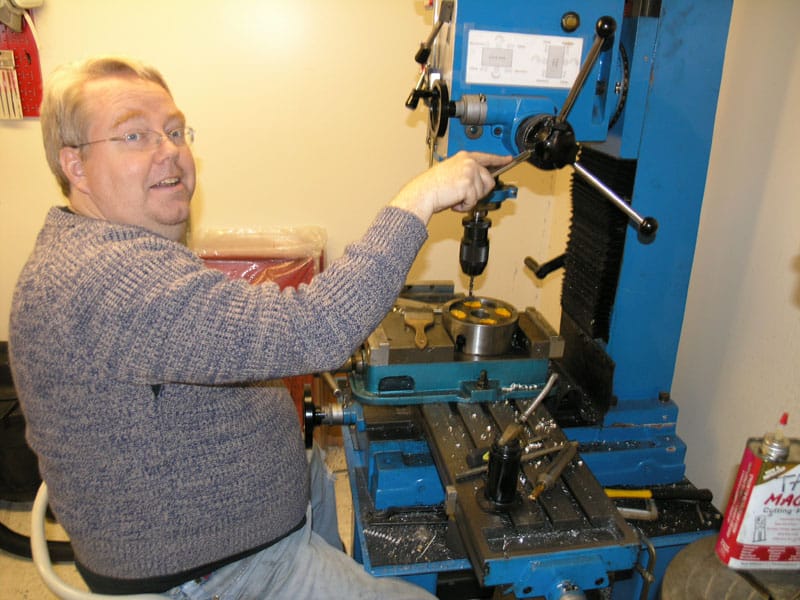
Looking guilty for drilling into that nice new chuck...
Cast iron machines nicely. It doesn't need oil, but I found oil helps evacuate the chips because they stick together and come up out of the hole...
There's the chuck. I need to run to the hardware store and get some long bolts now and I'll be ready to continue. That'll wait for the next day I'm in the shop!
Making a Square Plate Round on the Rotary Table (Nature's Way of Telling You to Buy a Bigger Lathe!)
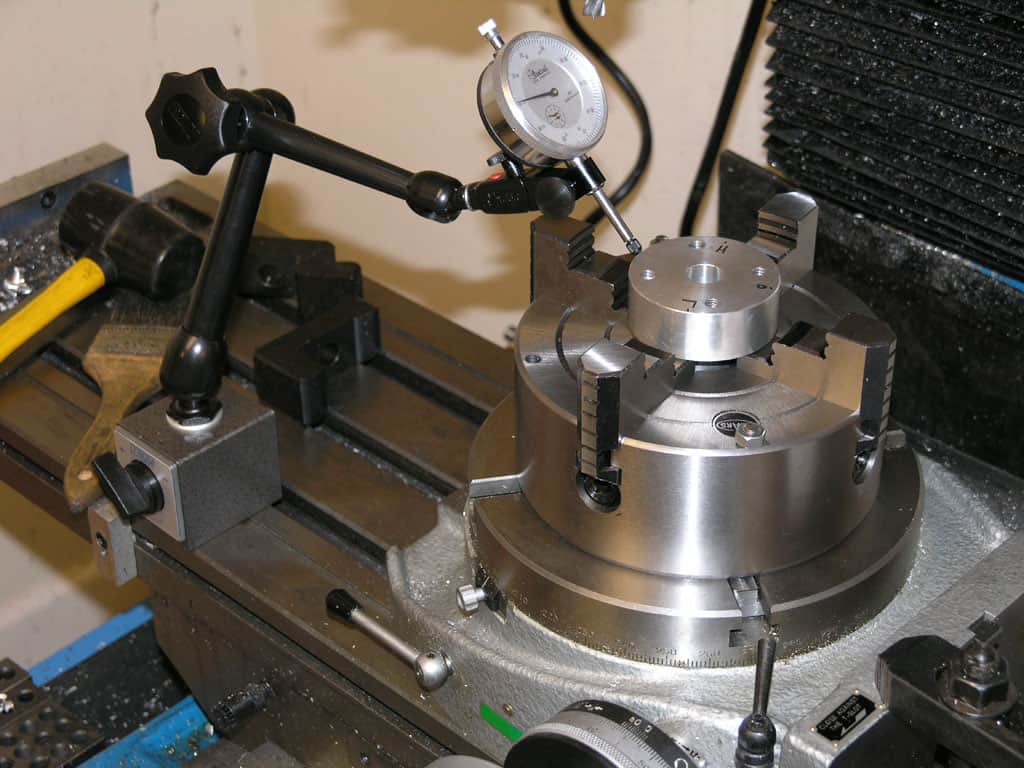
We need to dial in that hub so that it rotates concentrically with the rotary table. I start with a plunger style indicator, because I wanted a lot of range. Not the markings on the hub: "H", "L", and "0". I'm using a really fast way of dialing things in on the 4-jaw:
-
Make 1 revolution of the part and note the highest and lowest points. I marked them "H" and "L".
-
Go to a point exactly between the "H" and "L". Rotate the indicator bezel until the "0" is on the needle. I marked that point "0".
-
Go to each pair of jaws (not each jaw) and adjust until the indicator reads "0".
You are done!
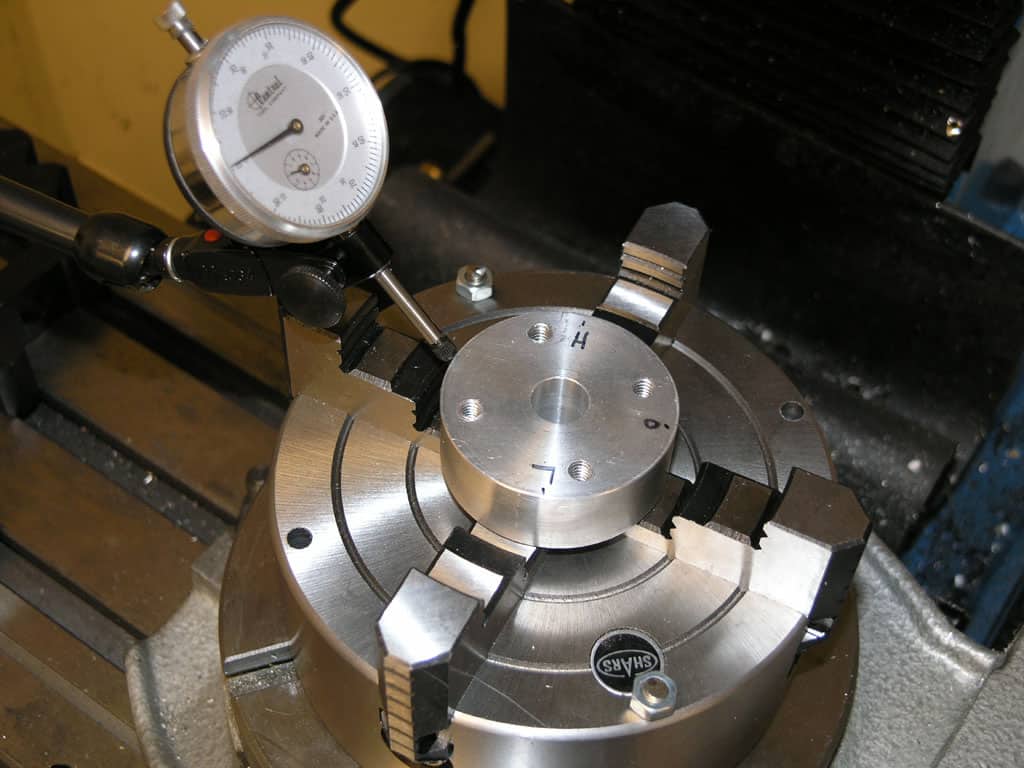
Yep, looks like "0" to me!
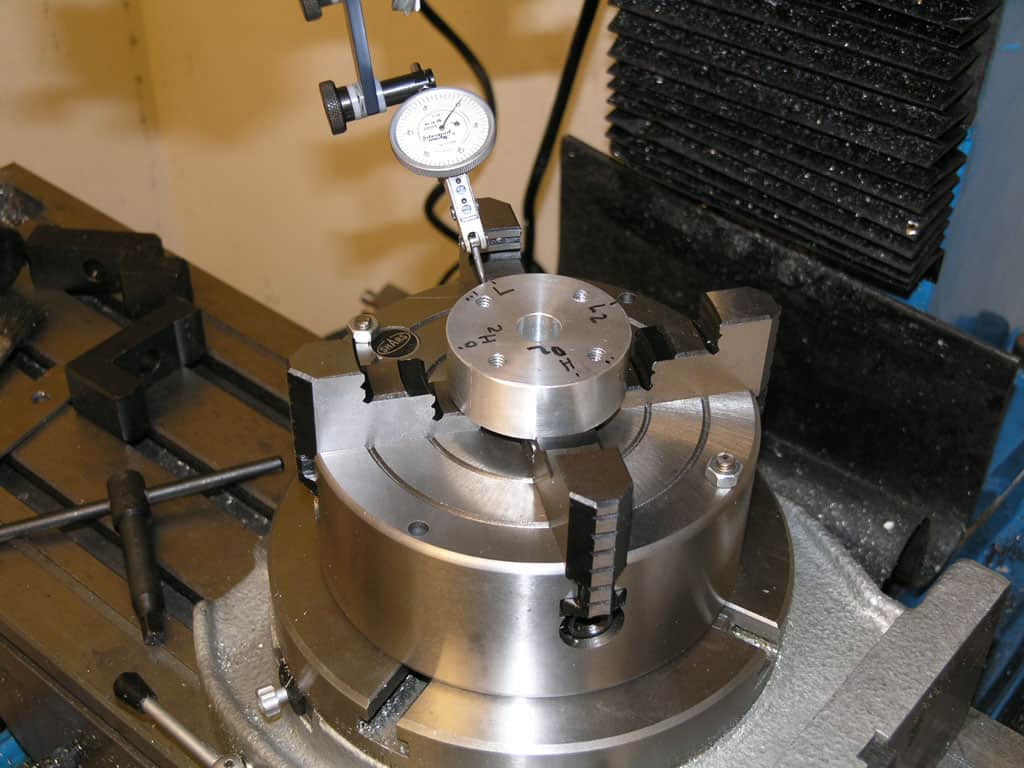
Just to be sure, I repeated the whole process with my much more sensitive Interapid DTI on the Indicol. More markings "H2", ":L2", "O2". And once again we got to "0" all the way around. That's a real fast way to dial in a 4-jaw!
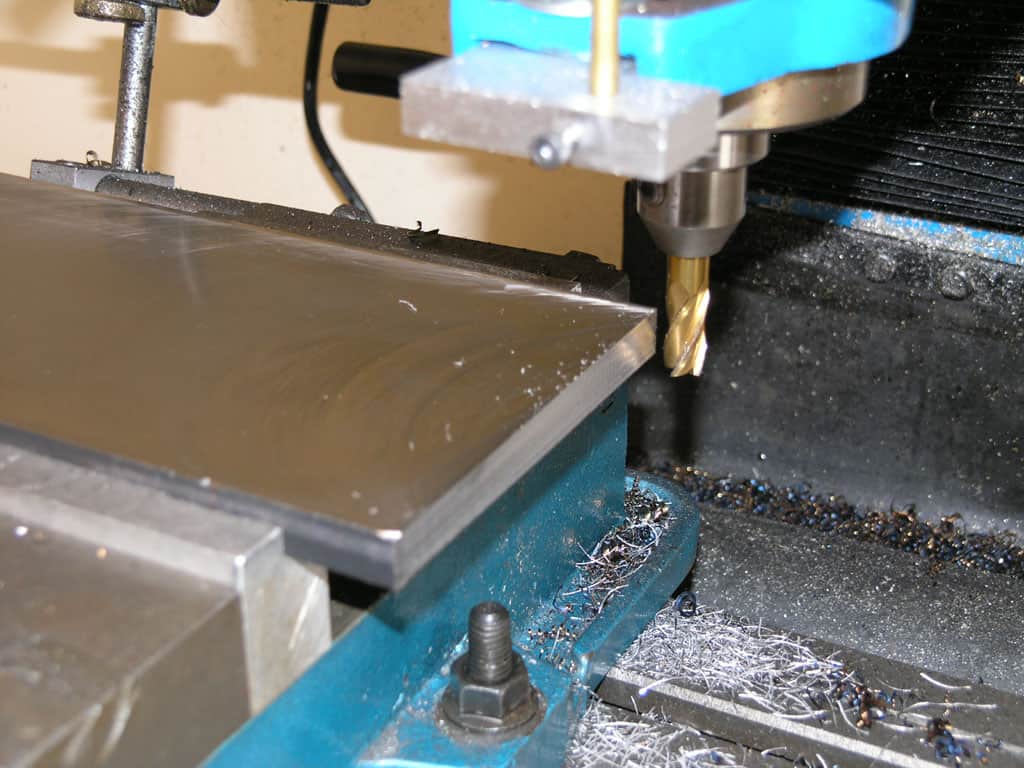
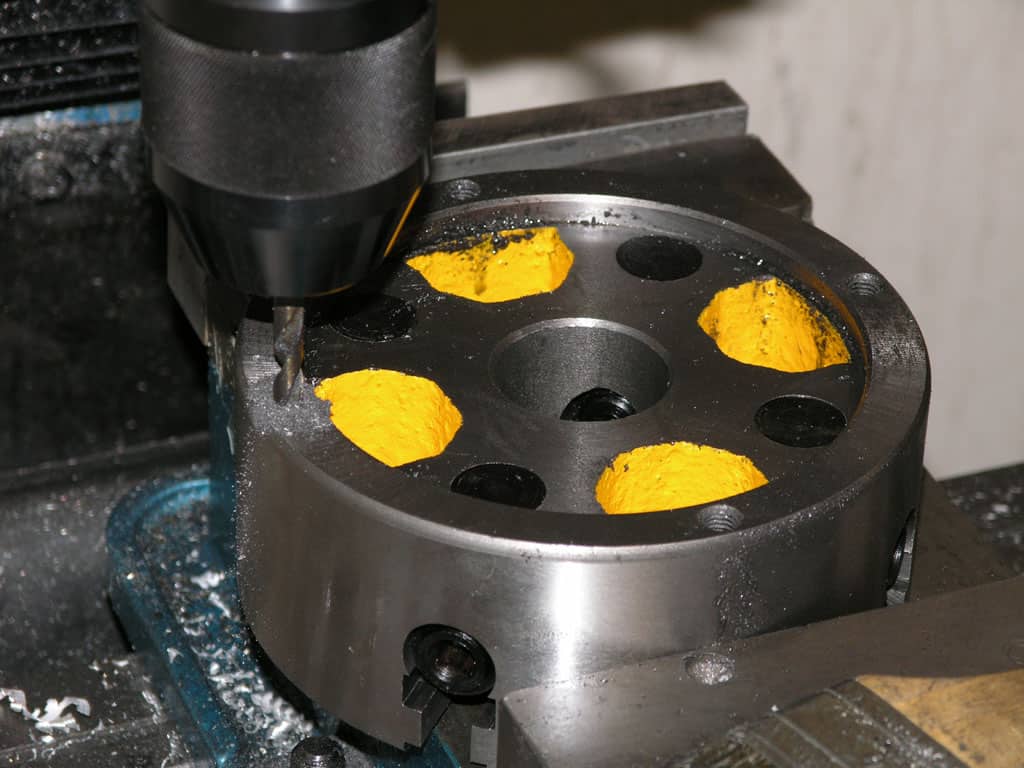
Now I"ve mounted the square plate and a 3/8" end mill....
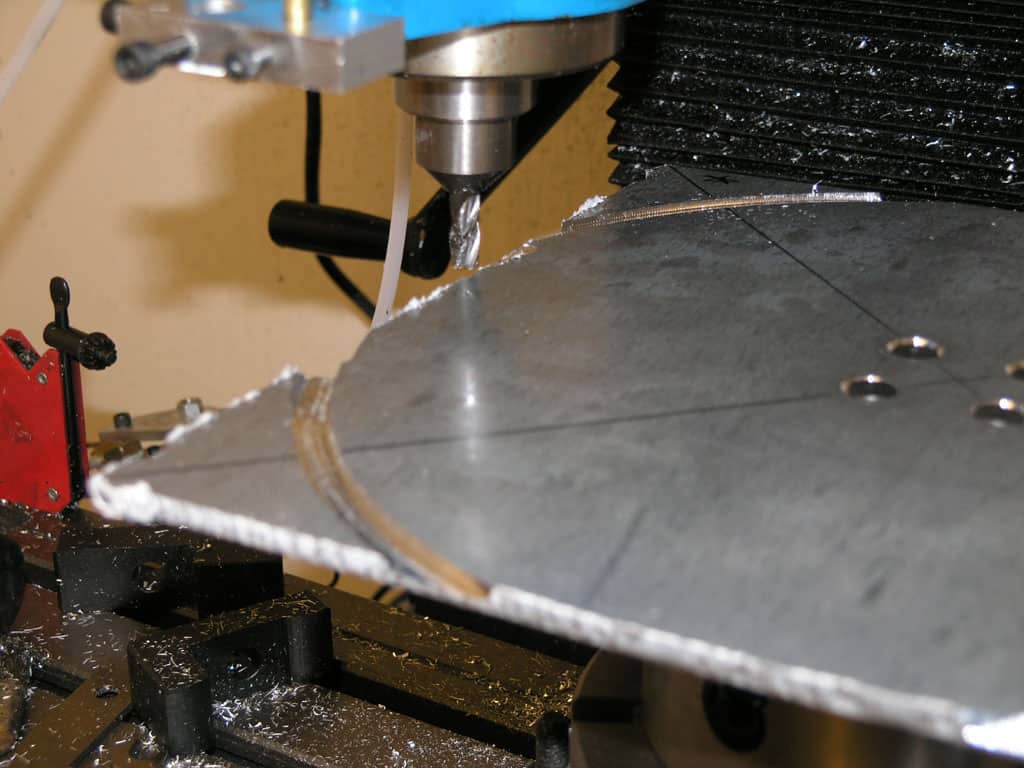
Pretty shallow cuts are all she'll take. The plate wants to ring and chatter because its only supported in the middle...
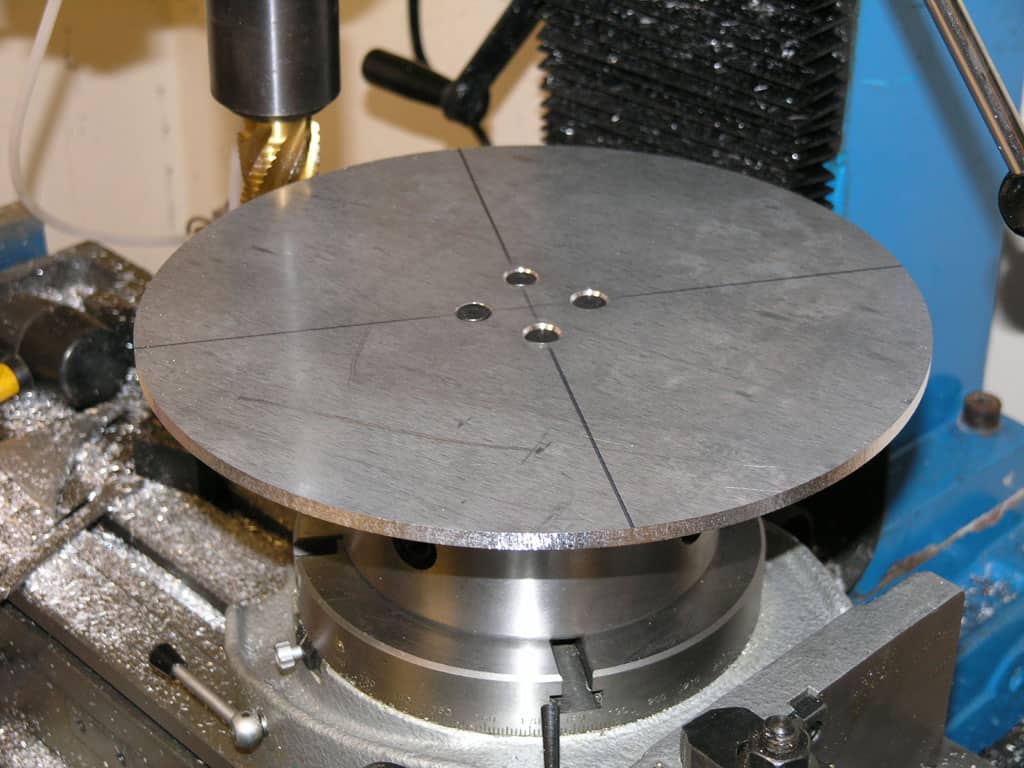
I tried several cutters. My big corncob roughing end mill seemed to behave best and cut with the least chatter. That's pretty round, isn't it?
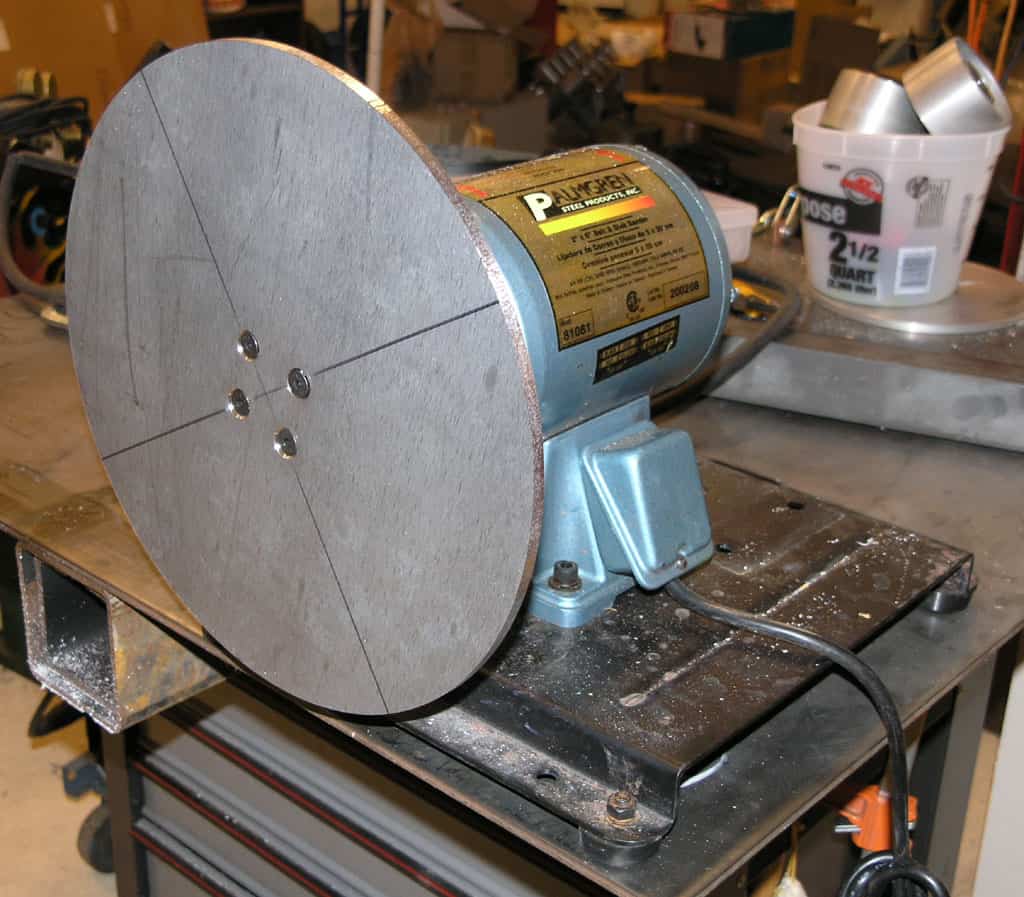
Ahhhh. Now that's starting to look like it'll be a disc sander!
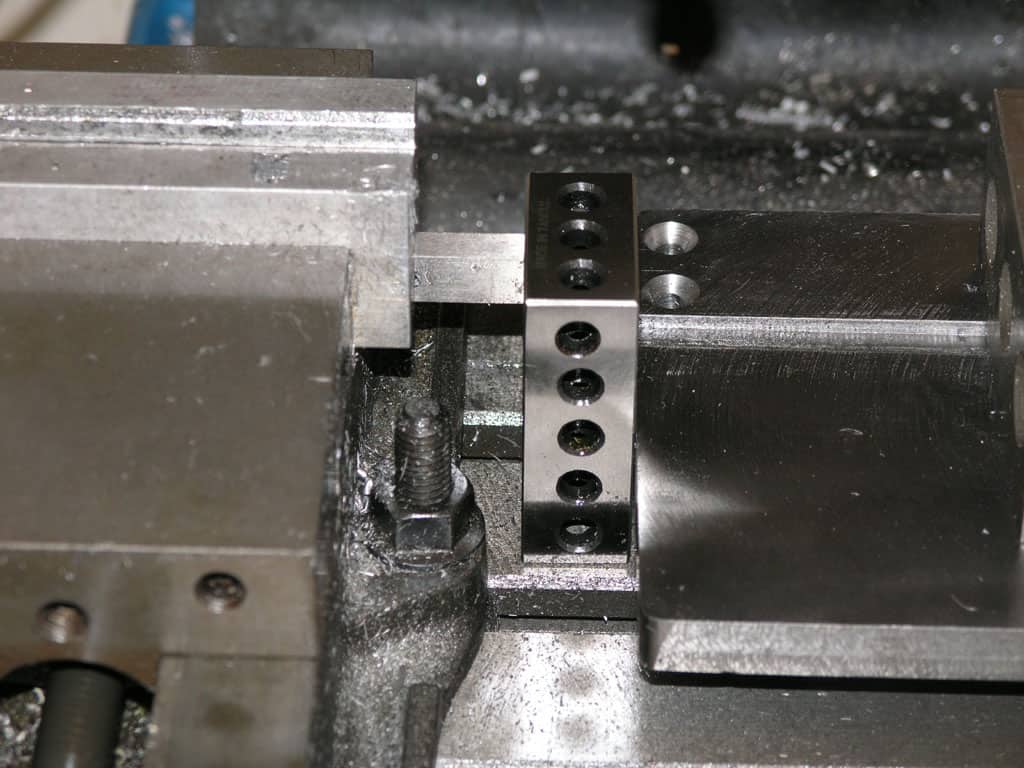
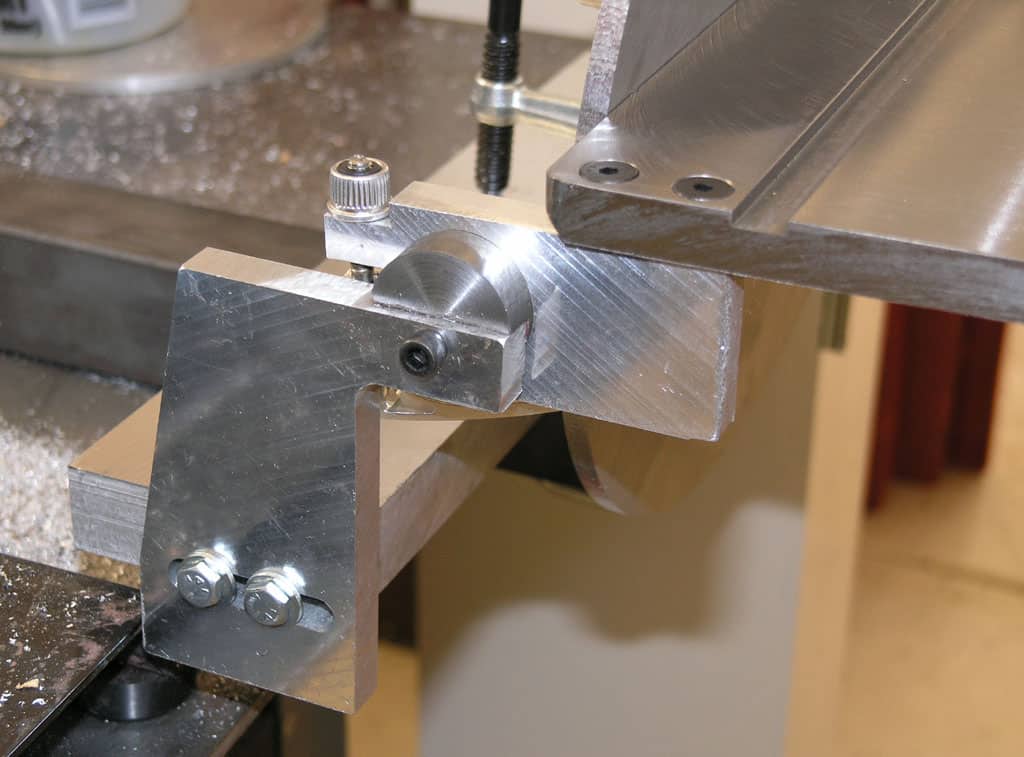
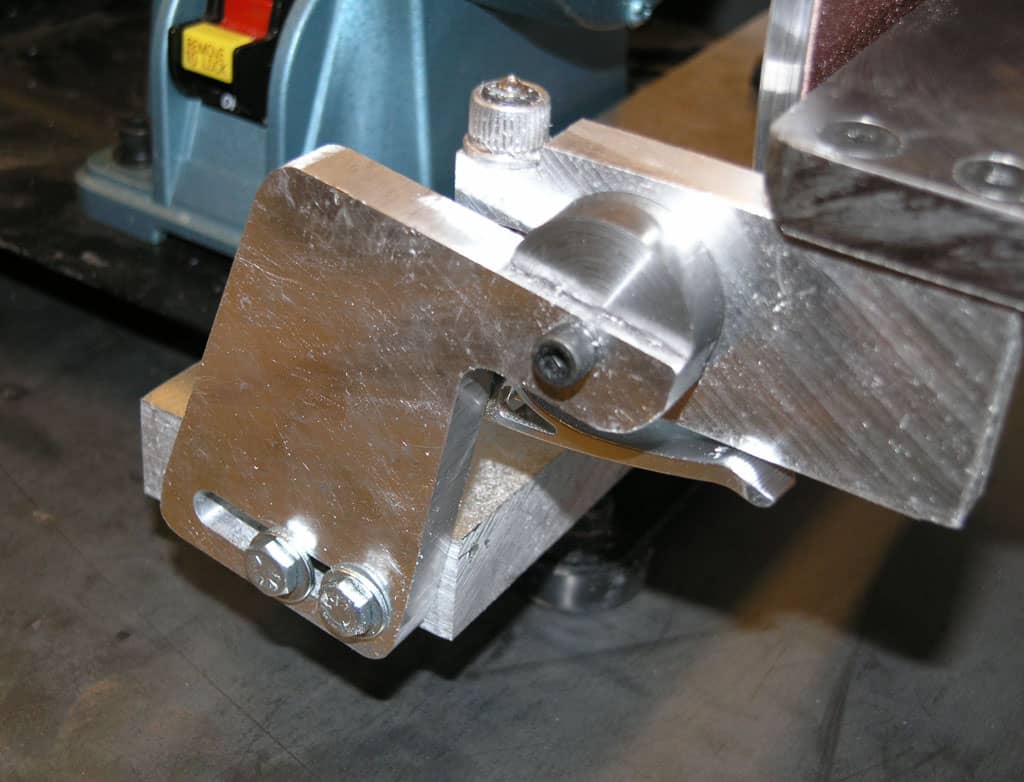
Toggle Clamps to Hold the Table
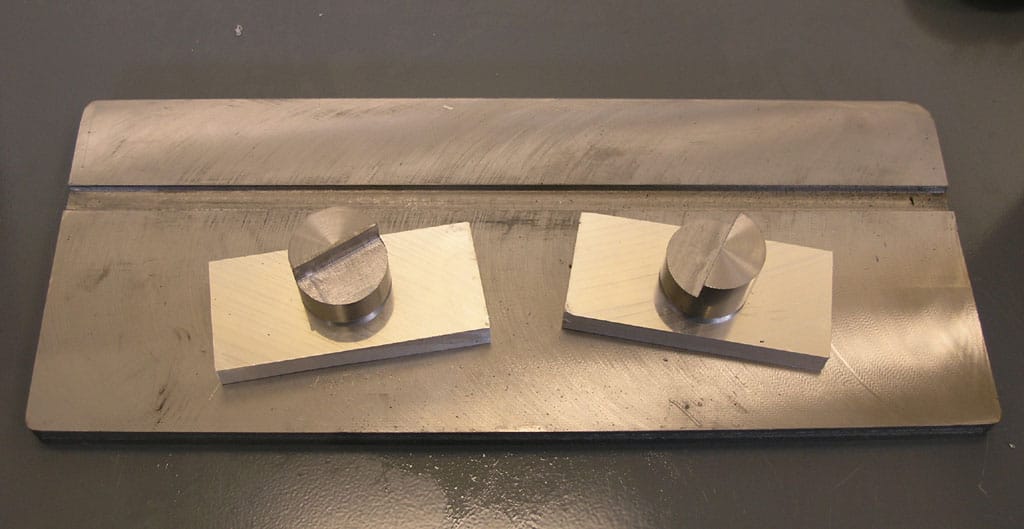
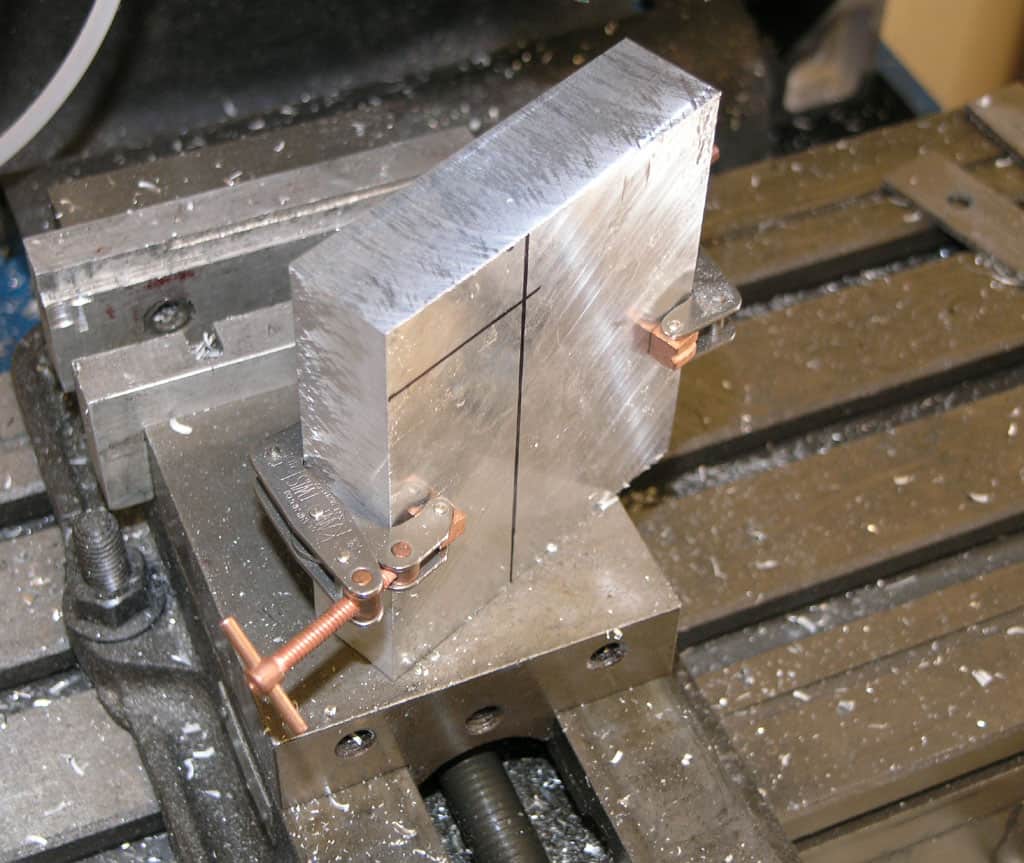
The hubs that will be fixed to the motor plate are 12L14. Resting under them are a couple of pieces of aluminum tooling plate (MIC-6) that I want to turn into clamps to be mounted under the table.
First job is tramming the mill...
Now I square up the pieces, more or less. I'm using my Lovejoy indexable face mill. It's a positive rake tool that cuts really well on smaller mills. You can see the seam between the two blocks is almost invisible...
I clamped the blocks together and flipped them over so we can make a hole for the hub...
My biggest Silver and Demming drill is 1" diameter, so I'll finish with the boring head...
Got this well used Criterion boring head off eBay for cheap. Works great. I really enjoy boring heads for some reason. I need to get some better boring bars for it though. The cheap little no-name bars that come in sets are very marginal...
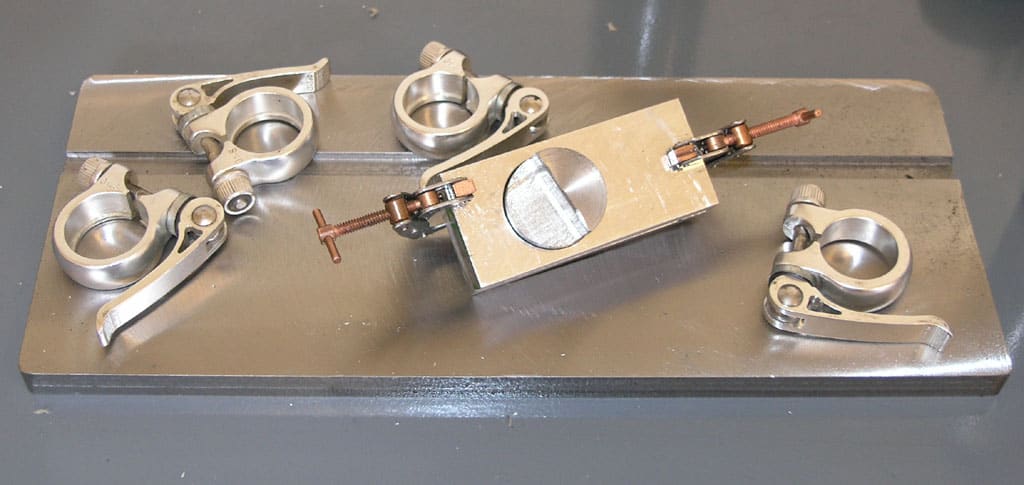
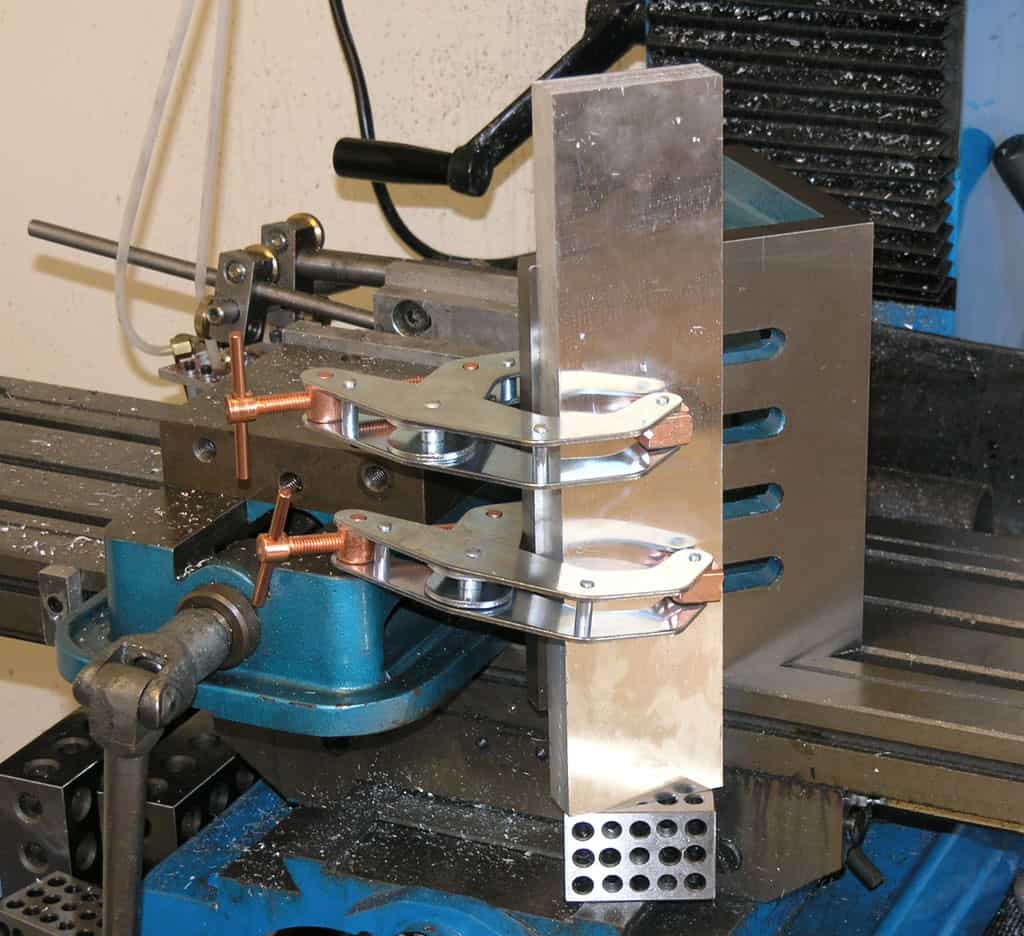
It fits! And, you can see the bicycle seat clamps I will use. I got them for $3 apiece on eBay...
Here's how they work for this application. I still need to mount the supports to the table...
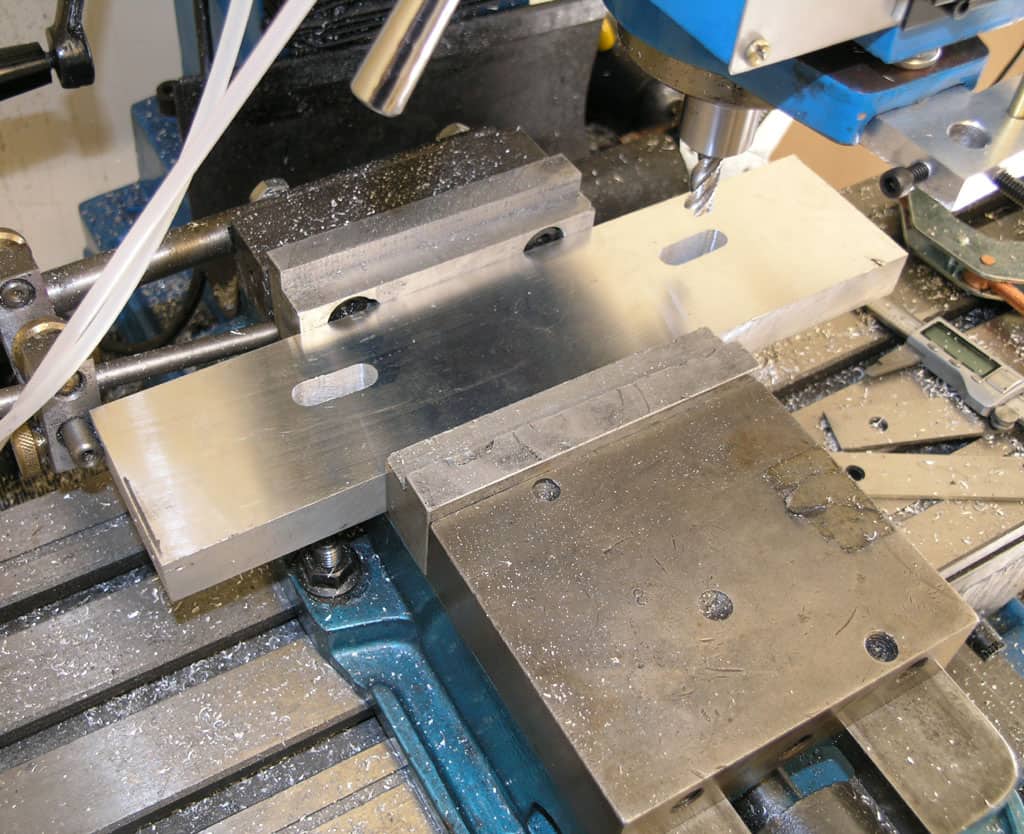
Making the Side Supports
Okay, we have a first class set of brackets. Next thing I did was to make the side supports that the brackets will ride on.
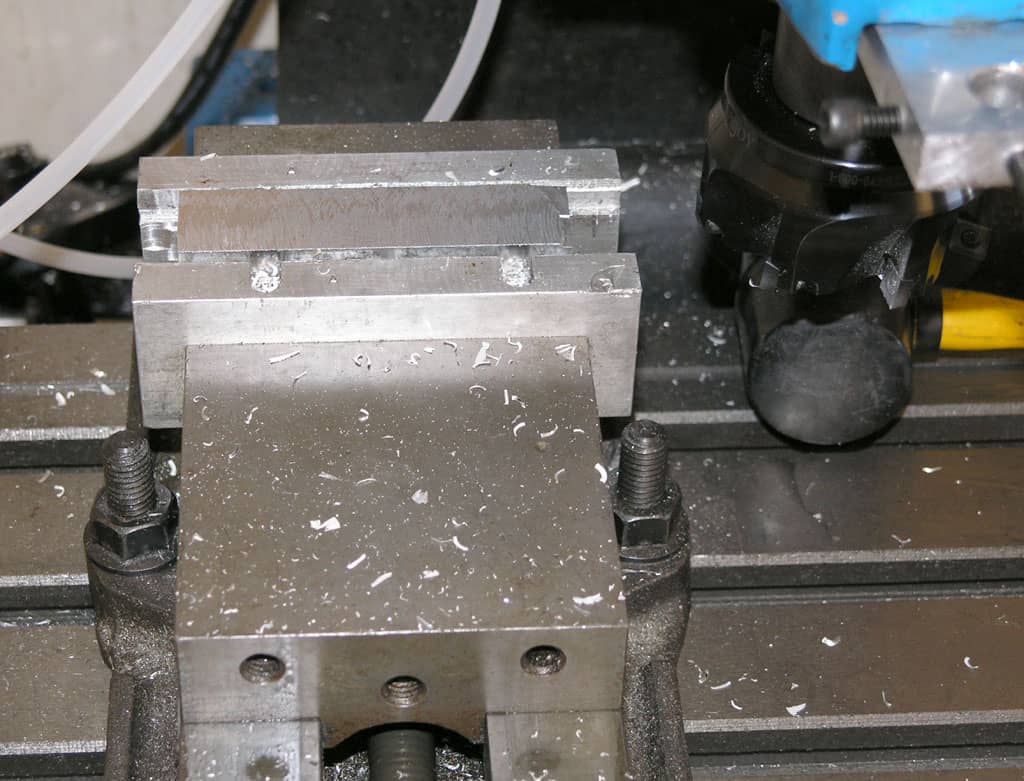
I started with 2 pieces of MIC-6 aluminum tooling plate. I sawed to approximate rectangular extents and then trued up the sides with my multi-insert face mill. It always helps to work on parts that are square! You can't beat Kant-Twist clamps to hold the assembly together so both supports are identical.
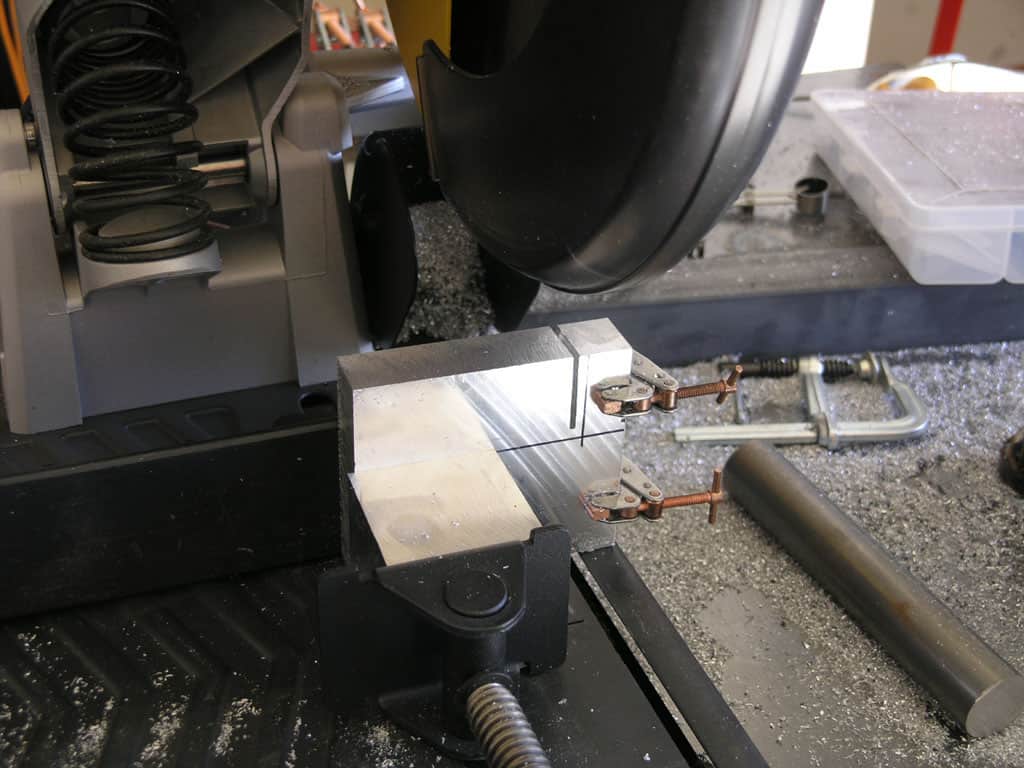
Now back to the saw. Things go faster if you can saw within about 0.1" of what will be machined rather than trying to remove all the material with the end mill...
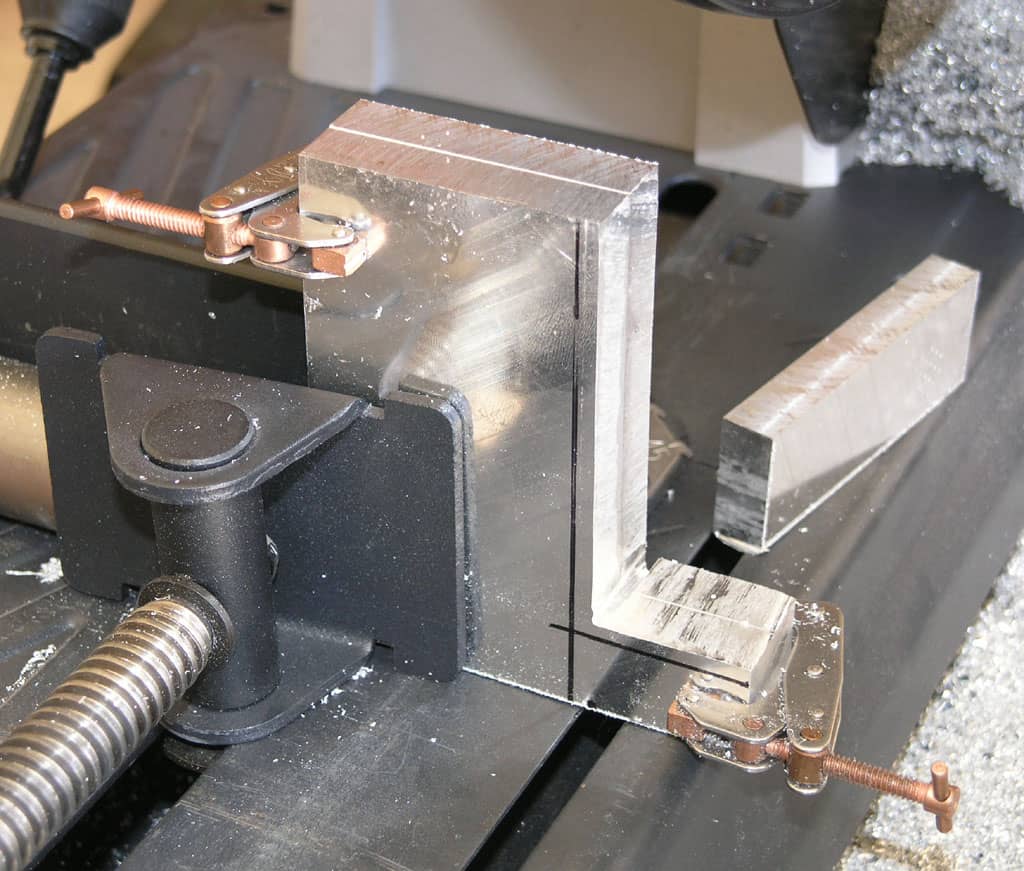
And the rest of the notch is cut. I now want to mill to the Sharpie lines. Note the Kant-Twists keep following us around. You can move one at a time without losing your alignment if you're careful...
1/2" 2-Flute End Mill does the job. Don't even think of getting your hand near those nasty splinters! I Shop-Vac'd them all up before going much further. Also note a peculiarity of this end mill: it is designed to run backwards! That's handy for certain circumstances. Not so handy for me. I got them cheap because there isn't so much demand for them. But I promptly ruined one by running it backward without thinking. Not much will dull and endmill faster than running it backwards at your mill's highest speed!
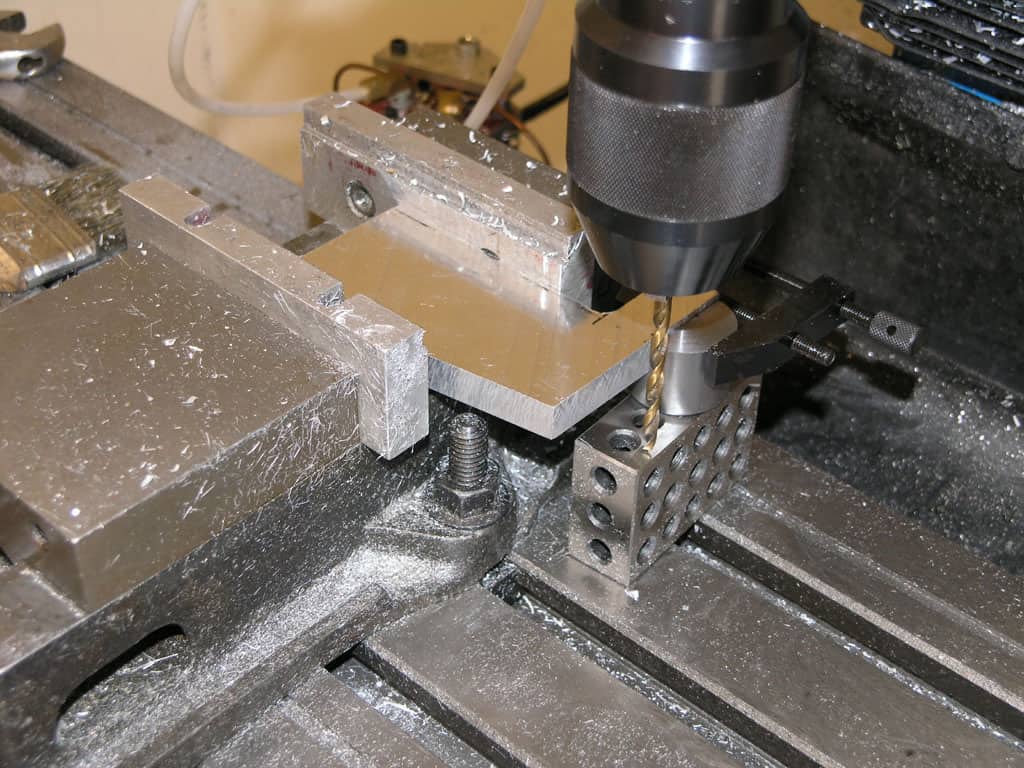
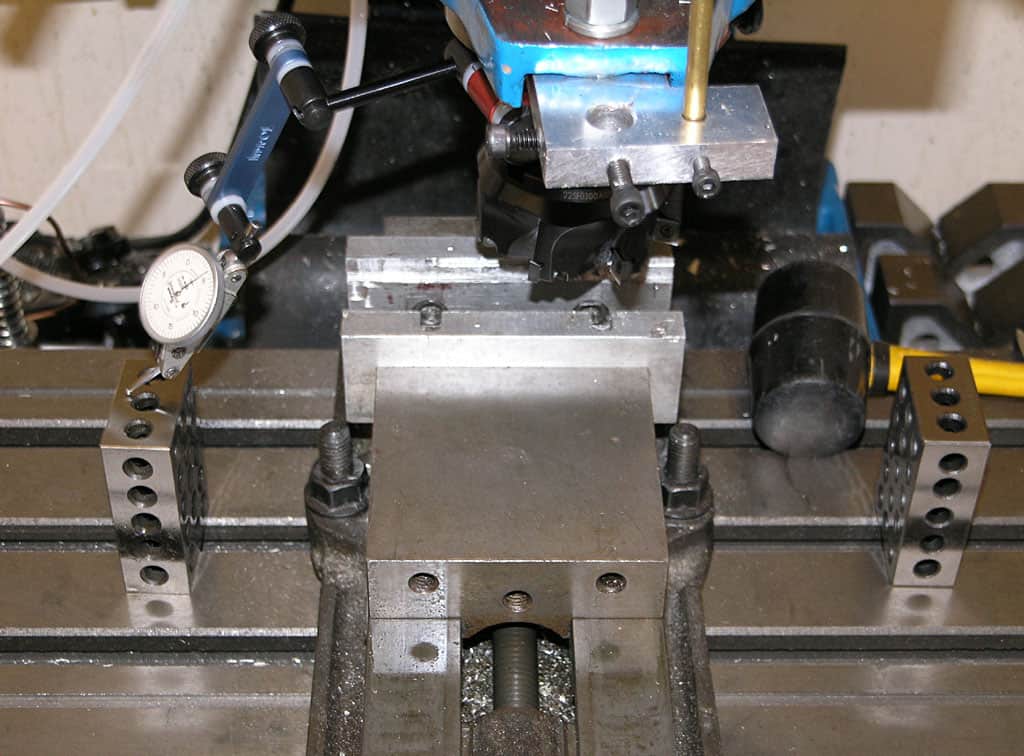
Now I'm going to drill the mounting bolt through the support and into the steel hub. I want to make sure I don't go through the hub, so I'm doing a touch off on the 1-2-3 block the hub rests on and zeroing my quill DRO. Now I can tell where I am as I'm drilling...
That's all there is to these supports at the moment. I will go back and slot the bottoms for mounting to the base. FWIW, I power tapped the holes using the mill, and I also applied High Strength Loctite and let that set before trying to drill a hole at all. Even so, the two parts have a machinist's clamp holding them together and I am supporting the hub from underneath on the 1-2-3 block.
Bracket Holes in the Table
The first two were easy, but then I got thinking: What's the best way to get the 2nd two lined up?
So I stuck a parallel in the nearby vise as an improvised stop, and using the parallel and 1-2-3 block, I could flip the table around to do the other two holes...
Hang in there folks, we're in the final stretch, I promise!
Slotting the Supports
I used a 3/8" 4-flute. 2-flutes would be better for aluminum, but didn't have one the right size. I use a special slotting technique: I never lower the spinning endmill unless I am moving X or Y. I crank the quill handwheel at about the same speed as the axis handwheel, in this case Y. This all seems to make cutting slots tremendously faster than trying to plunge the mill straight down. I got the idea watching CNC machines. The other thing is I save about 1/8" of the slot on either end and cut it when the mill is cutting the full thickness. It looks cleaner.
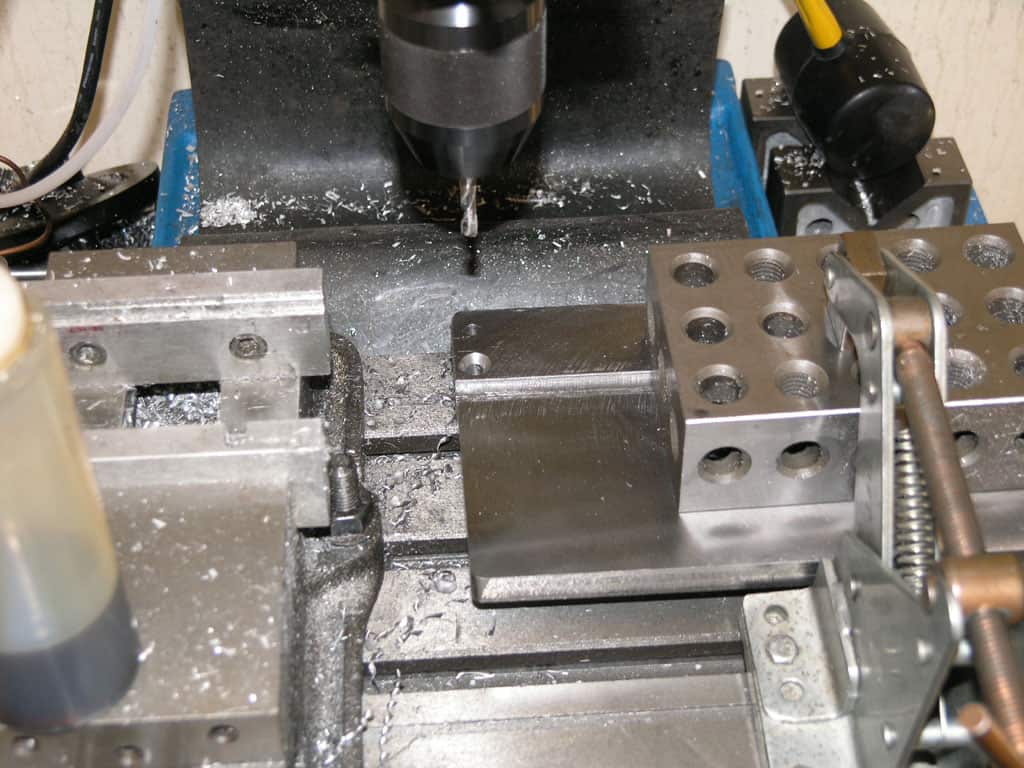
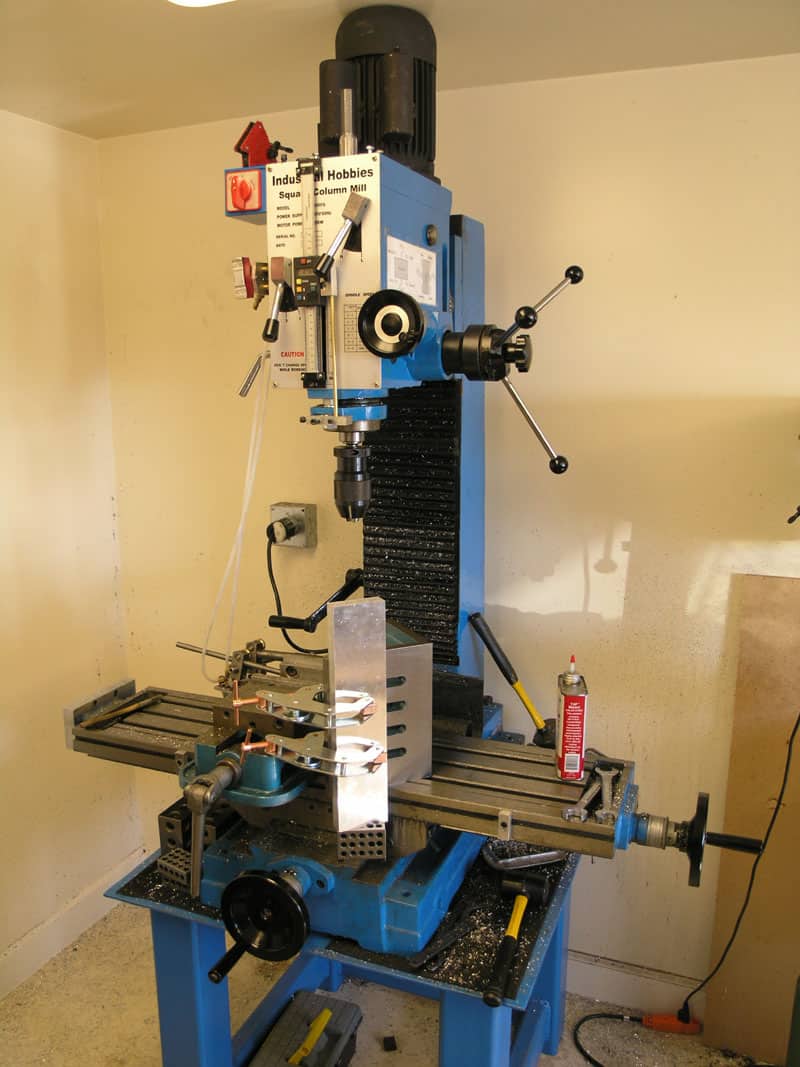
Trial Mock Up of the Table and Clamps
It's getting close so I wanted to try assembling the table and clamp system to make sure nothing too terrible is wrong. First I have to drill and tap the holes in the base:
Note how I'm hanging below the table on this. I've clamped my base to an Angle Plate, and between squaring the ends with an milling op, resting on a 1-2-3 block on the machine's ways, and the Angle Plate, I'm hoping things are pretty square...
The mill head is cranked all the way to top of travels. Now you see why I've got the plate hanging below the table top. I simply drilled and tapped 2 1/4-20 threaded holes in each end of the base plate, so now we're ready to mock it up:
Looking cool, this might work! Looking at all the square corners on the support and brackets, I'm wishing I had a disc sander to round them with. I'll have to look into that later...
Close up of clamp from the outside...
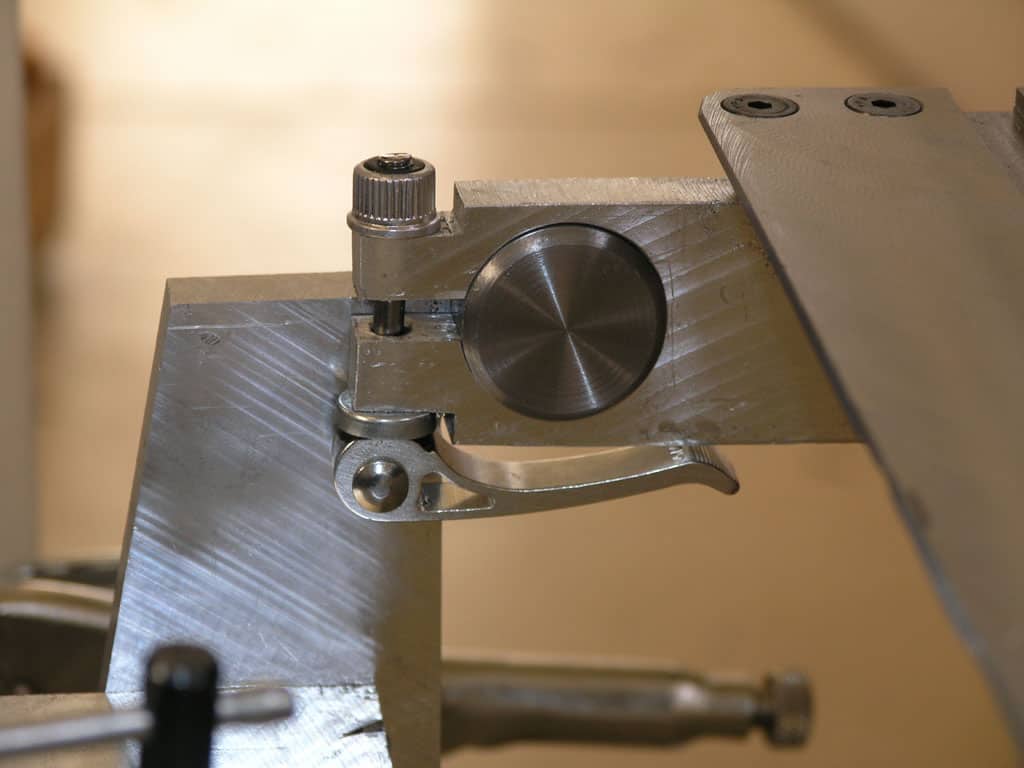
And a close up from the inside...
Getting mighty close now!
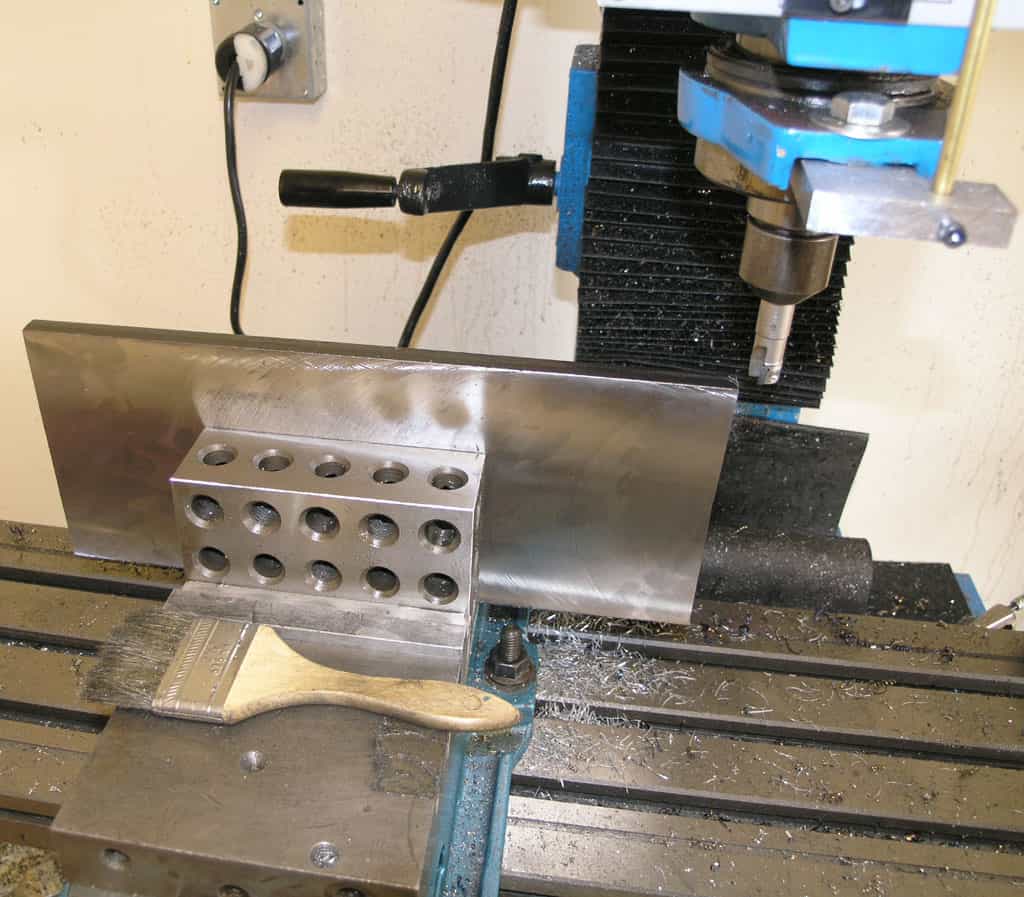
Slotting the Base Plate
I slotted the base plate with a "corncob" 4-flute roughing end mill. My technique involves turning the quill and X-axis handwheels at the same time, mimicking the ramped cuts CNC machines make. You can cut a slot much faster that way than trying to plunge full depth.
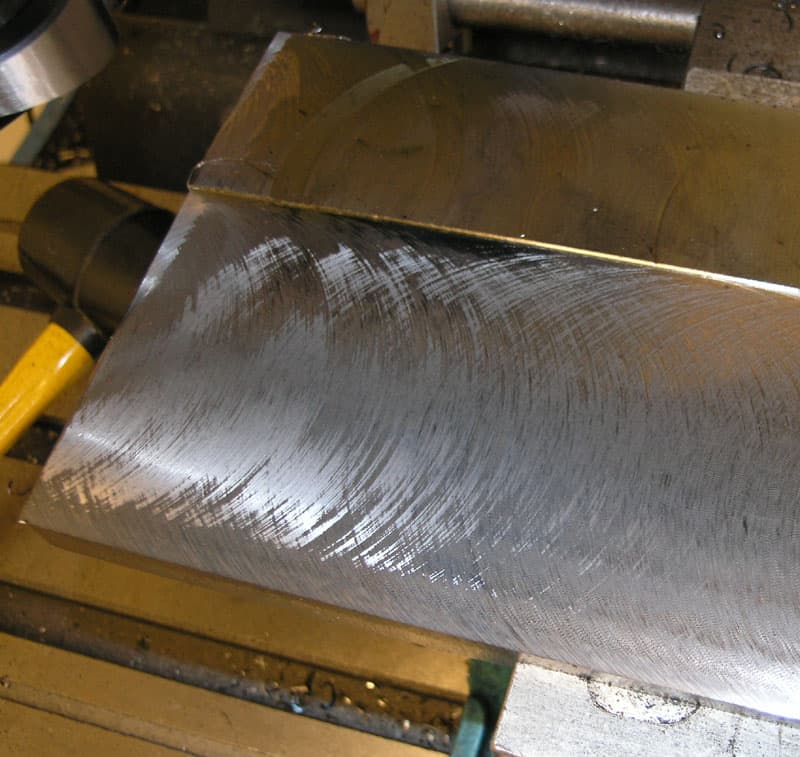
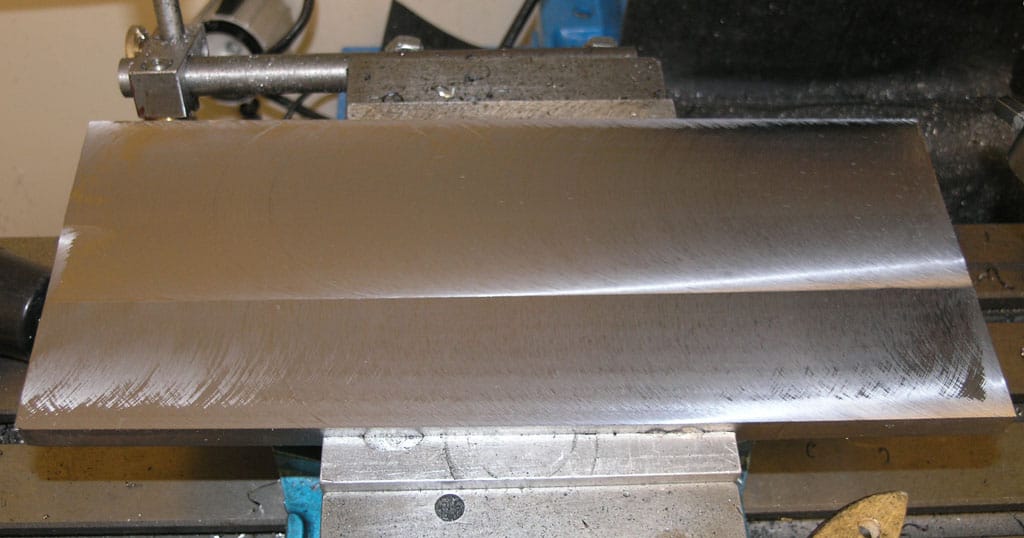
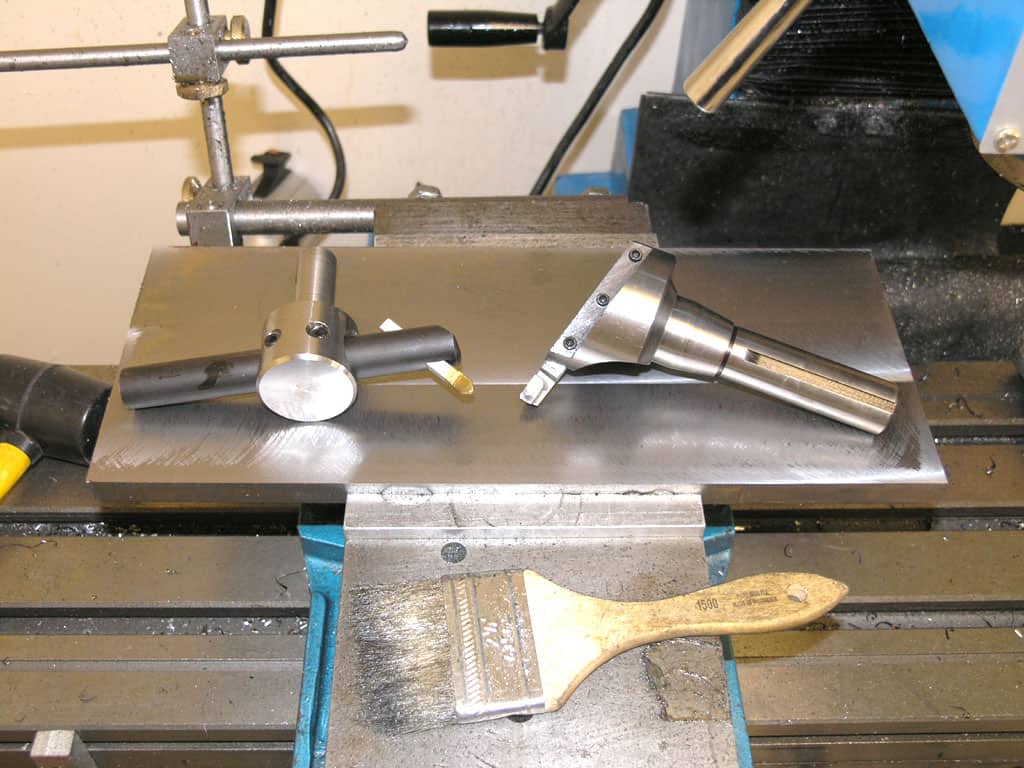
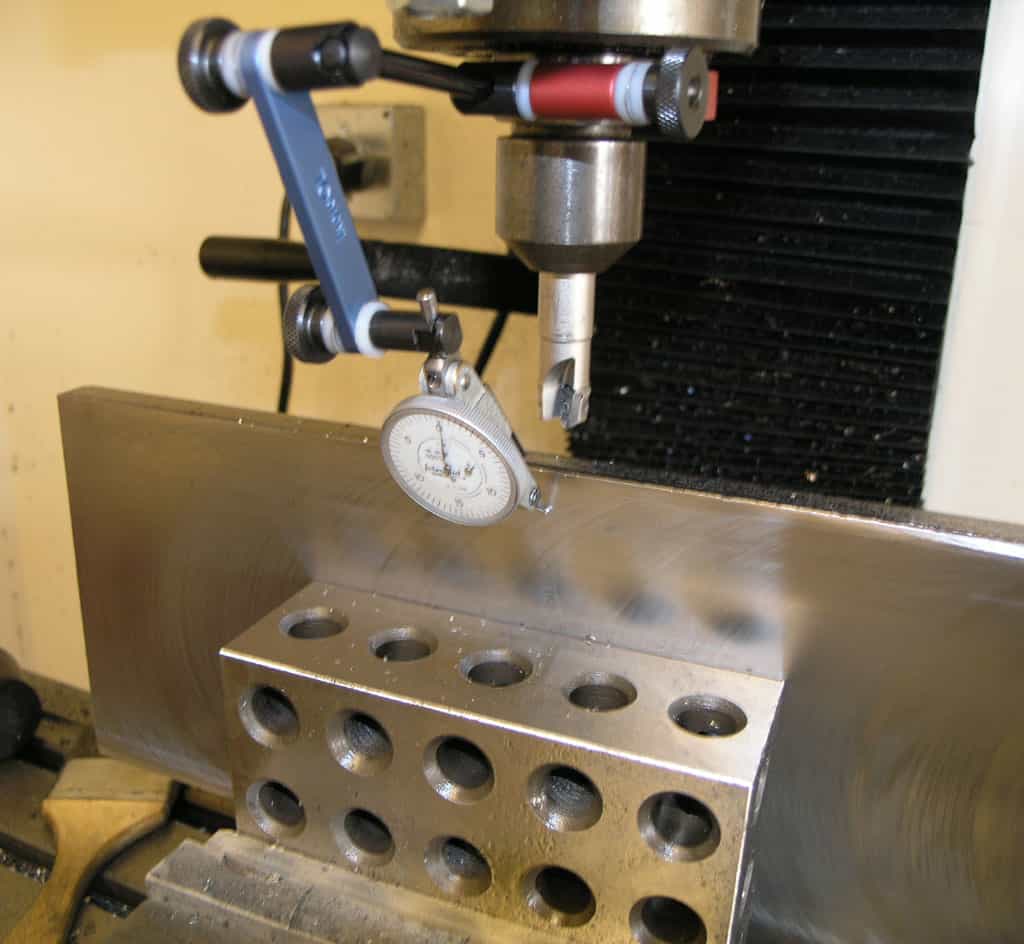
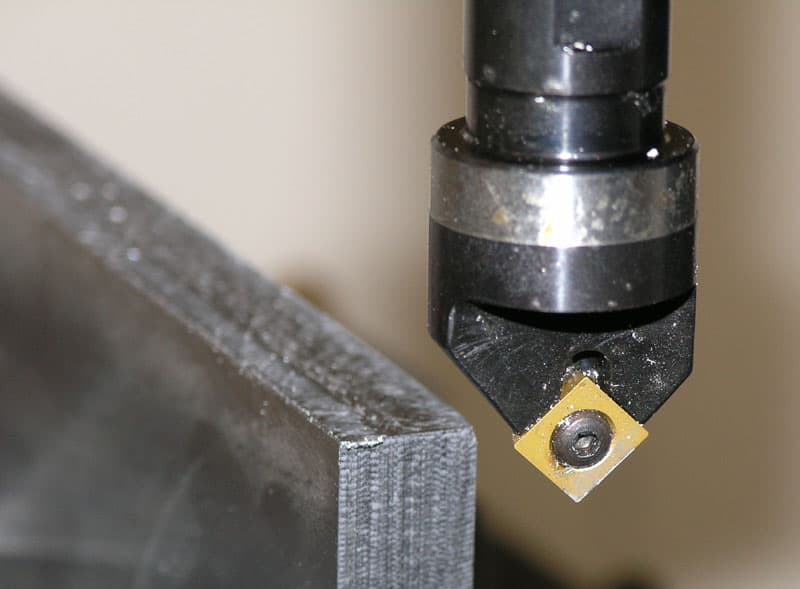
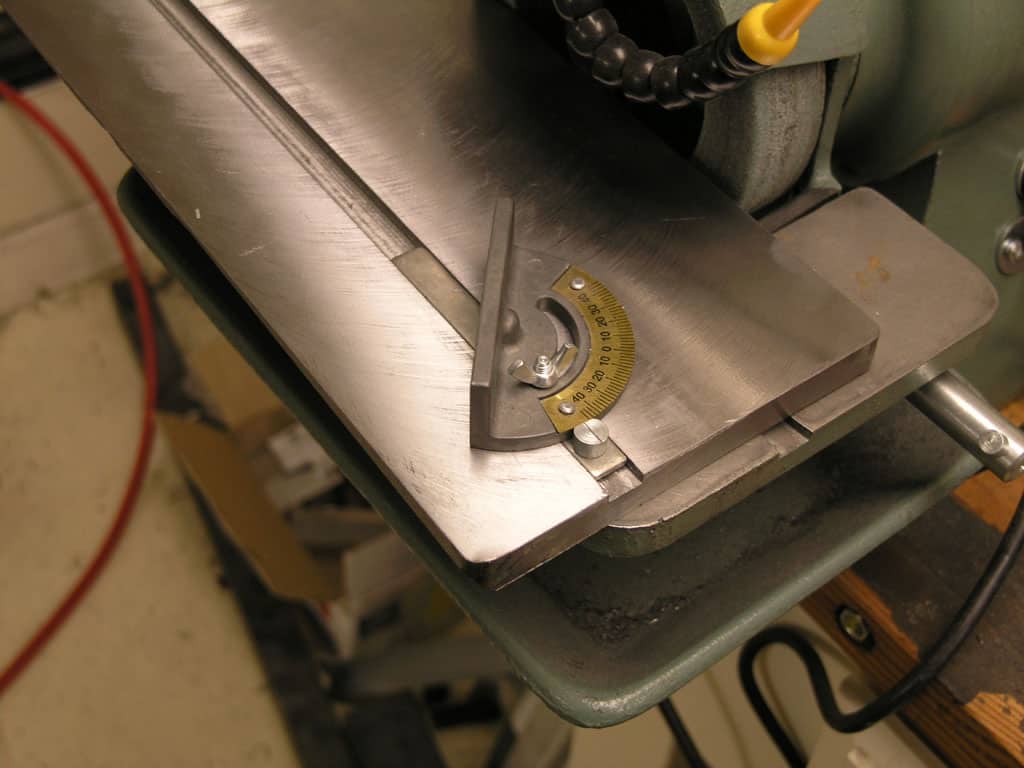
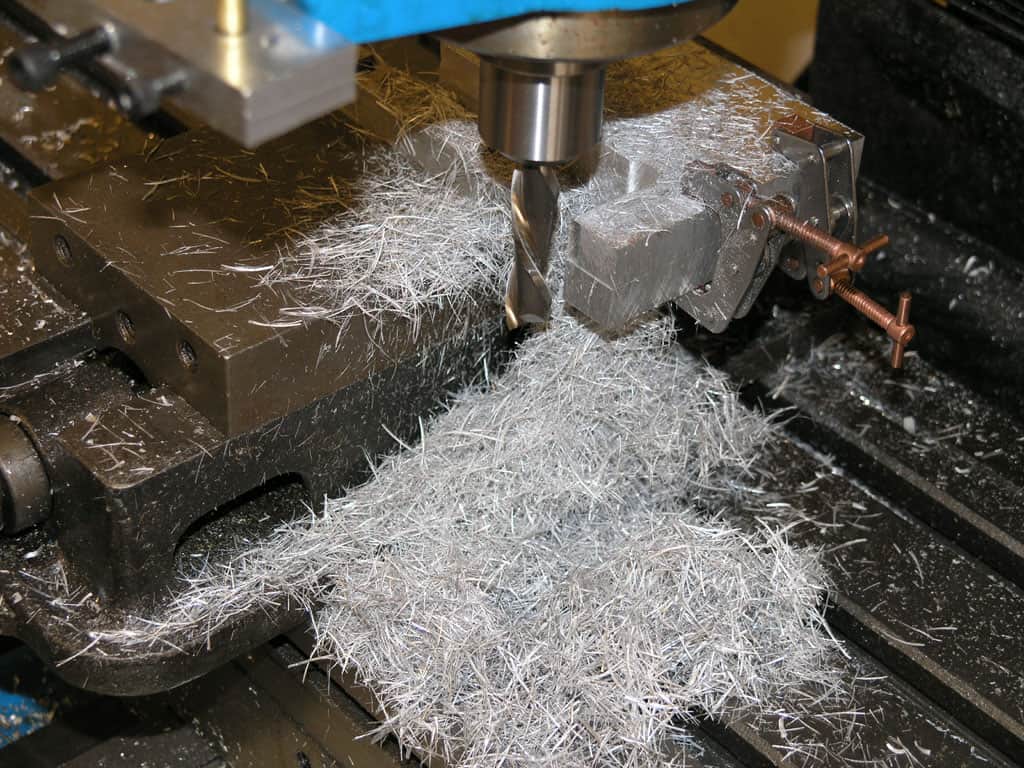
Final Wheel Balancing
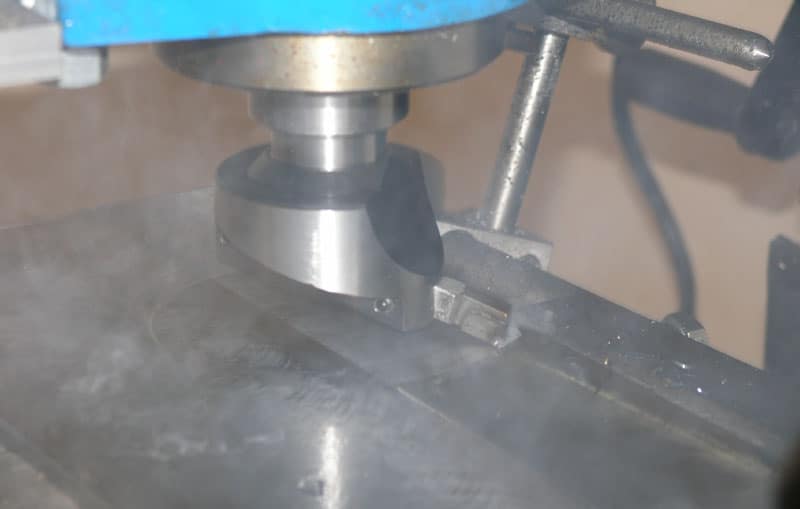
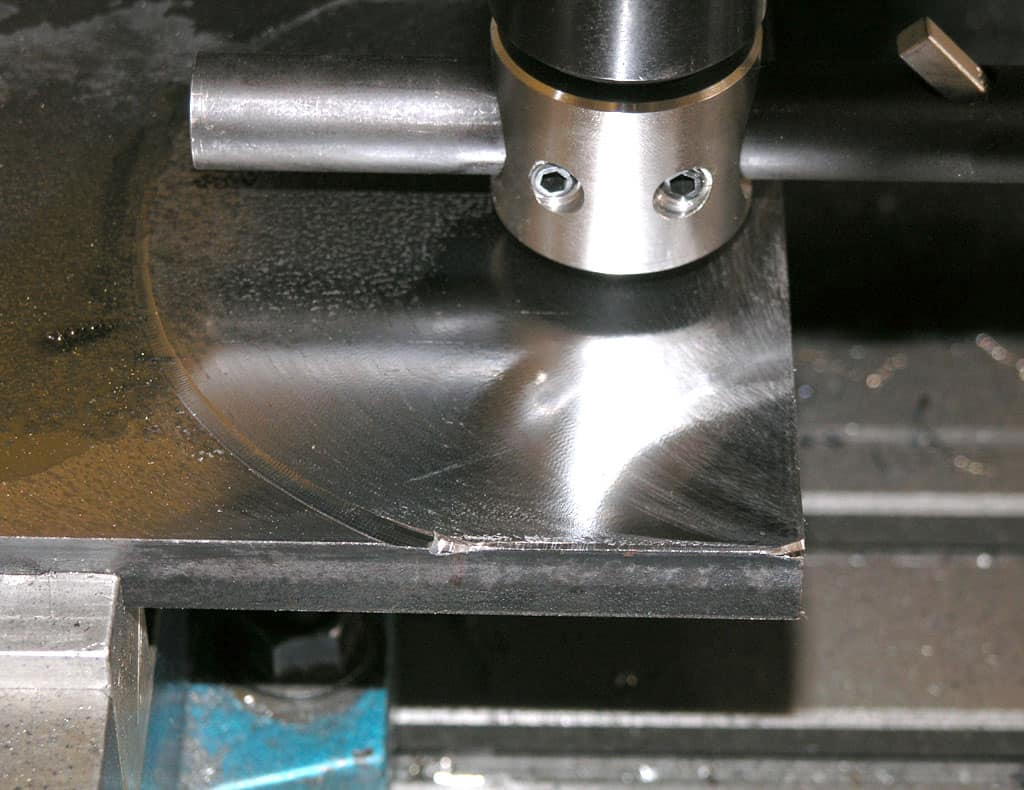
Final balancing of the disc was tricky. There was considerable vibration when I fired it up the first time. This was no doubt made worse by the fact I have a 3400 rpm motor, so it was going quite fast. I could see the disc wasn't quite spinning true, so my efforts at dialing in the hub on the rotab were not quite on the money. Since I don't own a lathe with enough capacity to true it up I decided to use the sander itself as a lathe:
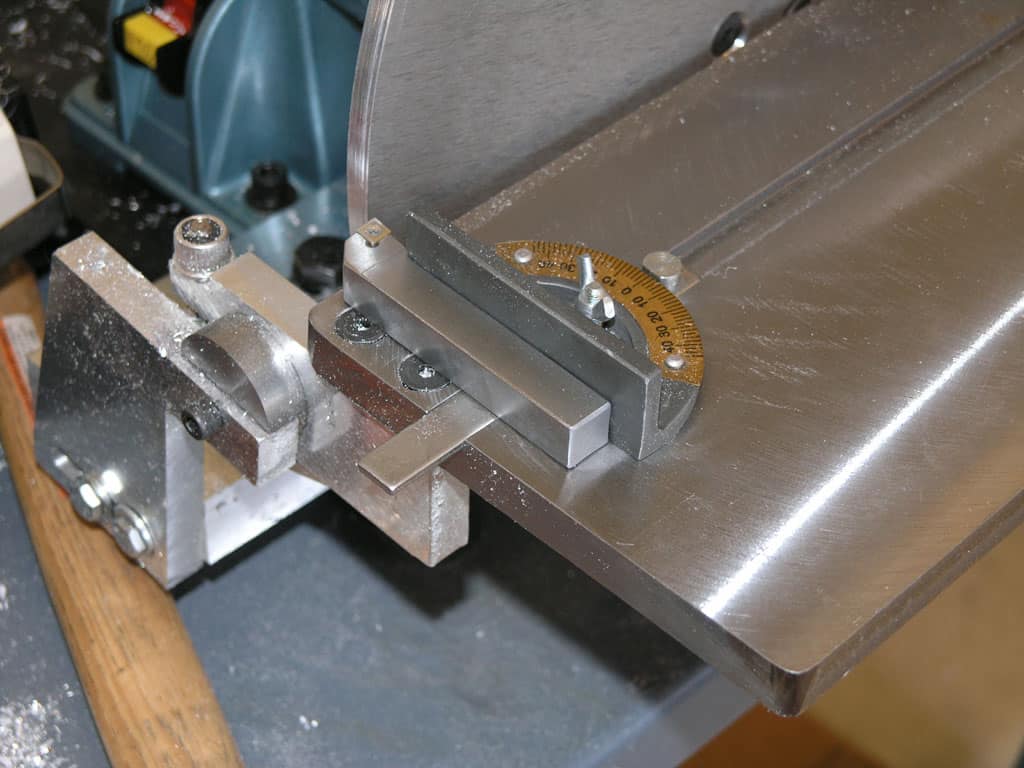
I using a CCMT 1/2" shank tool guided by the mitre gage from my HF Tool Grinder. Good thing I made my slot to match!
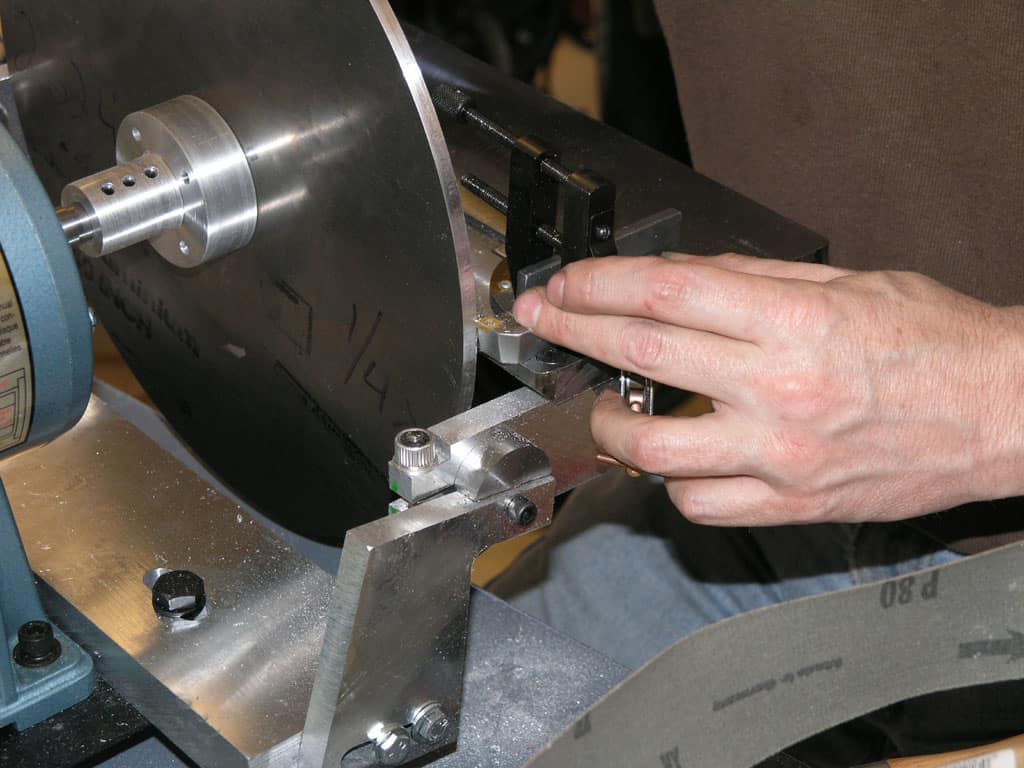
These cuts are made entirely by hand, so they have to be extremely light!
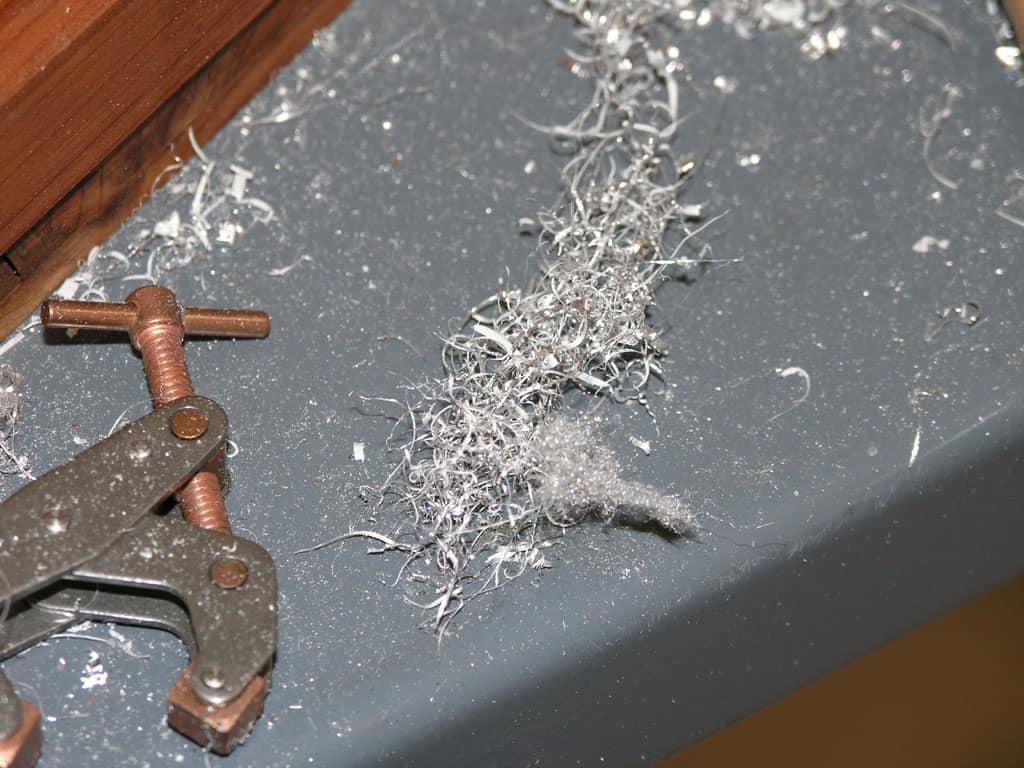
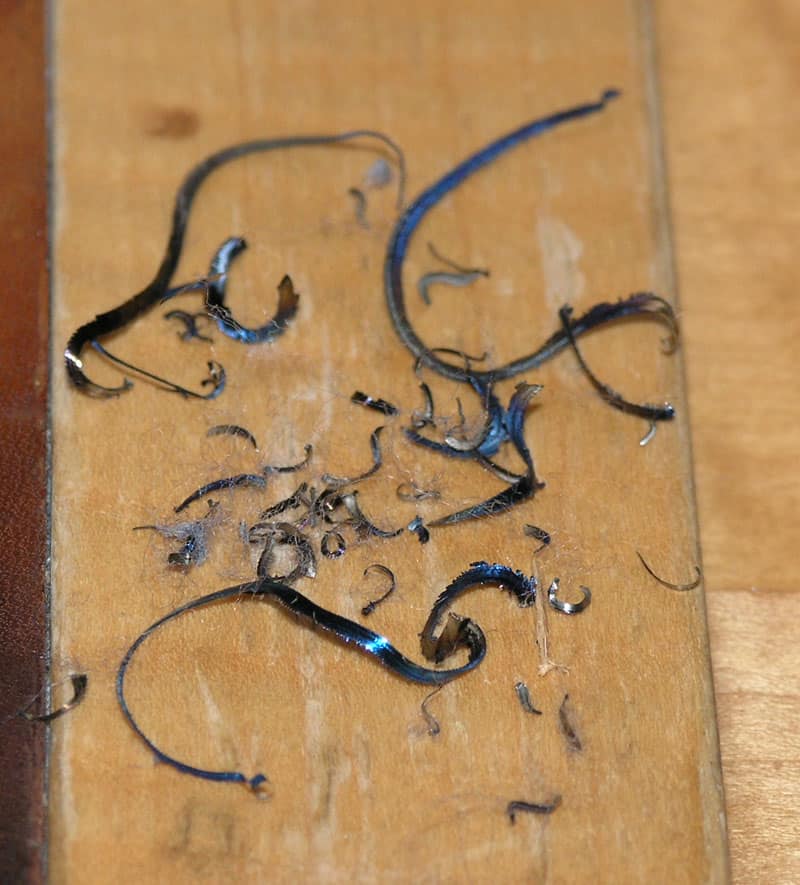
Check the fuzzy "aluminum wool" the light cuts made. This image is magnified. That Kant-Twist is about 1" across. I've never seen swarf like this, but 3400 rpm, a sharp CCMT carbide insert, and almost no cutting pressure on a shallow cut produces it...
Once the disk was true, that was all the balancing I need. The whole thing runs extremely smoothly and very fast.
Finishing Touches and Images
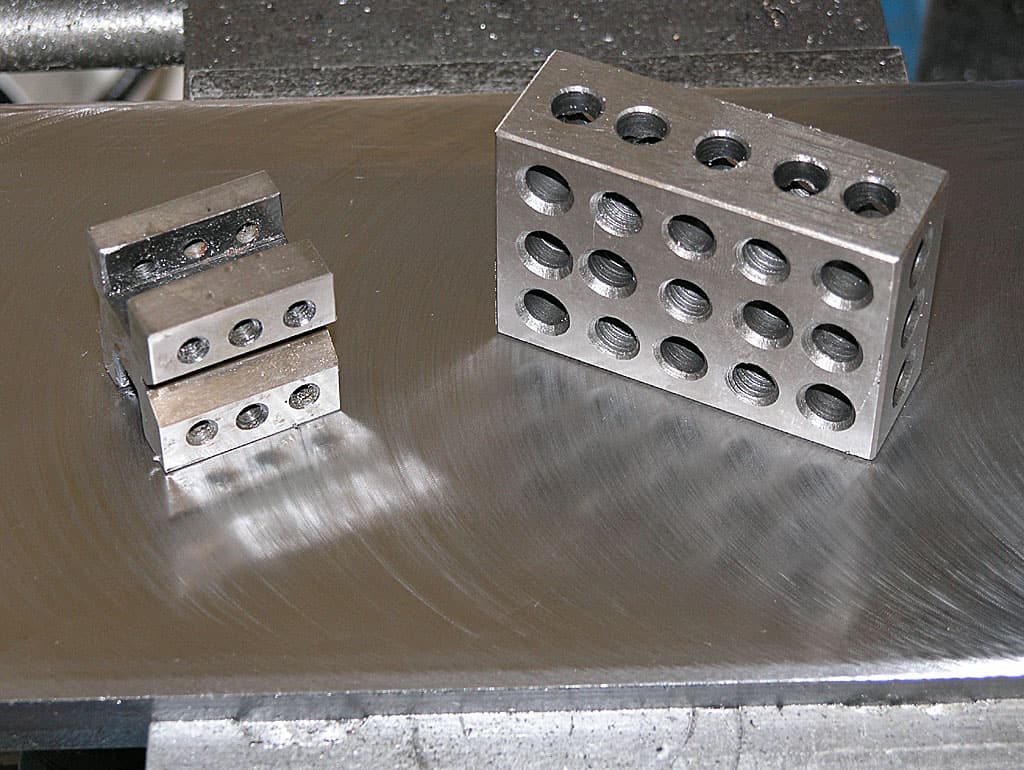
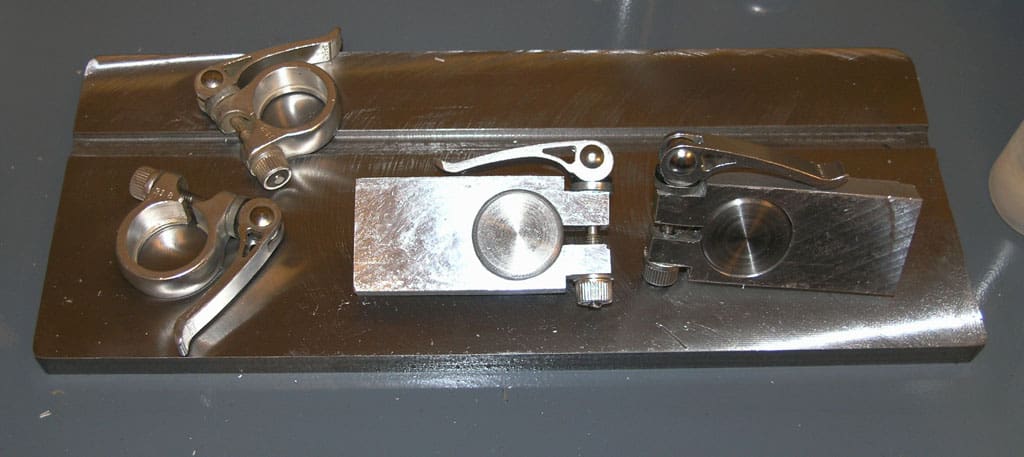
The old square brackets
The new rounded brackets. I rounded them using the disc sander and a 1-2-3 block as a support without the table. It took about 1 minute to do this freehand. I'm gonna love this new tool!
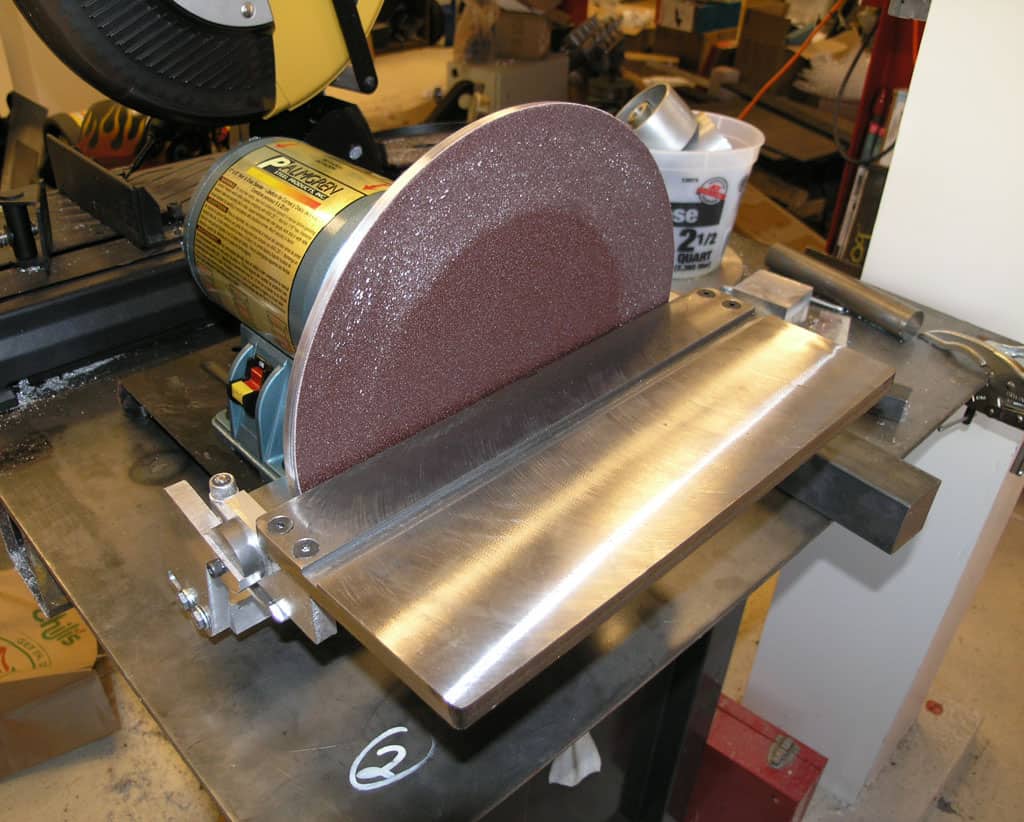
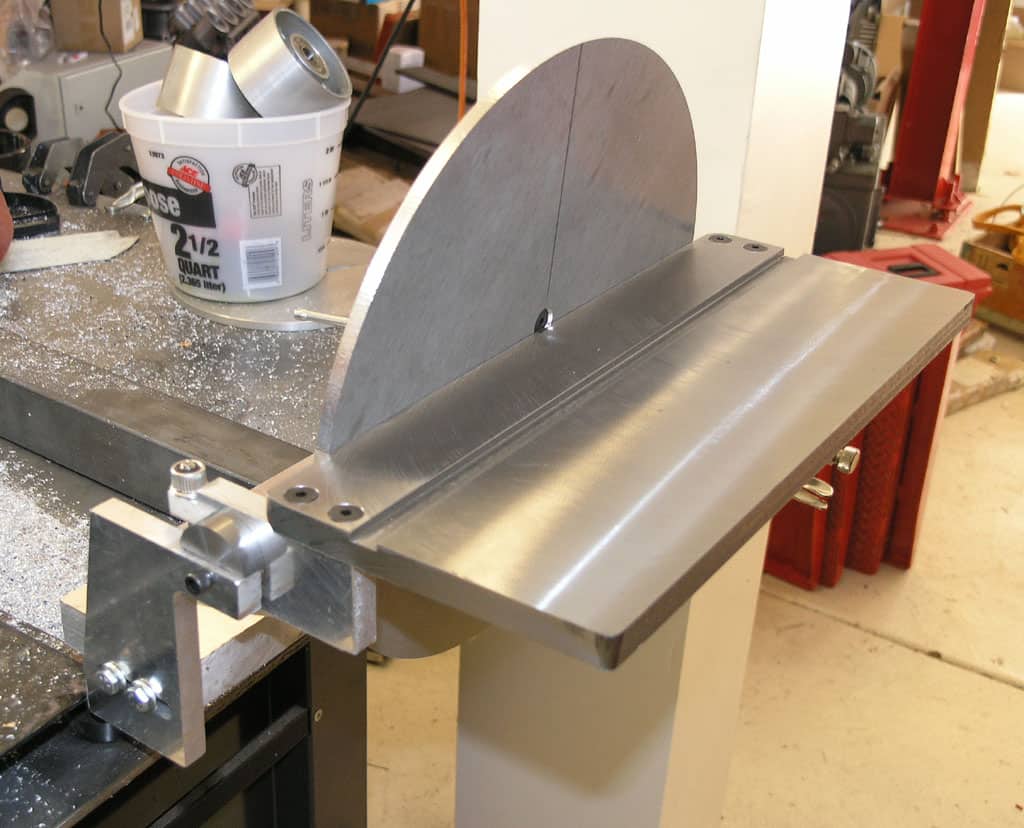
My new Thing of Beauty!
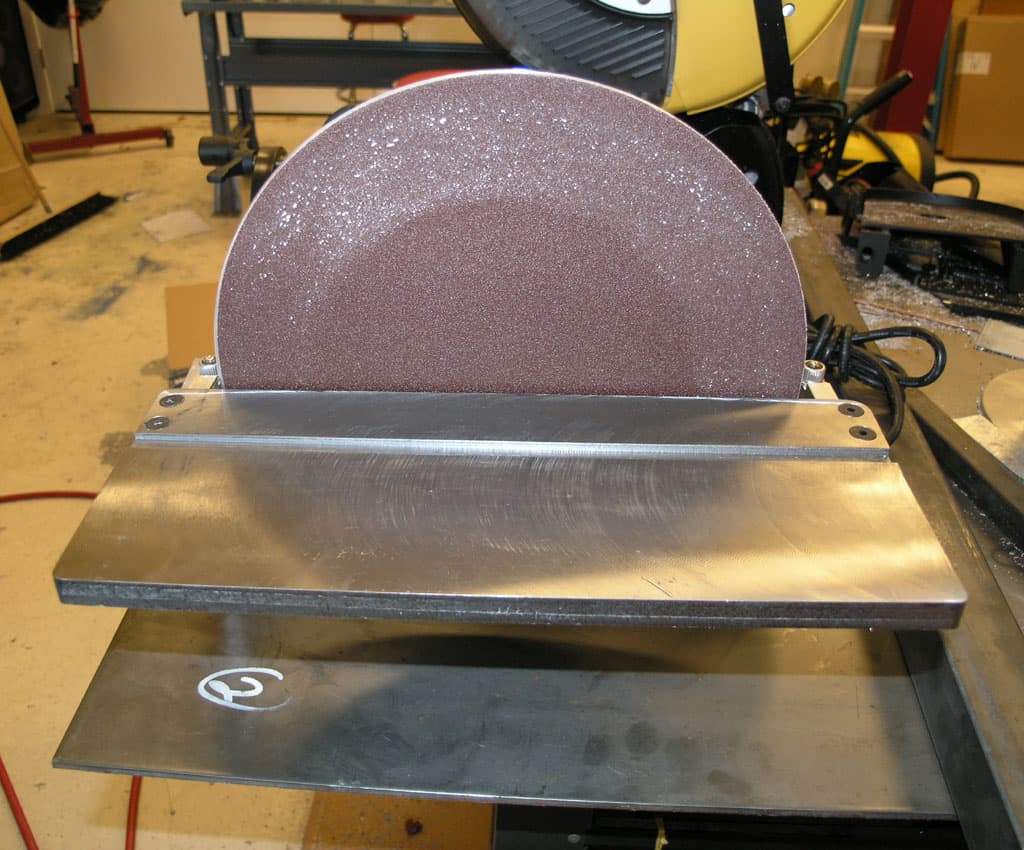
It's a powerful beast. I was pushing hard on that bracket and the motor didn't even think of slowing down.
Be the first to know about updates at CNC Cookbook
Join our newsletter to get updates on what's next at CNC Cookbook.