Deliverable: CNC Machine is Setup to Run the Part
We prepare the CNC Machines for operation during the setup process, ensuring they have the correct tools in the tool changer, the appropriate gcode program is installed, and that the machine is overall set to function.
Most of the steps taken are the same whether you are running a professional industrial-grade machine or a DIY CNC Machine.
Pro Shop Technique: CNC Setup Sheets
If you're a CNC Machine Operator at a Professional Job Shop doing CNC Machine Setup, you'll likely have a CNC Setup Sheet that gives you all of the job-specific details you need. For more on Setup Sheets, see "The Art of the CNC Setup Sheet".
1
Clean Machine Table and Other Surfaces
Deliverable: Machine clean of chips and other debris that may interfere with its operation and accuracy.
Clean machine table and fixtures of coolant, chips, or other debris. You can use compressed air, a brush, or coolant washdown to clear the debris. Just make sure that you aren't directing the chips and debris into any sensitive areas of the machine. High pressure air can push chips into places where they don't belong and can do harm.
2
Load Tools
Deliverable: Tool changer on the machine has all the tools needed by the gcode program for the part.
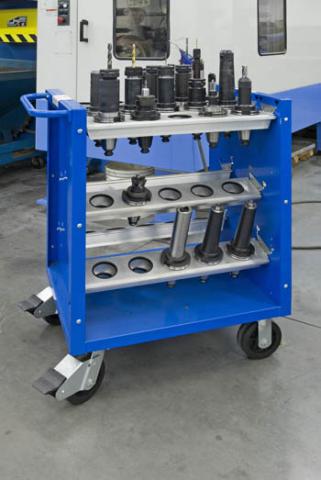
CNC Rolling Tool Cart...
Note: If your CNC machine does have a tool changer, you'll still want to have all the tools in readiness so they can be popped into your spindle quickly as they are needed.
Our goal here is to get the tools into toolholders (or just available if your machine's spindle doesn't use interchangeable toolholders), and to load those toolholders into the machine's tool changer or make them handy near the machine for running the job and changing tools by hand.
If you have a CNC Setup Sheet for the Job, it will list which tools are needed as well as what their Tool numbers are in the g-code program.
Typically, we will organize the tools for a particular job on a tool cart or a tool tray as part of CNC Setup. Perhaps the tools are located in your shop's Tool Crib. You load the desired tools onto a cart, roll it over to your CNC Machine, and load the appropriate tools into the machine's tool changer.
Each type of toolholder will have its own requirements for ensuring maximum performance. ER Collect Chucks have torque requirements that should be observed when tightening the nuts, for example.
Resources:
3
Warm Up Machine and Spindle
Deliverable: The CNC Machine is warmed up and ready to perform.
You want to consider running some sort of spindle and machine warmup program as soon as you're in the shop for the day. This helps ensure a minimum of thermal expansion as your machine changes from cold to normal running temperature (the Warm Up Program will get it up to normal temps) and it makes sure the machine's axes and spindle are well lubricated. Don't overlook this CNC Setup step if close tolerances are important!
Resources:
4
Set Tool Length Offsets
Deliverable: Tool Table on the CNC Machine has the proper length offsets for all the tools that will be used.
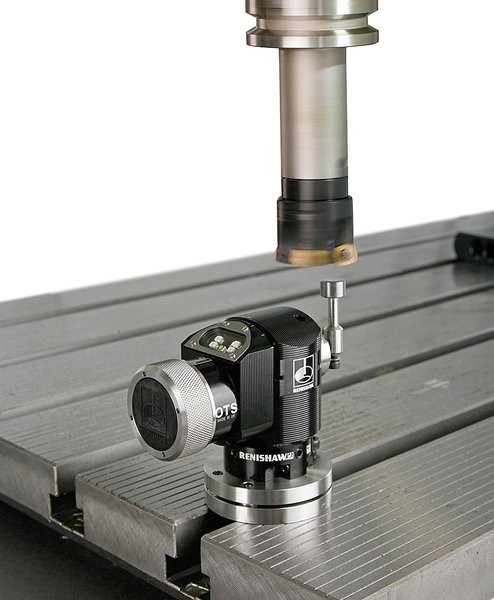
Setting tool lengths automatically with a Tool Touch Setter...
The machine needs to know how long the tip of the tool is from some reference, called the "Gage Point". It uses this information to adjust the spindle position relative to commanded positions for each different tool. This can be one of the more complex parts of CNC Setup, but it's not so bad once you've done it a few times.
It's very important that the Tool Length Offsets be correct for each tool and accurate to ensure the tool will cut correctly. In extreme cases, where the tool length offset is completely wrong, this can cause a collision that will damage the tool and likely the machine or workholding too.
Some machines will be equipped with a Tool Length Touch Setter. This is a special purpose probe that the machine uses to automatically measure Tool Lengths. In other cases, tool lengths are measured offline (meaning not on the machine) and entered into the Tool Table by the operator. This data entry could be done via:
- Manually punching it in on the front panel
- Loading it via a special g-code called G10
- Other methods
This is an area where it's important to follow procedures so that the Tool Table on the machine gets all the right offsets.
Resources
- Tool Length Offsets for CNC: Part 1 of our two part series on Tool Data Management.
- Tool Management for CNC: Part 2 of the two part series discusses tool presetters and offline tool data management.
5
Set Tool Diameters so Cutter Radius Compensation can be used
Deliverable: Tool Table on the CNC Machine has diameter information for all the tools that will be used.
If our part program will be using Tool Compensation, the CNC Machine will need to know the diameter of each cutter as well as the length.
6
Install Workholding
Deliverable: The desired Workholding for the part is properly installed on the CNC machine.
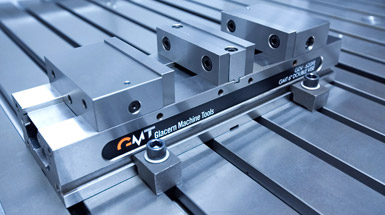
A typical double station vise is like 2 vises in one...
In this step, we install whatever workholding will be used to hold our parts while they're being machined. A large variety of workholding solutions are available. Specifying exactly what is needed for a particular job is another important role for the CNC Setup Sheet.
Resources:
7
Set Part Zero and Work Offsets
Deliverable: The CNC Machine's 0, 0, 0 coordinate is properly aligned with the desired Part Zero. Any Work Offsets used by the program are properly set up on the machine.
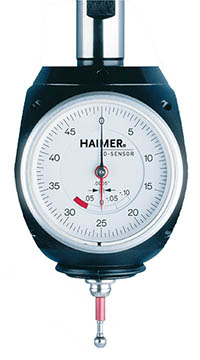
Your CNC Machine has to be told where Part Zero is, physically. There are a variety of ways to accomplish this task. The goal of Work Offsets is to make it possible to have multiple part zeros. This is useful, for example, if you have multiple parts that each want their own part zero. Or perhaps if you want to install different fixtures that each have their own part zero on the fixture.
Ideally, the CNC Setup Sheet has a diagram or image showing you where part zero should be measured visually.
Resources:
8
Load Part Program Onto the Machine
Deliverable: Proper g-code part program is loaded onto the machine.
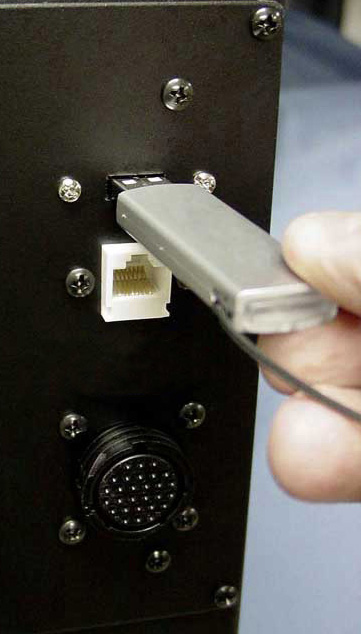
Loading G-Code from a USB Key on a Centroid control...
You'll need to load the g-code part program onto the machine as part of setting it up to run the part. Depending on your machine, this can be done in a variety of ways:
- Older machines may require you to load g-code from a floppy disk or even paper tape (that's REALLY old!).
- Newer machines load via USB thumb drive.
- Your machine may be connected to the local area network allowing you to load just by putting the g-code in a particular folder or by FTP'ing the code to the machine.
- Your machine may be connected via RS-232 connection and g-code can be downloaded via that connection or drip fed to the machine a few lines at a time.
Here are some important things to check for during CNC Setup:
- Make sure you have the proper version fo the program. It's easy to wind up with a lot of different versions floating around, so make sure you've got the right one.
- Load any subprograms or library routines that your main part program may require. For example, if your part program uses a probe, it may rely on a library of probing routines to be available.
- Know what the part program expects from the operator. Does it have optional stops? Do you need to enable them on the control? Etc. This information should be documented in the Setup Sheet.
9
Check Coolant
Deliverable: Proper coolant operation is verified and you're now ready to start running the g-code program.
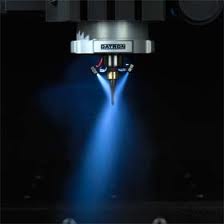
Make sure your coolant is in good condition and operable as part of your preventative maintenance before trying to run a part. Again, this step is at the end, but you've probably got a routine for when to check your coolant often enough to ensure it's in good shape.
Things to look for:
- If the coolant smells bad or rancid, you've got problems.
- Is there enough coolant in the tank or does it need topping off?
- Is the concentration fo coolant to water the proper mixture? You may use a tool such as a refractometer to measure your coolant concentration.
- Are you filtering the coolant to eliminate fine chips and debris that can clog up the plumbing?
- Run a quick check at the machine that the coolant is flowing freely and that you have properly aimed the coolant nozzles. Proper coolant aim is crucial to good chip clearing and can even allow you to increase your feeds and speeds if you can do it reliably.
Resources:
- The Role of Coolant in CNC Machining: Understand coolant's various roles to understand how to maximize its effectiveness.
- 4 Premium Coolant Systems and How to Calculate Their Feeds and Speeds: Learn how premium coolant systems and proper coolant aim affect feeds and speeds.
- Typical Technical College Syllabus for CNC Setup:
Be the first to know about updates at CNC Cookbook
Join our newsletter to get updates on what's next at CNC Cookbook.