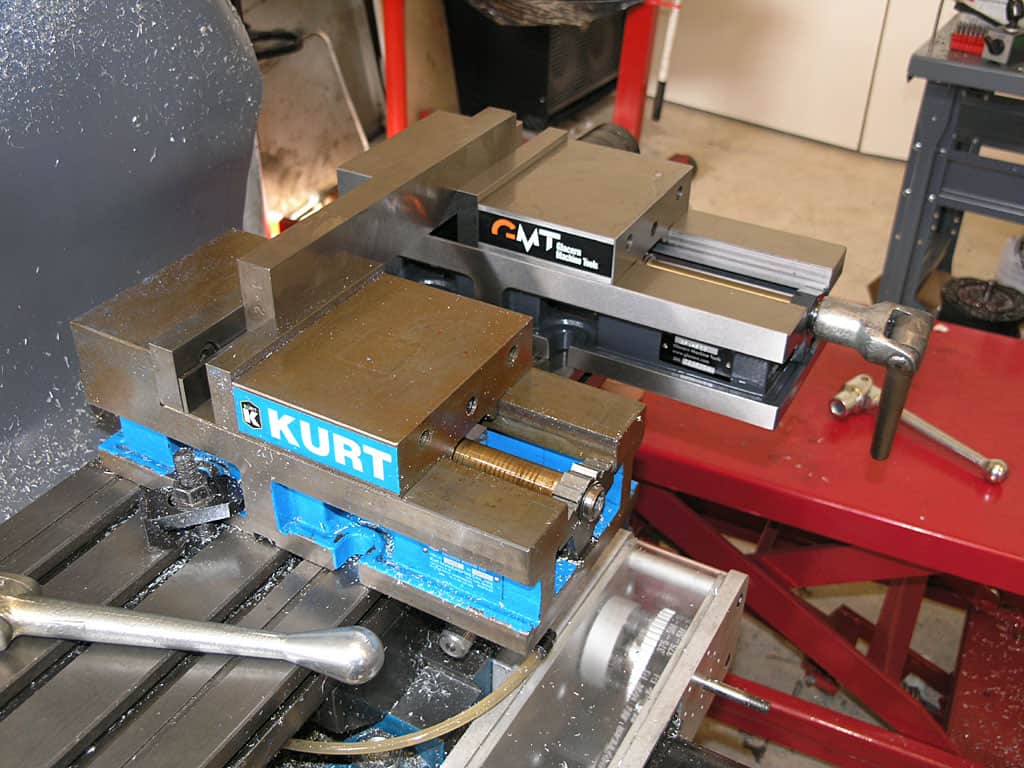
A pair of machinist vises sit side by side on a machine table…
A Machinist Vise (also called a Milling Vise) is probably the most popular workholding solution available for milling machines.
While there are many manufacturer’s of machinist vises, the poster child is Kurt who shipped their first “Kurt Vise” in the 1950’s.
What Makes a Good Machinist Vise?
A good Machinist Vise is well made, typically of cast iron. It operates smoothly, repeatably, and with a wedge mechanism that pulls the movable jaw down onto the bed so the part is not lifted due to deflection as the jaws are tightened. Don’t scrimp on your machinist vises because they’re the Workholding Solution you’ll use most often.
Machinist's vises come in sizes based on jaw width. The smallest ones have 4" jaw width. 6" is the most common jaw width, and 8" and even 10" jaw width are available for the largest CNC Machines
What about the Swivel Base?
Some machinist vises, particularly older ones, come with a swivel base:
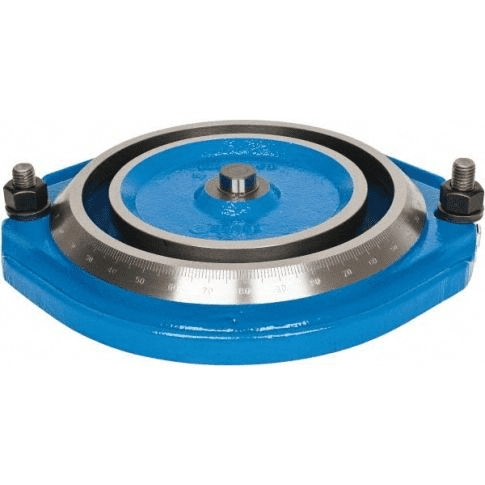
The idea is the swivel base makes it easier to set the vise jaws to a particular angle.
In practice, you seldom see a machinist use the swivel base and they've become an extra-cost option on most new machinist's vises.
Clean the Table and Tram the Machinist Vise
Before putting any machinist's vise on your machine table, be sure to clean the table of chips. You don’t want to trap a chip between the machinist vise and table. If you have a T-Slot table you’re mounting the vise to, you’ll probably want to tram the vise as well.
Tramming a vise is the procedure of using an indicator to sweep a vise jaw (you want the fixed jaw, not the movable jaw) so you can adjust the vise position until the sweep shows the vise jaw is parallel to the axis as it moves.
Learning to tram (or “square”) a Machinist Vise is one of those basic skills every machinist must learn early on.
Mount a Machinist Vise to Your Milling Machine's Table
Machinist Vises are typically clamped down to the mill table.
I had been using step clamps that came with my table clamping kit up until I got my Glacern 6" Premium Vise:
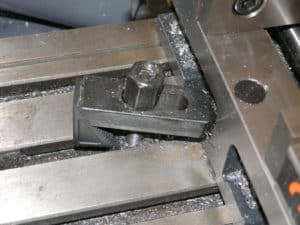
Old Style...
The new vise came with It came with a nice clamping kit that I like a lot better:
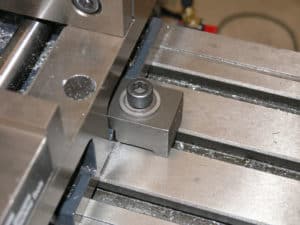
New Hotness...
The new clamps are simpler and more compact. For example, when I run two vises with my Jaws of Doom between them, it gets hard to swing a wrench in there. It also helps that I switched to a couple of Socket Head Cap Screws to use for these clamps.
I need to make up a couple of sets from some steel to use with my other vises.
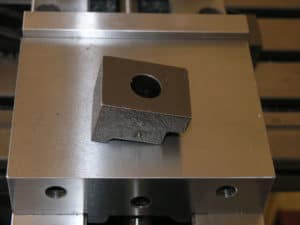
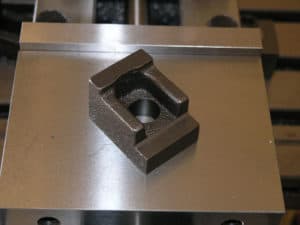
OLYMPUS DIGITAL CAMERA
Incidentally, the Glacern vise has been superb, every bit as good as my Kurt vise!
Vise Parallels and Jaw Steps
Having the vise properly installed and trammed, the next question is proper use. Most of the time we’ll want to sit the workpiece fairly high in the jaws. This is done both to provide access to the workpiece and because it provides more repeatability the less of the workpiece is gripped–there’s just less area for a chip or other irregularity to influence what’s going on.
We set the workpiece high in the jaws typically either by using a set of Vise Parallels or because we have jaws installed in the vise that have a step machined fairly high on the jaw. We may either machine the step ourselves (in the case of soft jaws) or purchase jaws with a step already machined.
Clamping Outside the Jaws and Other Jaw Tricks
There are a lot of Vise Jaw tricks but one of the first to be aware of is that you can mount the jaws either inside or outside the normal jaw mounting locations. Mounting outside allows larger plates to be gripped in the vise easily:
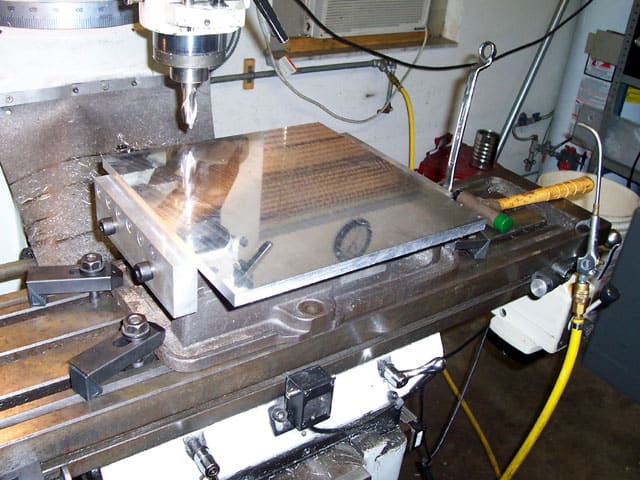
By mounting the jaws in the outside position, quite a large workpiece can be accomodated…
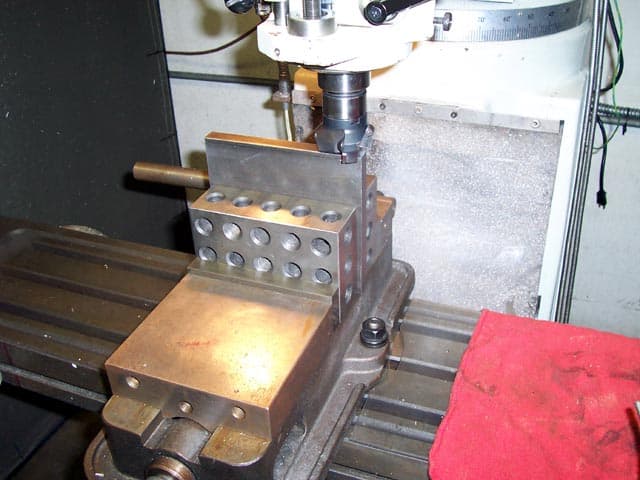
Increasing rigidity is always important. For this operation, two 2-4-6 blocks are used as a vise jaw extension to help support the plate on end better…
Using Multiple Vises, Jaws that Span Vises, and Grinding Matching Vises
There’s an old saying that if you want to make full use of your machine you need to use every square inch on the table. Most machine tables can accommodate multiple vises, and it is very common to install multiple vises on a mill table.
Our photo above of side by side vises shows one such setup. It’s not uncommon to see four or even six machinist vises on a larger milling machine. The more the merrier so long as travels will accommodate it because the more machinist vises you have, the more parts you can machine before the machining has to stop so the operator can load new workpieces.
When you have multiple vises on a machine, it is convenient if they match in all the key dimensions to within a decent tolerance. That way if you are duplicating a setup and get the vises in a different order, all will be well. Most vise manufacturers will match machinist vises for you or it’s a fairly simple operation with a surface grinder to match a pair of vises.
Another trick that’s possible with two vises is to use jaws that span both vises for handling really long parts:
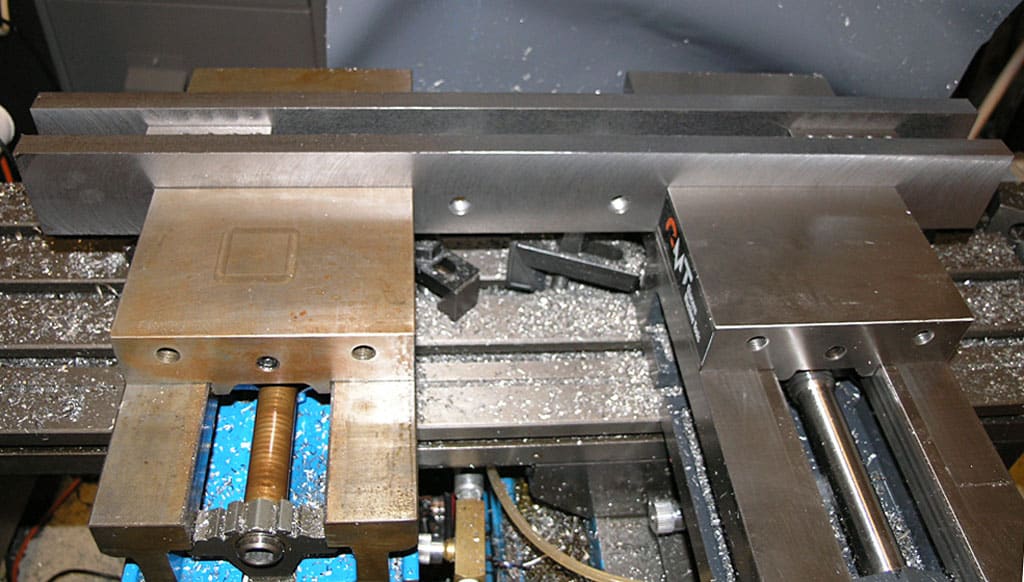
Spanning two vises with a single set of jaws…
I made that set of “Jaws of Doom” for a project that required machining a thin aluminum panel for some electronics and they worked out great.
Double Station Machinist Vise
Having spread three or four vises across your mill table, you’ve pretty well taken advantage of the X-Axis. But, there’s an opportunity to take better advantage of the Y-Axis by using Double Station Vises:
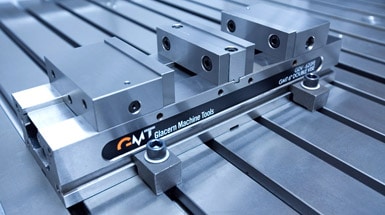
A typical double station vise is like 2 vises in one…
A typical double station vise is like 2 vises in one: you can put two workpieces instead of one. With judicious use of double vises you can really multiply the number of parts that can be worked at the same time on your mill’s table.
Vises to Hold Other Workholding Solutions
Between using multiple vises, double station vises, moving the jaws around, and even using jaws that span multiple vises, quite a lot is possible using just vises. In fact, you can even use the vises to hold other Workholding gadgets. It’s a very common trick to drop a sine vise into a Machinist Vise to get jaws working the other direction:
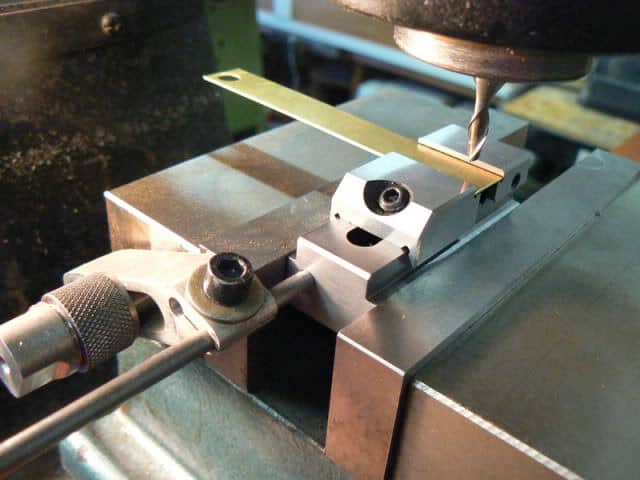
Use a sine vise to hold a part at 90 degrees from where the milling vise jaws run…
BTW, sine vises are also called Toolmaker’s Vises or Grinding Vises.
You can also create small plate fixtures that are designed to sit in a machinist vise, creating what is often called a “vise pallet” since the individual plate fixtures can be swapped out of the vises much like pallets. This vise pallet uses a bunch of Mitee Bite Toe Clamps to achieve a very high part density:
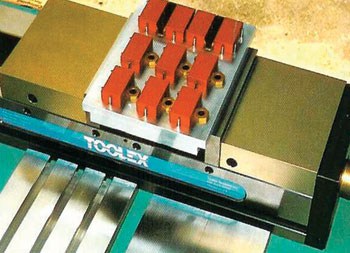
Vise Pallets are just small plate fixtures designed to be held in the jaws of a milling vise…
In general, solutions like Vise Pallets are created to enable vises to be left on the machine in shops where the flexibility and simplicity of vise workholding is ideal for most of their jobs.
Tormach made a great suggestion over in their blog which was to use a Sine (Toolmaker’s) Vise as a vise pallet.
Soft Jaws and Custom Hard Jaws Multiply the Vise’s Workholding Flexibility
Soft Jaws on milling vises are a very popular form of workholding. The idea is to create aluminum vise jaws (since aluminum is softer than ferrous materials that’s where the name comes from) that are customized for particular jobs. Sometimes a more durable material is advantageous, in which case we have Hard Jaws.
Here are some examples:
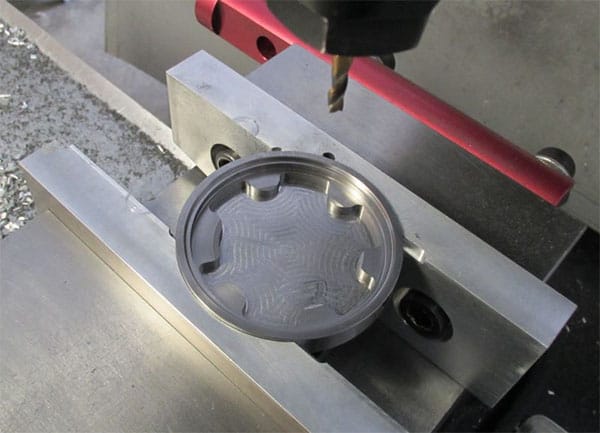
Use soft jaws to locate and hold a larger round part. A “V” is often seen, but it won’t support the part as well as the soft jaws.
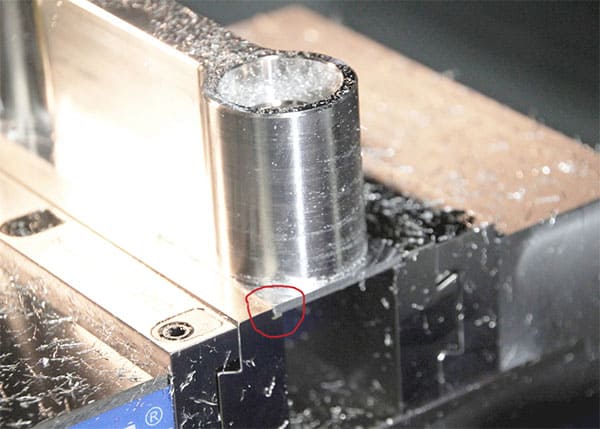
As mentioned above, we don’t want to grip the whole height of the part in the jaws. A particularly thin grip can be had with dovetail jaws. The little red circle points to the dovetail which locks the workpiece in from slipping upward under heavy machining. These are Carvesmart quick change jaws.
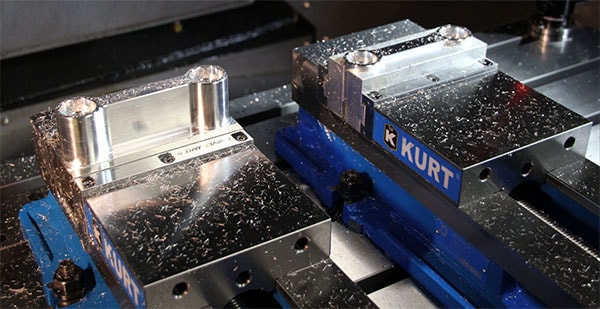
Here’s a common setup. The part is machined from a block on the left (those are the same Carvesmart dovetail jaws). Then the part is flipped in a set of custom soft jaws on the right that are the mirror image of the part. A Face mill then takes off the little bit of flat stock left from the original material (that’s already happened in this photo).
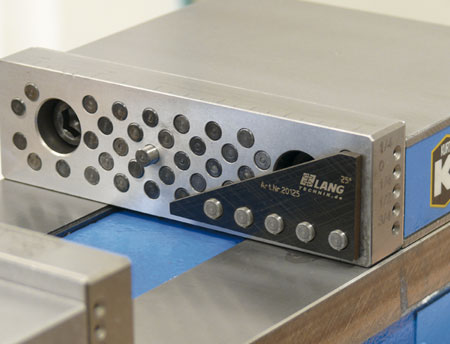
Lang Innovations makes these neat jaws that make it easy to set the workpiece in the vise at a precise angle when needed. The pins can be individually pushed in to create angles and other holding patterns too…
These are but a few examples. When using Custom Jaws, your imagination is the only limit. Well almost, table size will play a role as will the number and type of vises you have available.
The Ultimate Universal Soft Jaws: Adaptix
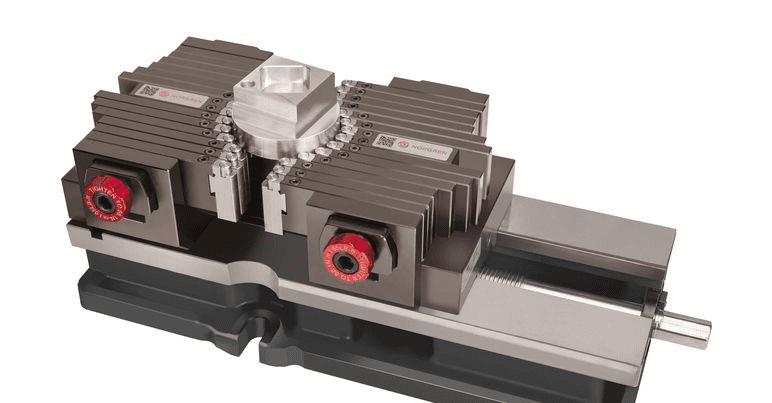
The Adaptix Soft Jaw system has movable fingers that make it a universal soft jaw. They will grip almost anything simply by setting the fingers to hold whatever shape is needed.
See my review for more information.
Quick Change Jaws
I hope you’re getting the idea that Milling Vises with Custom Jaws can be a powerful workholding solution. So powerful, in fact, that a lot of work is done solely with this style of Workholding. Shops spend a lot of time creating Custom Jaws and often box them up in storage to use for other jobs or in case a customer reorders a part.
Even though the vises spend most of their time on the table, we still have a Setup Time bottleneck in the time it takes to change vise jaws. Maybe you saw this coming, but there are a variety of Quick Change Vise Jaws available too. The Carvesmart jaws we pictured are one variety, but there are many more. Judicious use of an air ratchet and socket head cap screws can also speed the job of changing jaws.
Use a Vise Stop for Repeatable Positioning
Here's a Kurt Vise Stop I made in an afternoon for my milling vise:
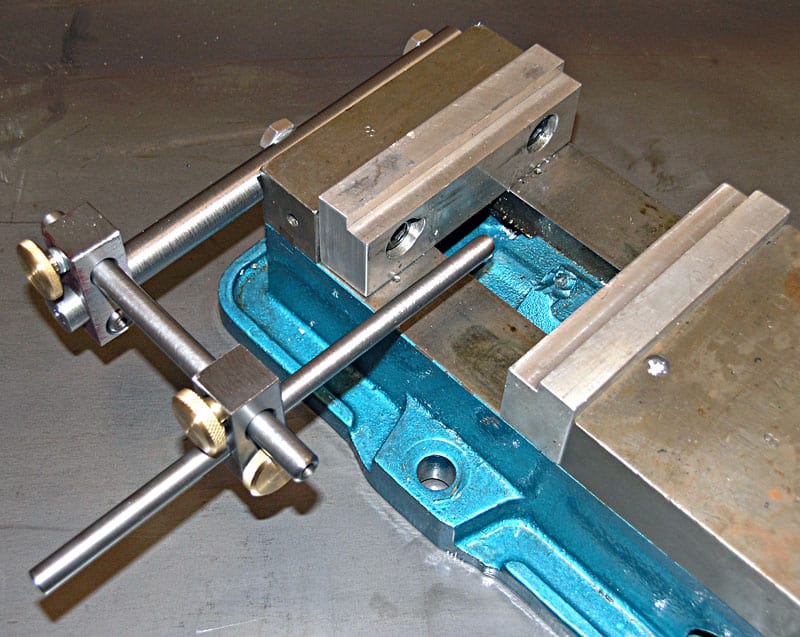 You can tell at a glance that once you set a part in the jaws and slide it up against the vise stop, you've got a repeatable position. Every part will be located in exactly the same place.
This can be a real time saver when making multiple parts.
[Vise Stop Review] Imaginetool’s Way Cool New SideStop

I just got my hands on a new product for review. It’s the SideStop, a next-generation vise stop (work stop) made by the good folks at ImagineTool:
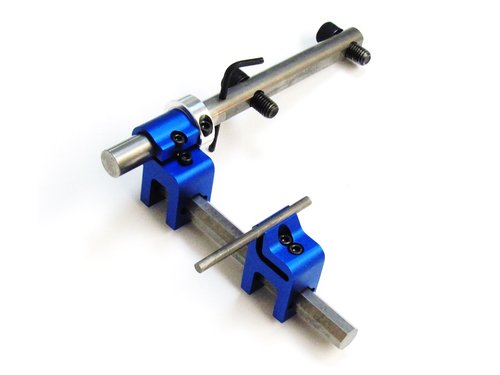
The SideStop is a next-generation vise work stop…
The SideStop is one of those “Better Mousetrap” kinds of products. Better mouse traps are great–we all love to find an improved version of a tool we’ve used for a long time. After all, we’re sold on the tool already, so an even better version is a guaranteed win. SideStop is that kind of thing–it’s a vise stop that’s been improved in all sorts of ways to make it a better mouse trap.
I had a nice lunch with Brian Richardson, one of ImagineTool’s founders, and got to learn about what Imagine is up to. Brian does a lot of interesting prototyping work on some fairly exotic applications involving super-high purity filtration systems. It’s real cutting edge stuff, and it was fascinating to see some of his nano-scale filtration devices. Along the way to creating these kinds of parts and doing both prototypes and limited production runs for testing, he and his partner have come up with a variety of new ideas for CNC tooling. The SideStop is just the first such product.
How is it better that whatever work stop you already have?
I’ll let their artwork spell it out:
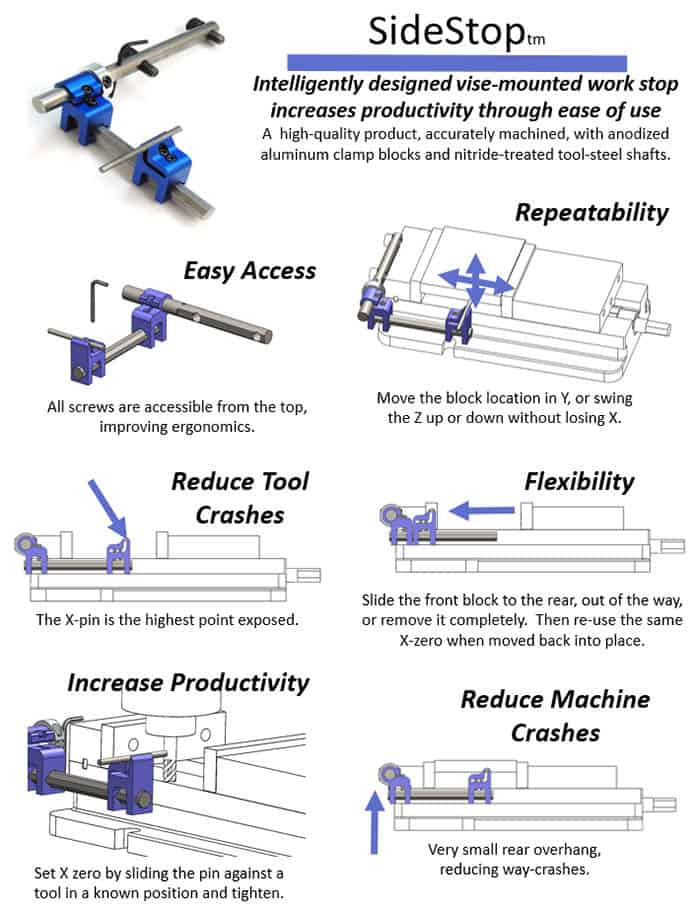
One thing their chart doesn’t mention is there’s even a little hole to store the one size that’s needed allen wrench right on the vise stop so it’s always there for you when you need it. Nice attention to detail!
The popular buzzword here in Silicon Valley is they have “reimagined” what a vise stop should be and how it should work. It makes total sense to me, and having played with one for a while now, I am sold. I’m not sure why the others on the market don’t work the same way, but I’m glad these guys have figured it out.
Installation is Easy
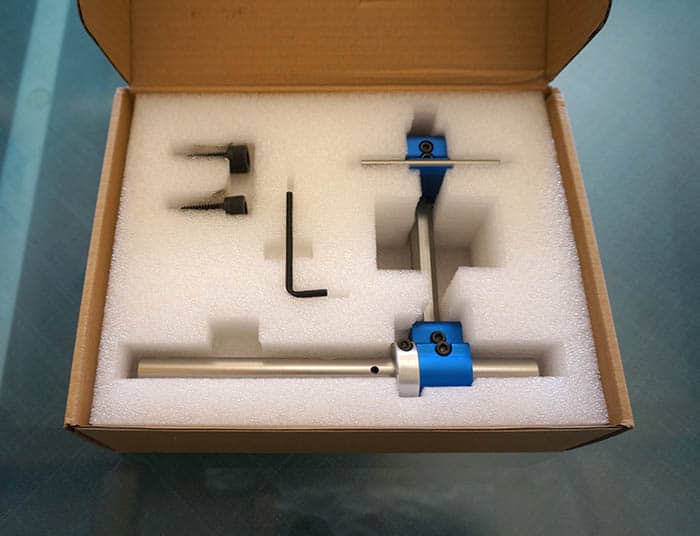
Open the Box…
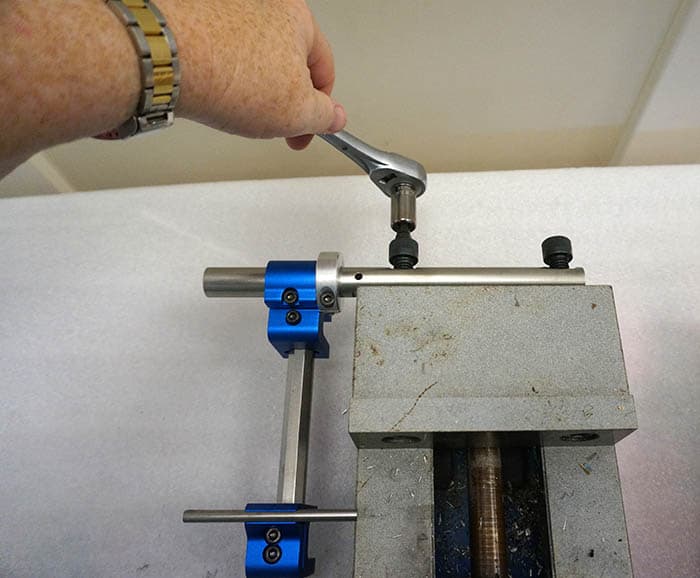
Bolt it on to the vise’s rear jaw mounting holes…
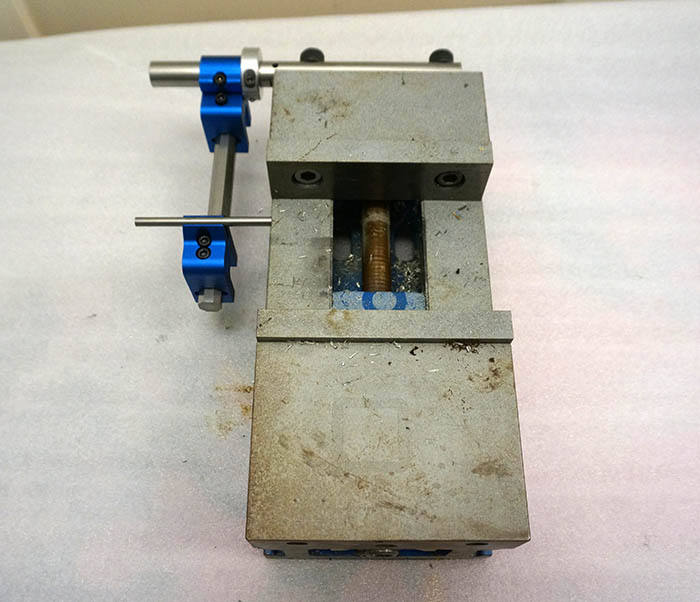
Rock your work stop. It’s a bit shiny for my groady old Kurt 6″ vise, LOL!
Why Would You Want A Vise Stop?
Never used a Kurt vise stop? Wondering what they’re good for?
It’s all about making it easy to drop a part repeatedly into your milling vise and just go. The fixed rear jaw of the vise nails the Y coordinate. The parallels supporting the workpiece nail the Z repeatability. And an adjustable vise stop makes it easy to achieve X repeatability.
Now you can set things up for a run of parts, and each time you drop a new blank into the vise jaws you can be sure it is in the same position as the last before you hit the green button and the CNC Machine does the rest.
There’s more to it than that, though. I never take a part out of my vise unless I’ve set my vise stop to allow me to put that part right back in if I change my mind about something and need to re-machine the part a bit. This is super helpful when you’re prototyping or debugging a new production process, but it’s a lesson that’s hard-earned. In fact, I wrote a story about using vise stops this way that’s been very popular among seasoned machinists who frequent CNCCookbook.
Trust me, you need one of these if you don’t already have a vise stop you use daily. In fact, even if you do, you might find the advantages of SideStop make it worth switching.
Better Vise Mounting Clamps
I had been using the normal clamps that came with my table clamping kit up until I got my new Glacern 6" Premium Vise. It came with a nice clamping kit that I like a lot better:
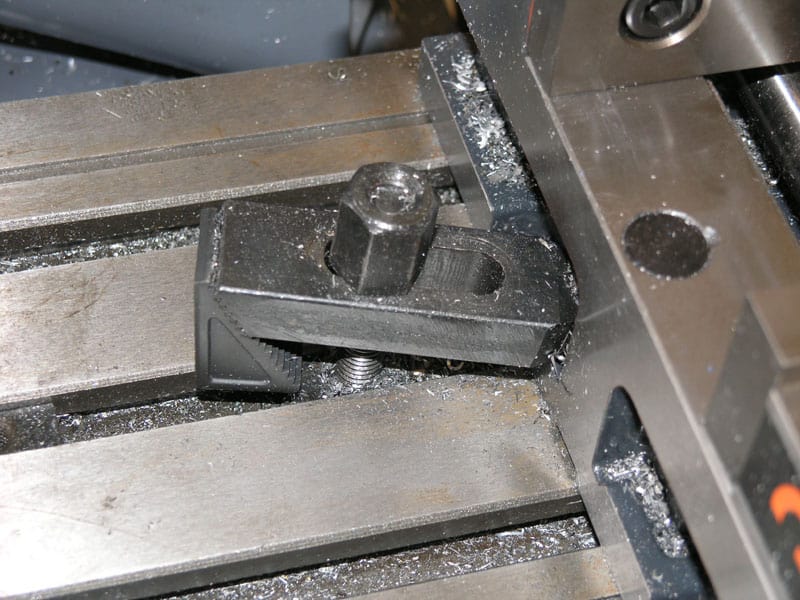
Old Style...
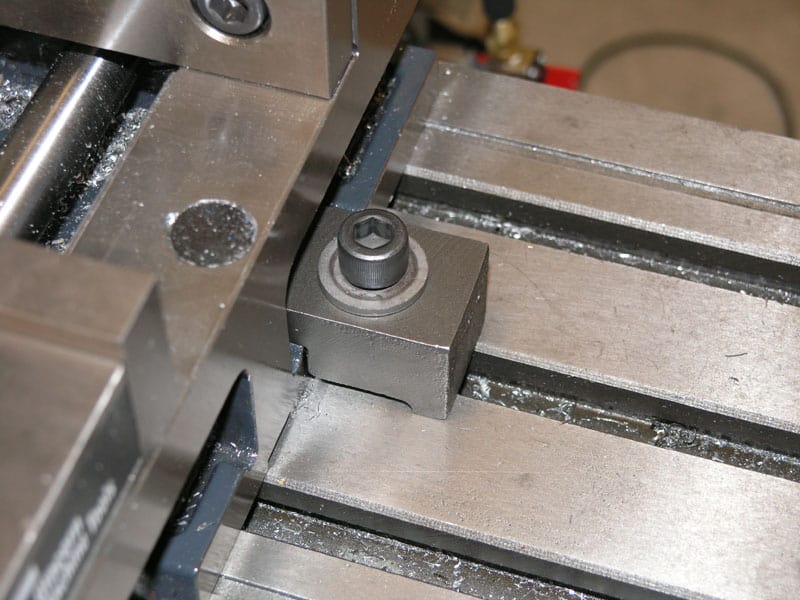
New Hotness...
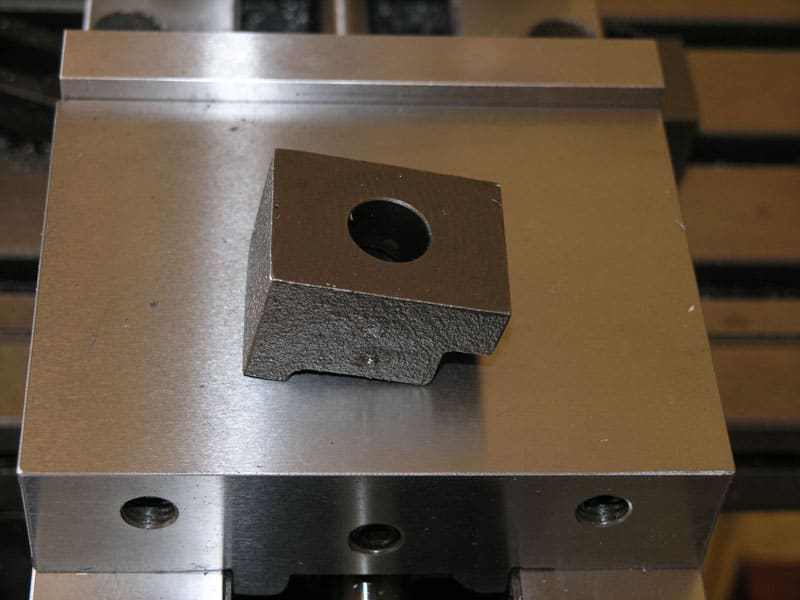
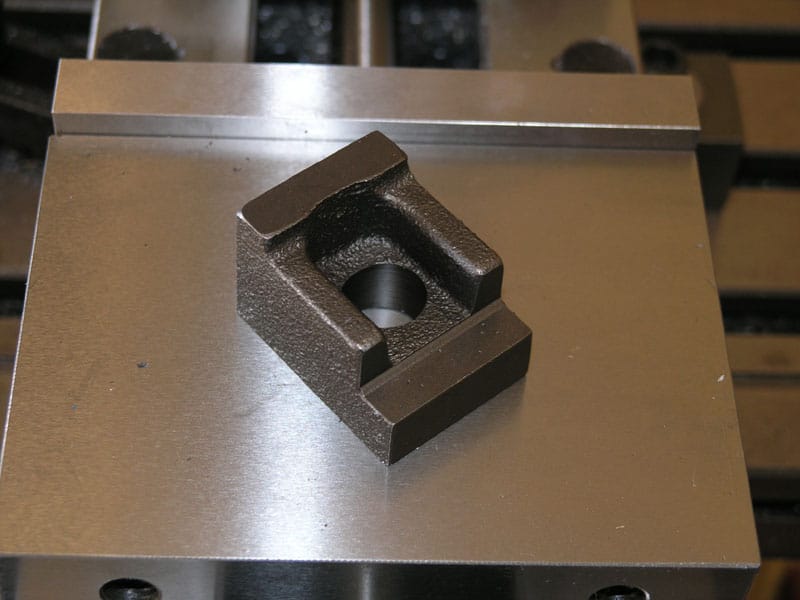
The new clamps are simpler and more compact. For example, when I run two vises with my Jaws of Doom between them, it gets hard to swing a wrench in there. It also helps that I switched to a couple of Socket Head Cap Screws to use for these clamps.
I need to make up a couple of sets from some steel to use with my other vises. Incidentally, the Glacern vise has been superb!
Vise Jaws of "Doom"
I got started on this project after trying to do some engraving of a plate for a CNC enclosure. I was engraving 1/4" aluminum plate and the ends were just not being supported well enough by my 6" vise. Since I happened to have a second vise, I decided to make a set of Vise Jaws of "Doom" that could span both vises and provide ample support. A brief hunt on eBay yielded some very nice 4130 steel that I decided to make the jaws out of. I figure they'll be around for quite a while, so may as well do them up real nice.
To answer an obvious question, "How do they work in practice?" I was worried that the two vises would fight each other, but in fact, you can feel very close when they are in alignment and it's very easy to spin both handles at a close enough rate.

The finished Jaws of "Doom" are 24" long and span 2 6" vises to make one "Super-Vise"...
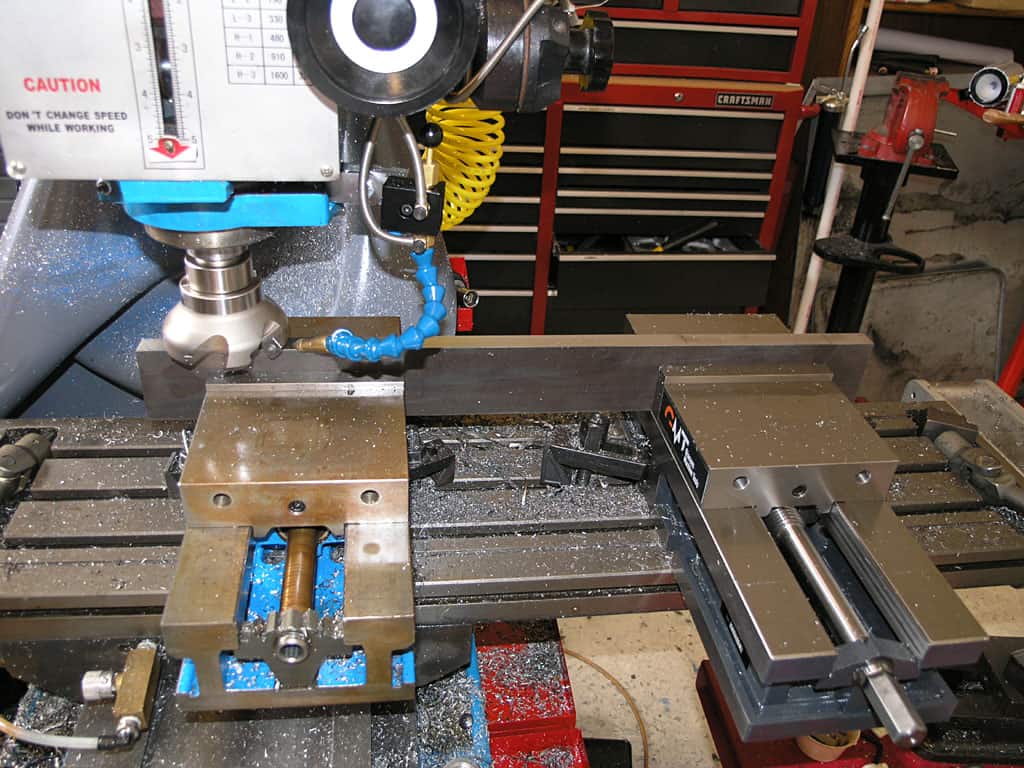
I squared up my block of 4130 right up front...
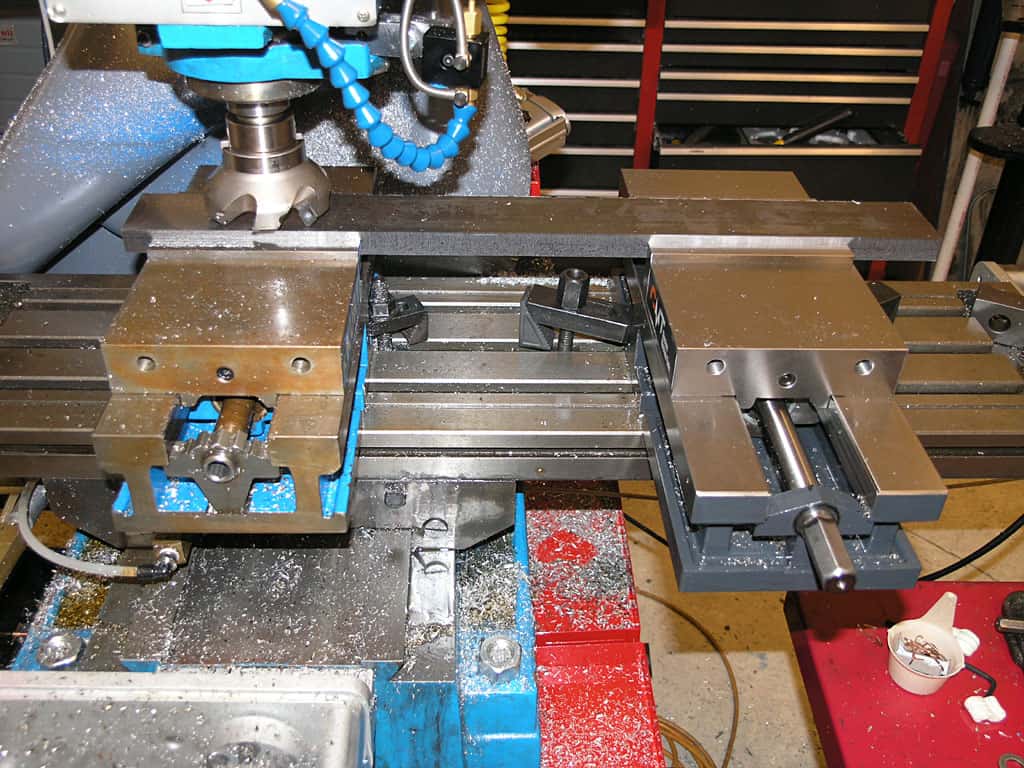
The face mill is a Glacern 45 degree 3" with inserts intended for steel. It cut very nicely!
Here is the plan I drew in Rhino3D:
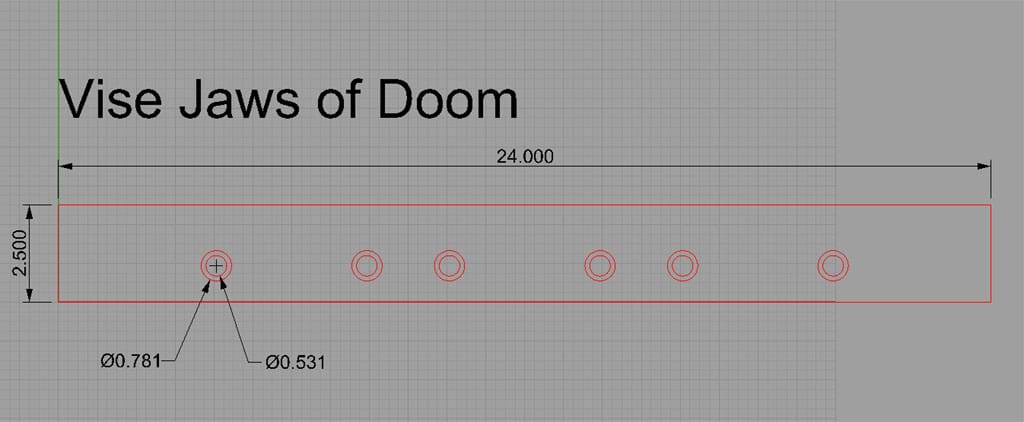
The mounting holes are 3.875" apart. I have 3 sets of holes so I can either stick the jaws across 2 vises with the end sets, or put them on one vise with the middle set...

BTW, the handy way to tram two of these vises is to tram one and then clamp my big Brown & Sharpe parallel in it. Clamp the other one on the parallel while lose and then clamp it down. Done!
G-Code to Countersink the Holes
G-Code for a Bigger Countersink
Sine Jaws for the Kurt Vise
After cogitating on the idea of putting dowel pins in vise jaws (of which more below on how a fellow did that for another purpose), I did a Rhino drawing to figure out the placement of pins needed to provide a set of angle stops in 5 degree increments from 5 to 45 degrees:
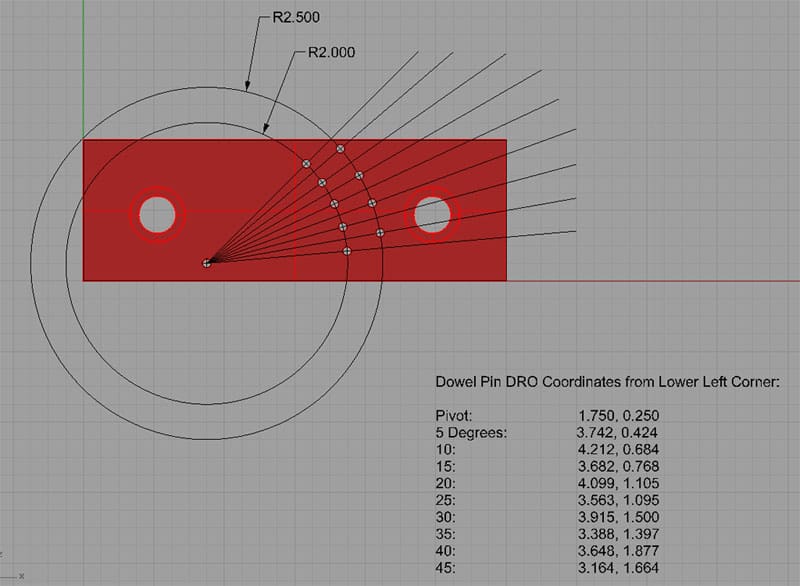
This would be a dead simple thing to do with CNC, but I went ahead and listed DRO coordinates for those who want to play with it on a manual mill. A rotary table would let you do the work very easily as well. The idea is to drill and ream holes for 1/8" precision dowel pins. As you can see these holes are divided between a 2" and a 2.5" radius so they don't land too close together. One could either make a little bar with two pins to use as a stop to align the workpiece at the desired angle, or just use two dowel pins in the appropriate holes. I would bore the opposing jaw with holes slightly oversized so the dowel pin ends go in when tightening the vise on thinner workpieces.
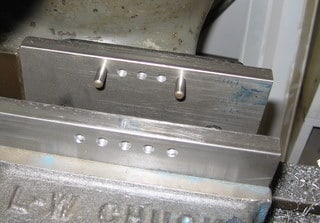
I got the idea to use dowel pins from Jim Sehr whom I mention below for this set of jaws:
Nifty Soft Jaw Tricks
Soft jaws for your Kurt vise are fantastically useful gizmos and easy to make. But there are a few clever things I saw recently while prowling the web:
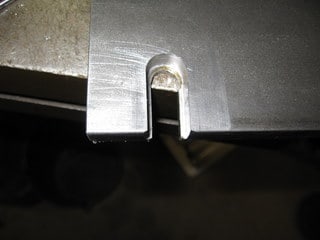
Use slots instead of holes and the soft jaws are quick release...

A series of holes for precision dowel pins and you get:
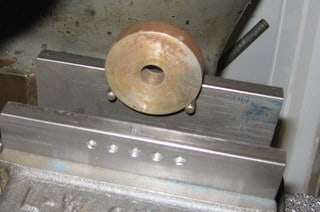
An easy way to hold round parts for drilling. Normally I would make do with a V-block in the vise...

And here is one of the most interesting tricks. This is a mini sine bar. Depending on which holes the two pivot pins use, you get angles from 0 to 90 degrees. Exotic, but useful! Available on eBay...
Mill a Strip of Parts in a Vise
So you want to make a bunch of small parts at once in one setup, and using one vise. Make a strip of parts in a set of big soft jaws:
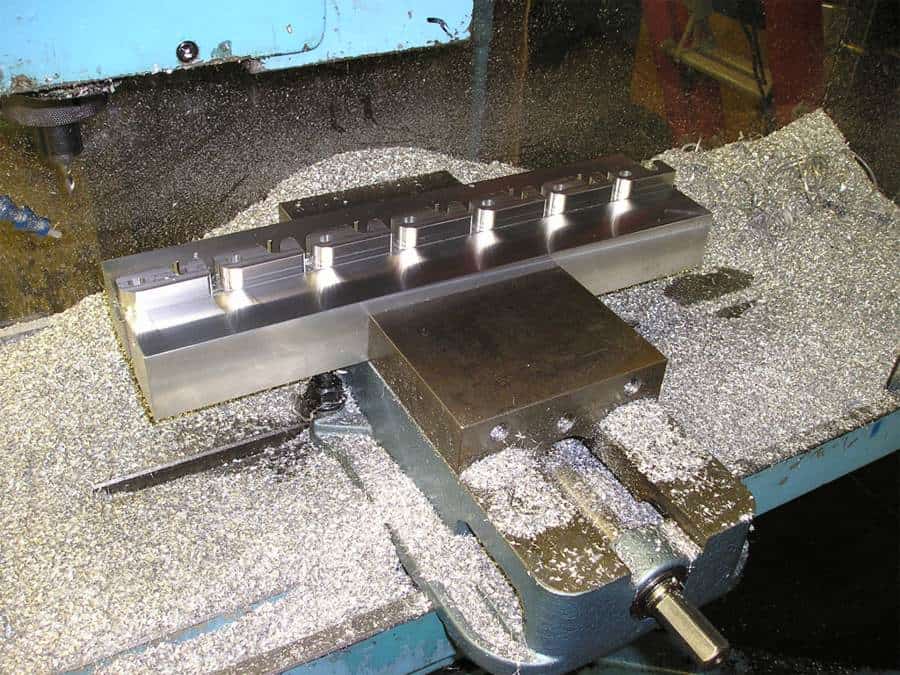
The parts keep a strip underneath. To finish, flip the whole thing, drop it into softjaws of appropriate “negative image” of the parts, and mill of the back.
An alternative would be to make a tooling plate that goes in the vise and acts as a pallet. Use Mitee-Bite clamps or the equivalent to hold the parts. Make at least two plates so you can load one while the machine is working on the other.
If you start getting some chatter, the backing is probably too thin, or your jaws are holding it well enough. You call also try some big “Jaws of Doom” like I made up for 2 vises (see above).
Machinist Vise FAQ
What is a Machinist's Vise
A machinist vise is a special type of vise made to hold workpieces on a milling machine. A good machinist vise is well made, typically of cast iron. It operates smoothly repeatably, and it has a wedge mechanism that pulls the movable jaw down onto the bed so the part is not lifted due to deflection as the jaws are tightened.
What is a Swivel Base Vise?
A swivel base vise is simply a machinist vise that has an optional swivel base.
How do you use a Machine Vise
To install a machinist vise, first clean the table of any chips. Place the vise on the table, clamp it down, and tram the vise so it is square with the motions of the table. Use either parallels or soft jaws with a step cut in them to hold the part high in the vise. Make sure the work is tightly held and you're ready to go.
What Vise is used in a Milling Machine?
The most common vise put on a milling machine is called a machinist's vise, or sometimes a milling vise. `
Be the first to know about updates at CNC Cookbook
Join our newsletter to get updates on what's next at CNC Cookbook.