Now you have your lathe setup, and all the tooling to get started.
What's next? Getting it going and doing something with it!
I take a very slow cautious approach with any new machine tool. It's just who I am. I'm usually super eager to make stuff with it, but I've found that being over-anxious and jumping into things too quickly, typically leads to extra expense, which, after spending this much money on a machine, is the LAST thing you want.
I know I've said this in a past article, but, I'm going to say it again.
"Make sure you know the proper startup and homing procedures for your machine. If you don't know, and can't find it, ASK. That's why you bought a new machine, so that you would have some support when you need it!"
Programming your lathe.
Next step is figuring out how you are going to create a program for your new lathe. And by this, I mean are you going to do 1 of at least 3 different things:
- Hand code your gcode?
- Use conversational programming to write your programs?
- Use a CAM program to generate your gcode programs?
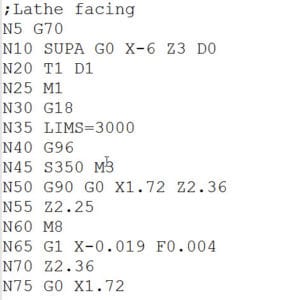
Whichever method you decide to use, make sure you understand the gcode that your system generates. Reading thru the coding section of your manual will never hurt you in the least. If you've never taken the time to learn g-code, try CNCCookbook's Free G-Code Tutorial-it can help you a lot!
Me personally, I use a combination of option #3 then option #1 as I like to do all my programming with CAM, then after I've tested that program, I optimize the gcode by hand. I can't really talk on using conversational, as that's something I have done very little of, so I'm not even going to profess any knowledge of it to pass on to you.

I personally use SprutCam, but there is a plethora of other CAM programs out there to choose from. The most important thing about CAM is the ability to find, build or have built a PostProcessor for your lathe. The Automate FL300-II that I use has a Siemens 808D Basic control on it which is a fairly popular control, especially in Europe. It's also becoming a lot more prevalent here in the USA.
You want that customized Post Processor because while gcode is meant to be standard, it is anything but. Pretty much every control maker out there has customized gcode in some fashion, and the post processor needs to be able to post into the format your particular control understands.
What's next?
Use the simulator on your lathe.
Most modern controls have some sort of simulator which allows your control to pretend to execute the program, without the potential of causing damage. I used it a lot when I want first setting up my machine and getting the post processor working.
Note: I did not modify the post processor myself, though I did make a few tweaks to it.
Another thing to think about, is that some control makers offer a PC Based simulator that you can download to "test" your code on the same computer you use to write your code. I know Siemens has a PC Based simulator to download.
Using the simulator is invaluable in testing out and vetting a new post processor for your machine.
You can also use CNCCookbook's G-Code Editor to simulate g-code. Plus it has all sorts of features that make it easier to understand what the g-code is doing, such as hints for each line of g-code in plain English.
Dial down those rapids!
Sure, it's exciting to see the machine whipping around at 1000 inches per minute, but think about it.... How fast are your reactions?? Mine are pretty quick, but at 1000ipm, there's no way I can hit stop or pause in time to prevent a crash in the event I screwed up (which, let's face it, with a new machine, it's inevitable).
For all new programs, I dial my rapids down to 200 ipm. It's slow, but gives you plenty of time to keep catastrophe from happening.
Tool offsets!
Without your tool offsets, you have no idea what your parts will wind up looking like (or what your tools will look like after they are wrecked). Your manual should walk you through the process, but a quick explanation is that you setup the Z offsets based on the center axis of your spindle. As mentioned in my last article, I use a Z setter that is 2" at zero.
On the Siemens control, these are the basic steps to setting the Z tool offsets:
- Press the "offset" button on the control
- On the offset screen you select Z axis
- Enter in an offset based on your indicator height (for me, that's 2")
- Use your jog pendant to jog in very slowly.
Note: Most Jog pendants have movement increments in 0.0001", 0.001", and 0.010". Feel free to use the fastest to get close, but make sure you drop it down to the 0.0001" when you get close, because you really don't want to break your Z indicator by moving too fast. - Touch the tool to the Z setter until the dial reads 0, then press the "measure tool" button.
Your Z offset is now set.
When I am setting up my tools, I typically cycle thru and set all my Z offsets for each of my tools before I worry about setting the X offset.
On the Siemens control, these are the basic steps to setting the X tool offsets:
- Index or change your tool to Tool #1.
- Insert some scrap material into the spindle.
- Use the jog pendant, get within 1/4" of your part, and position the tool to perform a cut.
- Now switch to the 0.0001" or 0.001" increment on your pendant.
- Turn on the spindle, it doesn't have to be super fast, 750-1000 rpm should suffice.
- MAKE SURE YOUR SPINDLE IS TURNING THE CORRECT DIRECTION for the tool to make a cut. If it's going the opposite direction, and you try to make a cut, you have just killed your tool. 😉
- Use the jog pendant to move X to where you will get a nice clean cut.
- Now switch to Z movement, and make a cut about 1/4" axially, then back off to where you are cutting air.
- Move the Z out of the way so you have several inches of space in front of the end of the part.
DO NOT CHANGE THE POSITION OF THE X AXIS - Turn off the spindle.
- Get your calipers, or micrometers out, and measure the diameter of the cut you just made.
- Press the "offset" button on the control
- On the offset screen you select your X axis
- Enter in the dimension you just measured.
- Press measure X.
Now your X offset for that tool is saved. For boring tools you do pretty much the same thing, except on an internal hole instead of an external one.
Drill offsets are a little bit different.
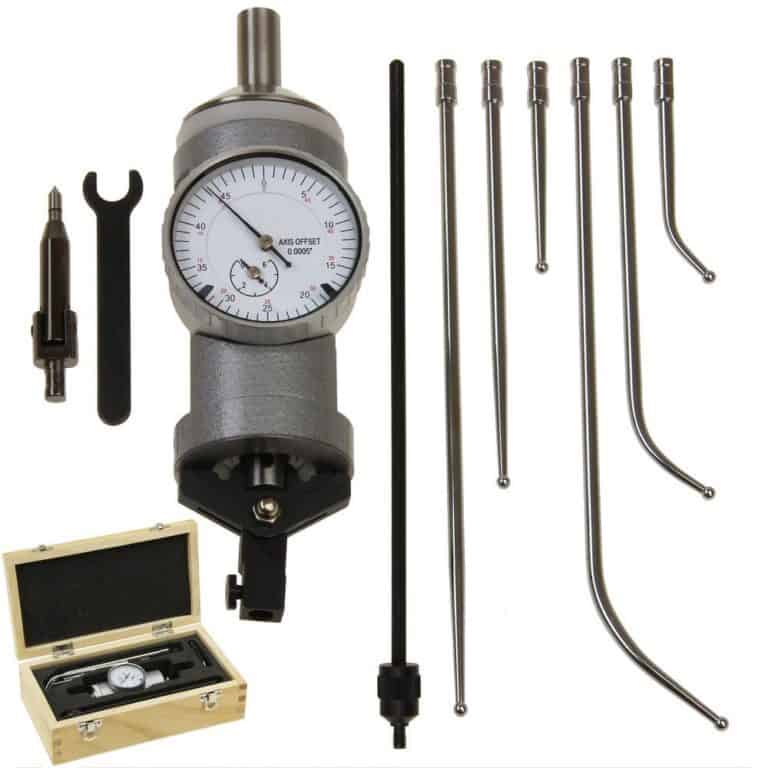
Drills are a little trickier, but I like using a Coaxial Centering Indicator. I mount the centering indicator in the chuck of the lathe, then I sweep the center of the holes where a collet would mount to hold a drill bit. I switch the X to 0.0001" on the jog pendant, turn on the spindle very slow, like 100 rpms, and just jog X back and forth until the needle on the centering indicator doesn't move anymore. When I measure the offset of the tool, I just select 0 for the measurement of X. Now the drill bits are right on center.

Don't Rapid Near your Chuck!
Let's just say this is a warning. This was the first time I had to reset my turret and it was because I forgot I had my jog pendant on 0.01" and smacked it right into the chuck.
Also, make sure when you index your turret, you are WELL out of the way of the chuck. I have not done that one, and really don't want to. Those turrets index really fast, and if a tool is in the way of the chuck, something (probably the tool) is going to break.
Hint: I always recommend that people not use G00 Rapids with MDI commands. Always run G01 and set a feedrate that gives you time to react. You'll save on crashes and stress! - Bob Warfield
Setup offsets for empty tool positions in a turret.
I learned this the hard way. When I was programming a part, I entered in a turret position which didn't have a tool in it, and never had one in it before, so there was no offset for it what so ever. I found out that offset for an empty turret position, is basically at the spindle nose (NOT the nose of the chuck, about 4" behind the chuck. Yep, it sucks. That was my second turret reset.
I highly recommend you at least put in an offset a few inches away from your chuck because of this.
Compilation of cuts.
Well, I hope you enjoyed this article in my series. Please take a few minutes to check out this compilation video of some of the projects completed on my new lathe, from my very first part on it, to some of my more recent parts.
Wade Wendorf
Mandala Rose Works, LLC
Check out more videos here.
Be the first to know about updates at CNC Cookbook
Join our newsletter to get updates on what's next at CNC Cookbook.
