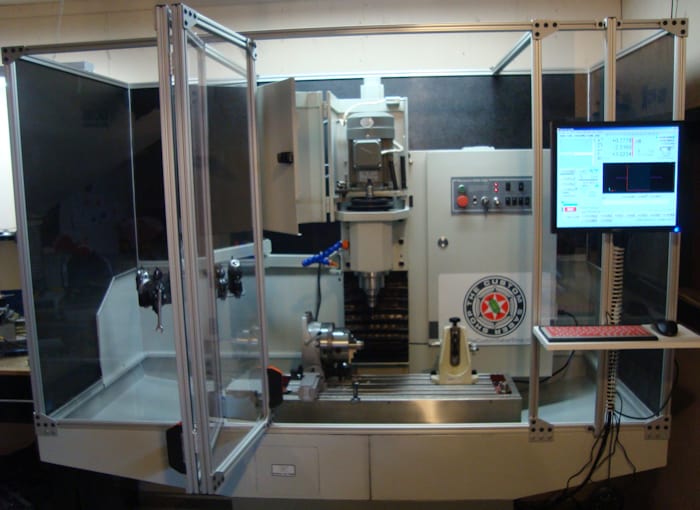
CNC Enclosure for my RF45 Mill
Upon receiving a letter from a user regarding their self-made Flood Enclosure, I was inspired to begin crafting an enclosure for my own IH CNC mill. I’ve reached a point in my craft where the combined capacity of G-Wizard's superior speeds and feeds and my own developing skill-set with CAM, assorted toolpaths, and finishing methods have greatly increased my material removal rates.
I expect better surface finish and even higher material removal rates will be possible with full flood machining coolant, but the biggest advantage is not having to deal with the mess.
With the feedrates and material removal rates way up there, my mill throws chips as far as the eye can see. They get into everything from my hair to the keyboard on the laptop I run to control the machine. Simple shielding barriers don't seem to deter them in the least as the laptop hides behind a pretty good shield in addition to its own screen yet it still constantly picks up chips.
Time for a real enclosure!
Design Sketches
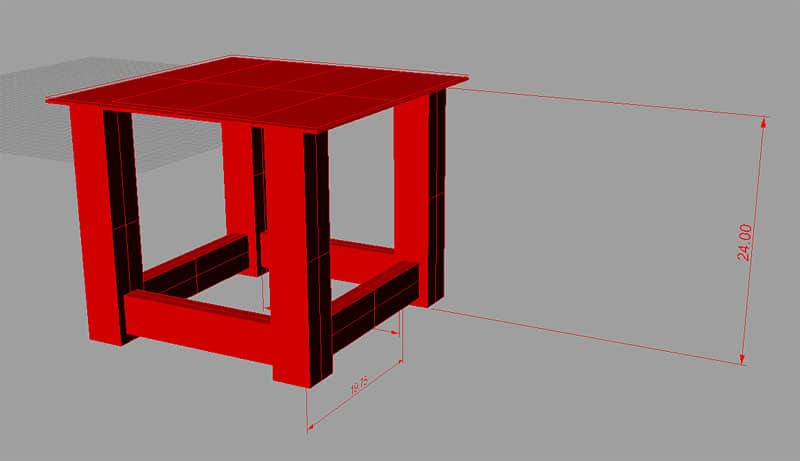
I started with the mill's footprint travel-wise and being mindful of how far the servo's protrude. I also gave thought to the table height relative to the door opening of the enclosure. Some sketching in Rhino3D led me to this result:
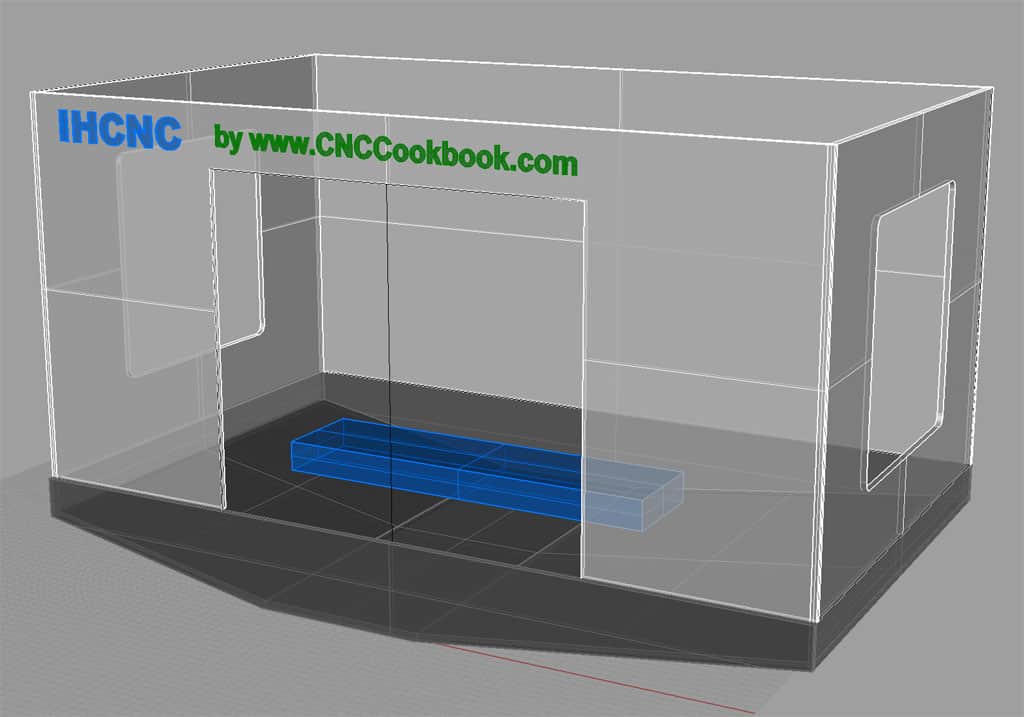
This rendering gives a flavor for the enclosure. Mill table (blue) is shown in its full forward and centered position...
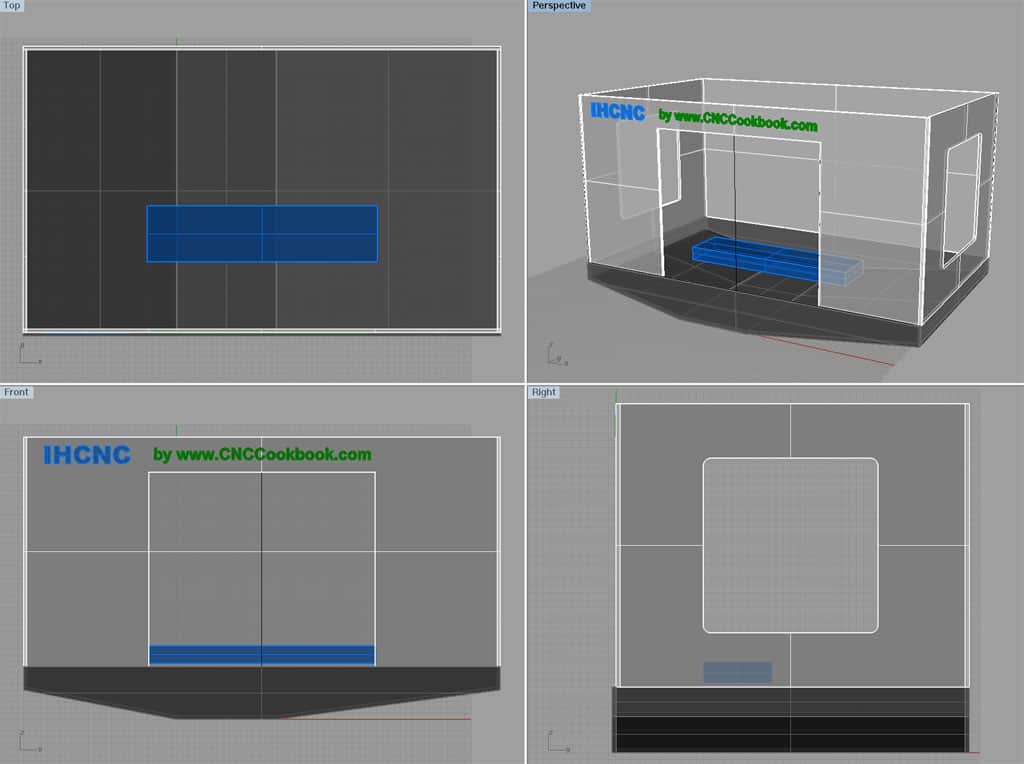
More views...
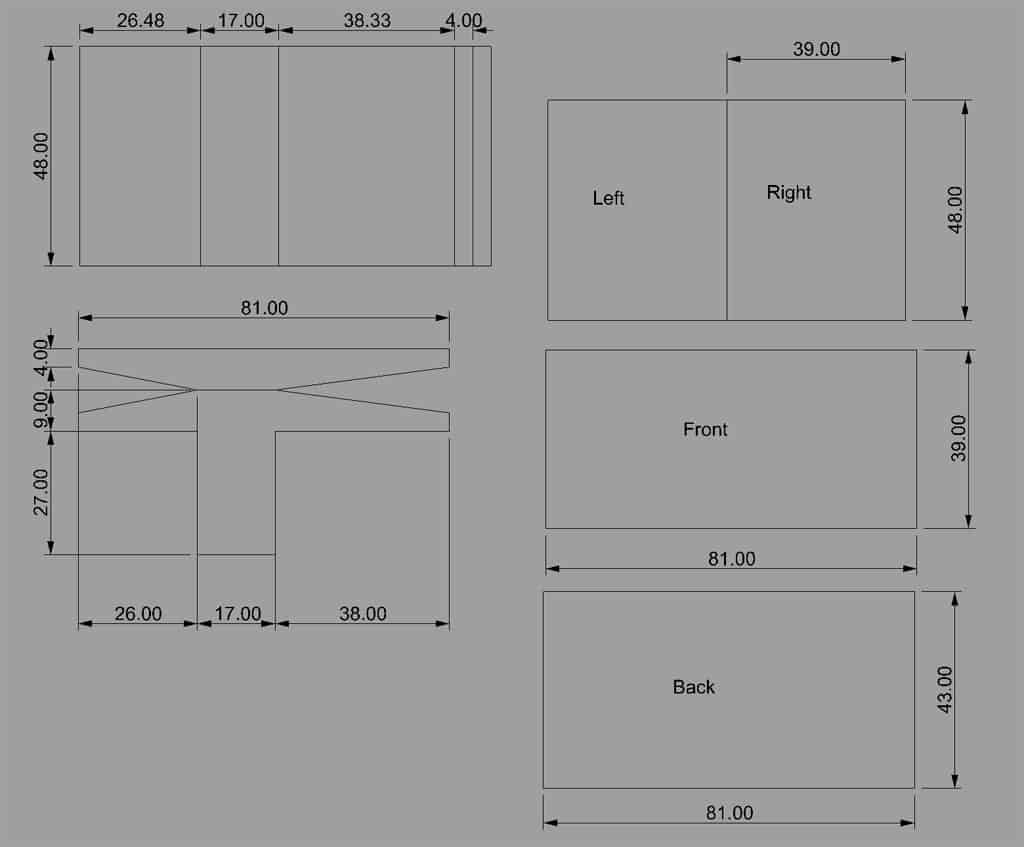
Some dimensions...
On the dimensions, note that we let the pan bottom left/right and the short right and left sides run slightly long. The center of the pan was cut to size. This allowed us to cut the angles for these pieces to meet up, fit them up against the front and rear pieces, mark off the actual measurements, and then make a final cut to size. Leaving this room for adjustment was a good idea!
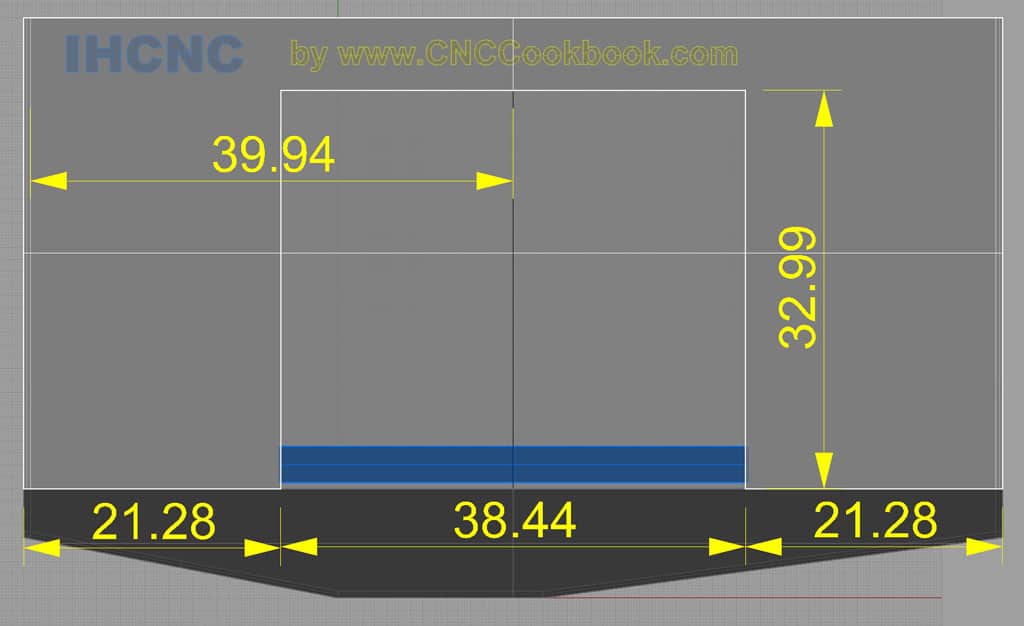
More dimensions for the door...

And side window dimensions...
One further requirement is I wanted to be able to hinge down at least three of the sides of the enclosure to make it easy to work on the mill or to deal with workpieces that hang over too far to fit inside the enclosure. When I drew the sketches, I made no allowance for how the mounting of the walls was to be engineered. I plan to work that out right after I build the chip pan and cut the sides so I can experiment. Ever since having seen a Deckel with the hinge-down feature, it's been on my must-have list for an enclosure.
Deckel with Enclosure up...
Convenient to be able to put the enclosure down...
After looking over the dimensions of the enclosure, and the space I have available, I decided not to go with a hinged design. Instead, there are two means of gaining further access:
- Each side is individually removable.
- The side windows can be opened.
That should provide quite a lot of leeway. The issue with hinging is the spot I want to put the mill enclosure won't leave room to clear the big sides if they're hinged.
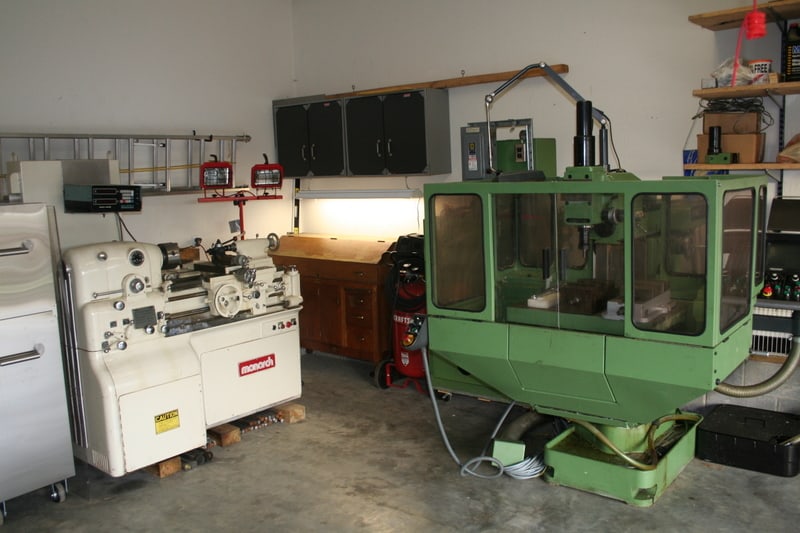
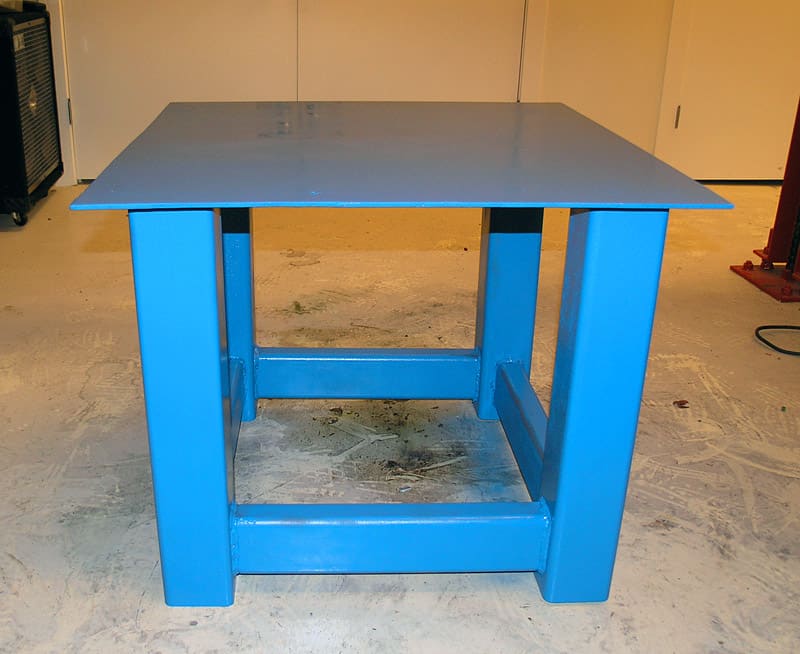
Milling Machine Stand
This page collects a few photos for a simple project I undertook to build when I first got my Tig welder going. It’s a stand for my Industrial Hobbies milling machine. Having read that vibration can seriously impact the quality of surface finish, and not wanting this 900lb machine tool to rest on an unsteady surface, I opted to build a pretty beefy stand for it. The basic platform is constructed of 1/4″ steel plate and 1/4″ wall 4″ x 4″ square and 4″ x 2″ rectangular tubing. Tig is what I used, but Mig would have been faster. Still, the Tig worked out pretty nice and it was good to keep my Tig skillz honed with this project.
On with the photo essay!
The basic plan: is that solid enough fer ye?
Here is my Tig welder…

Proper fit up is very important…
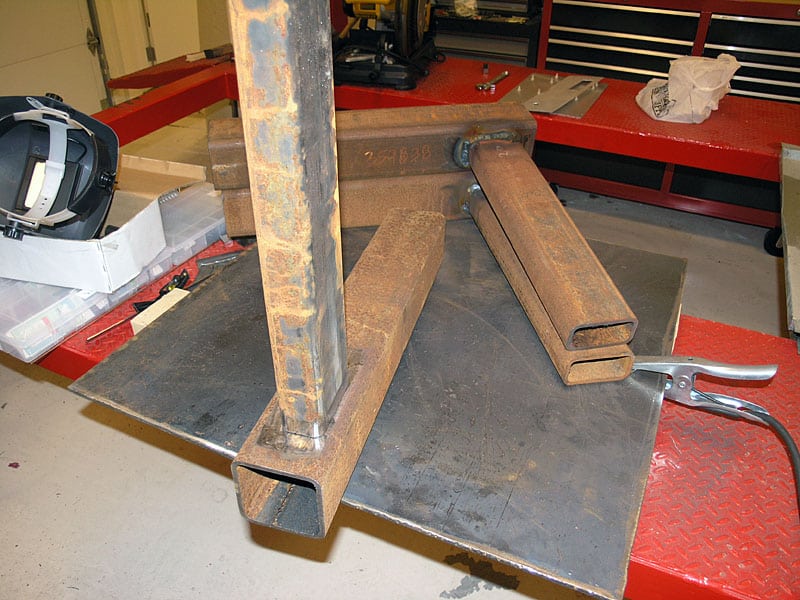
You have to grind off that rust before trying to weld…
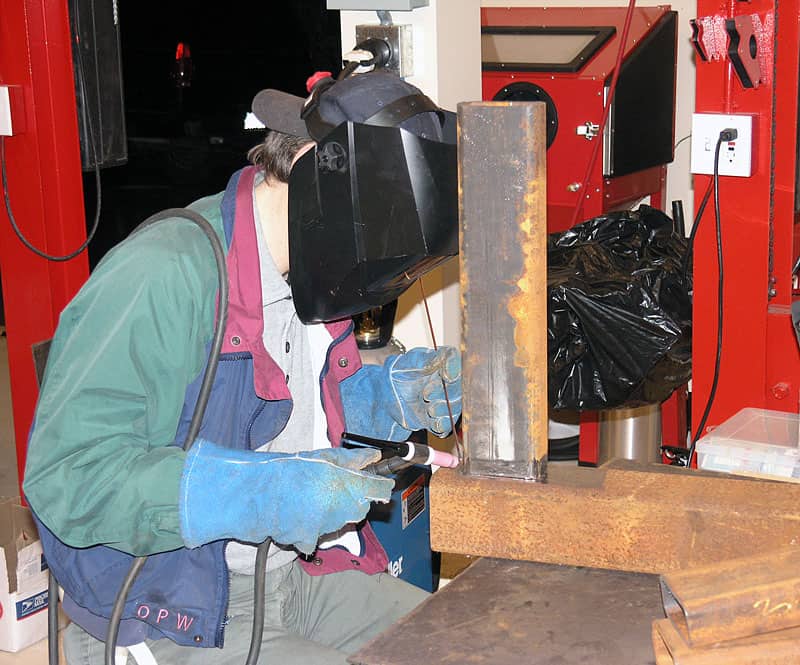
Here we go!
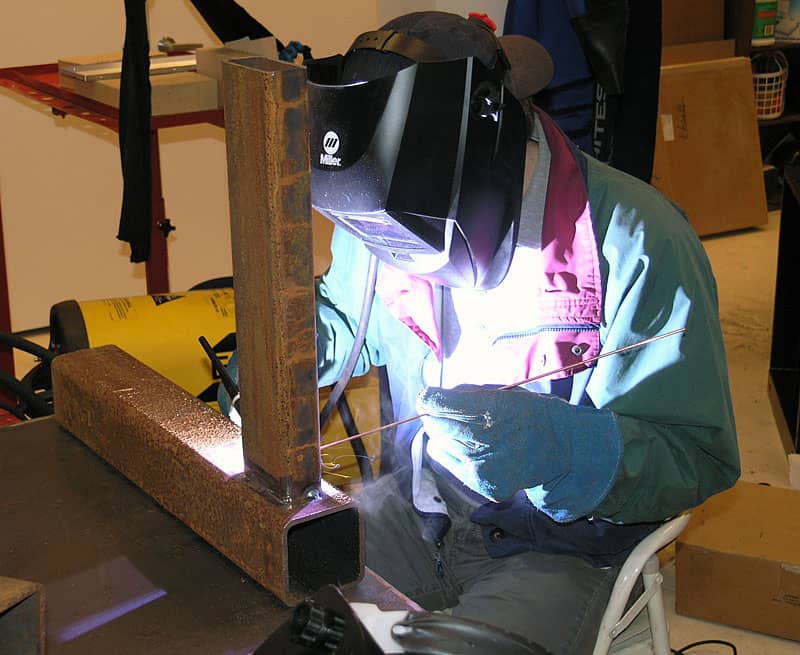
Basic Tig Welding…

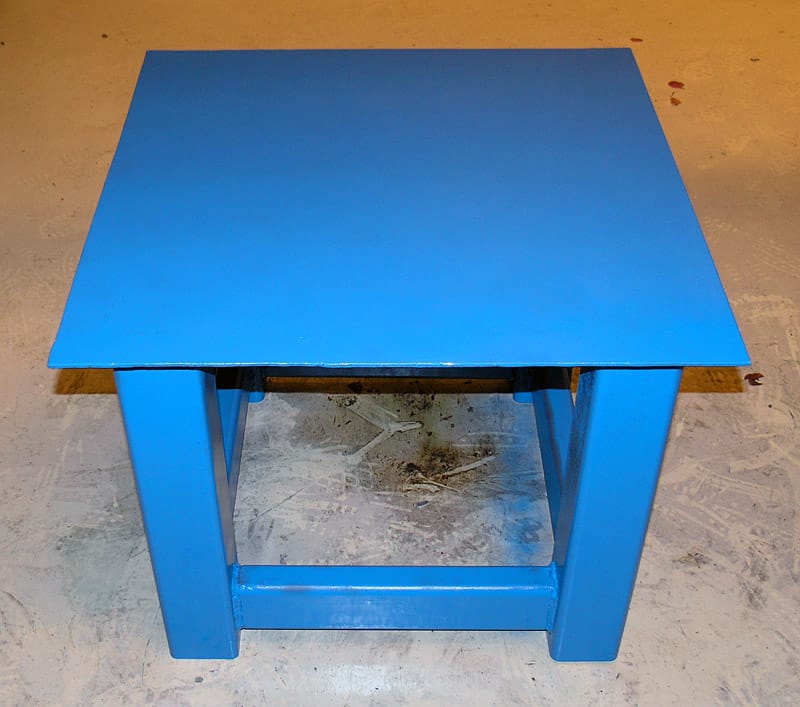
The Glamor Shot…
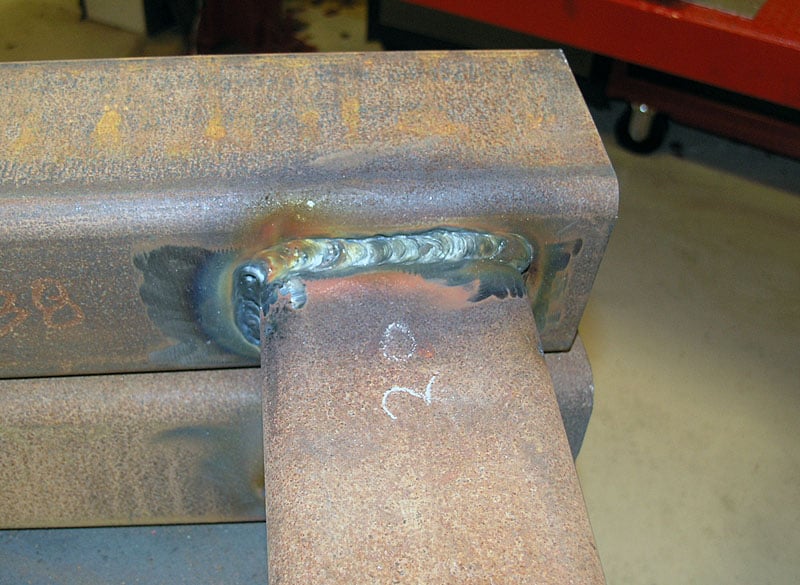
Not the finest welds in the land, but they will do!
Voila! One Mill Stand, Ready to Go…
Are you ready to parté, monsieur mill?
Leveling Casters
Came across these leveling casters from Access Casters, so I ordered a set and they're great:
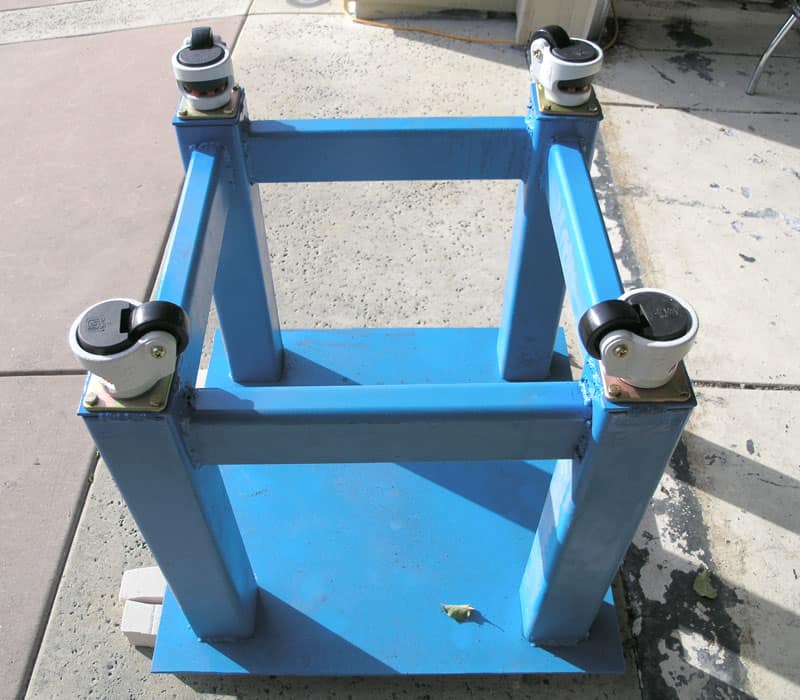
Leveling Casters...
They'll make it easy to level the machine and enclosure as well as make it easy to move things around in the shop if I have to. There is a leveling screw on each caster that raises and lowers the rubber puck. When you've raised it high enough the casters is off the floor and the stand sits solid. These casters are extremely well made and were surplus, originally intended for heavy medical equipment that had to be moved around hospitals. With the heavy mill atop this already heavy stand, the whole thing should be very sturdy and hopefully will dampen vibrations as well.
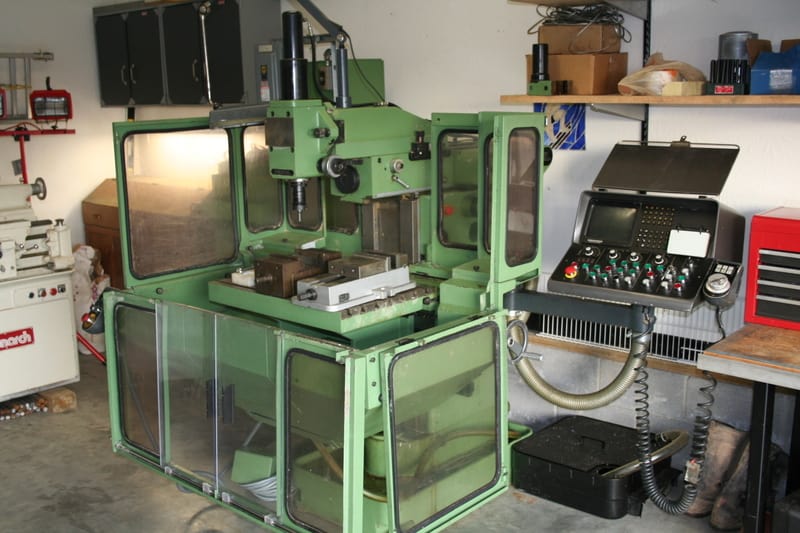
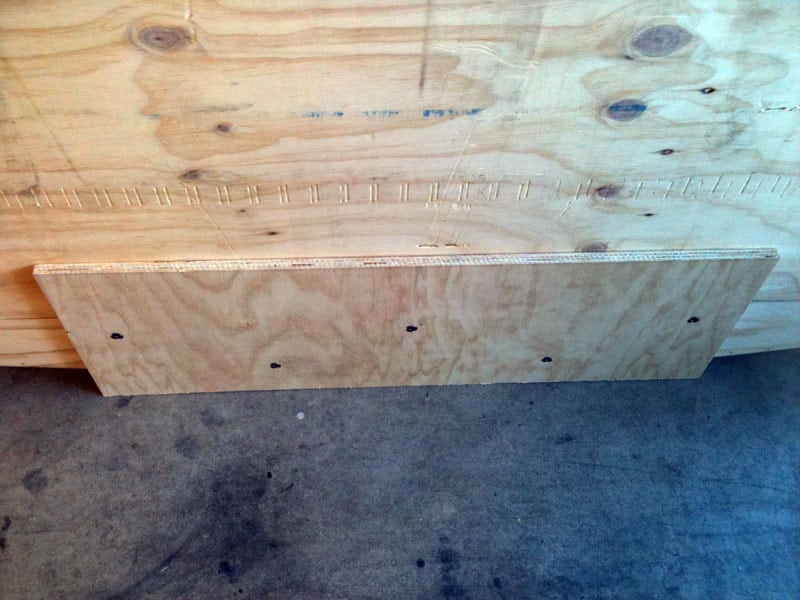
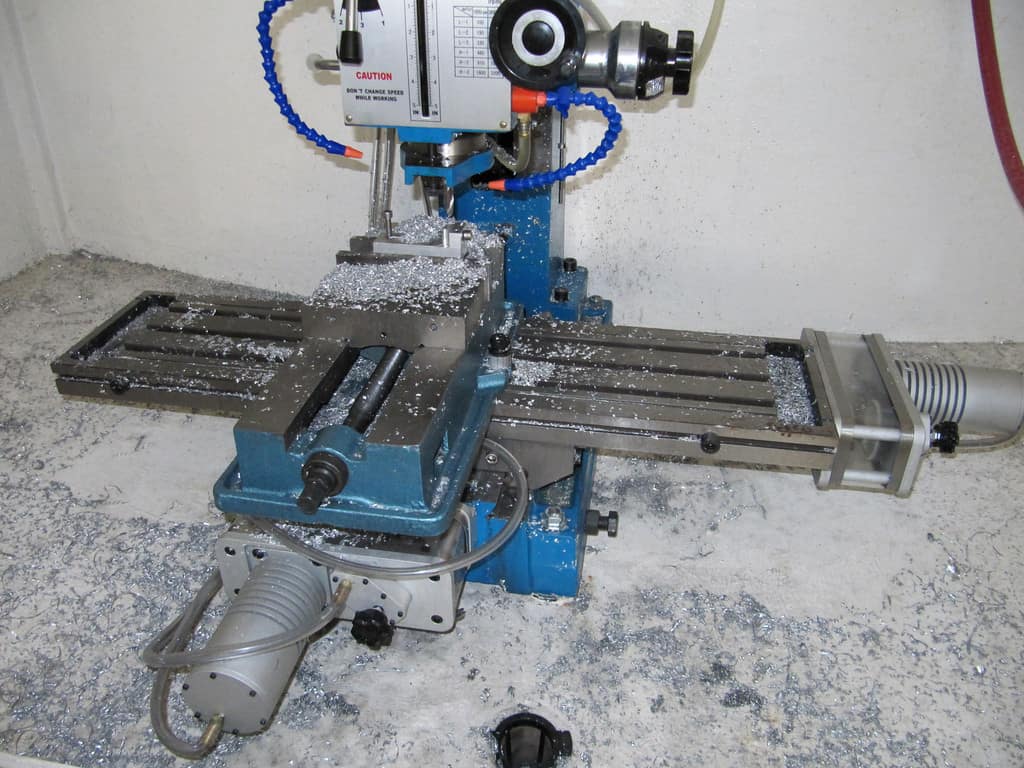
The Pig Trough (Chip Pan)
As you can see from the design drawings above, the IH has a pretty good-sized footprint, so I built a largish chip pan for it. The materials are furniture-grade 9/16" plywood (on sale at Home depot, so I couldn't resist picking up 5 sheets of it). Waterproofing will be 3 coats of West Marine Epoxy. This is what the boat builders, who have to deal with a lot more water, use for wooden boats. In addition, I have a fair amount of left over epoxy from my adventures in filling the mill base with epoxy-granite. You want the 3 coats to be rolled on pretty thin.
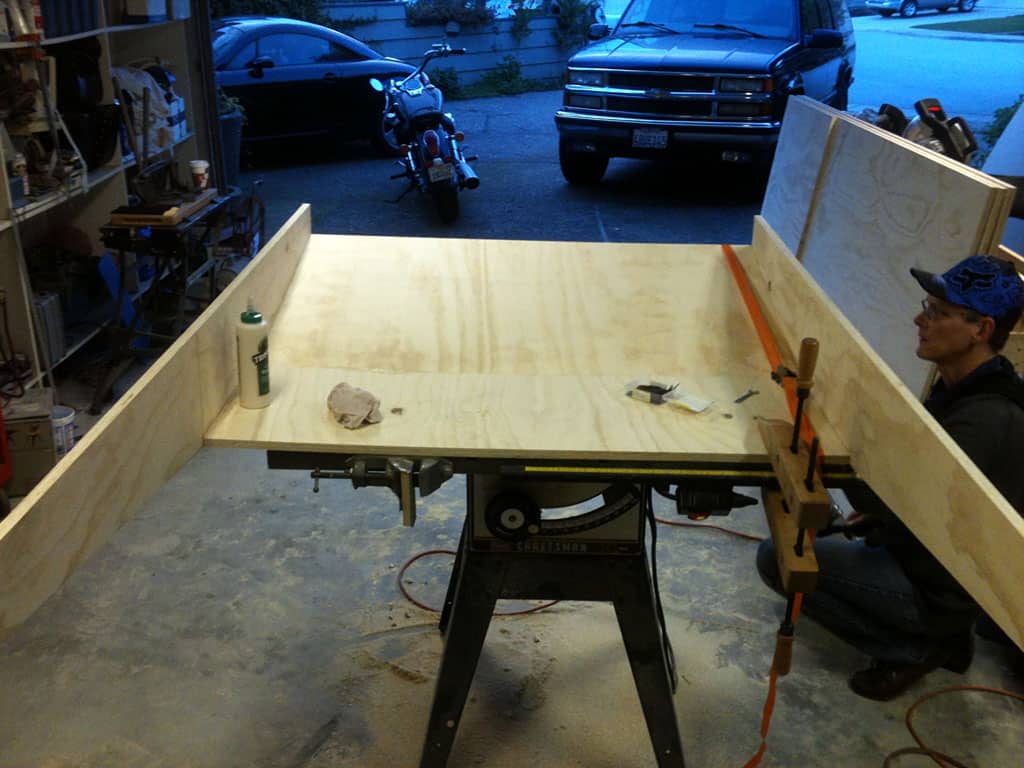
My brother runs a picture framing business, so he handles the woodworking end of our projects...
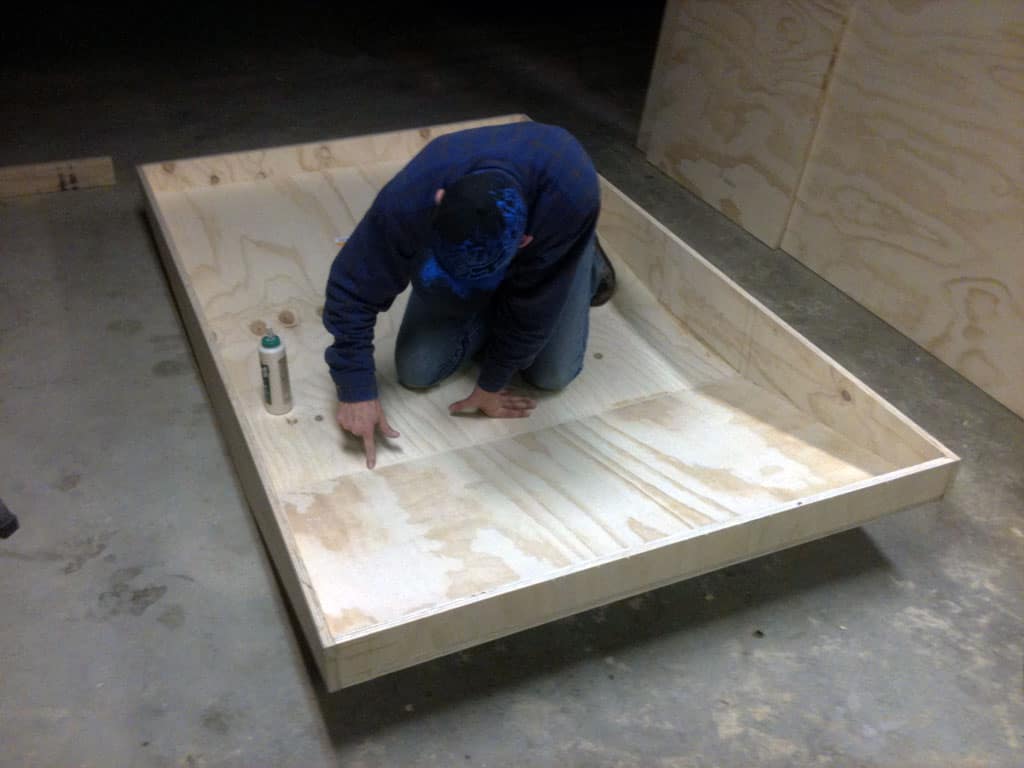
I would estimate we have about 5 hours in the pan to this stage, including an hour visit to Home Depot...
Takes a pretty good sized trough for the IH Mill!

You know they'd be happy in that chip pan!
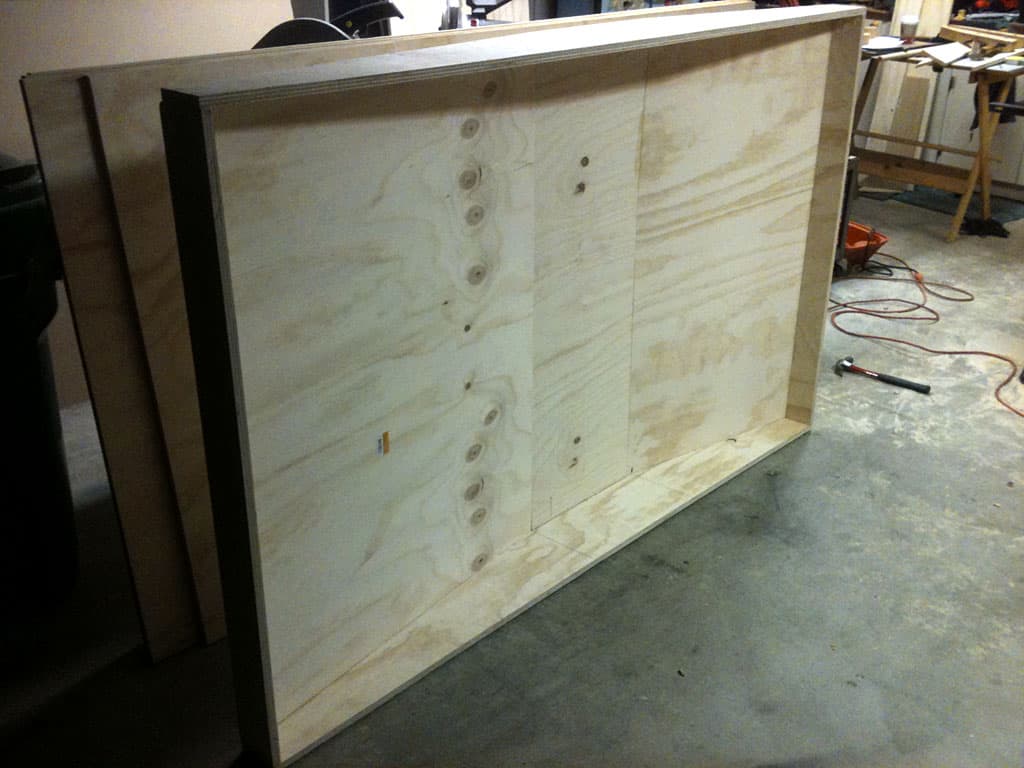
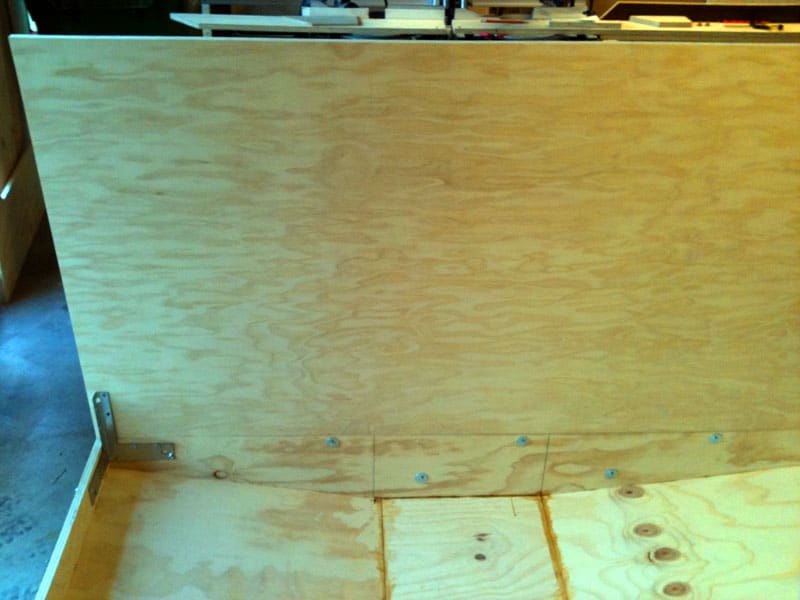
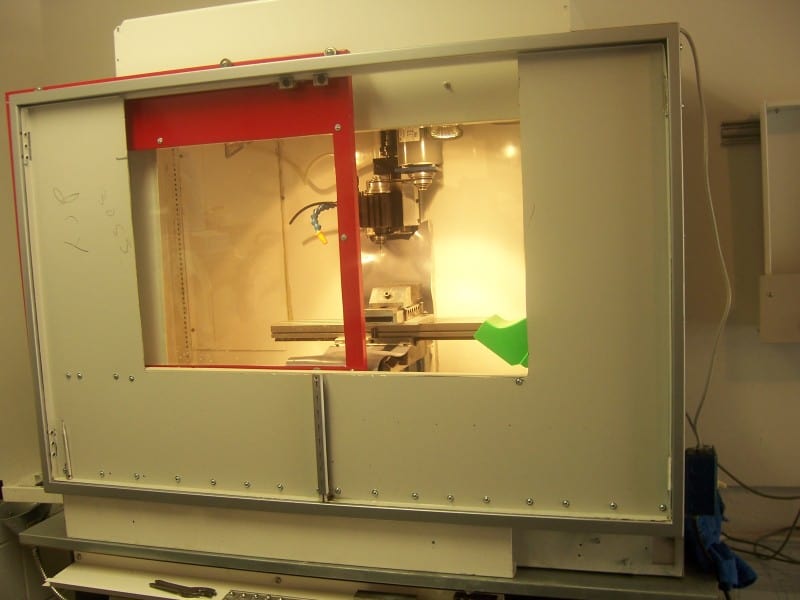
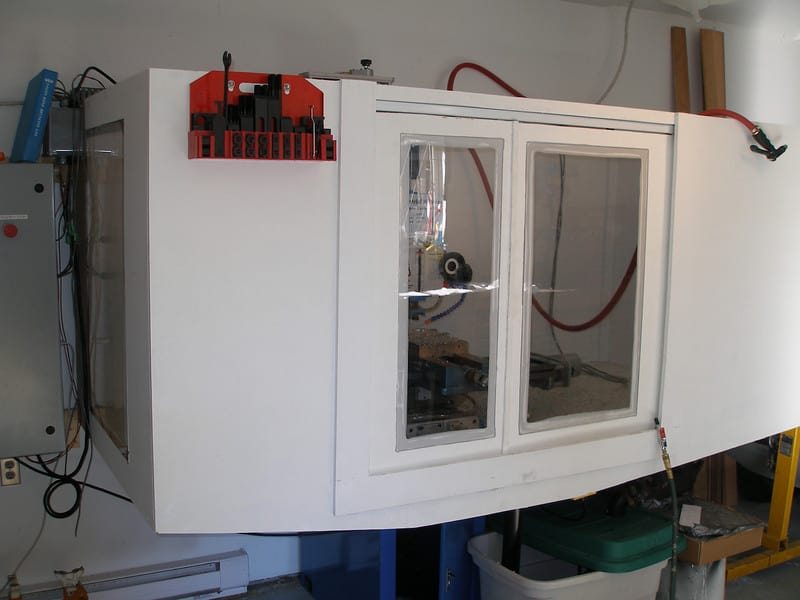
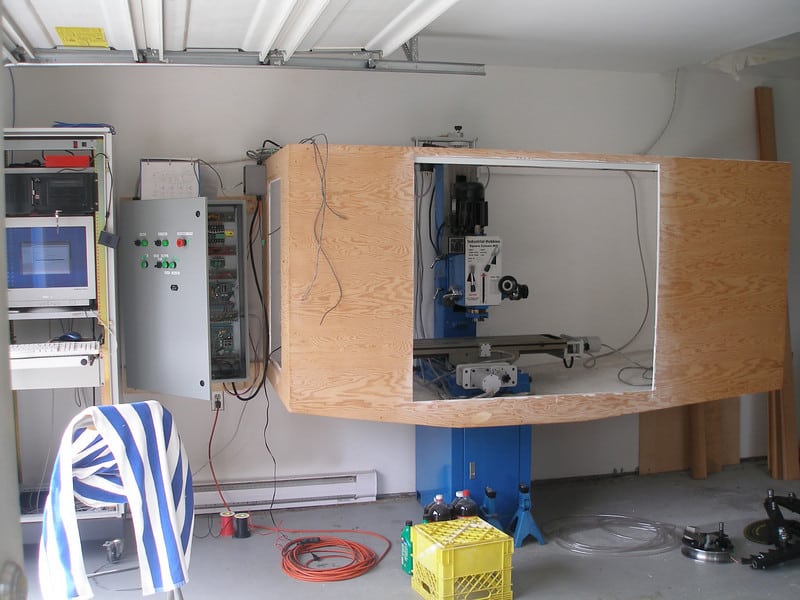
The Enclosure Walls
The walls were straightforward to create out of furniture plywood:
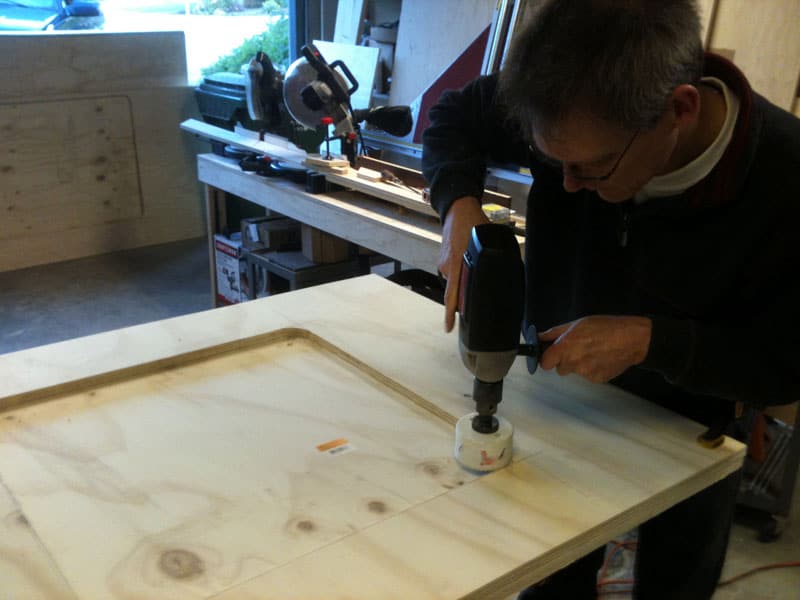
We used a holesaw to create some rounded corners. The straight edges were cut with a RotoZip and a straightedge guide clamped to the plywood. When RotoZipping, be sure to consider whether you're making a Climb or Conventional cut. Handheld tools have a lot of "backlash" so Climb is preferred!
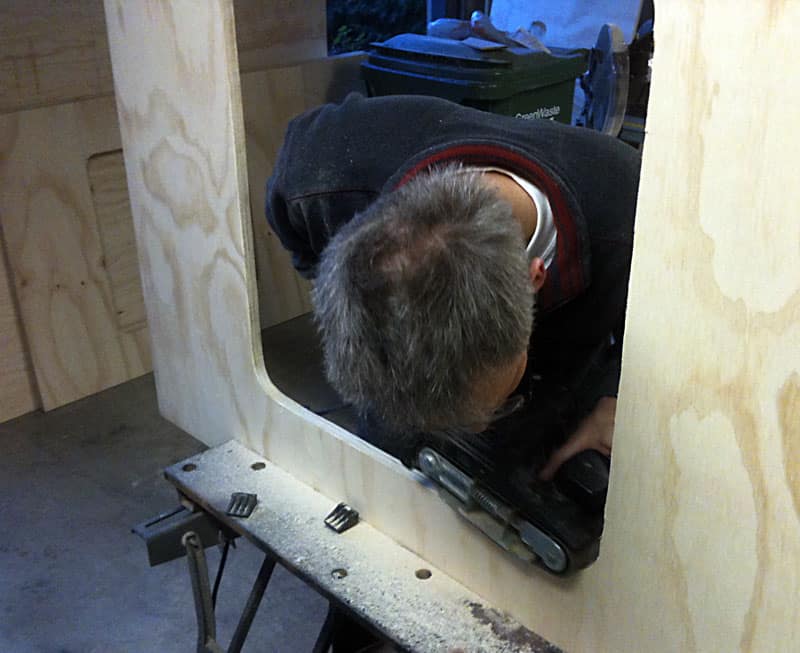
Use a belt sander to clean up and chamfer the edges so they look nice...
The back wall is structurally the strongest anchor of the 4 walls. In addition to the corner braces, it has this back brace made with some plywood and attached via T-nuts and through bolts...
Here is a look at the corner braces. These are just standard house framing braces. Once you've got one top and bottom it adds a huge amount of rigidity without adding weight or bulk...
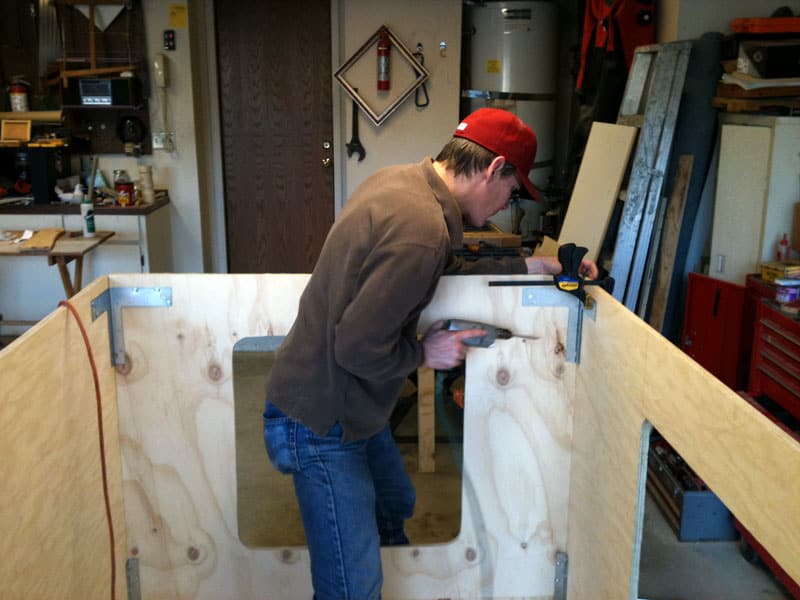
Here you can see the top and bottom corner braces. Bottom ones are anchored in the chip tray. Once all four sides are bolted together in this way, the enclosure is solid!
West Marine Epoxy and Paint
In order to waterproof and finish the enclosure, we applied 3 coats of West Marine Epoxy (I had a gallon left over from my Epoxy Granite Fill project on the mill). This is exactly how they recommend finishing a wooden boat, and those are waterproof, so I figure this has got to work, right?
Once the epoxy was dry, we applied extra silicone (the kind that doesn't have acetic acid which accelerates rust on metal machinery) to make doubly sure:

That pan is pretty well sealed up...
Then we applied 3-5 coats of Ace Hardware enamel in a two-tone scheme. The pan is blue to match the mill and the walls are light gray to brighten things up a bit. The paint was applied with a Harbor Freight HVLP gun system, which worked extremely well. We sanded between coats and kept applying paint until we had gotten rid of most of the grain. We weren't trying to create a show finish, but we wanted it to look decent.

Here's my brother spraying with a touch up gun. We started with that and pretty quickly moved on to the HVLP gun, which worked a lot better...
Enclosure Ideas
I came across some really nice work in a CNCZone thread recently. jid2 has used an inexpensive sheet metal brake to make some really nice parts for his RF45 CNC conversion.
Nothing special, just the usual cheap import brakes available from Harbor Freight and others…
The Enclosure, complete with logos…
A little bigger view…
X-Axis Cover
Nice shot of the air springs. I like the way they wrapped the servos so they’re out of the way…
Check out the thread–lots of good ideas. Makes me wish I had a sheet metal brake.
Spectacular Tormach Flood Enclosure
This was up on CNCZone, just gorgeous:
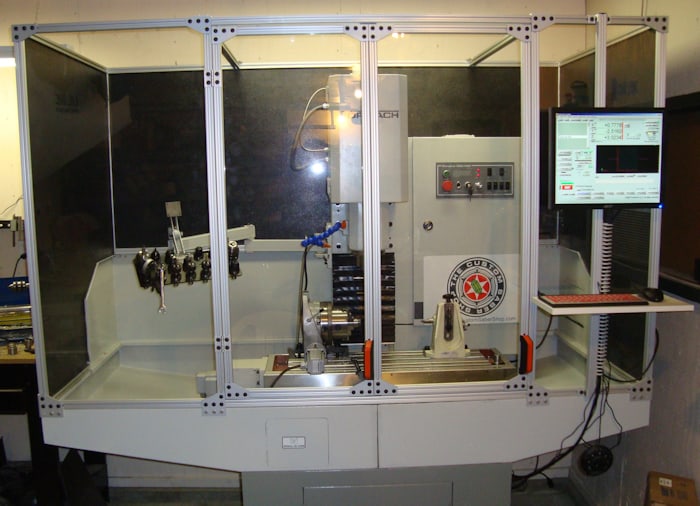
Nice addition to that Tormach mill...
A parts list for the 80/20 enclosure may be found online...
Nice Enclosure for a Small Mill
That's not a chip conveyor, which is what I thought at first. But it is a gently sloping trough that lets the chips drop out as the coolant makes its way back to the reservoir....
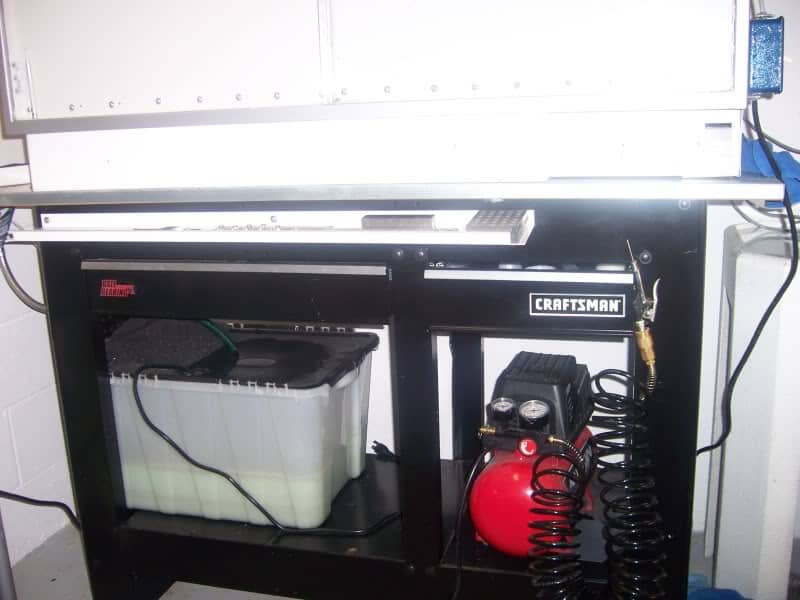
Coolant reservoir and compressor underneath. I like the use of the Craftsman workbench as a stand...
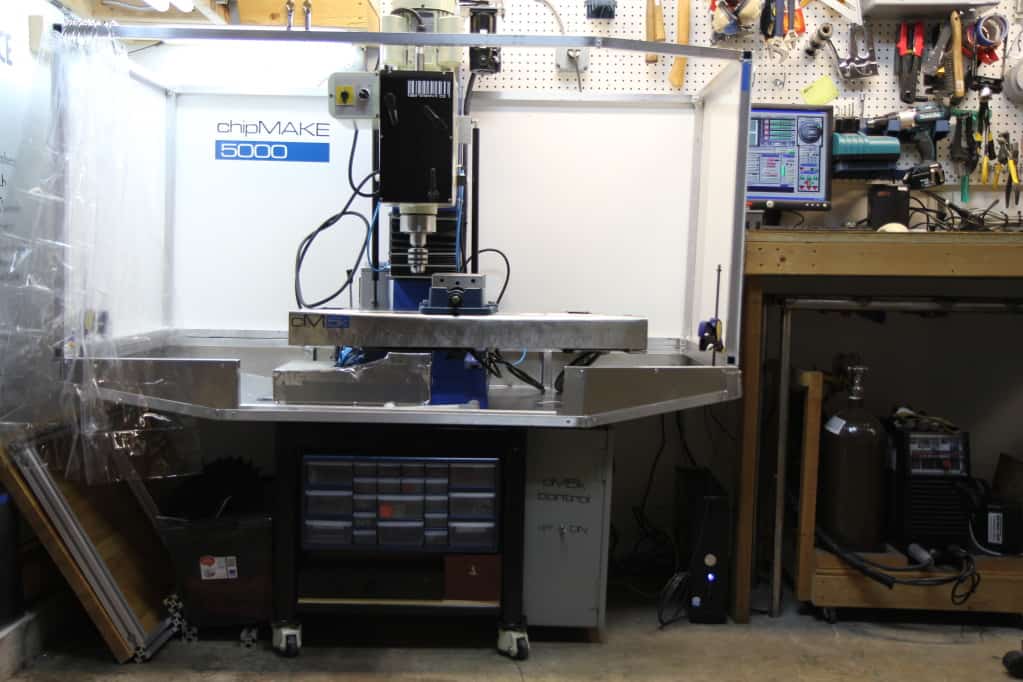
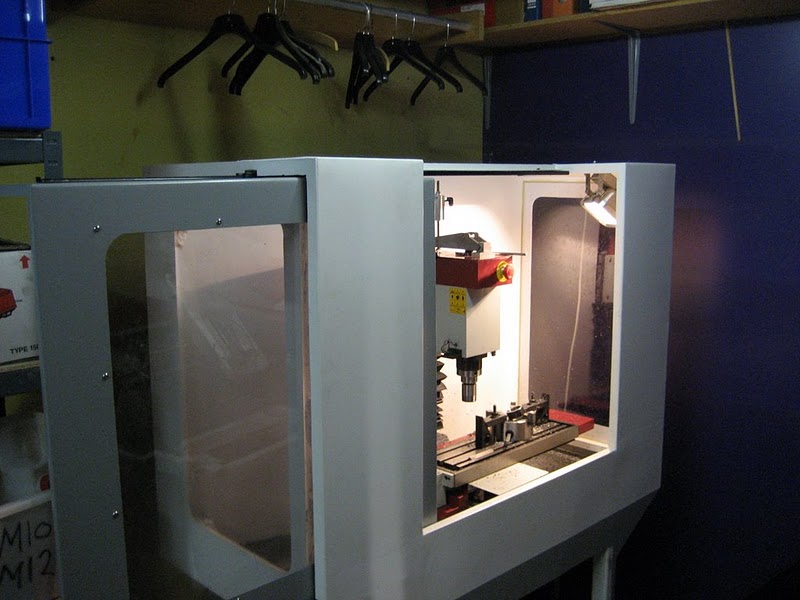
Wooden Enclosure for an Industrial Hobbies Mill
Very professional! I'd be racking toolholders up and down the sides too...
The mess all lives inside the enclosure now...

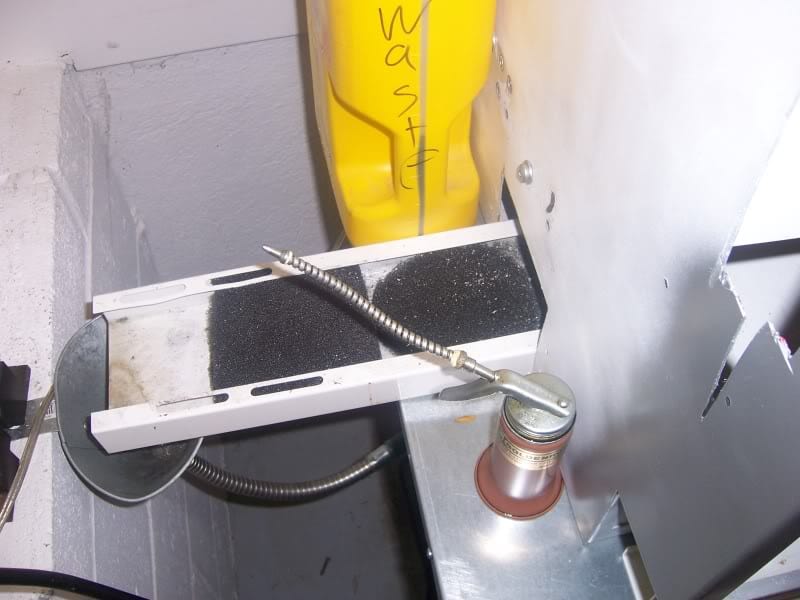
Hocky pucks are fiberglassed into the enclosure for the machine to sit on. They isolate vibrations.
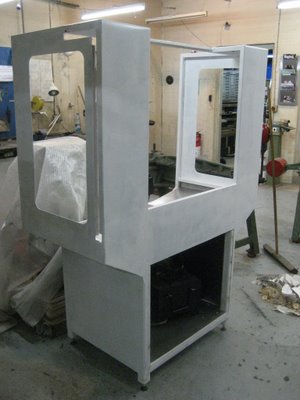
Desktop Enclosure for a KX1

Very clean small mill enclosure...
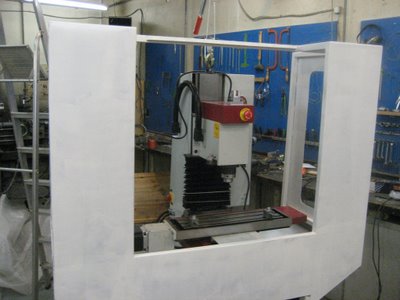
Convert a KX3 to a Pro VMC on CNCZone
Beautiful enclosure comes out looking just like a little VMC!
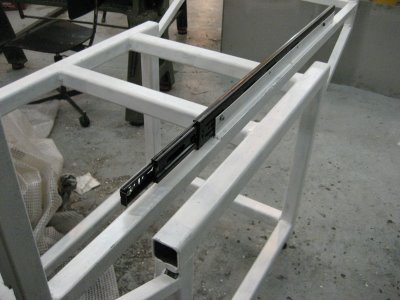
Frame with door track...

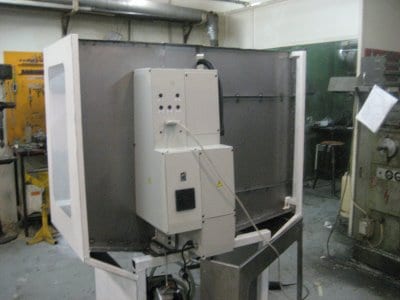
Electronics enclosures have protection from the fray...

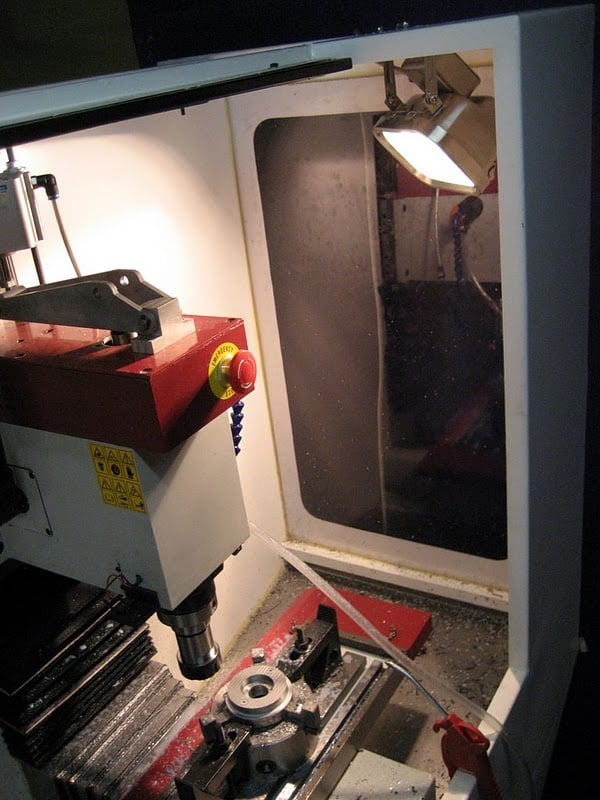
Seems you can never have too much light!
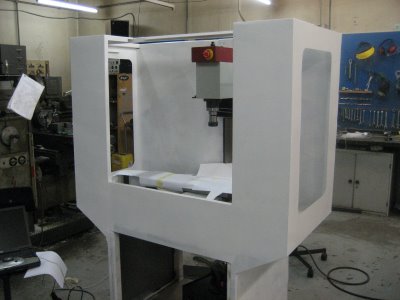
Good shot of the enclosure pretty well finished. I think he should've put a snazzy "KX3" logo top left in red!
Table Enclosures: When You Don't Want to Deal With a Full Enclosure

Nice one from Keen on CNCZone...

Keen's enclosure for his Tormach table from below...
See my Flood Coolant page for details on the Coolant System
Be the first to know about updates at CNC Cookbook
Join our newsletter to get updates on what's next at CNC Cookbook.