Filling the machine castings with Epoxy Granite with Epoxy Granite (sometimes also called "Polymer Concrete") has been a time-honored tradition of some of the finest machine tool manufacturers such as Hardinge with their proprietary "Harcrete" and others.
Hardinge as well as many of these others are quick to point out that the damping properties of epoxy granite are about 8x those of cast iron. Combining the strength of the existing cast iron with the additional damping properties of epoxy
granite seems very attractive. The procedure can make your machine significantly more rigid and less prone to chatter. When you consider that even a heavy "bench" mill like the IH still weighs just under 1,000 pounds, while a really small commercial CNC mill such as the Haas TM-1 weighs in at about 3,000 pounds, you can see we hobbyists are challenged to do whatever we can to increase machine rigidity!
Since I've got one of my two IH mills down for extensive modifications and ultimately CNC conversion, I decided to go ahead and take this step as well. Be sure to read the "Inspirations" section below for the experiences of Davo727, whom I credit with giving me the impetus to go forward.
First, Build a Containment System
It'll be necessary to create a containment system so the epoxy grantie goes where you want it too and where you don't. That's been a real easy project for me using a combination of my Harbor Freight band saw and the 12" disc sander I built. Here are
a few photos showing what I'm up to:
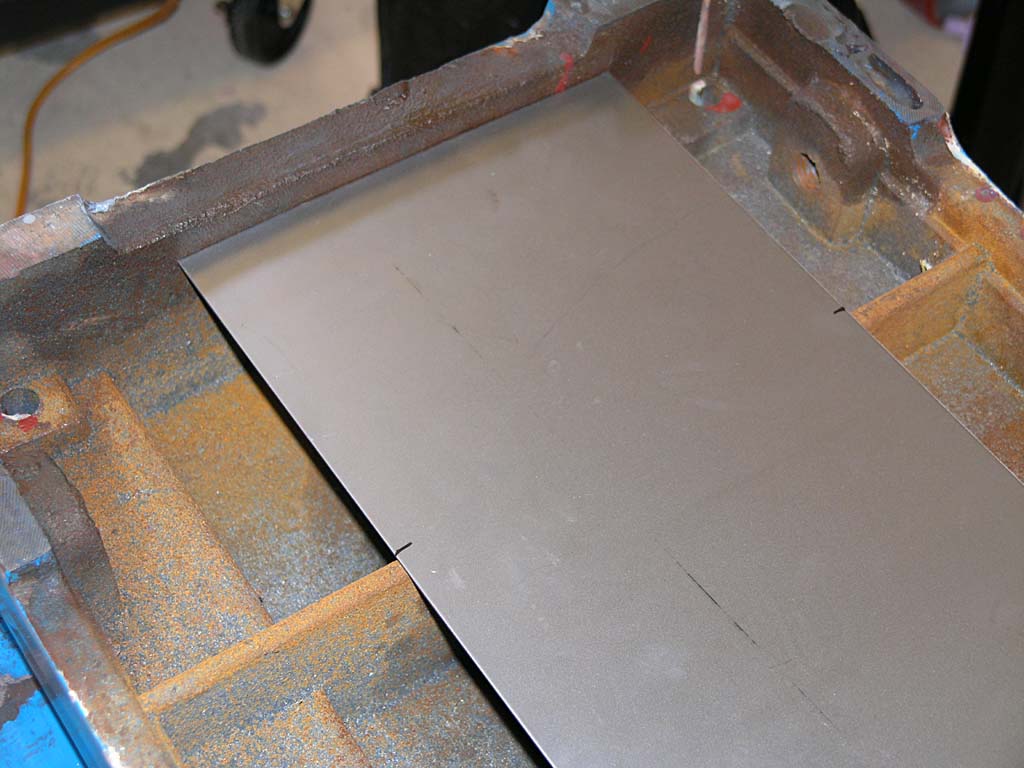
Mark your stock with a Sharpie to fit between the webs. Rough cut on the bandsaw...
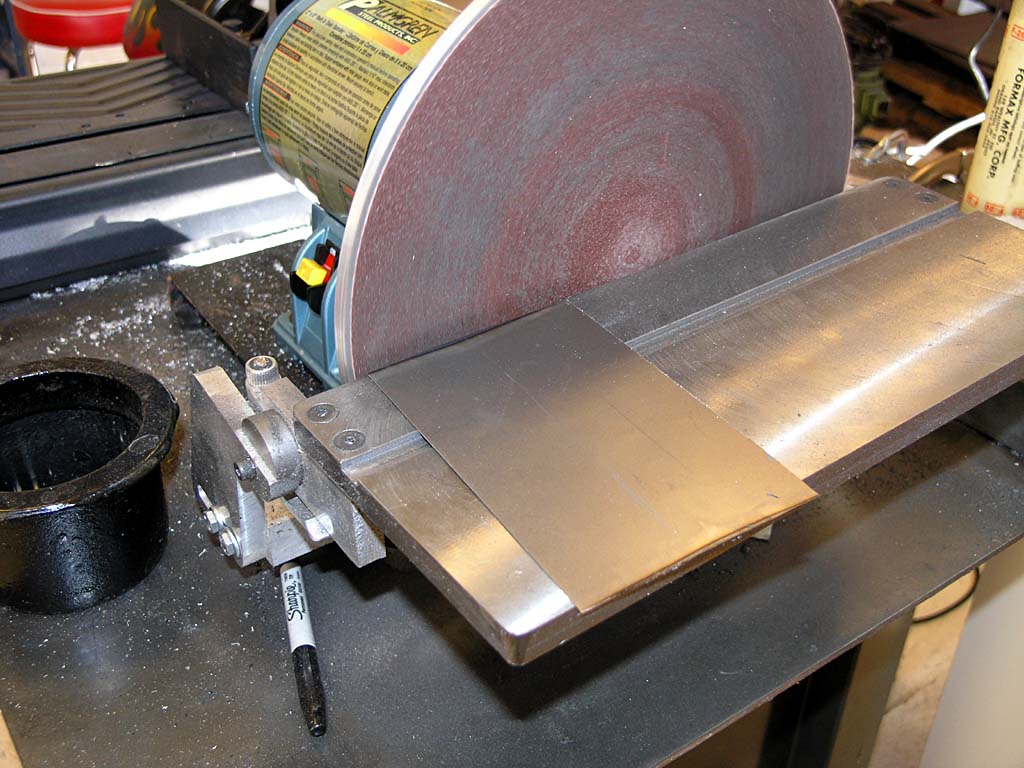
Fine tune onthe disc sander. It's a perfect tool for the task and made it real quick and easy...
I'm using 1" thin wall to protect bolt holes from the epoxy. These are the holes needed
to secure the column, as well as the 4 leveling bolt holes for the base.
I plan to tape the side holes from the inside, but I don't think I'll
extend them further inside the epoxy casting...
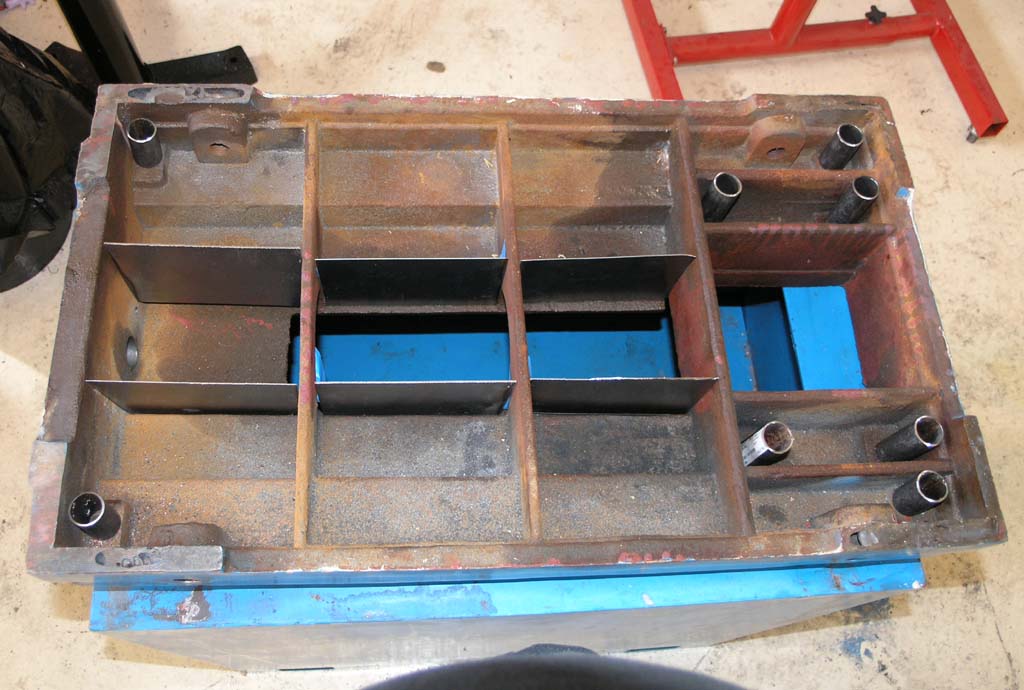
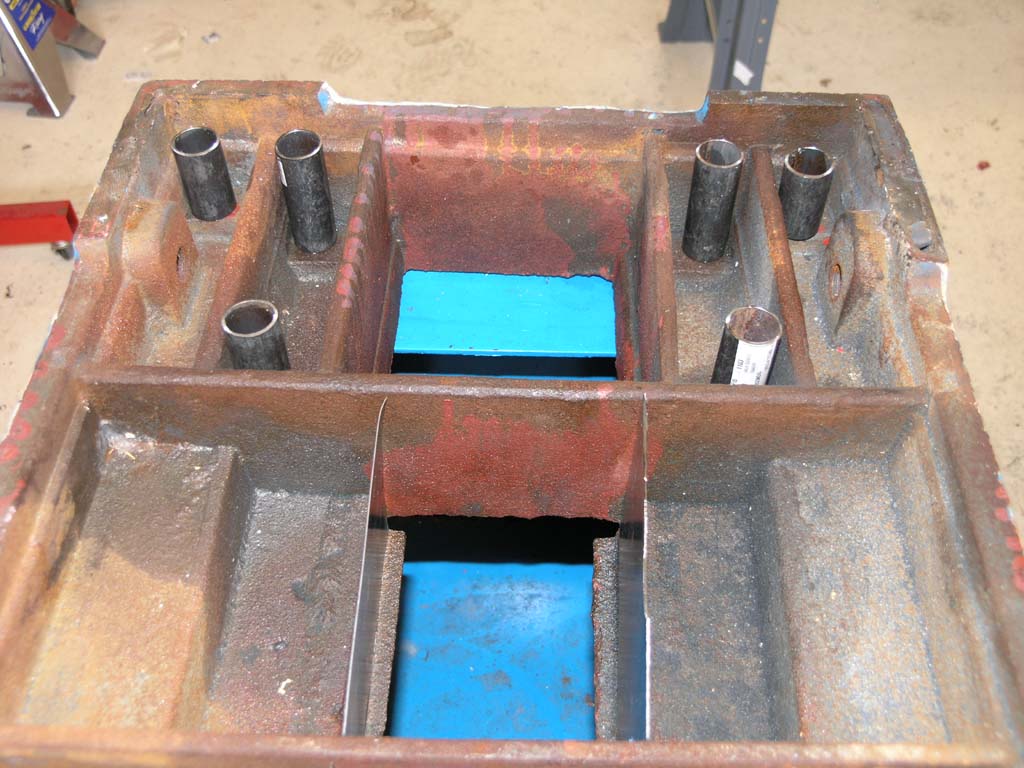
And so we have 6 flat plates between the webs, and 8 short sections of tubing...
I used GE silicone cement to secure the plates and pipes. I just put a fillet of silicone around each edge. It fills gaps very nicely to make a watertight seal:
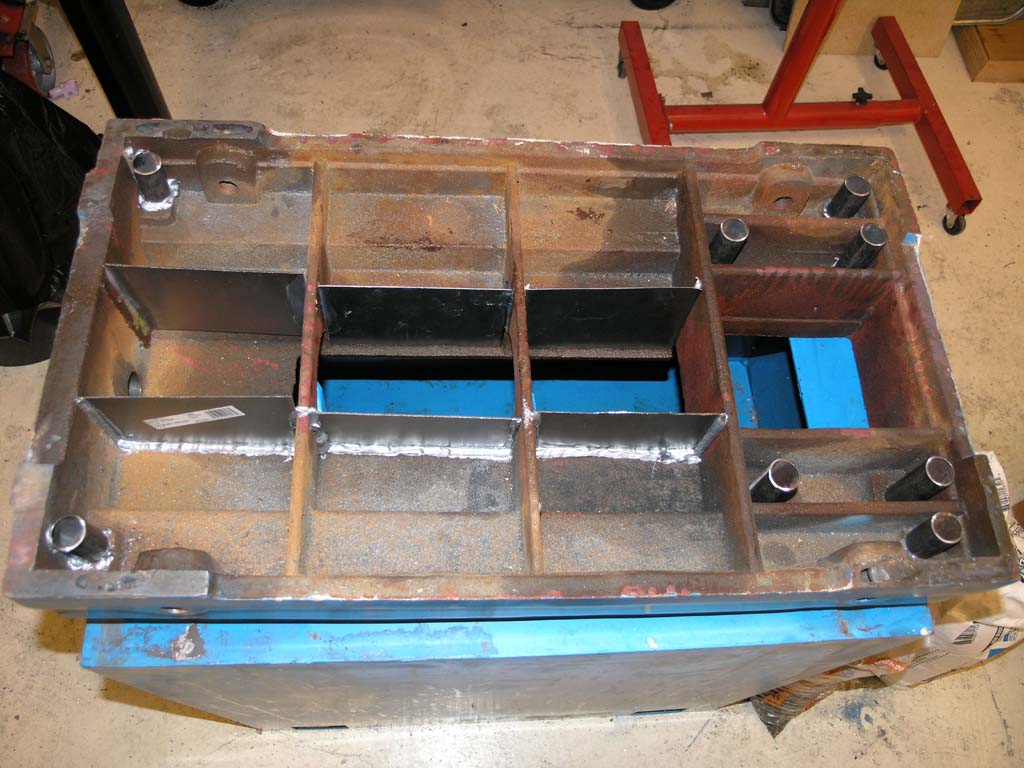
Silicone fillets are designed to keep epoxy in the designated areas...
A thought forfuture generations: you could get all hardcore about trying to fill across that webbing while still keeping enough room for the leadscrew. There's probably room for maybe 1" of epoxy granite all the way across the base of the machine. I'm not going to bother, but it is a thought.
Mixture Ratios and Aggregates
There is much complex mathematics, computer simulations, and good old fashioned experimentation taking place
over on the CNCZone Epoxy Granite thread around the issue of mixture ratios. Their goal is somewhat different than mine. They want to cast machine frames entirely out of Epoxy Granite. That's doable, but a more demanding task. Their working assumption is that finding the optimal mix of various sizes of aggregates that minimizes the amount of epoxy needed to fill the holes and that will hang together as a homogeneous mixture is the secret to maximum performance. Other than Walter, who cast major portions of a CNC gantry machine and Davo727, who followed his own guidelines for mixing the material, not too much has yet been built although there are literally hundreds of pages of postings.
Their optimal mix by computer simulation so far is as follows:
20% Agsco #6 Aluminum Oxide
20% Agsco #4 Quartz
20% Agsco #2 Quartz
20% Agsco #2/0 Quartz
20% 3M #800 Zeeospheres
These quantities are by weight.
The problem is that you have to order from an industrial aggregate supplier to get these materials. There are minimum orders, you have to call and can't just order online, yada, yada. It's a pain, in other words.
Another formula, by a commercial producer of Epoxy Granite in the UK, is as follows:
500 micron and less 10%
silicon powder 5%
1mm 20%
3-4mm 10%
6mm 10%
10mm 15%
14mm 30%
Take that aggregate mix by weights, and you should need just 7% epoxy. Interesting, but again, it requires a lot of different sizes of aggregates.
Walter's last empirical formula I found was as follows. Mix equal portions by volume of each of these components:
#6 Agsco Brown
#4 Agsco Quartz
#2 Agsco Quartz
#2/0 Agsco Quartz
G800 Zeeospheres
G200 Zeeospheres
This will yield an aggregate that needs about 10% epoxy.
Both Walter and the UK guy
suggest evaluating the consistency. For example, the UK guy says if you try to make a "snowball" of the mixture with epoxy. When you open your hands if it's too dry, it breaks down into clumps and if it's too wet, it'll run through your fingers. Walter suggests that if the mixture is too clumpy, just add a little more resin.
From what I can see after reading through literally hundreds of pages, I want to shoot for 10-15% epoxy,
and if I want a mixture that is perhaps slightly less strong, but that pours and molds well, add more epoxy resin. So I figure I'll just shoot for 20% resin and call it a day. Moreover, I don't want to have to search high and low for special components. I'm going to use granite gravel and play sand (supposedly the cleanest grade according to the long thread) purchased at the local Home Depot.
I have a "secret Weapon" in the form of glass beads from my blast cabinet. These are much smaller than the play sand granules, and if I add a little of it to the aggregate, it will displace a little epoxy. That's my fine tuning approach, at any
rate.
Rather than fuss with complicated math (the equations are all in the thread!), I'm going empirical. So, I got out my postage scale, measuring cups, and media, and started conducting some experiments. My goal was just to find an easy mixture that got me in the 20% range for the epoxy. My method was to mix media, and then top off the cup with water to measure how much epoxy would be needed to fill voids. Since the epoxy will be more dense, I figure shooting for a little less than 20% water by weight will get me a slightly lower epoxy ratio plus air bubbles. The latter I will try to minimize with a vacuum rig
I will describe later.
The mixture I arrived at wound up using these proportions by weight with epoxy resin:
62% gravel
23% sand
14% epoxy resin
That worked out pretty darned well if I do say so myself. In terms of volumes, this was 1/8+1/4+1/3 cup of gravel, 1/4 cup of sand, and 1 1/2 pumps each of resin and hardener.
The Test Batch
Okay, having worked out trial consistencies, the next step was to mix up a test batch and evaluate it.
First thing is that epoxy resin generates a cumulative allergic reaction. You don't want it on your skin, so wear rubber gloves!
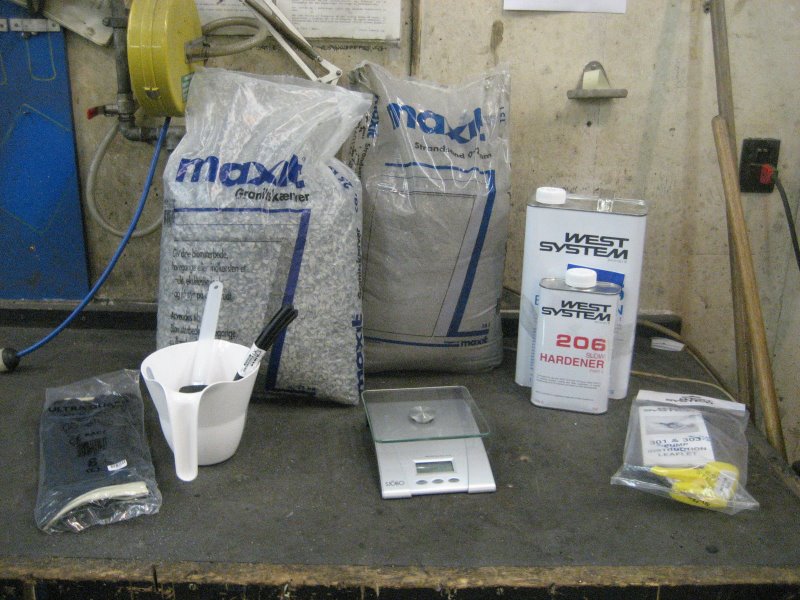
Here's what my West Marine resin looks like along with some odds and ends to help out:
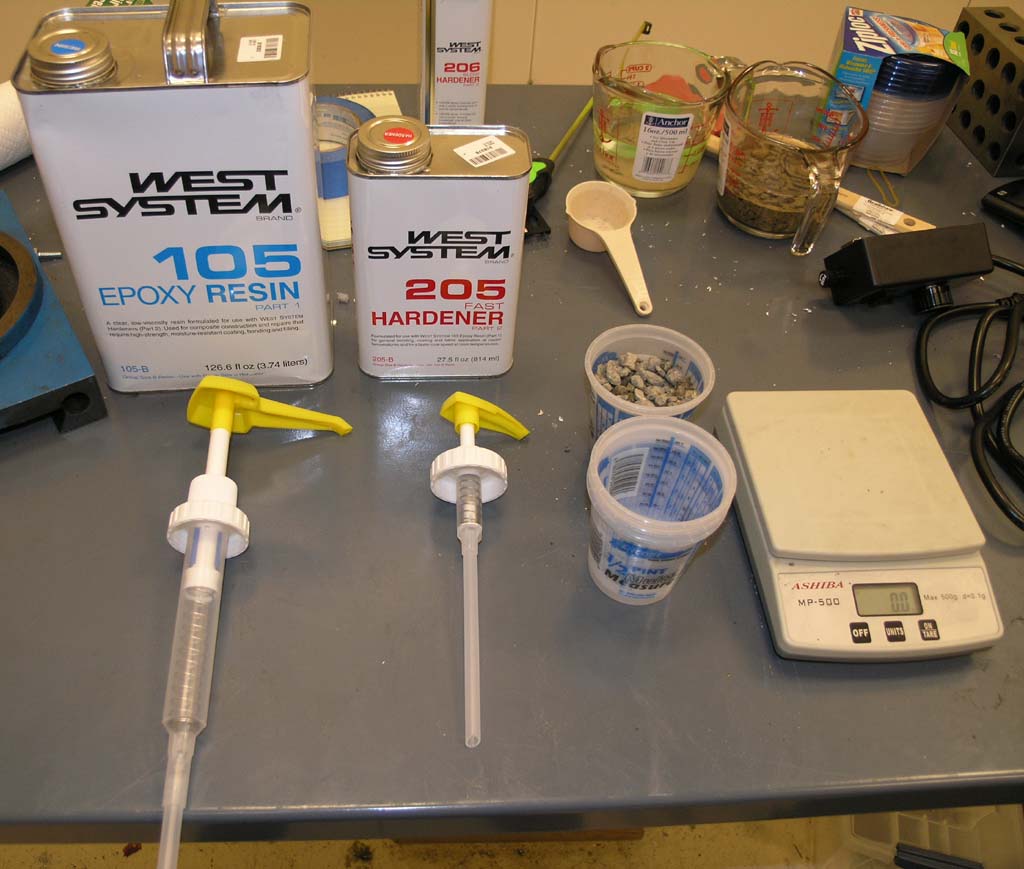
Resin, Hardener, Metering Pumps, Disposable Mixing Cups, Postal Scale, etc. We're making toxic mud pies here people.
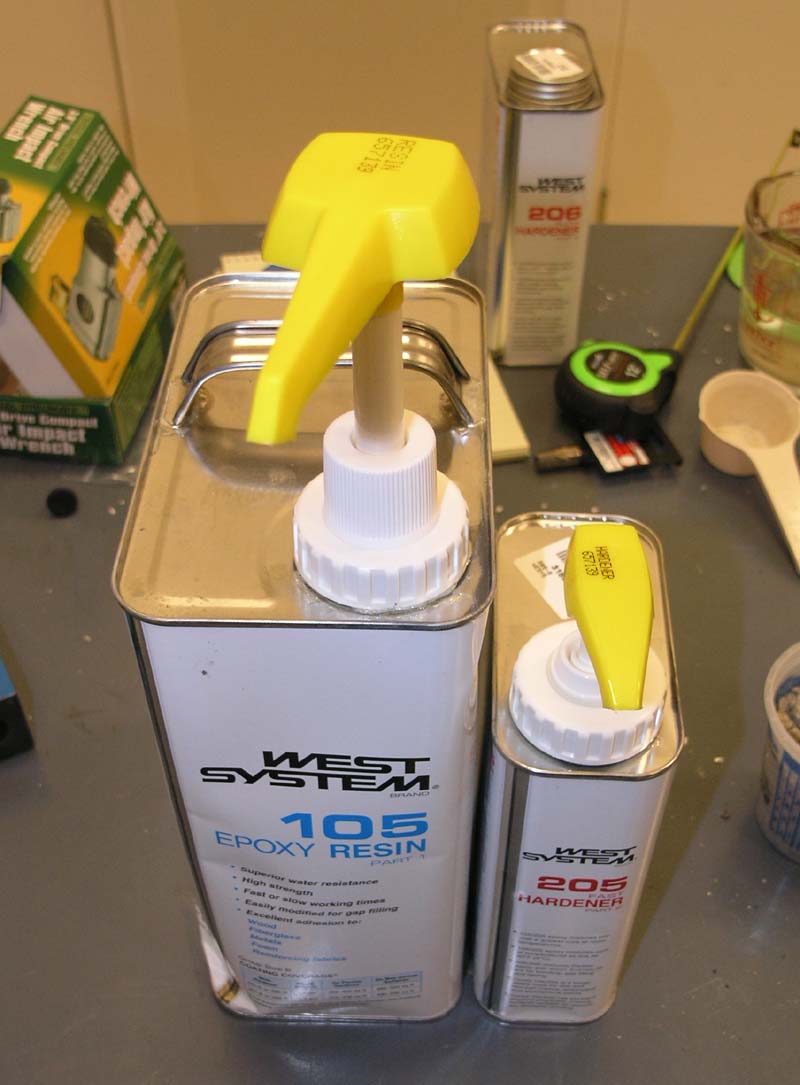
The West Marine pumps are cool. Each pump meters the right proportion of the critical
fluid so you don't have to worry about it. The instructions say you can
leave the pumps on even in storage and worst case is you may have to clear
a nozzle of gummy liquid. The pumps worked great: wouldn't want to be
without!
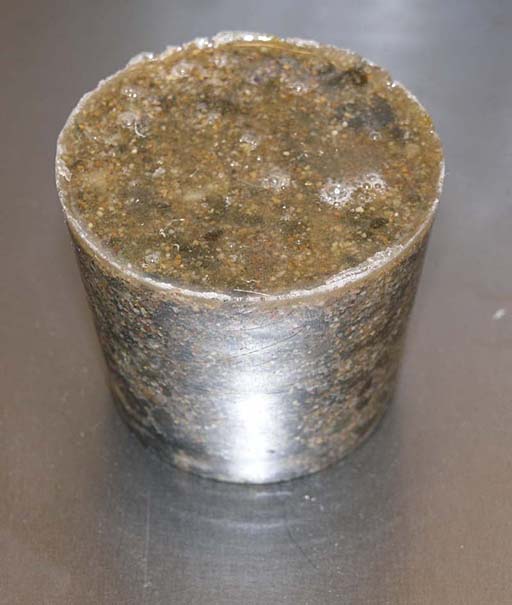
The consistency came out great. I started with the epoxy in the cup and then folded in the aggregate (already
mixed) a little at a time. At one point I thought it would be too dry, but I kept right on stirring until everything was coated and it came out looking pretty decent:
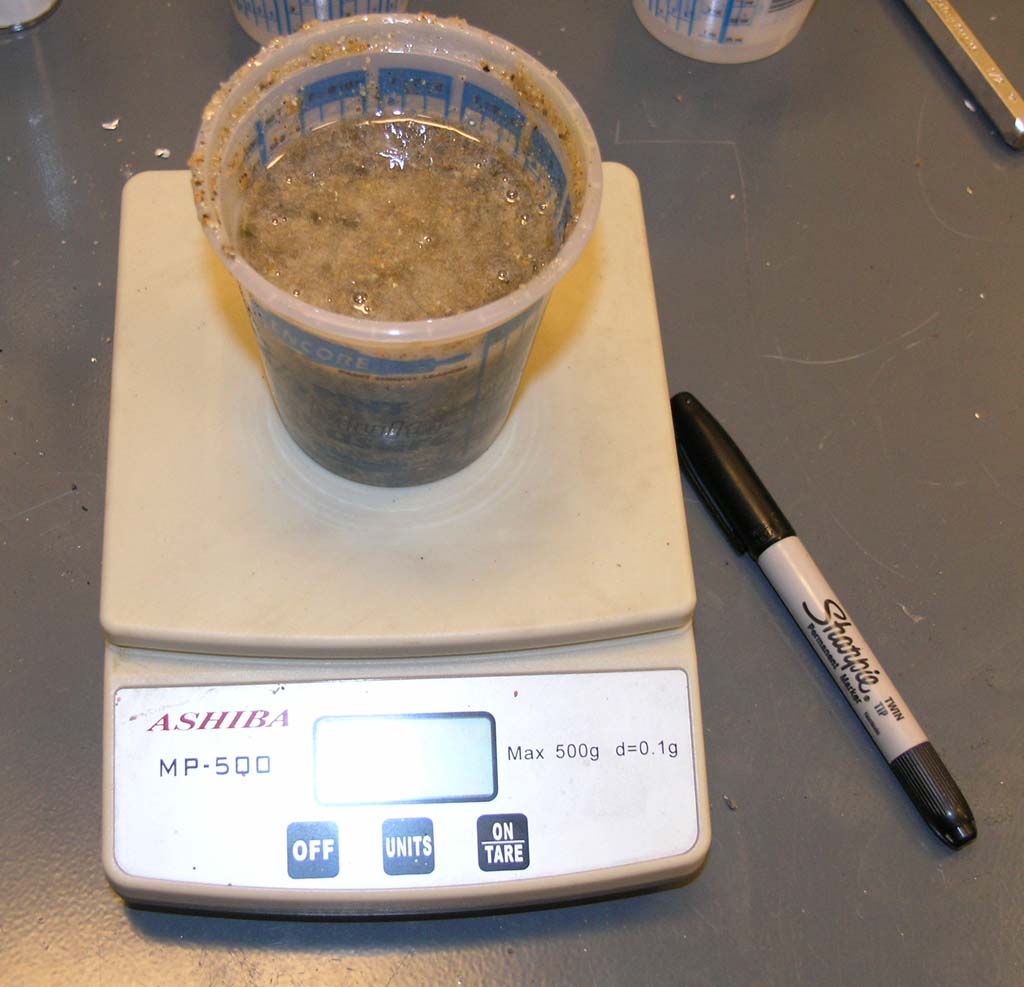
It looks like it may even be a little wetter than needed at 14% epoxy resin. The easy answer is to add sand or bead blast media, probably just a little bit.
This is not critical for my application. If I wanted a real smooth optimal casting, I would play with it some more. Meanwhile, I have to wait until tomorrow to see how it sets up. Visually, I'm thinking I have a bit more sand than Davo727 did, but I can't be sure of that.
Here's what we got the next morning:
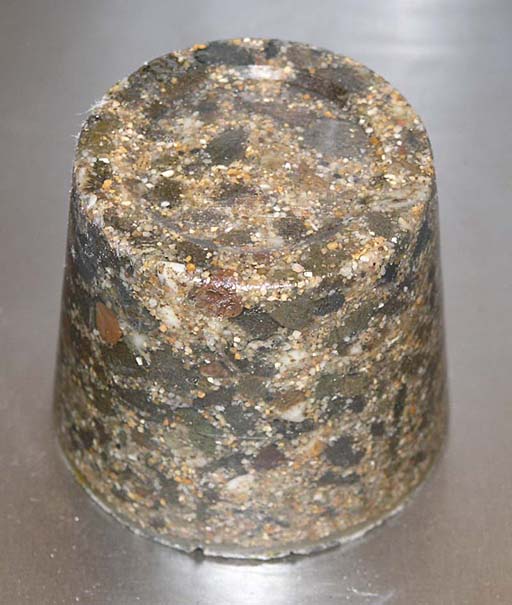
Test was successful!
The test was successful!
The aggregate is embeded in the epoxy. The slug took a very accurate impression from the cup-you can even see scratches made in the plastic by the gravel's sharp edges are faitfully reproduced. I suspect creating a precision surface in this material is easy if you have a precision mold. The material released easily from the plastic cup-just a couple sharp raps on workbench and it dropped right out. The ugly parts are at the air-epoxy interface from the top of cup. There are various approaches to eliminating the air bubbles, but it doesn't seem like there were many bubbles trapped in the material from the mixing process-they're all at the top. A quick pass with a heat gun is rumored to be the quick trick to get rid of those.
At this point, I can't see much point in monkeying with success. It may be that a 10% epoxy formula would be better, but this will work just fine for this project. I plan to keep Epoxy Granite in mind for other projects. I understand it sets up with an accuracy of 0.001" on top if you get rid of bubbles, so you could make a surface plate from it.
Filling the IH Mill's Base
Okay, let's begin filling the base. We've got all the dams built. Here's how I go about it:
]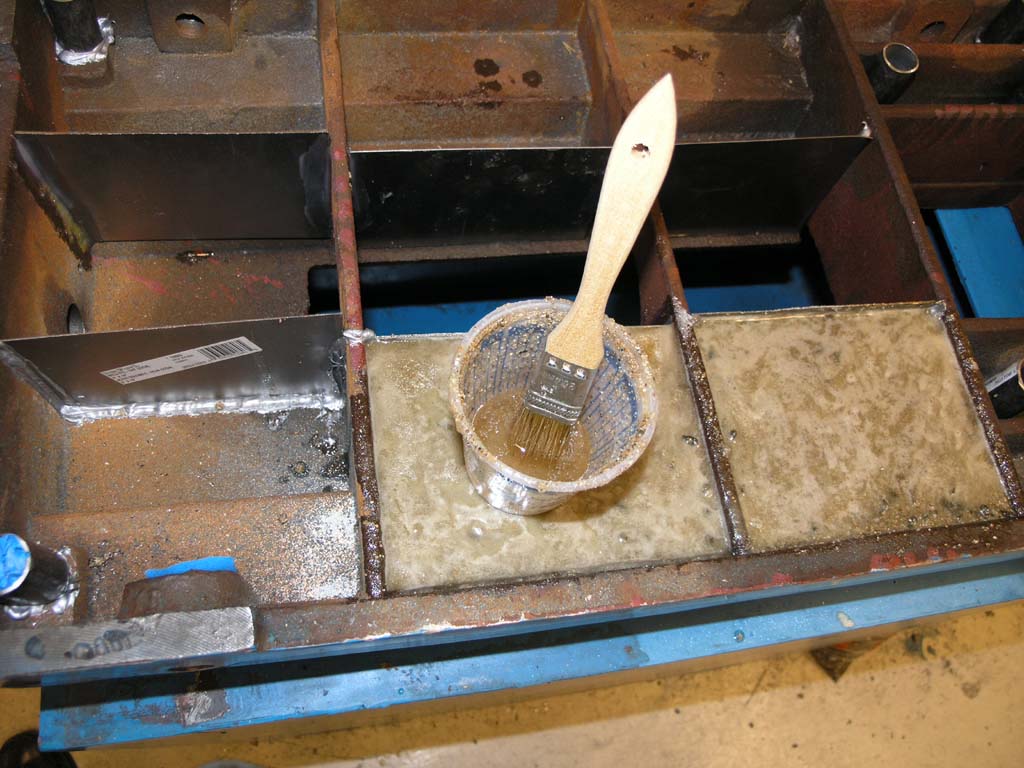
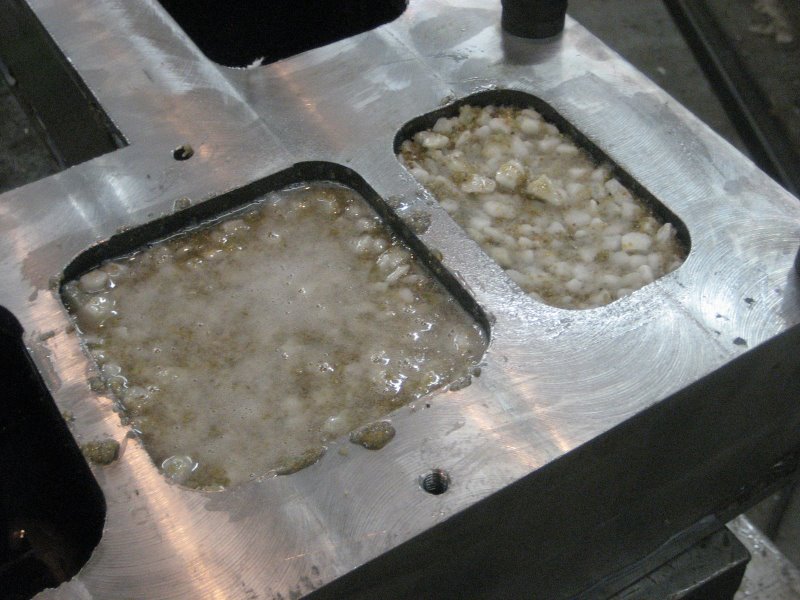
First, I mix up a little batch of epoxy. Those pumps make it dead simple: 2 pumps resin,
2 pumps hardener, mix well with the chip brush. Note the two bays already
filled have cured overnight and are lookin' good!
Next I like to paint all the surfaces with the first batch of epoxy. I want the epoxy
to bind really well to the metal. Cross linkages from this layer back
into the aggregate will ensure things are really tied together well...
Now I quit taking pictures because I was juggling!
You can do the work in layers, so long as the layer you pour on top of hasn't set up the epoxy can still form good cross linkages. According to West Marine, you're good even after things appear to be hard so long as you can still get an impression from your thumbnail on the epoxy. I don't let it get even close to that. The way I work is I mix aggregate and epoxy in the little cup, but too wet. I stir it well with the chip brush to make sure everything is well coated. Then I pour that into the base. Next I put on a layer of dry material without additional epoxy. I know my ratios, so I'm not just doing this by eye. When I stir that into the wet layer, I get a consistency like peanut butter and everything is well coated. I'll go like this for a couple cup fulls, and then watch it for two or three minutes. Usually some liquid epoxy rises to the surface. That's when I add a layer of glass bead media on top:

The glass beads are very fine, so they'll fit into the holes between the sand and gravel. More stirring until it's all well coated, and I will have a lot less epoxy on top. So I go to another layer. Eventually, I get to the top of the bay:
See all those nasty air bubbles? I like to get rid of them...
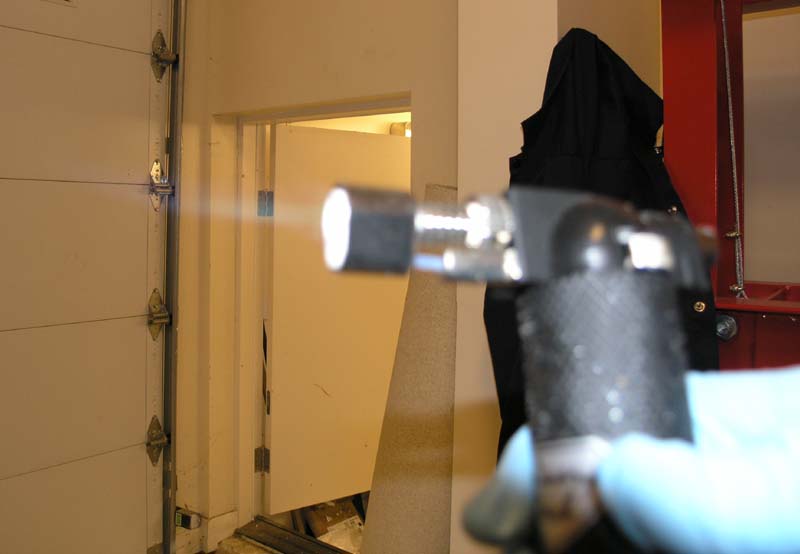
This lousy out-of-focus pic is of a little push to light butane torch that is perfect for bubble
busting. Play it slowly over the surface and the bubbles disappear quickly!
Leaving me with something more like this. I could've add more sand or glass beads, but
I'm concerned about overflowing, so I stopped. Another bay is complete!
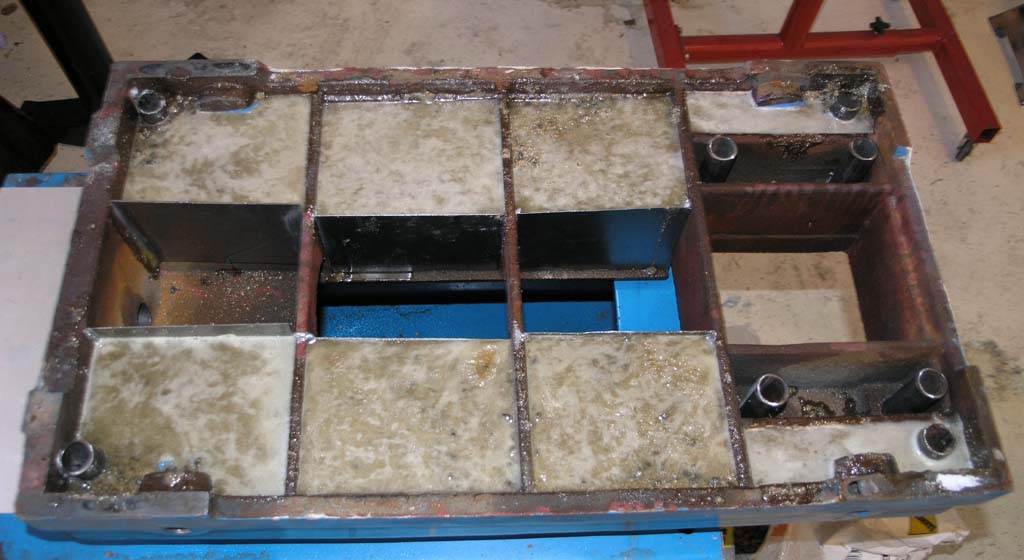
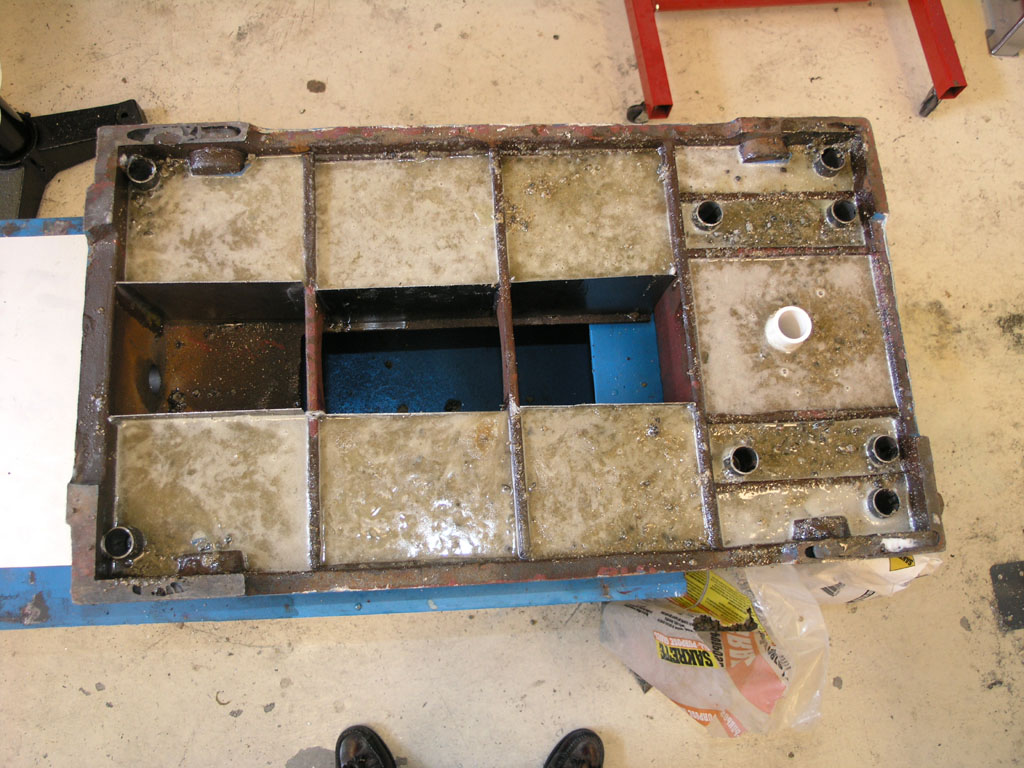
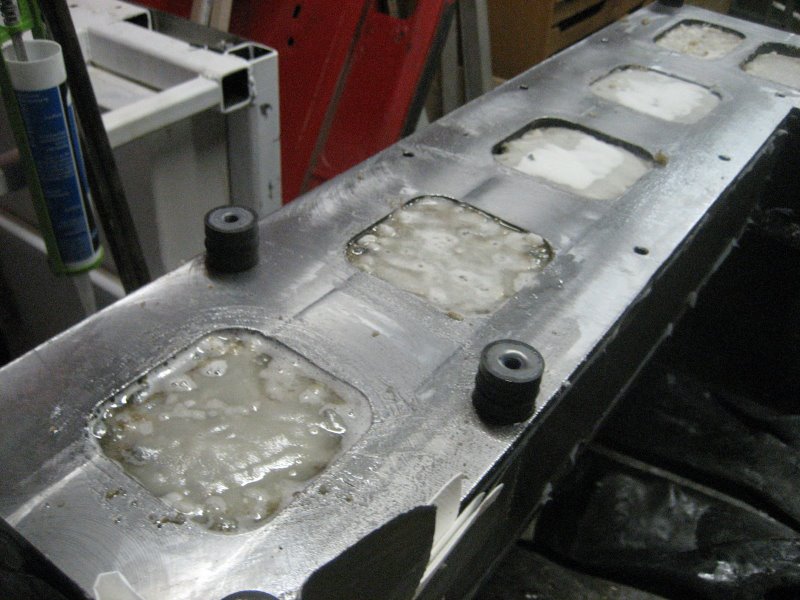
Working like this, I made it all the way around, and filled all the bays except the
center column hole and the 2 bays where the 4 column bolts come in. The
whole casting is considerably heavier, and when tapped with a hammer,
sounds a lot more solid and less "ringey"...
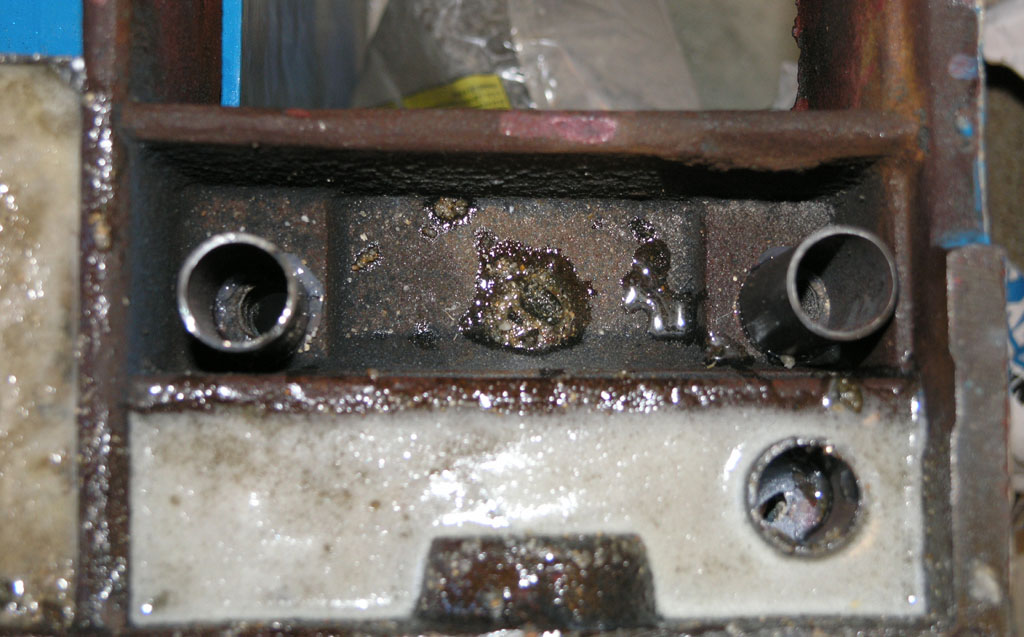
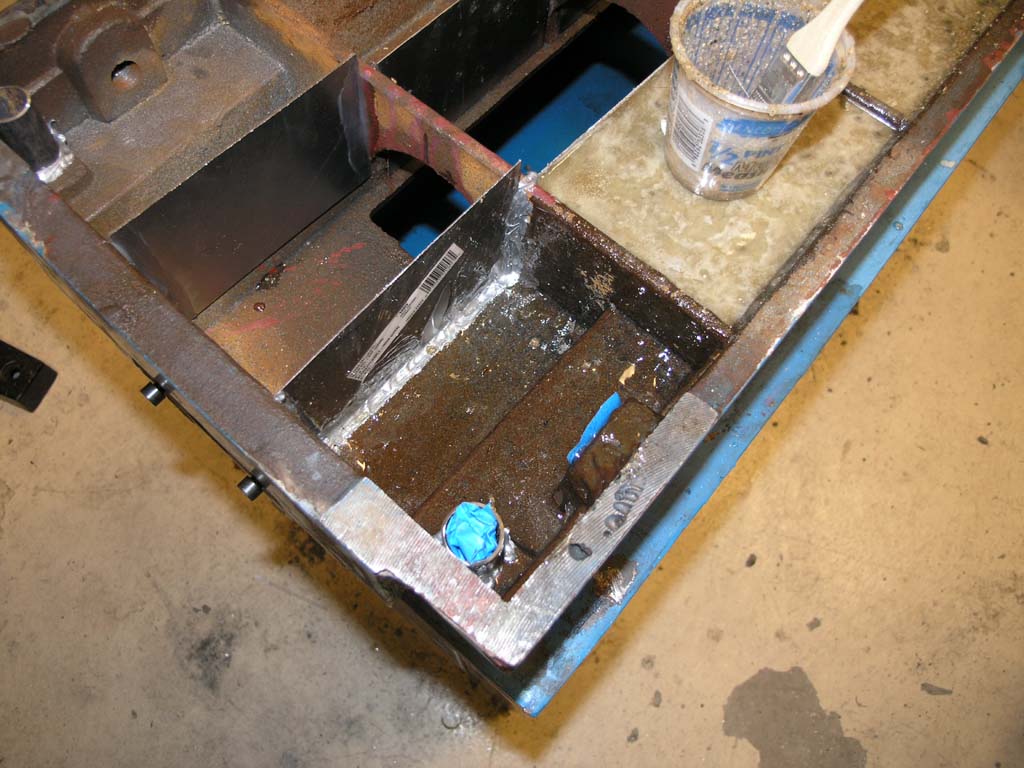
My concern at this stage is whether the pipes that protect the column bolt holes from
epoxy are really epoxy tight. I had a couple leaks in the rest of the
bays. Nothing major, but it would have been enough to gum up the works
terribly if even a little epoxy ran down those column bolt holes!

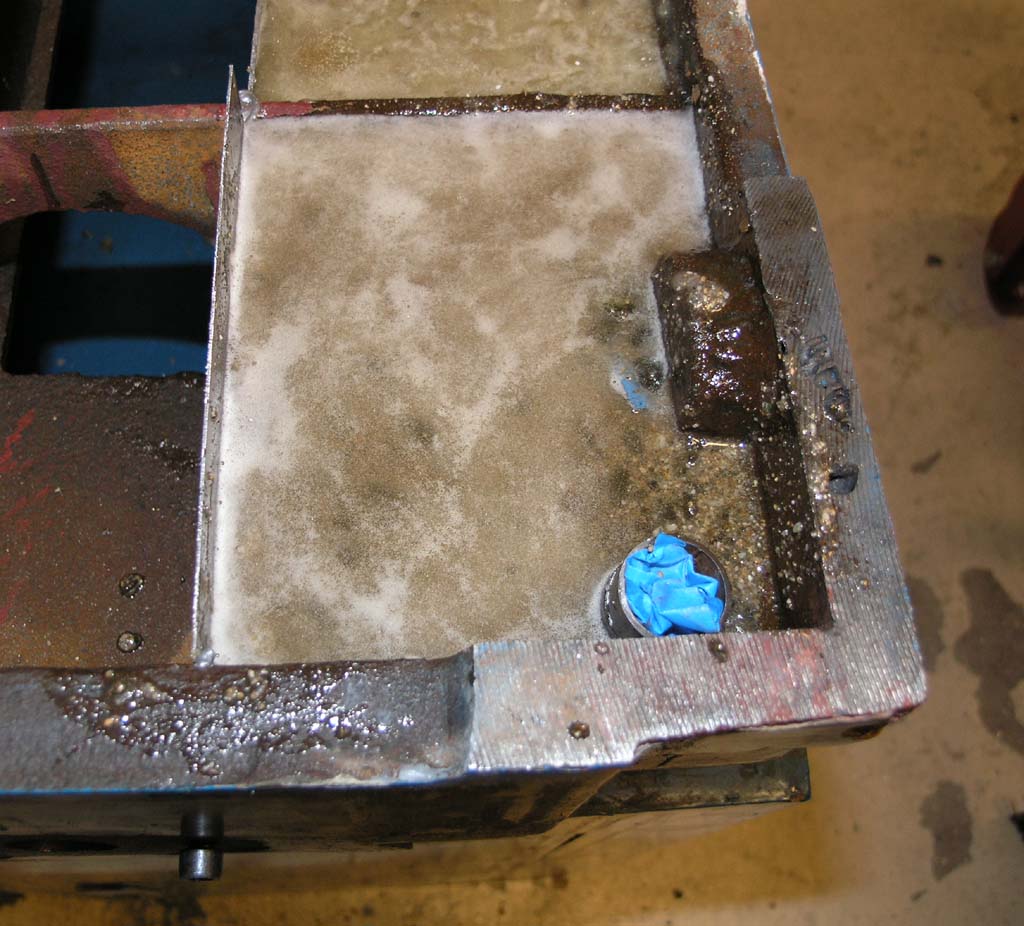
Accordingly, I am going to insert the bolts into each hole just a short ways...
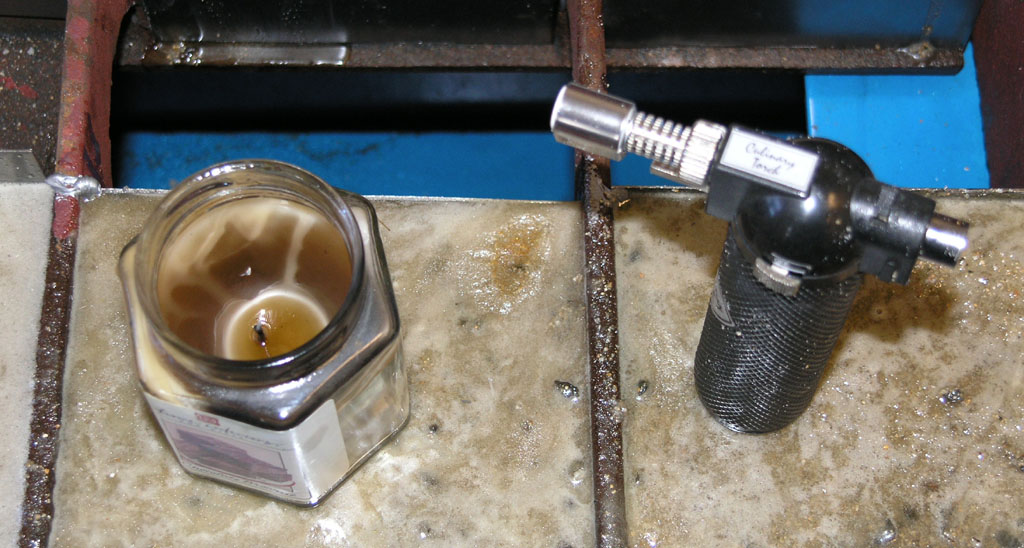
And then I will fill until I am above the casting line with wax from a candle. The wax
will harden and keep the epoxy out. When the epoxy has set, I can heat
up the wax and melt most of it out. The bolts can cut any remaining wax
that gets in the way very easily. At least that's the theory. We'll see!
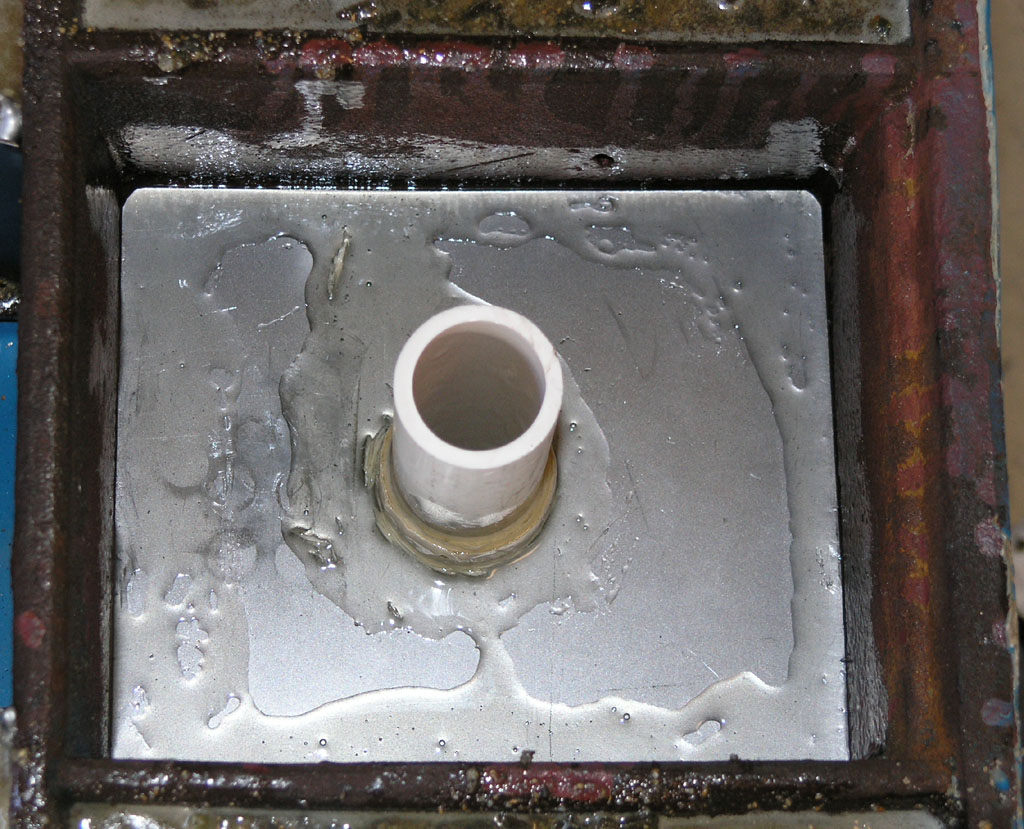
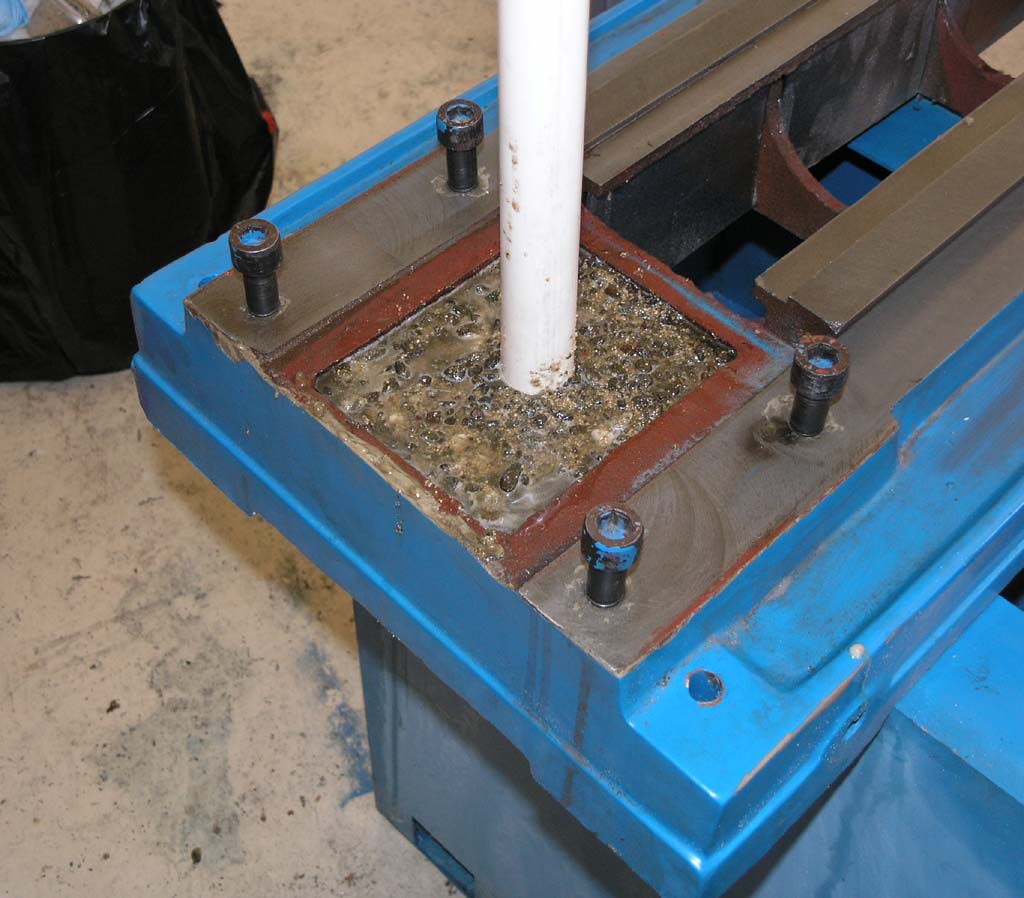
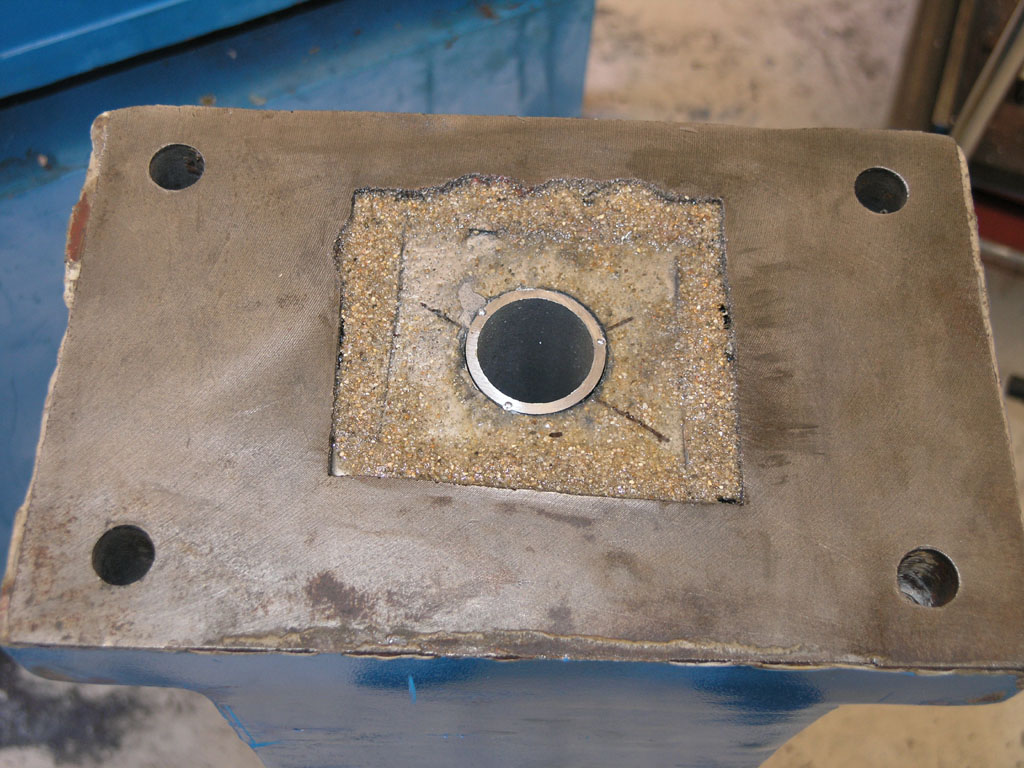
Next I made a plate to fit the center column hole which goes all the way through.
I've got a piece of PVC pipe that will serve as the channel for my big
1 1/8" column bolt. I've just applied copious amounts of epoxy to
the edges to seal it up. Thicker epoxy would've been better for the purpose,
but this is what I had on hand...
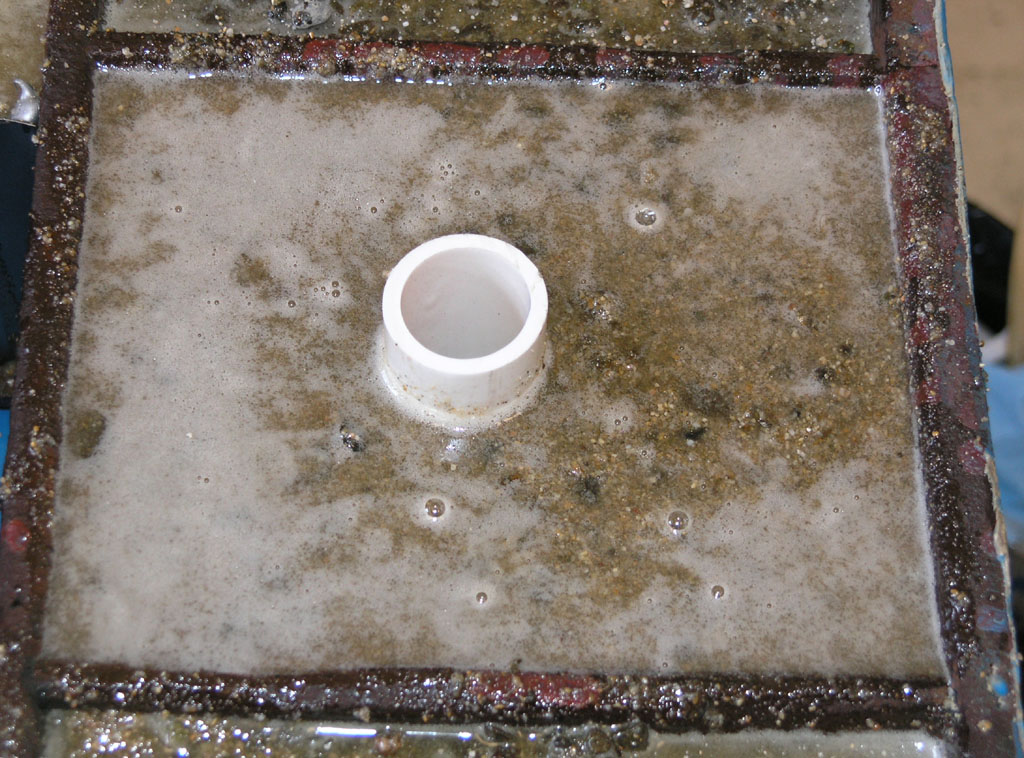
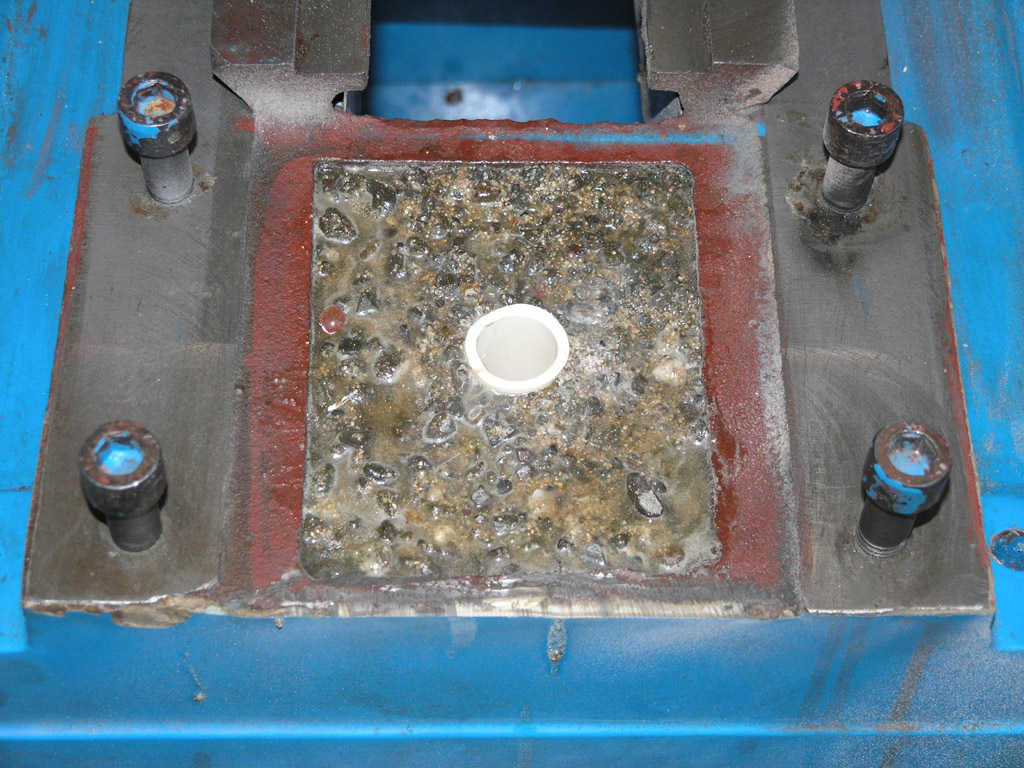
Just finished filling and still need to go over it with the blowtorch to pop the bubbles...
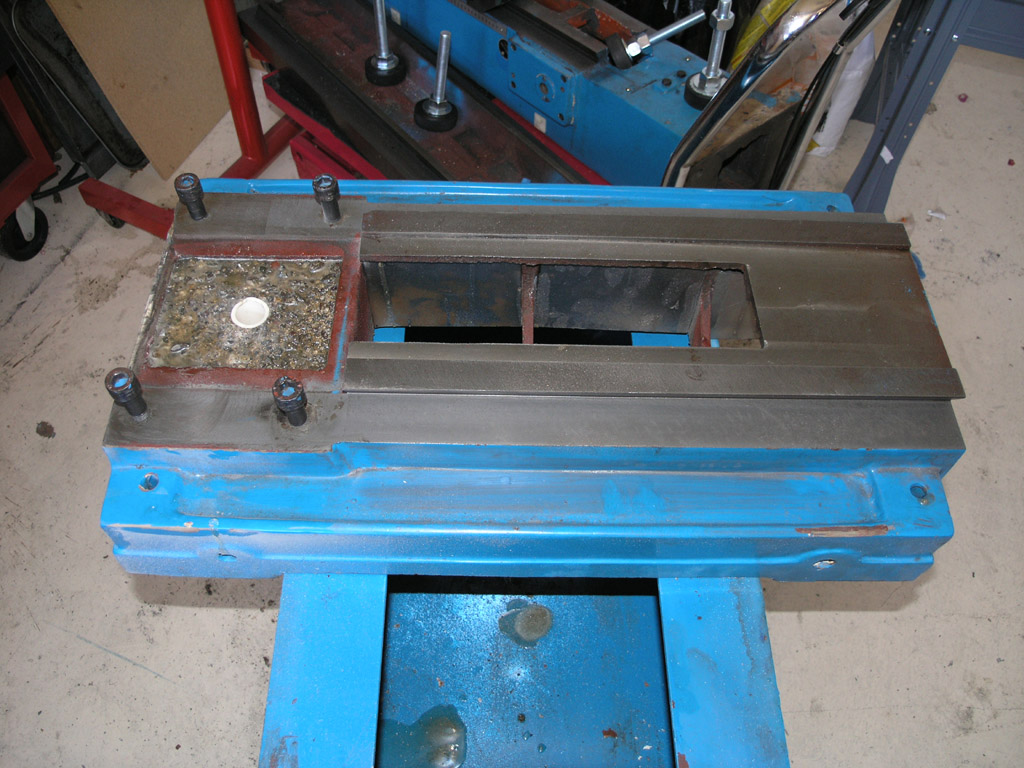
A view of the whole thing. Column hole is still drying but the other wells are set...
Once that had set, I flipped the base over with help from my brother and poured the
small top cavity above the metal plate. The base now weighs close to 200
lbs! It is markedly "deader".
Here you can see I trimmed the PVC liner for the big central bolt hole that will help
anchor the column...
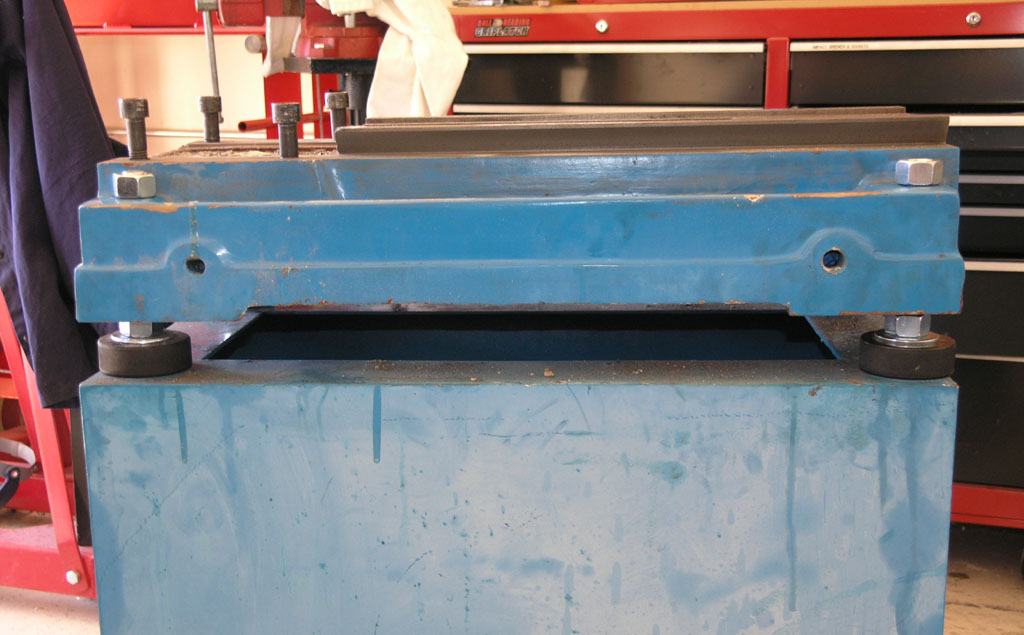
Looking good! Next step for the base is a set of leveling feet...
Vibration Dampening "Hockey Puck" Leveling Feet
Borrowing an idea I first saw Aaron Moss put up on the old IH site (probably still there), I made a set of leveling vibration dampening feet for the mill from hockey pucks.
Somewhere along the way I bought a crate of used pucks for almost nothing on eBay. They machine very nicely!
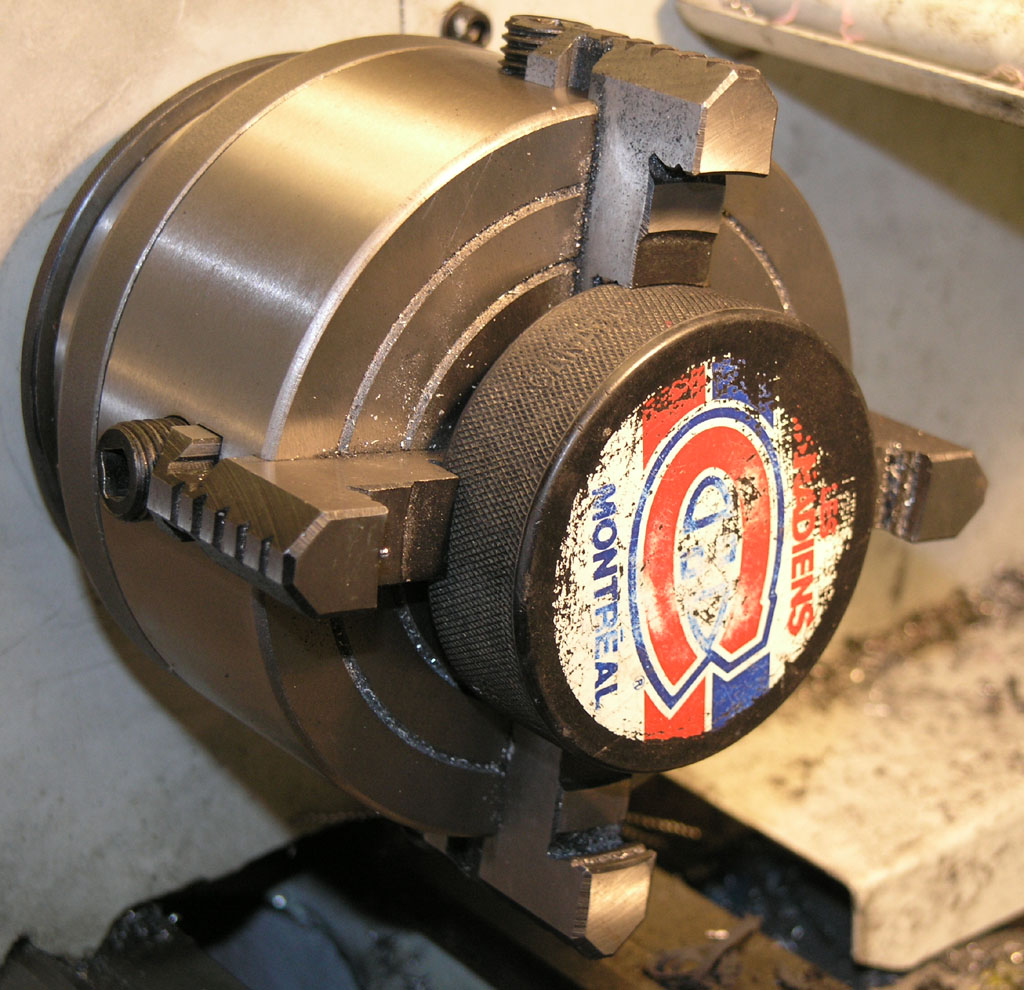
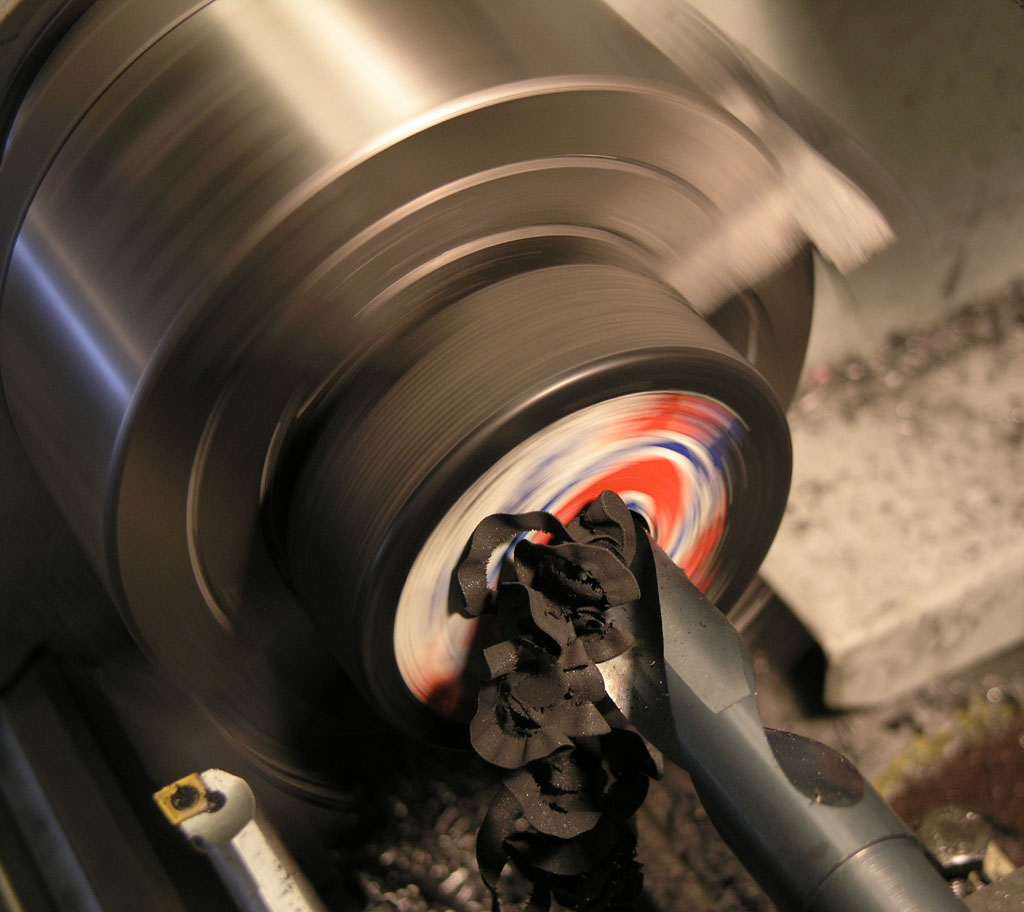
Speed is fairly slow, about 1/4 of my lathe's capacity or maybe 300-400 rpm. Wish I had
a tachometer. The Silver & Deming bit goes right through it like butter...
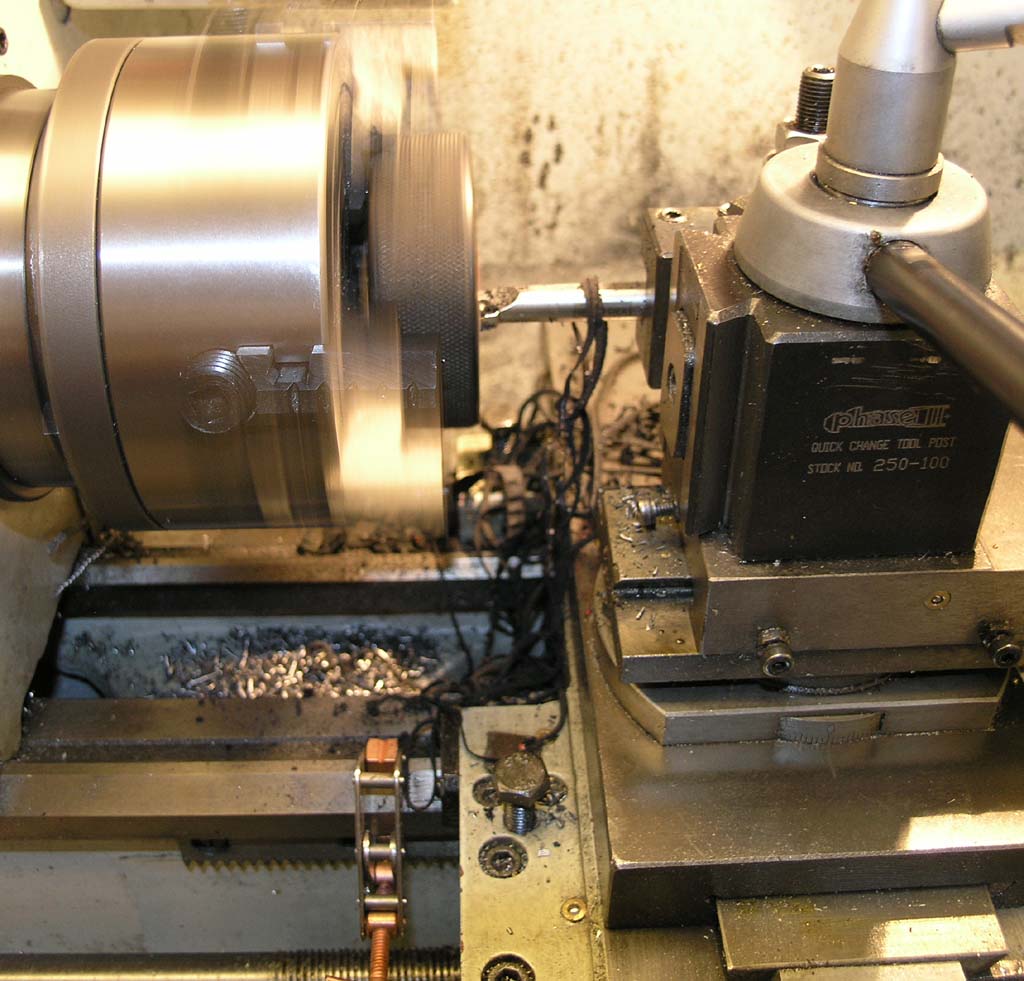
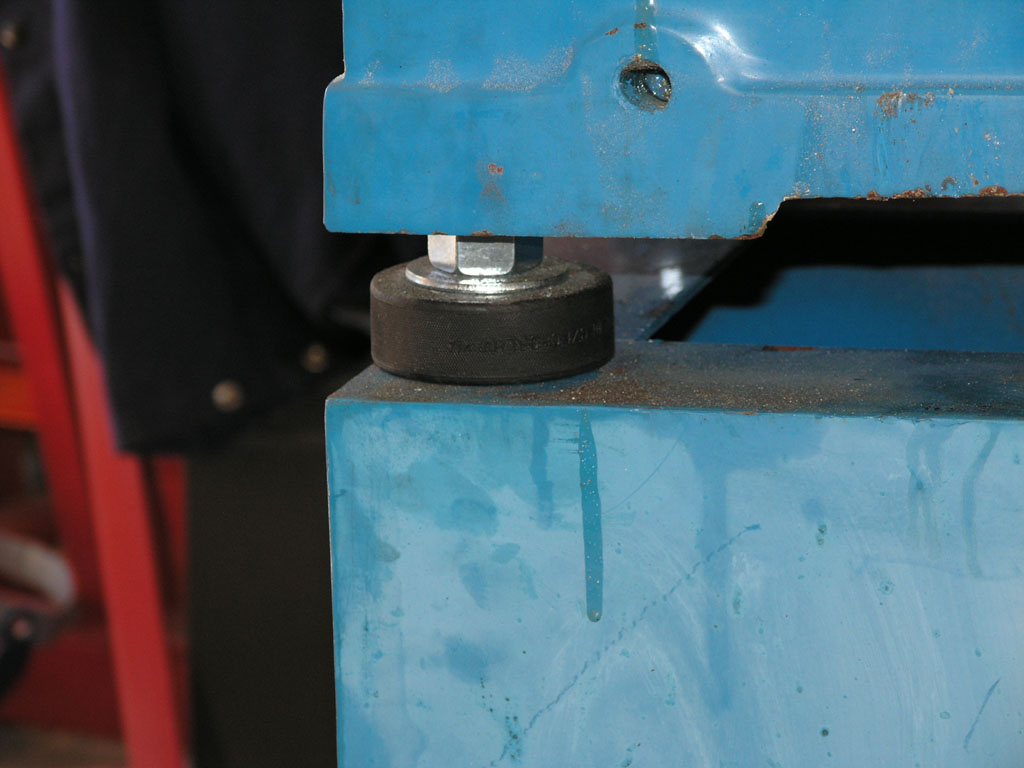
I bore a little pocket for the bolt head with a CCMT boring bar. Note the Kant-Twist "carriage
stop" so I get the same depth each time. I used a pair of calipers
to monitor the diameter of the bore, which was not critical...
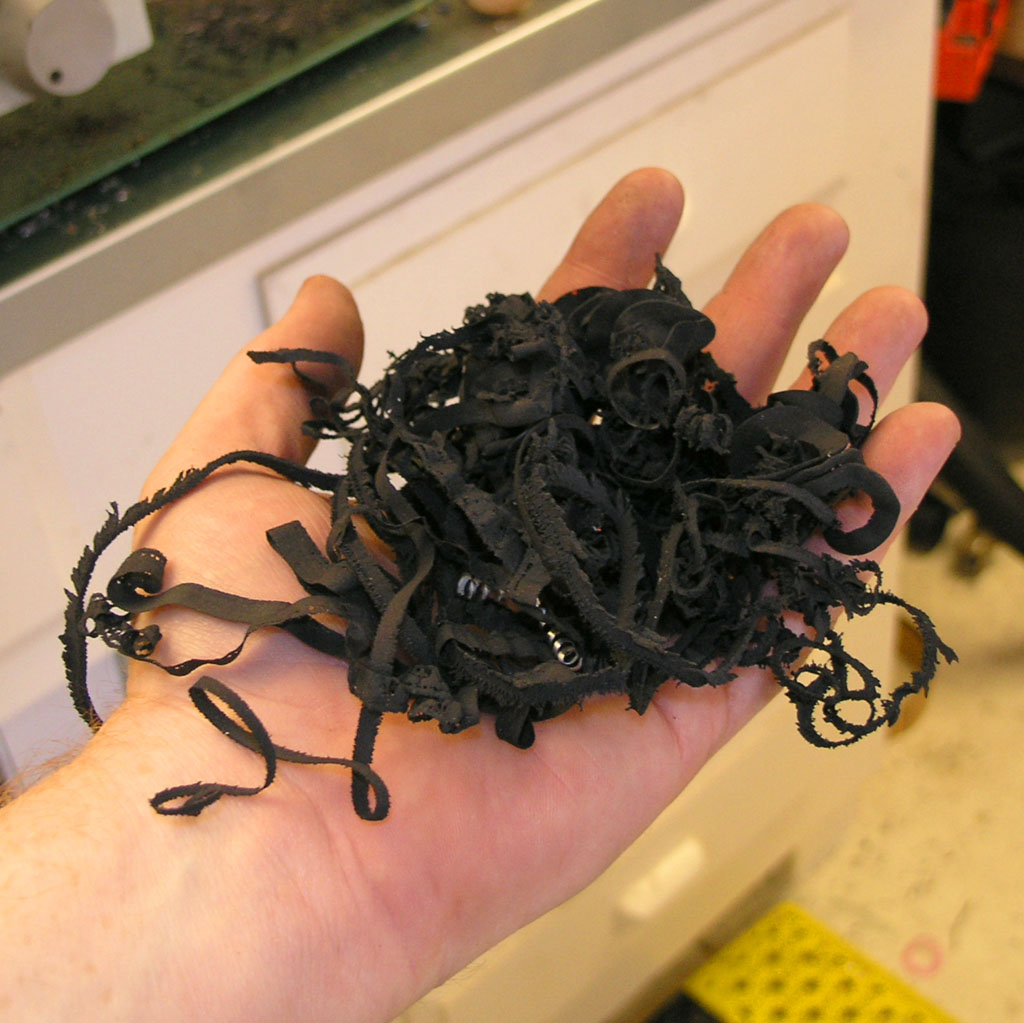
Weird locking swarf, no?
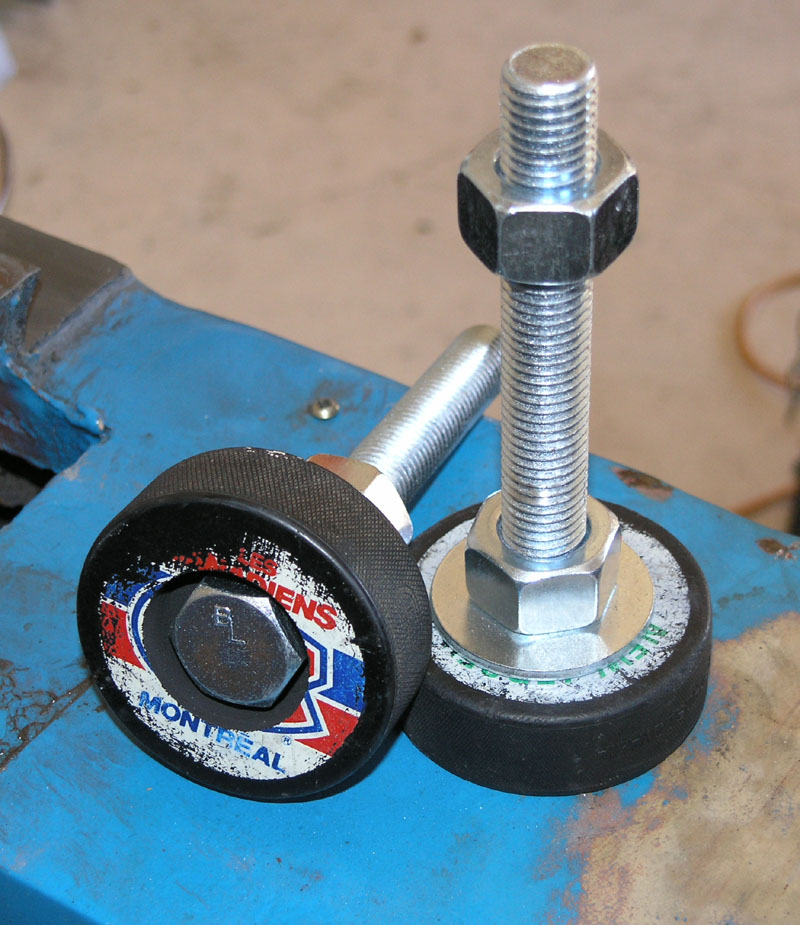
There's my machine leveling feet. Came out pretty neat!
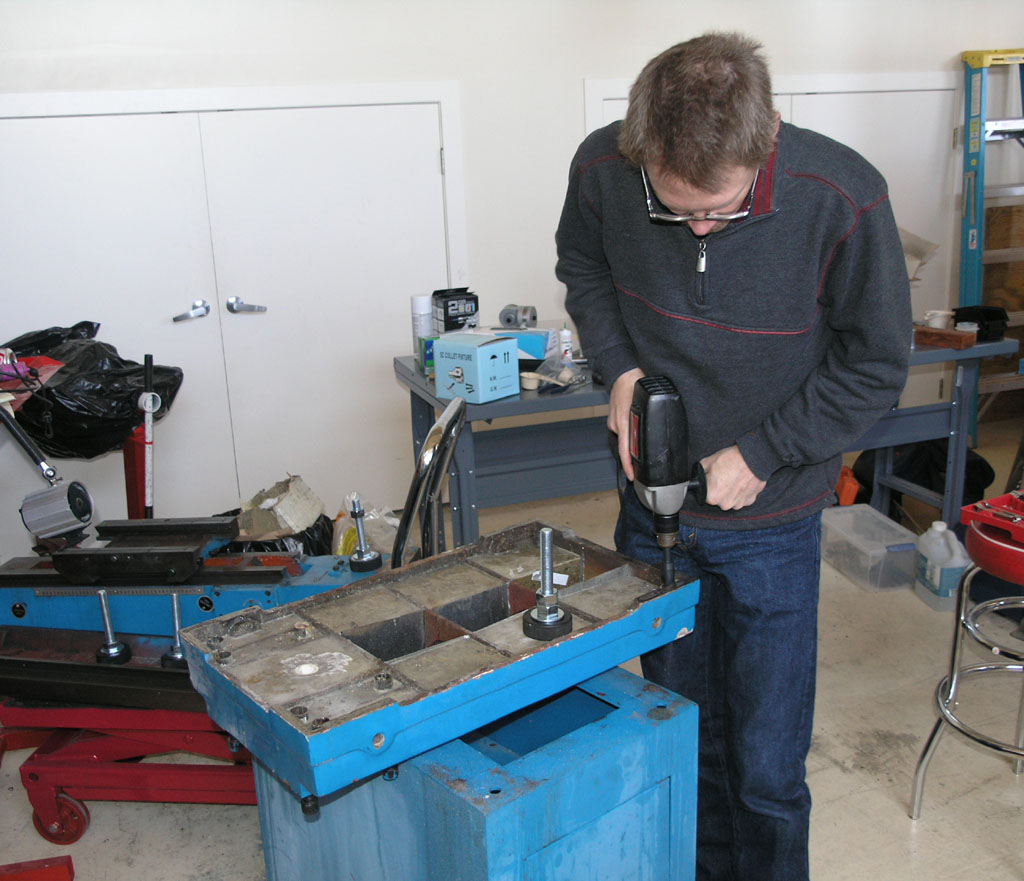
The bolts I'm using are much larger than the holes provided. My brother and I are using
a 1/2" drill with Silver & Deming bits to enlarge the holes.
This was a painful process! By the end, we agreed we should have carried
the heavy base in and set it on the other mill to do the drilling...
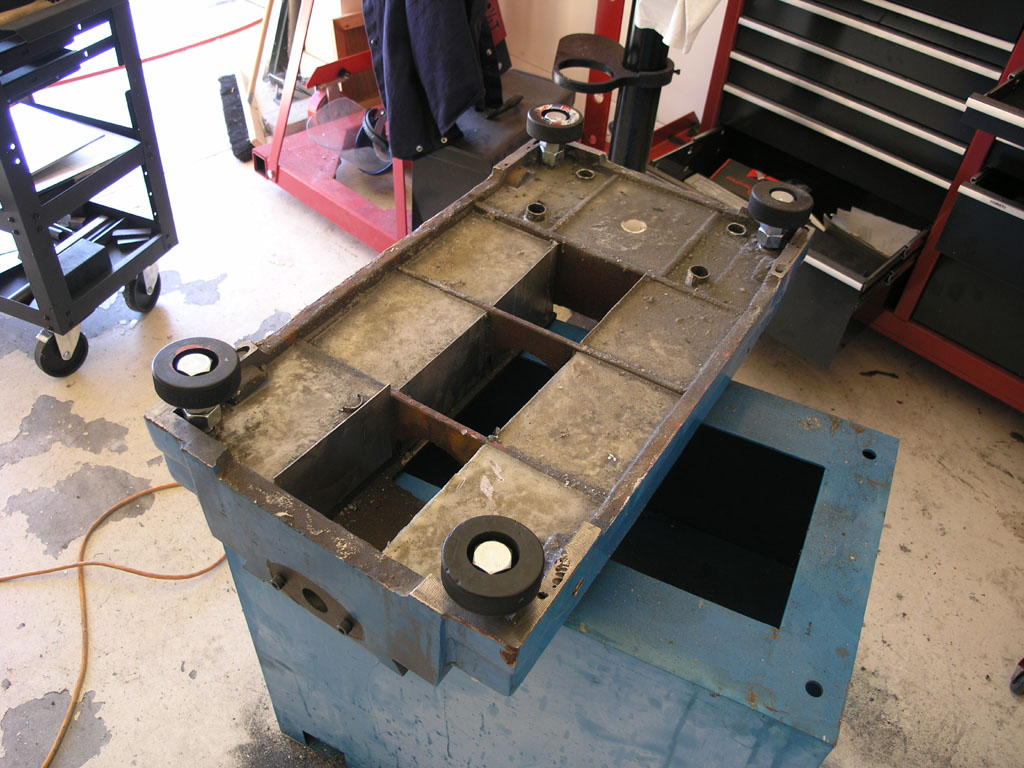
Here they are from the bottom...
And the base is now upright!
Got hockey pucks?
Column Fill
On to the Column Fill: First We Need a Column for the Central Bolt
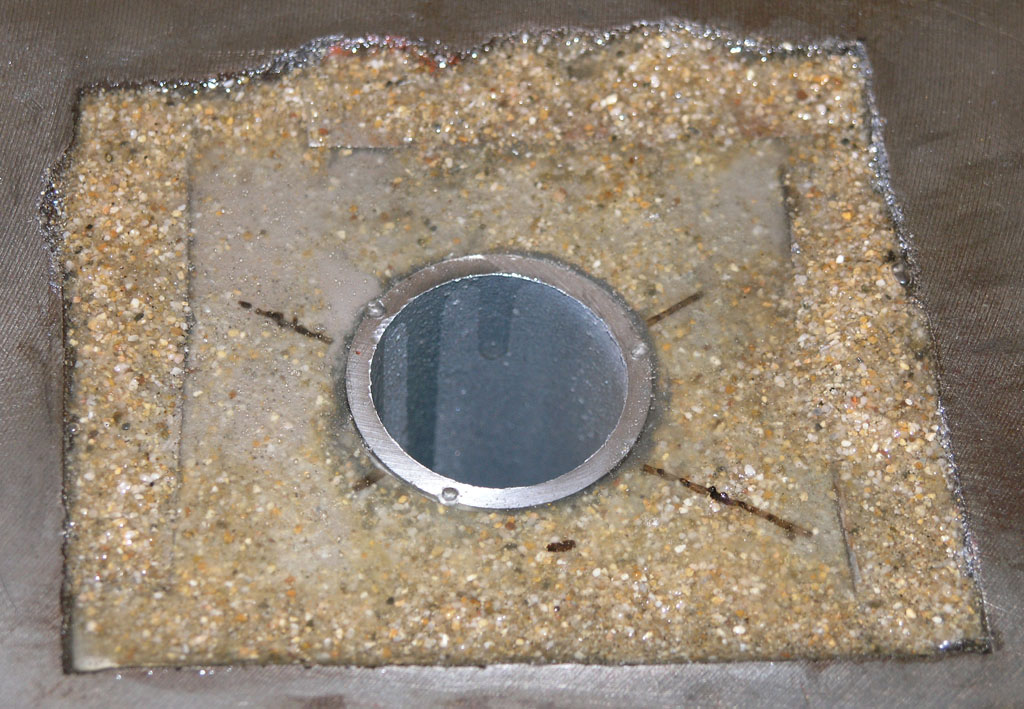
First step was to epoxy a thin metal plate into the opening in the base so it would seal. The casting was really rough, so I used epoxy with sand to fill in the edges until I got the plate solidly mounted and with no discernible leakage. This was a big improvement over the silicone cement I had used earlier.
After the epoxy for the plate had dried I took a hole saw for the pipe the bolt will pass
through. Note that I used a pipe quite a bit larger than the PVC on the
base so there is plenty of clearance. This greatly simplifies alignment
and there's still plenty of beef. The pipe was kind of an off-size, so
I used a 1 5/8" hole saw and then a drum sanding cartridge to make
it a nice sliding fit.
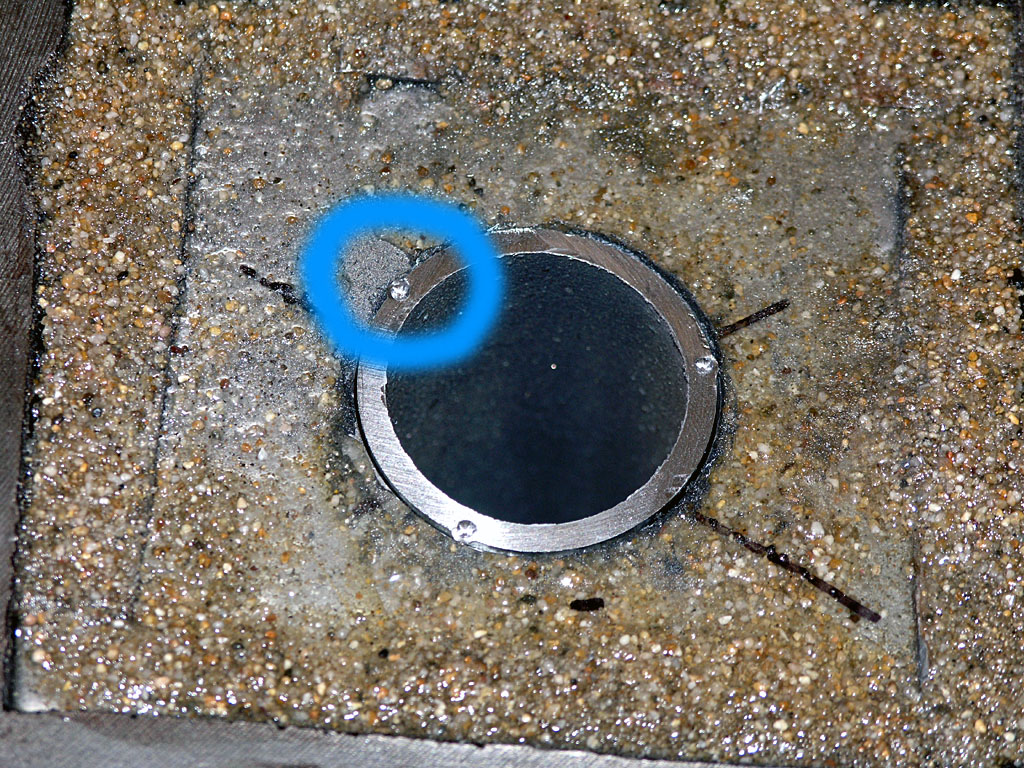
To hold the pipe in position I used a punch to dimple the edges in 3 places. That's
how close the fit was. I made sure to level the pipe so it was vertical
and then I applied some more epixy around the edges.
The surface tension works nicely to let me apply a fair amount of epoxy. I just want enough to hold the pipe solidly so that when I flip the column over start adding the E/G mixture from above it won't break loose. I'll let this cure all week and then tackle the fill next weekend. I've decided not to fill the column all the way up. This arrangement will fill the bottom 10" or so and should add considerable dampening without in any way being a clearance problem. I would think this will really help the mill to perform better to have this much added dampening mass in the critical junction between the base and the column. More would be better, but I'm anxious to get on with the rest of the CNC conversion and there is a lot of work to do!
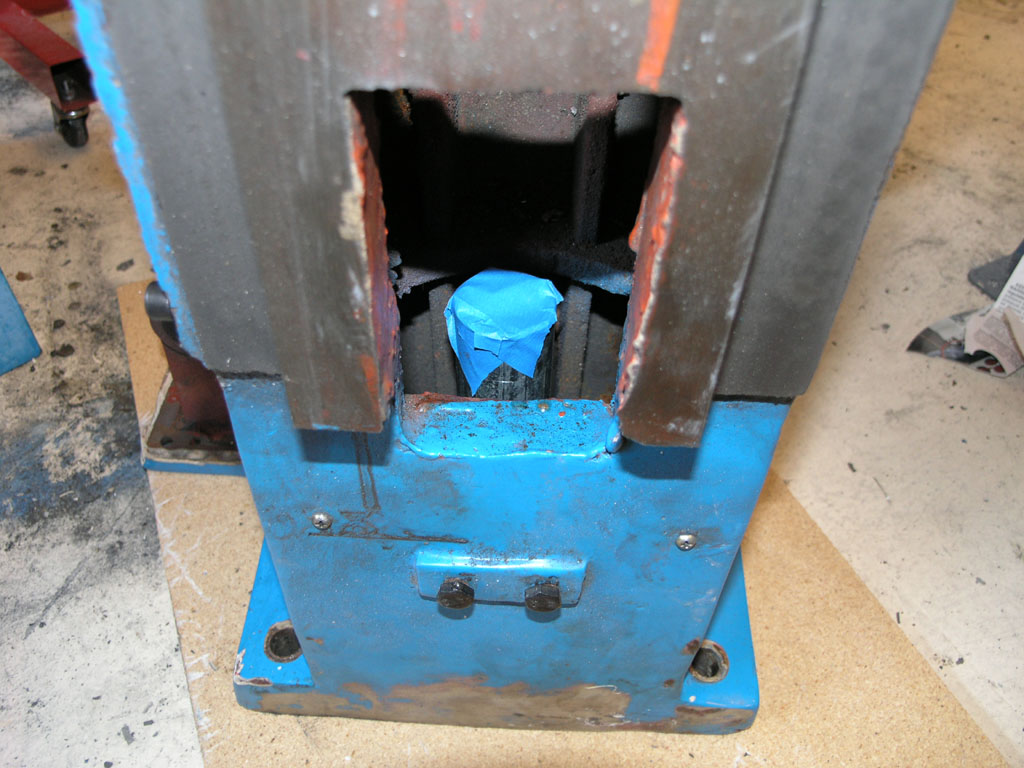
With the pipe and bottom plate secured, I flipped the column up on end and masked off
the top of the pipe...
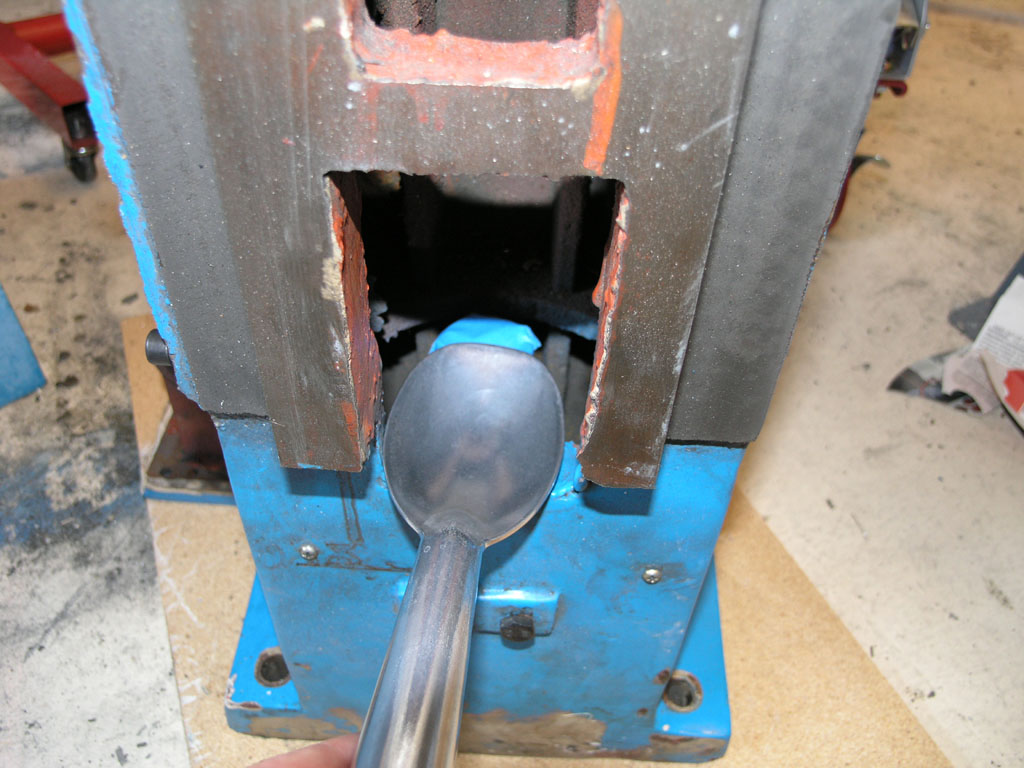
Filling the cavity through the narrow slot was easiest with a cheap ice cream scoop
I bought at the hardware store for $4...
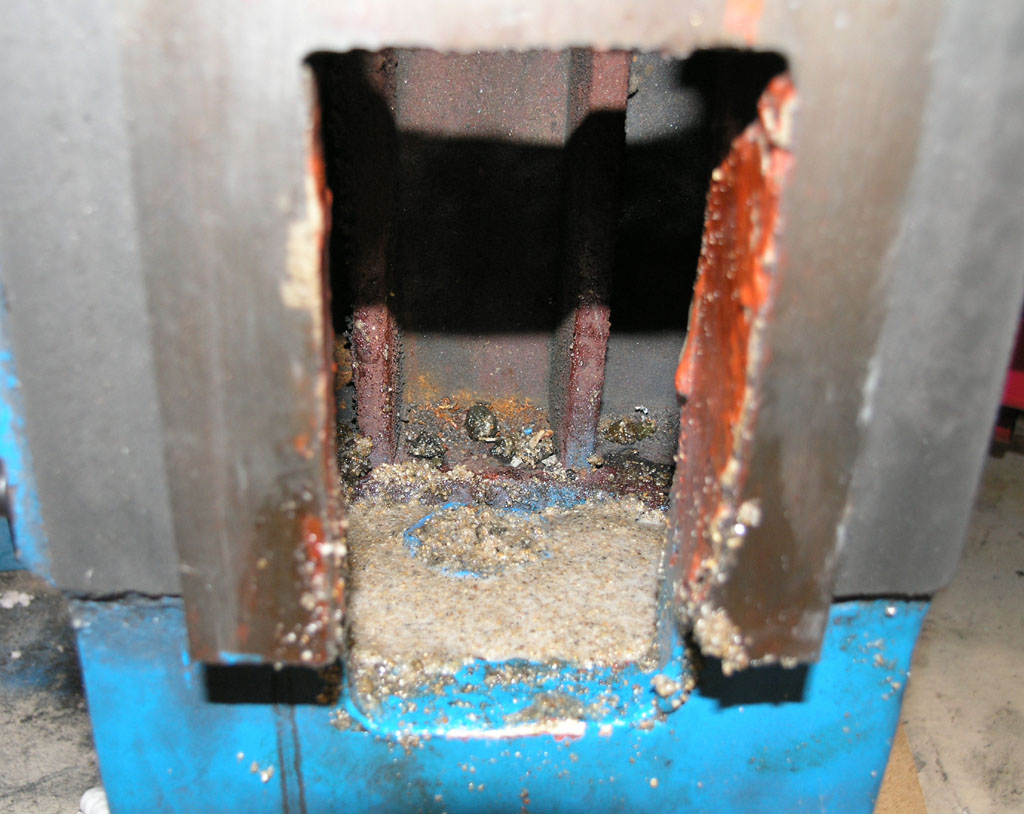
I filled up to about 1/2" from the top of the pipe, and then I switched to a
pure sand mixture to make sure the top was free of rock edges sticking
up...
Inspirations
I have to say that Davo727 has been the biggest inspiration for me to make this mod. I first read about his efforts through a nice couple of posts in the CNCZone Epoxy Granite thread. His mill is an RF-45, similar to the Industrial Hobbies mill I have, but you will note some minor differences such as the fact there is a little less webbing in the base casting.
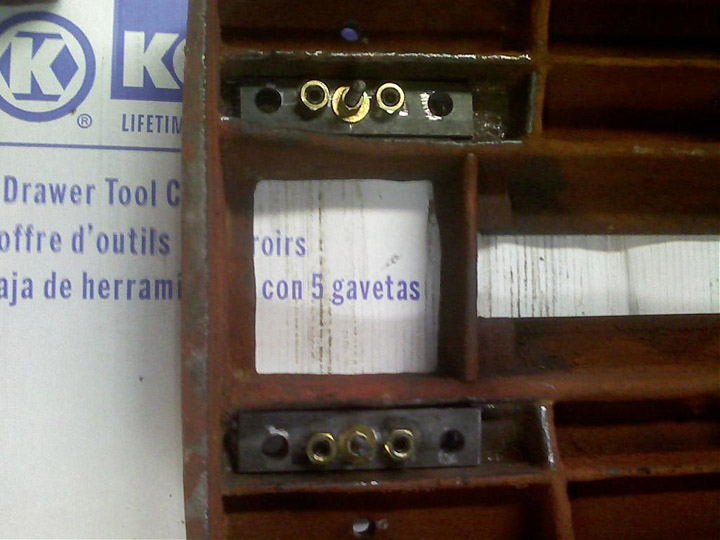
He used West Marine 105 epoxy, West 206 slow hardener, and a mixture of river rock and sand as the aggregate. He fabricated a welded steel partition from 1/4" plate to manage where the epoxy is going:
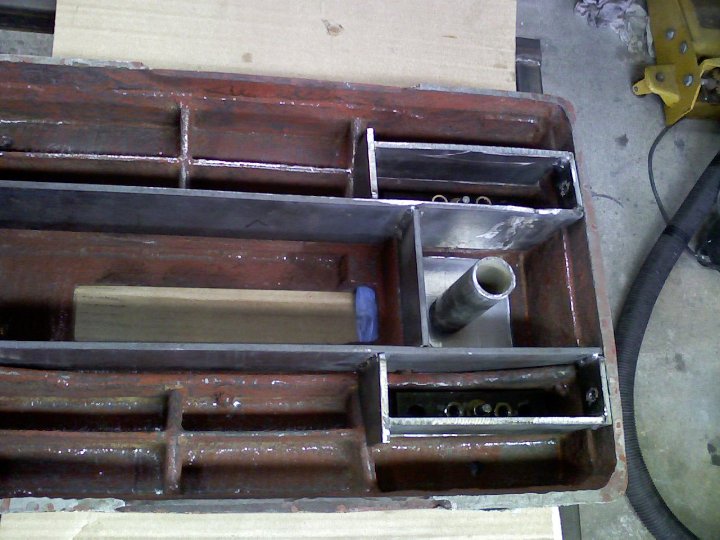
Partitioning system is secured by bolts at the front and rear of the base...
Before pouring the epoxy, he also plumbed in a one shot oiling system. Here is the first pour he did to get started:
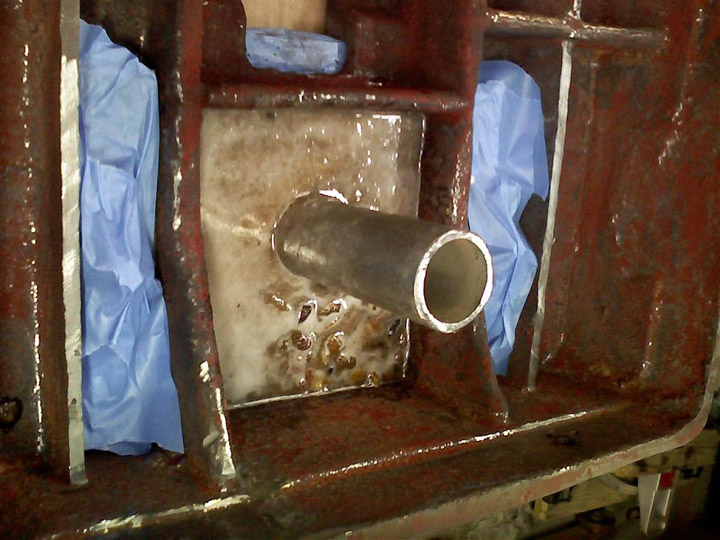
First EG pour in the base...
davo727 plans to pour his base, and the lower part of his column for this project. In addition, he has fabricated a much more solid assembly to bolt the column to the base:
3/4" Plate Bars Add Beef Below for the Column Bolts...
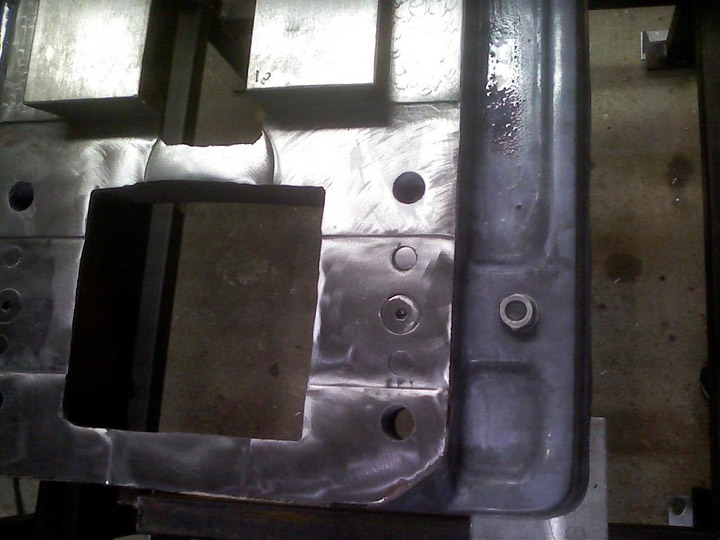
Column Backing Plates are Also Secured From Above...
The column support system is also being augmented by a central large diameter bolt that goes from the base all the way up to the top of the epoxy fill in the column. Steel plate above the epoxy and below in the base provide a solid sandwich for the bolt to latch on to. It occurs to me it may be pretty hard to tram in the column with that arrangement as the central bolt will be capable of considerable compression force. As in many things, a little care and time spent should get it done.
Here is the finished result, which added circa 65 lbs to the 100 lb base:
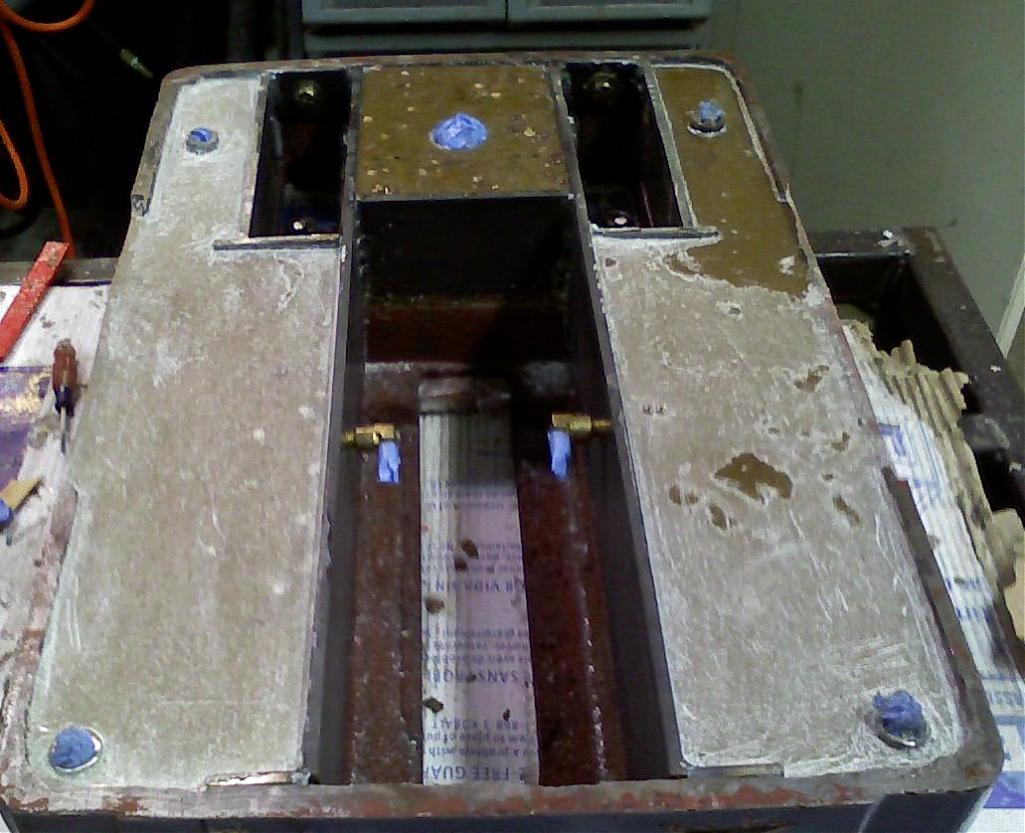
That came out looking very professional!
I checked back some time later with Davo727 via PM, and he is still very pleased with this mod on his mill.
FYI, his mix consisted of:
17 lb Sand = 26%
38 lb Gravel = 58%
10 lb Epoxy = 15%
Other Fills
Since having done my E/G work, some others have come along to provide further inspiration.
Guldberg's Scratch-Built Slant Bed Lathe
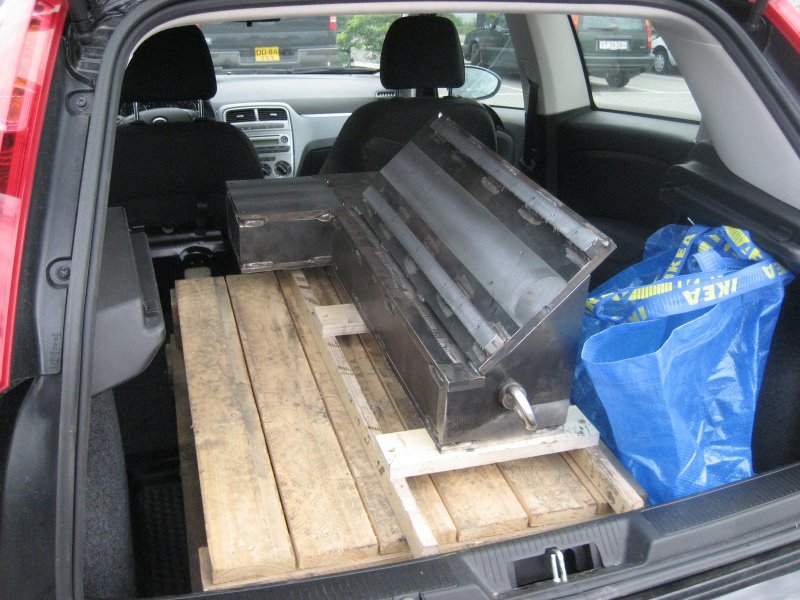
Welded frame coming home freshly machined on a big HMC...
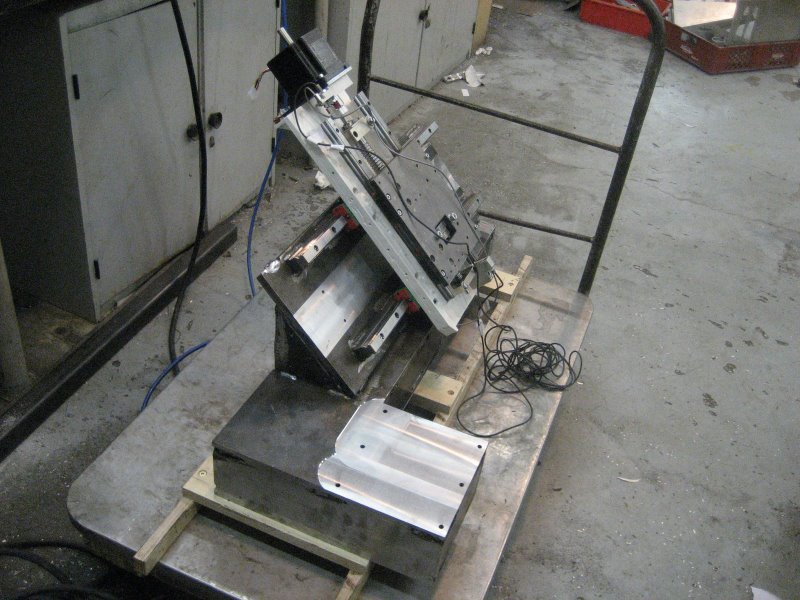
Trial fitted linear rails...
Raw materials...
Just poured...
Pour finished. The base is now 40kg heavier, and I'll bet a lot more rigid and vibration
dampened...
Is Manual Machining Faster than CNC for Simple Parts?
Be the first to know about updates at CNC Cookbook
Join our newsletter to get updates on what's next at CNC Cookbook.