This page contains my notes on finishes and treatments for metal that I've experimented with.

Finishes

Files, Sanding, and Hand Grinding
Filing is my first choice for quick finishing on the lathe, as it turns the file into a power tool
- Nicholsons are recognized as the best, although there are some European brands that are just as good.
- Keep them chalked with railroad chalk (available from Enco and many other places), which helps keep them from getting clogged. I also find heavy sulfurized cutting oil works well, but it can be messy, so I general only use it on the lathe.
- Learn how to drawfile. I won't attempt to explain here.
- Keep a file card/file brush combination handy and clean the file often so it doesn't fill up.
- I understand you can sharpen a file by soaking it in vinegar. I haven't tried it, but would do some more web research before trusting your file to it.
If not on the lathe, I use a right angle air grinder with a fiberglass reinforced cutoff wheel as a quick deburring tool.
Scale Removal
If you are working with cast parts, or want to remove scale from forged or hot rolled steel before machining, a variety of pickling treatments are well suited to the task. Look for names like Safe-T-Pickle and Sparex which are quite common. Note that virtually all dry pickling agents like Sparex are simply expensive trade names for a very inexpensive chemical compound called sodium bisulfate.
In some cases, sand blasting can also be an effective mechanism for scale removal.
Sand and Bead Blasting
I picked up a very inexpensive blasting cabinet off eBay. It looks identical to the ones sold by Harbor Freight, but was cheaper at $89. I'm very satisfied with it. I loaded it with glass beads, which leave a finer finish than sand. In practice it leaves a nice satin finish on surfaces. The beads are not a very effective way to clean, however, as they're a little to fine in their action. Beads produce more of a polishing action. A coarser grit will work better for cleaning or coarse work. Carborundum grain, pumice, and sand are all common media for the purpose. It's easy to swap grits. The grits sit in the bottom of the cabinet and there is a door that will release them into a bucket below. Dump the old grit, pour in the new, and you're ready to go. Be sure to run the gun a bit between grits to clear any residue.
Note that blasting can also produce hardening of the surface by work hardening it, often called "peening". Blast cabinets are cheap and any shop with room for one ought to have one.
Polishing
Lots of polishing methods are available ranging from hand polishing on buffs to vibratory polishing. The latter is a fast way to deburr and polish small to large production runs of parts, depending on the capacity of your vibratory polisher.
There is lots of good material on hand polishing from the gunsmithing and knife making fraternities, as they obviously value a very fine finish.
For vibratory finishing, Shor has some of the best information available. For example, this page on media.
See also my CNCCookbook page on Vibratory Deburring and Polishing.
Anodizing
Anodizing uses electricity to open up pores on aluminum and deposit a pigment inside those pores. It also hardens the surface of the aluminum. It is a process that is fairly straightforward to do at home. I recommend a book by Ron Newman as your bible for anodizing at home. I haven't tried the process yet, but the book is very comprehensive and Ron seems to get good results for his own business using these techniques:
Anodizing's hardening properties can also be quite helpful in making aluminum more durable.
Cold Bluing
Cold bluing uses acids to put an oxidized finish on steel at room temperatures, or close to it. They're very easy to apply, requiring only a thorough degreasing before application. For fun I compared the finish from two Brownell's cold bluing products:
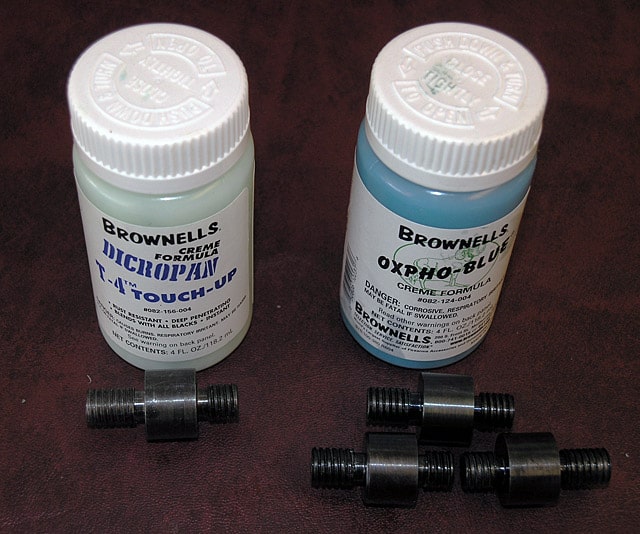
Dicropan T-4 and Oxpho-Blue Creme Cold Bluing Test
Both the Dicropan T-4 and the Oxpho-Blue Creme came as creams, which made them easier to apply. To perform the test, I took the spacers I had made for my new 6-jaw chuck backplate and compared the results. I simply cleaned them in some mineral spirits and then applied the compounds with a folded paper towel. Do this wearing gloves as the chemicals are fairly nasty. The steel turns blue quickly, after which you rinse it in cold water to remove and neutralize the chemicals. I then oiled the parts with Break Free, which is also an excellent anti-corrosive. The oil helps bring out the blue a bit more.
My conclusion was that the Dicropan looked darker, almost black, and seemed to go on more evenly. On the other hand, the Oxpho-Blue showed more blues and was a prettier finish despite it being less even. All things considered, I decided I preferred the Oxpho-Blue look. I'm not sure I'd want to do a whole firearm in it, but it's excellent for making tools look better.
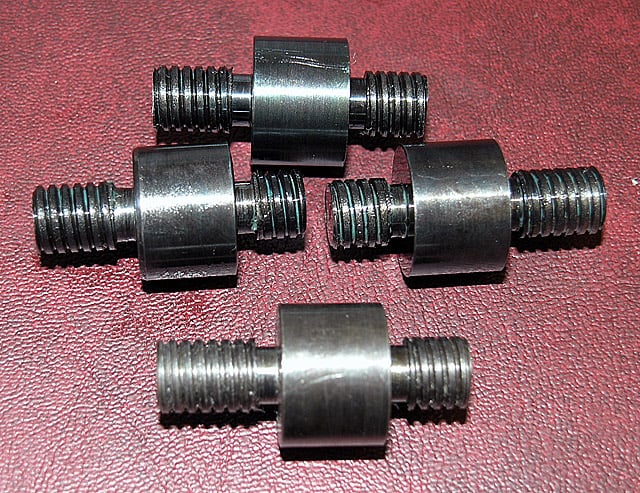
Rear three: Oxpho-Blue. Front spacer: Dicropan T-4.
Hot Oil
Here is a machinist's jack finished with a hot oil treatment:
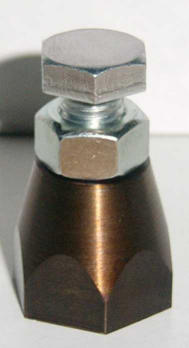
I like the look of the finish, though I don't know how protective or durable it may be. It was done by Dave Hylands who states that he simply "cooked" the jacks in his BBQ for 30 minutes and then plunged them into some 20W-50 motor oil.
Parkerizing
Parkerizing is a very durable treatment often used on firearms. It's pretty straightforward to set up a Parkerizing process in a small shop. Here are some picks from an HSM thread:
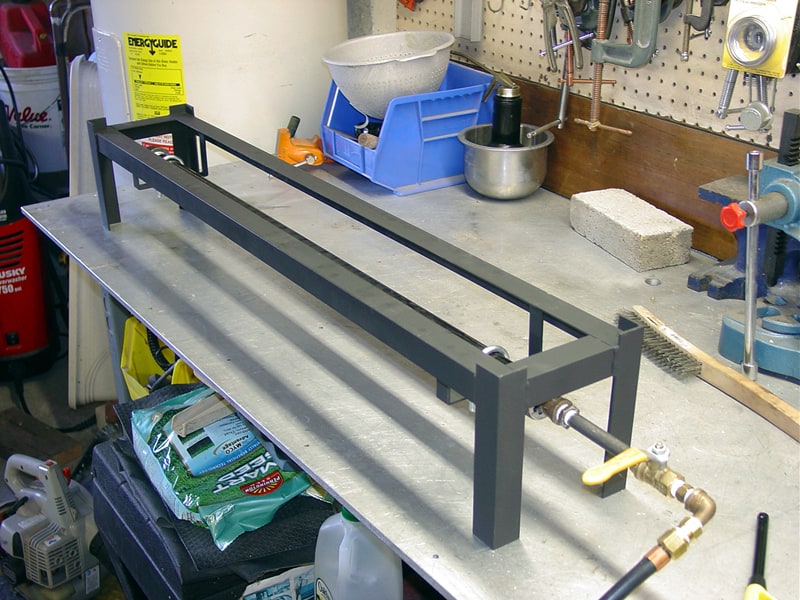
Stand for a Parkerizing tank is just welded from angle iron...
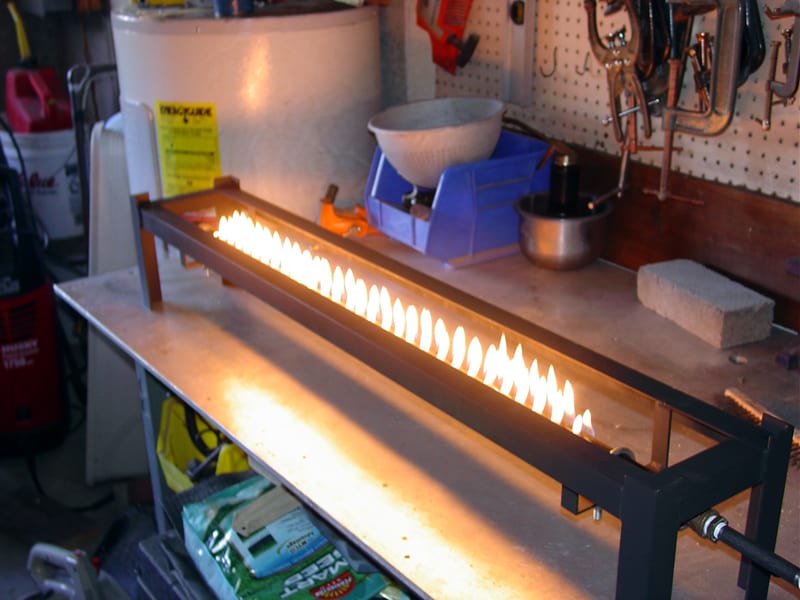
Shopmade propane burner...
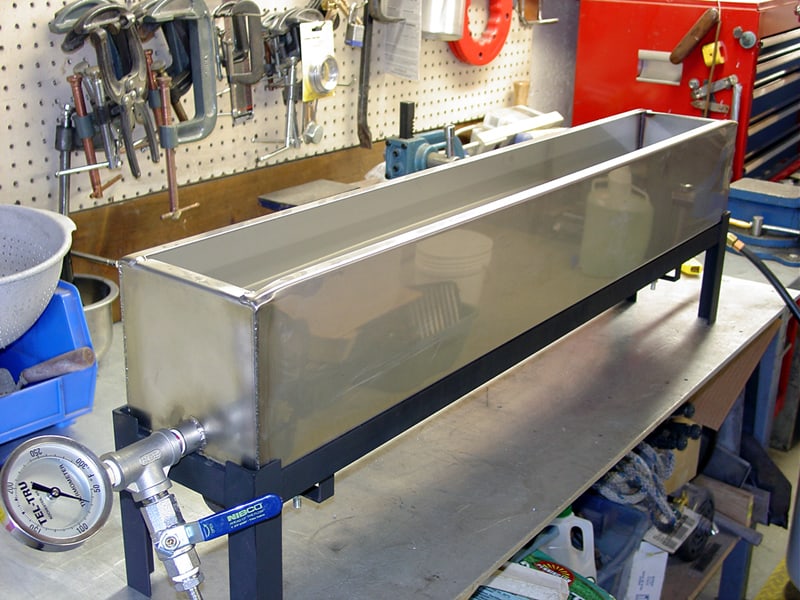
Tank needs to be stainless. This one was purchased from eBay for $99...

Chemicals are from Lauer Custom Weaponry. 1 Gallon is $29 and will last a long time!
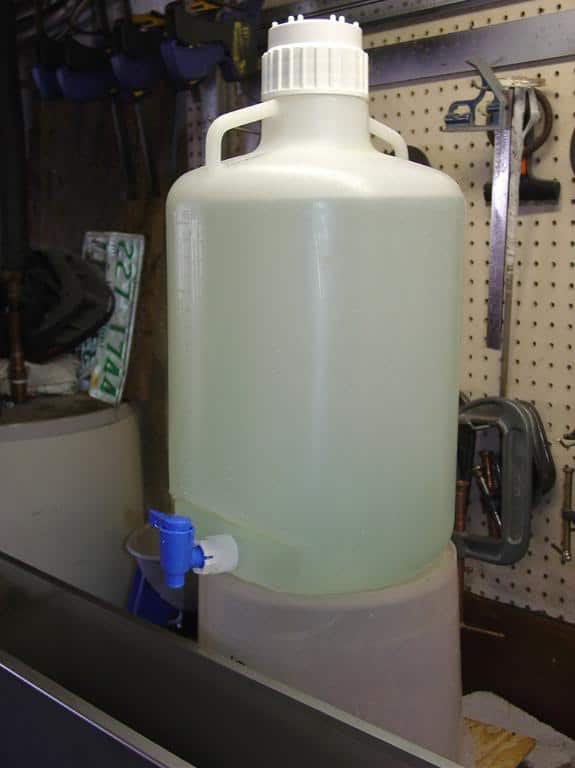
Mixing chemicals up in a big container like this is very convenient. Strain through a coffee filter and return to the container when finished...
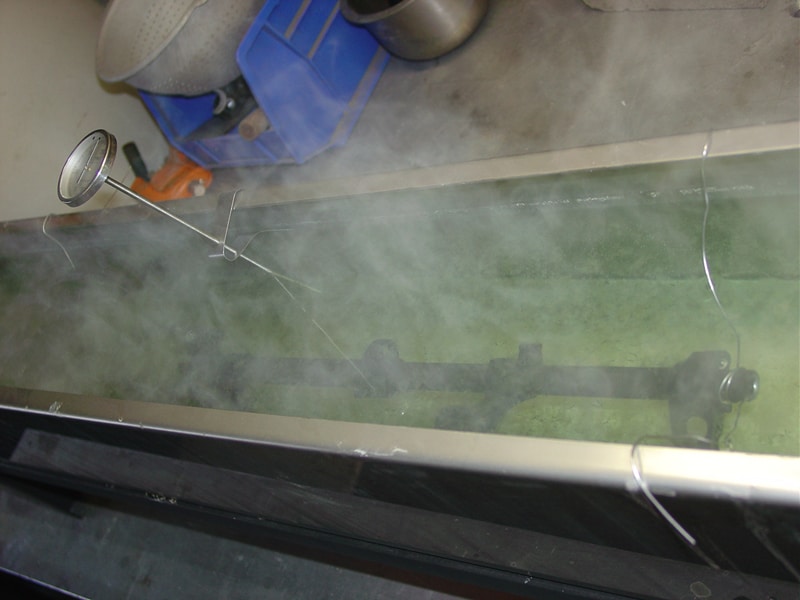
"Cooking" a firearm in the solution. Rinse with clean water then apply the Lauer Post Treatment solution. When that's all done, a little oil and you have a military-grade nearly rust-proof finish!
Hot Bluing
Treatments (i.e. Heat Treatment, etc.)
This is definitely an area I'm very interested in experimenting with, both for the hardening properties afforded heat treated steel as well as the awesome temper colors that can be produced.
I have been interested in heat treating metals for a long time, and finally sat down to do a little web research on how to build a heat treat furnace. Industrial PID controllers are readily available on eBay cheap, and the rest of the materials required are not expensive either. I'm adding something like this to my "someday" project wish list:
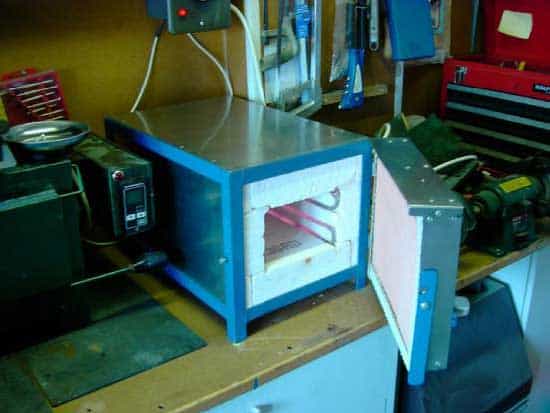
Links about making your own furnace:
The Home-built Heat Treat Oven Pictured Above: A nice project with lots of photos.
https://www.knifeforums.com/forums/showtopic.php?tid/752668/post/775813/hl//: Not much on pix, but some good tips and techniques. For example, there is a high temperature mortar/calk available at Home Depot to seal the bricks that is good to 2000 degrees. You want a "K" type thermocouple for this kind of project.
Back to CNC Beginners Home Page...
Be the first to know about updates at CNC Cookbook
Join our newsletter to get updates on what's next at CNC Cookbook.