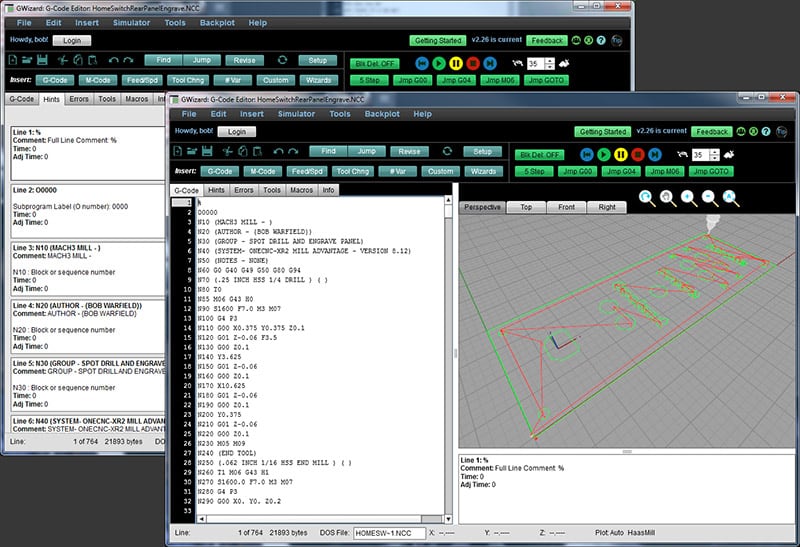
Deliverable: CNC Program is Proven and we're ready to machine the Part
Proofing the program is the last step before we actually make real cuts. The goal of proofing is to verify the program is correct and the CNC machine is setup correctly so that there will be no problems when the g-code is run for the first time. We're looking to avoid crashes where the tool comes into contact improperly either breaking the tool or cutting into something we didn't want to cut into.
It's important to proof all your G-Code part programs. If you just throw them on the machine and start it cutting, you're likely to have a lot of unhappy accidents. Proofing is all about avoiding those things!
Errors that are caught during proofing can come from a variety of sources. For example, there may have been an error in the programming. Or, sooner or later, you will come face to face with a bug in your CAM software-a toolpath glitch, in other words. These are easily fixed if you catch them in time, and can wreak havoc if you just let a program with glitches run.
BTW, just because you've proven a program in the past doesn't mean you might not need to prove it again. Always prove programs after you make any change, and consider proving a program again if you're putting on the machine for the first time after a hiatus. Remember, you're proofing not just the g-code, but all the machine setup as well.
In fact, proofing should also be considered a test of your documentation too. Was your Setup Sheet accurate and complete enough that setup was easy and resulted in a clean proofing run? If not, update it accordingly.
There is one way to minimize the amount of effort needed in proofing, and that's to simulate the program first. If simulation is done to it's full potential, you actually can eliminate the need to proof on the machine and save considerable time. But even a little basic simulation can help a lot.
Resources:
- What Every CNC'er Needs to Fix CAM Glitches Quickly and Easily
1
Set Part Zero so the Cutters only Cut Air
Deliverable: Machine is set up so you can run the Part Program and the cutter will only cut air.
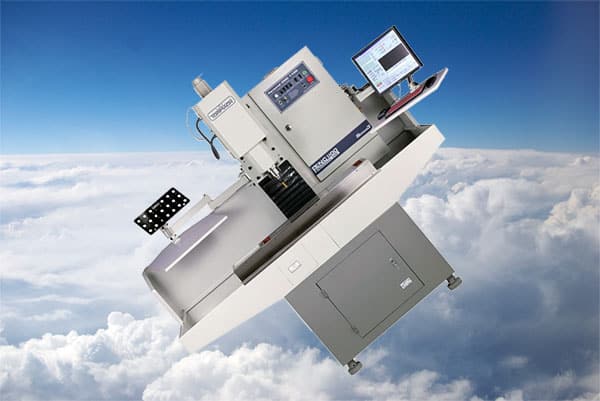
Cutting Air? What is this "Cutting Air" of which you speak?
Set your Part Zero so the Cutters only Cut Air. Rather than setting Part Zero to be the real Part Zero, you need to set it to a point that is higher in Z, so the tip of the lowest cutter is well above your workpiece and workholding. This is done so you can watch the program run with no chance it'll crash into anything.
You could just estimate this from the length of your longest tool-just eyeball it. Or, you if you use Simulation Software, it will often list the lowest Z in the program statistics. If the program is set up so Part Zero is the top of the material, the lowest Z will be a negative number. Just set your Part Zero Z to be a positive value equal to that magnitude of that negative.
2
Turn down the Feedrate Override so you have Time to React
Deliverable: The machine will move slowly enough you can see what it will do in time to react if it is about to crash.
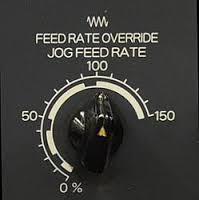
Most CNC Controls have a feature called "Feedrate Override" that allows you to set Feedrate to some percentage of the actual commanded feedrate-either faster or slower. Turn it way down, almost to zero. This will give you plenty of time to react if the program looks like it is going to crash.
Most cuts follow a pattern:
- Retract to a safe height
- Move at rapids speed to a position above where the cut begins
- Drop down to cut height
- Make the cut
- Rinse and repeat for the next cut
You'll get used to this cadence. On a simulator, you'll look for cases where the pattern was not followed properly. When cutting air, you keep the FRO (Feedrate Override) turned down until the cutter reaches safe height and starts to move in its cut pattern, then you turn it back up until that particular cut finishes and turn it down for the retract until you see it move safely and slowly to the next cutting position.
You'll see most operators keep one hand on the FRO as they watch the program Cut Air for the first time.
Depending on the machine, there may also be a separate rapids override. Make sure you're not running full rapids speeds during the Proofing Run.
Tip: Use the Machine's Dry Run Options, if available.
Many machines have a dry run lock. This will run the program through tool changes and other activity, but the axes won't move. This run allows the control to check for syntax errors and other alarms. The operator can also follow along visually to make sure the right tools are being indexed relative to the current position in the g-code program as expected.
3
Be ready to press the E-Stop
Deliverable: Be prepared to push the E-Stop before the program can get into trouble.
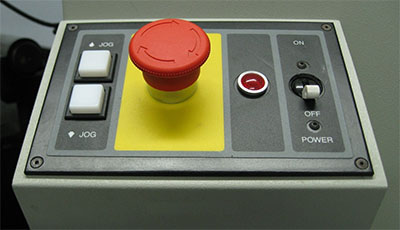
Before any run, I always look carefully for where the E-Stop button is located. I reach out and touch it, mimicking the motion I will make if there is a problem. If my hand will be on the FRO, I start there and act out the motion of moving my hand from FRO to E-Stop. I close my eyes and visualize that motion too, several times.
Sound crazy?
I am just trying to make sure that if I have to press E-Stop, there'll be no fumbling for it. I want my muscle memory to know exactly what to do without having to stop and think about it.
Note: On some machines Feed Hold is a better choice than E-Stop. This is because it can be easier to get the program restarted after a Feed Hold than an E-Stop. Make sure you know which one is best and that it will always stop what's happening as soon as possible.
Tip: Use Optional Stops in the G-Code to make Proofing easier.
Experienced CNC'ers often put Optional Stops in the G-Code aimed at making the Proofing Run go smoothly. They stop the machine automatically so the operator can check what's happening at that point in the program and then restart.
4
Watch as the Program Cuts Air
Deliverable: Having watched the Program Cut Air, you'll know whether it's ready to make chips.
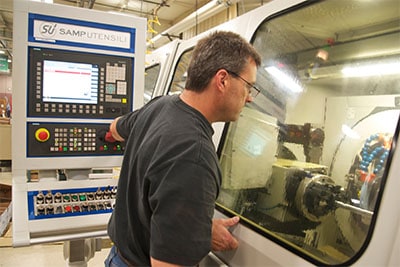
Before you even start to run the program, look at the backplot display on your controller. Are there any unexpected moves? Does it look like the correct program you expected?
If it all looks good, you're ready to cut air. At any point during a run, the operator can press the Feed Hold in order to stop progress and check on something. For example, if you know every tool is exactly 2" above the work when cutting air, you could use Feed Hold and a 1-2-3 block to check tool height after each tool change.
4
Make changes and improvements to the Program, Setup, and Setup Sheet as needed
Deliverable: A proofed program read to cut chips.
You'll want to update your G-Code Program or other areas (for example, you notice the wrong tool is loaded and need to change it) based on what you see during Proofing to fix any problems.
And remember, proofing is also a test of your documentation. Update your Setup Sheet to make it more accurate and complete enough that setup is as easy as possible.
4
How do we proof programs faster? ▶
Deliverable: Proofing programs can be slow and expensive. You'll learn how to proof them faster and more cheaply.
The best way to save on proofing is with Simulation...
It should be ovbious that Proofing programs can be slow and expensive. The more expensive the CNC Machine, and the more work that is backed up waiting for that machine, the more expensive it becomes. If you're going to make a lot of parts, you can amortize the cost of proofing over all those parts. But if you're only going to make the part once, proofing can more than double the machine time needed to make the part.
How can we do better? How do we proof programs faster and more cheaply?
The alternative to proofing programs by hand in the manner described above is to have a system that ensures that by the time a program lands on the machine, it can be run without the need for proofing.
Most CNC operations can't eliminate proofing entirely, but those that do, report they nearly doubled their profitability. What are the major areas we need to address if we are to save on proofing:
- We need to make sure the G-Code Programs don't have errors. Even the best CAM software sometimes generates g-code with errors. This can happen for a variety of reasons, such as problems with the postprocessor. But, those errors are usually very obvious in a Simulator.
- We need to make sure the right tools are loaded and the right tool data is there to go with the tools. This is also something that could be carefully checked and even automated via tool touch setters (one example) to avoid the need for proofing.
- We need to make sure the right fixtures are loaded, the workpieces are properly in the fixtures, and the right Part Zero or Work Offsets are set up. Again, this can either be carefully checked by the operator or automated to an extent with, for example, in-process probing.
Resources:
- See our Series on Tool Data Management for information on how to automate Tool Data needs.
Be the first to know about updates at CNC Cookbook
Join our newsletter to get updates on what's next at CNC Cookbook.
