If you use a milling machine, you will need to be able use Edge Finders, Center Finders, and 3D Tasters to find edges, corners, and hole centers. This is all part and parcel of setup work on these machines. Often it's done to locate Part Zero, so be sure to also check out our article on all the different ways you can locate Part Zero.
Edge Finders
The classic method of locating features on mills is to use an edge finder. These fall into two categories-mechanical edge finders and electronic edge finders.
Here's a typical mechanical edge finder:
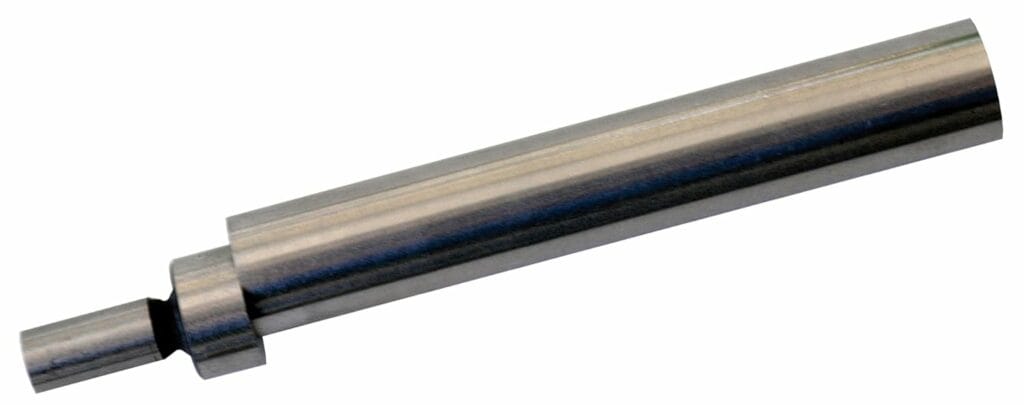
Mitutoyo Mechanical Edge Finder. About $12.77 from Amazon...
You can also get conical tipped models that have a pointed contact. Here is a Starrett Mechanical Edge Finder that has both a cylindrical and a pointed contact:
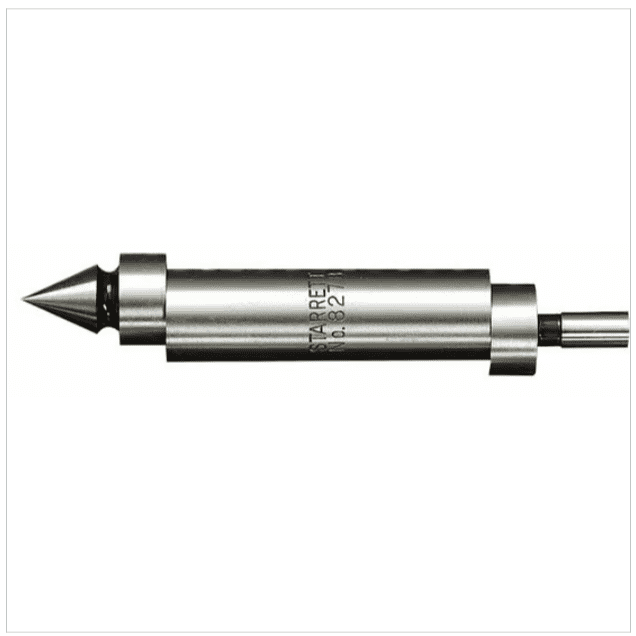
Technically, the pointed contact versions are center finders. A center finders edge is whatever the tip can reliably measure. Center finders are also capable of picking up things like scribed lines. The ability to pick up scribed lines can be very handy if you've got a set of layout tools that involve marking up the work piece with scribed lines.
These tools can be had in a variety of body diameter-usually 0.375, 0.5, or 10mm. The choice of body diameter for your edge finder isn't really important, just choose a body diameter that you have a toolholder for (preferably a collet-style) so you can leave it setup and ready to go.
Operating one of these isn't obvious until you've learned how. This video from Tormach will walk you through it:
As you can see, its pretty easy to use edge finders and center finders to locate a work edge. Stick it in your collet or check, start the spindle moving slowly, and move the worktable until the edge finder first lines up and then "kicks". At the point where it kicks, you know the center of the finder is one-half the diameter of the contact from the work edge.
As you can imagine, locating scribed lines with center finders is just as easy. Put the tip into the scribed line, move the worktable until it is lined up and running concentrically, then moved it slightly more until it kicks. You've just established a work edge on your work piece that's inline with your scribed lines.
The video above also shows how to use an electronic edge finder. There are a couple of styles:

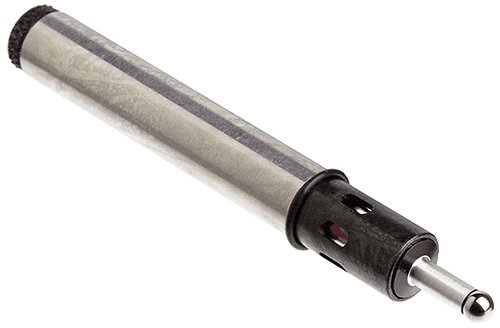
Fowler Electronic Edge Finder. About $33.59 on Amazon...
They're pretty accurate. Claimed to be 0.0002" (2 thousandths) repeatable. Not sure I trust them to that degree. Their worst issue is they're very easy to break if you jog too far, at which point you just bought a new one.
They make one that has a little spring loaded ball so you don't break the electronic edge finder:
Fowler Electronic Edge Finder with moveable ball. About $150.46 on Amazon...
I've never owned one because I was told they have lousy repeatability due to that moveable ball. Plus, they're not cheap either.
Another disadvantage of this kind of edge finder is there are no electronic center finders.
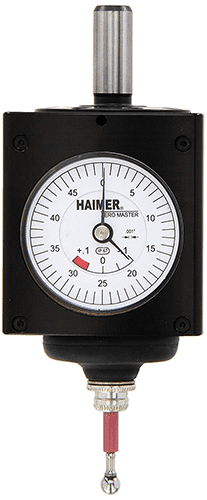
These types of edge finder are fine and well, but once you've tried a Haimer 3D Taster (also called a 3D Sensor), you will never go back to this old style.
3D Sensors (3D Tasters)
These German-made measuring devices are my favorite aside from a 3D Touch Probe for edge finding and part zero setup. They used to be called "3D Tasters", which was such a charming name, though I am sure a mis-translation of the original German. Now you look for them as "3D Sensors." They can be used as edge finders, center finders, and more.
Here's the typical unit:
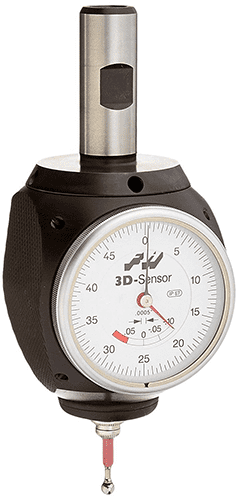
Haimer 3D Sensor. About $408.46 on Amazon...
They're not inexpensive, but boy are they a time saver and a pleasure to use. They do have a less expensive "Mini" 3D Sensor:
Haimer Mini 3D Sensor. About $390.00 on Amazon...
I haven't tried a "Mini", but I wouldn't hesitate because the Haimers are very well made. One thing you must remember to do is get at least 2 extra tips when you buy one. It's only a matter of time before you break a tip:

I've got a sign like this hung up in my shop...
You want to buy two tips so you can order 2 more as soon as you break one. They cost $43 on Amazon, and they do add up. But better to break a tip than the Haimer itself.
Something not to bother with-don't try the cheap Chinese knock offs. I used to start with Cheap Chinese on new tools and then buy something better if I liked the tool but wanted higher quality. It worked out okay about half the time or more. The simpler the item, the more likely it would be okay.
But the Haimer knock-off I got didn't work very well and it also broke in record time. I think I only used it for less than a month. Even though it looked like the real thing, it wasn't.
Haimers are good for all sorts of things, so I will leave you with this video from Tormach on how to use one:
Be sure to adjust your Haimer for concentricity. The video shows how.
One thing to keep in mind-the Haimer is a larger tool than the wiggler style edge finder. It has a larger shank than the typical edge finder body diameter. You want to keep both types of tool around.
DTI as Edge Finder with Accessories & DTI Center Finder
When accuracy is a must, you can use a DTI as an edge finder. Particularly if you have some handy accessories like these chair edge finders:
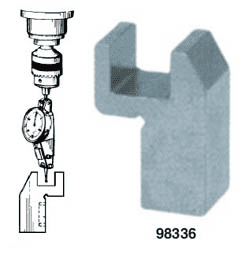
Edge Finder "Chair" for DTI...
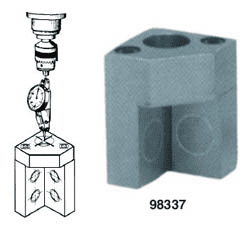
Corner Finder for DTI is center finders-type tool...
These gadgets should be high quality, ground tools. They're usually equipped with magnets. These tools are from the days of jig boring machines and can be highly accurate.
This video from Oxtool gives a great explanation of their use:
Here's a neat DTI holder that's designed for finding circle centers:
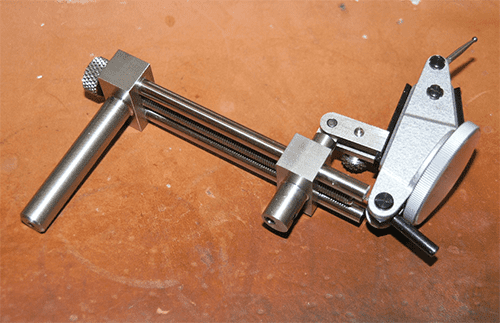
The radius is adjustable with the knurled wheel on the left.
Blake Coaxial Indicator: Hole Center Finder

Coaxial Indicator. About $59.99 on Amazon...
Finding the center of bores is a common mill setup operation. It also comes in handy with lathe tool setup in certain cases. You can use a Haimer 3D Sensor for bore center, wiggler-style center finders, DTI rig similar to the above, or a Blake Coaxial Indicator.
The Blake Coax dates from manual machining days, but it is super simple to use and handy. Mine is a cheap Chinese knock-off, but it works great just the same.
Using a coaxial indicator is simplicity. Position it in the spindle over the hole, put the probe edge on the hole edge, and start the spindle rotating SLOWLY. Now adjust the X and Y handwheels until the indicator needle quits moving as much as possible.
Done! Wasn't that quick and easy?
Here's Tubal Cain's video showing the Blake Coaxial indicator in use:
Coaxial Indicator Accuracy
Think of coaxial indicators as good to maybe a few thousandths. If you need better, set up your DTI or Haimer 3D Sensor. I've written an article about Blake accuracy that goes into the details of what's going on.
This article is part of our Free Metrology Course.
Be the first to know about updates at CNC Cookbook
Join our newsletter to get updates on what's next at CNC Cookbook.