Why use a 5C Collet Chuck for a Lathe?
If you consult our Total Guide to Lathe Workholding, the advantages of a 5C Collet Chuck become clear very rapidly:
- They're repeatable. Remove a part and put it back while maintaining fairly close concentricity. You can't do that with a 3 jaw chuck unless it's fitted with soft jaws.
- They're easy to use.
- You can use them to feed bar stock to speed up making multiple parts.
Hardinge, back in the day, launched an empire on the back of lathes that were almost exclusively 5C. Even today, there's a huge market for small CNC Lathes similar to older Hardinge machines. Omniturns are a great example of a 5C-oriented lathe.
Accurately Fitting a 5C Collet Chuck to a Lathe
I've had one of the cheap Asian import 5C collet chucks for a long time. Mine is not an adjust-tru nor even a Bison. I think I got it for $150-ish on eBay.
I finally decided I needed to get a backplate made so I could use it when I joined a team build for one of the Verburg steam engines on the HMEM Board. My job would include machining a little connecting rod that would be about the most complex small part I've made so far. It's an ideal part for 5C collets due to its size, the desire for precision, and the need for both turning and milling operations. It so happens I also have a set of 5C collet blocks and a 5C spin indexer for the mill.
If I can get a 5C collet chuck on the lathe, I will be set!
I had done one backplate before for a Buck 6-jaw chuck. It was one of my earliest lathe projects and a thing or two didn't go exactly smoothly, so I decided to try to do a few things differently this time around.
Bandsawing the Rough Stock to Size
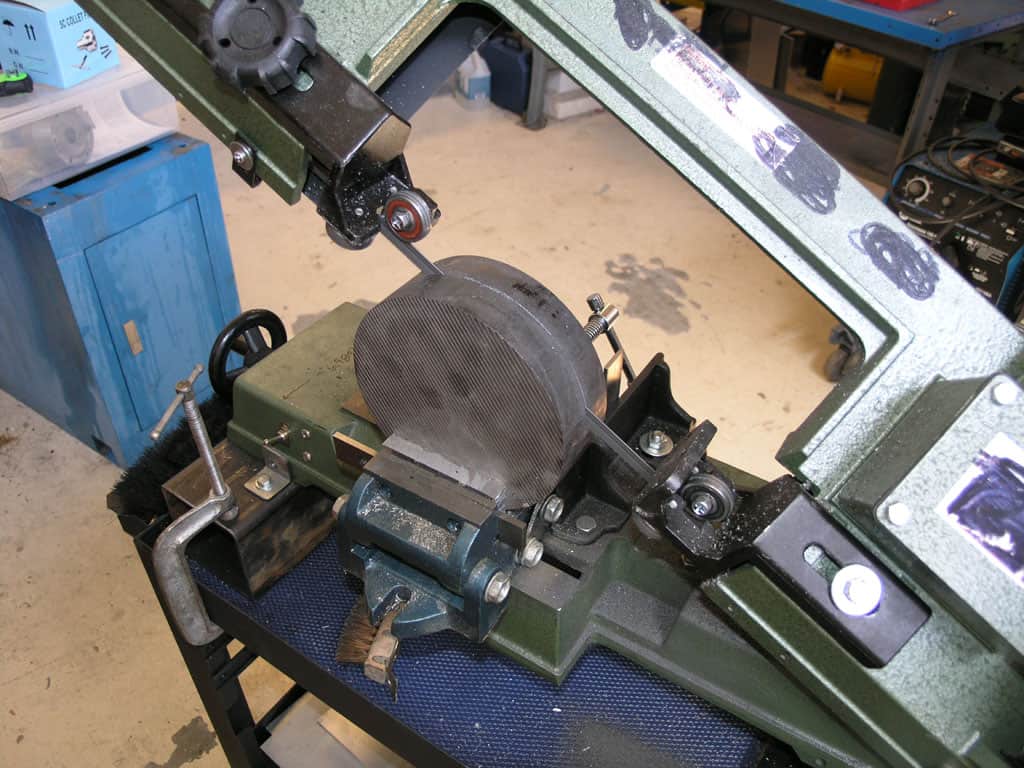
The first order of business is to cut the cast iron blank in half. There's enough meat here for 2 chucks. My trusty DeWalt Multicutter is powerless against a
piece of iron this big, so the old bandsaw was pressed into service. Been a long time!
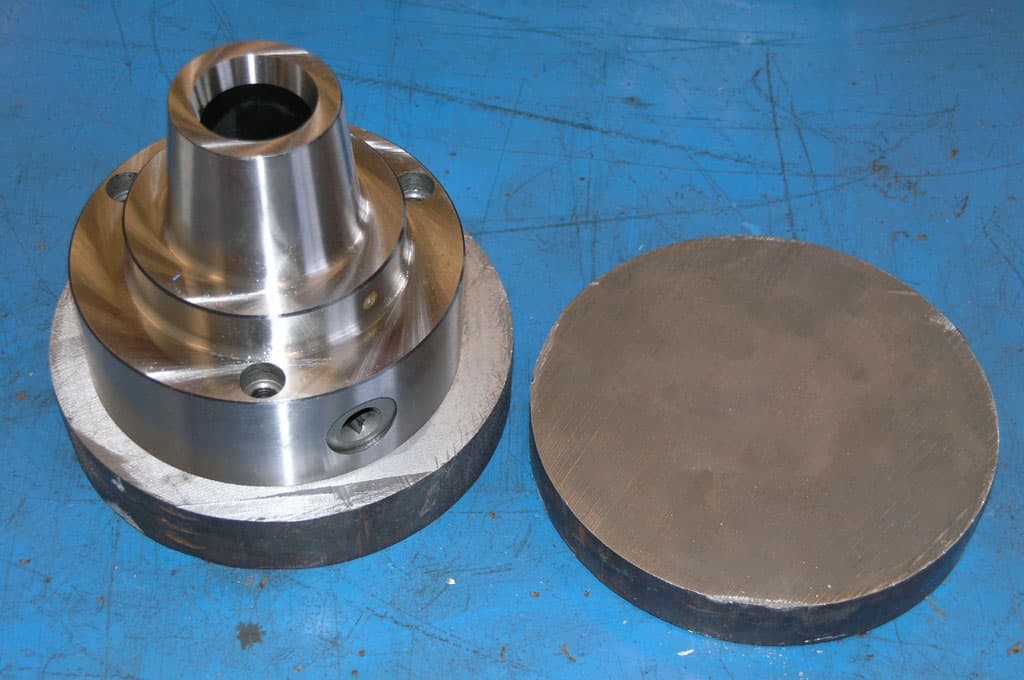
More than enough material here for the 5C collet chuck. It sure is a precision looking thing, isn't it?
Re-Cutting the 5C Collet Chuck's Bore to Be Concentric With the Spindle Axis
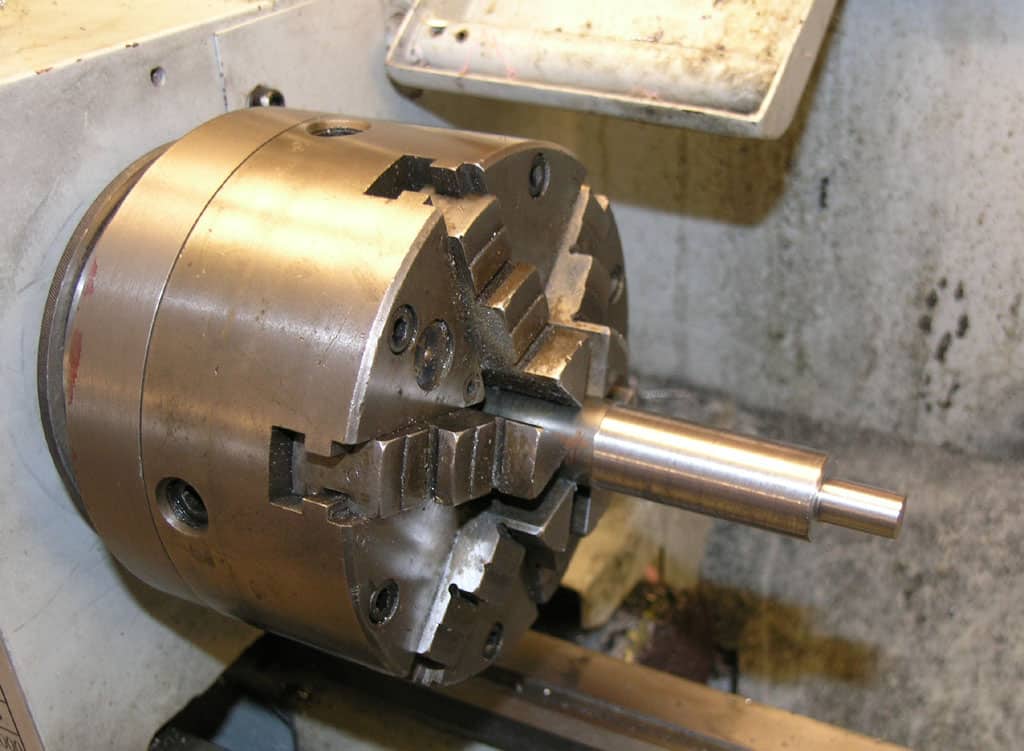
I started out doing an odd thing: I stuck a piece of junk stock in the 6-jaw, turned
it true, and then I put a collet in the 5C collet chuck and stuck the collet
chuck onto my round stock....
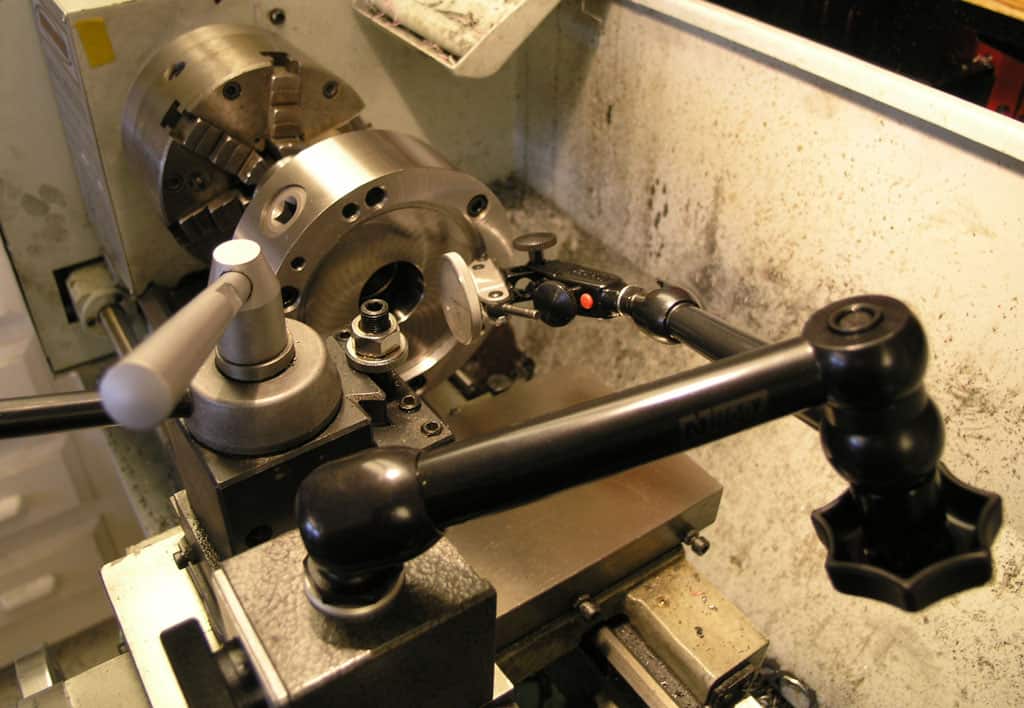
Next I stuck my Noga indicator holder on the lathe and checked the runout. About 0.002-3".
Lousy!
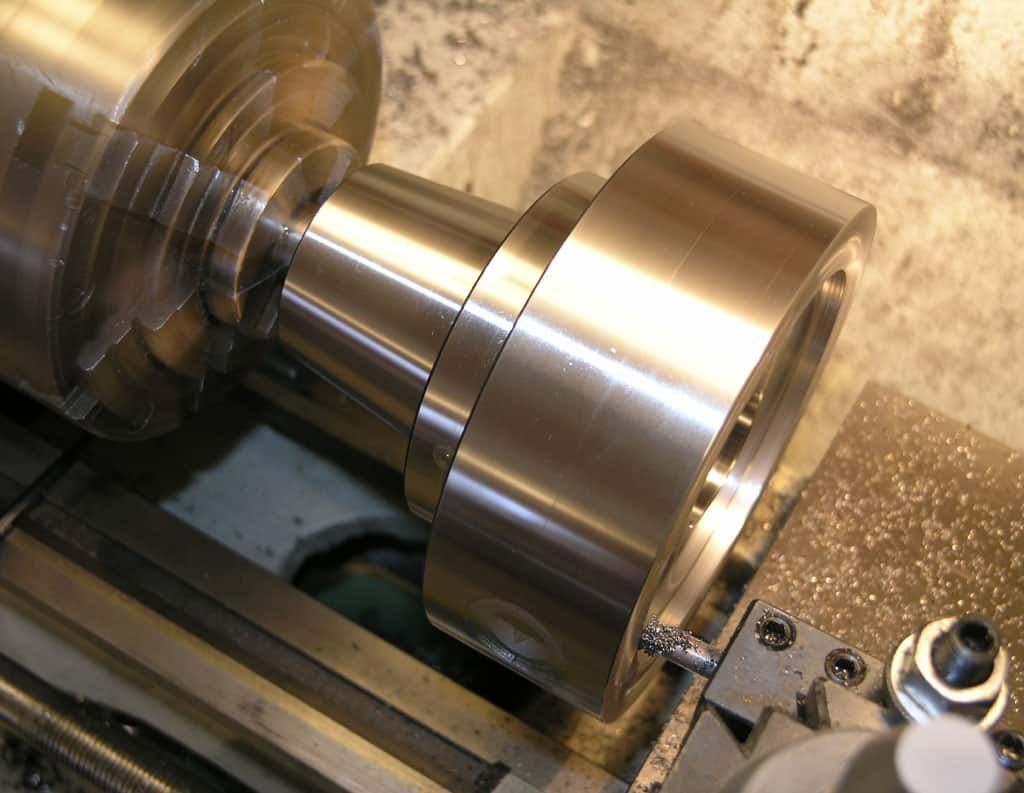
Then I got out my little Circle Boring Bar and made sure the ID on the 5C collet chuck was true
relative to the lathe's axis and the collet on a live piece of stock.
You can only take very light cuts this way, but the technique worked well...
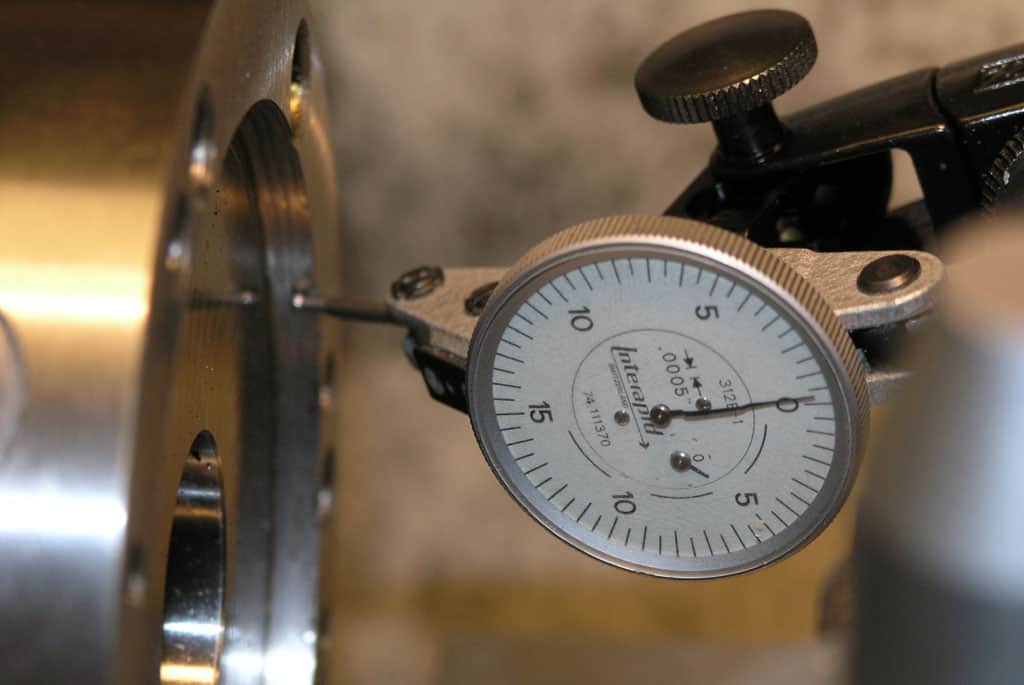
I was out around 0.002" before truing. Now this is the most I'm out. Looks like maybe
2 or 3 tenths. I should be so lucky as to hold that tolerance when I get
it all put together!
Facing the Rough Stock Flat
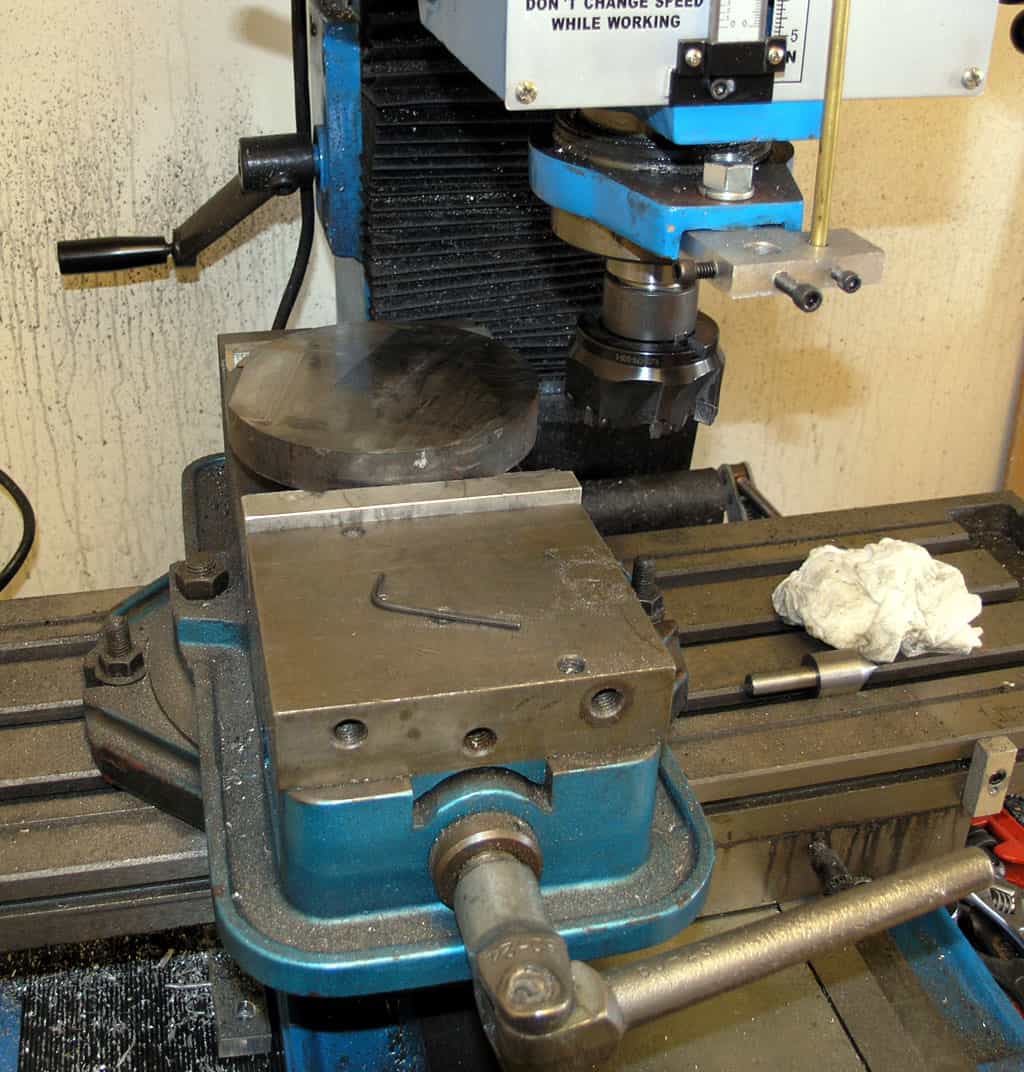
Next I fired up my Lovejoy indexable face mill and made sure the two faces of the stock
were flat. When I made the 6-jaw backplate I had no mill and had to follow
the common method of using a bolt as a spigot to turn on the lathe. It
was a mess: lots of chatter, lots of wasted material for the spigot, barely
enough clearance, yada, yada. Much easier with the milling machine!
Locating the Faux Cam Lock Holes With Shopmade Transfer Screws
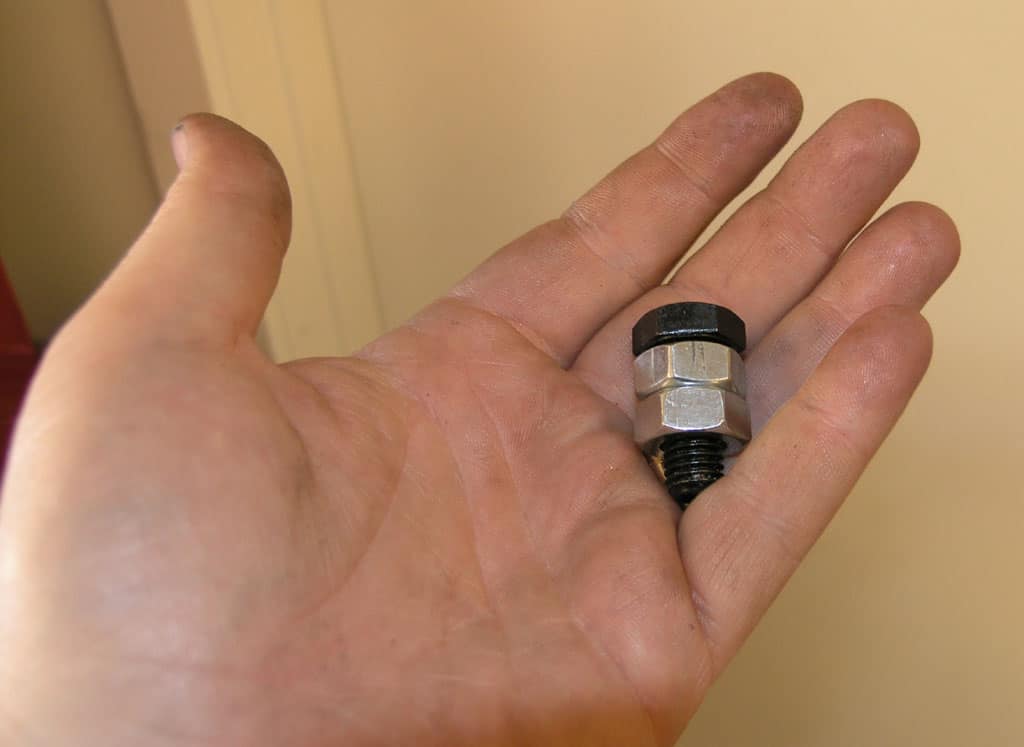
What's all this then? I need to make a transfer screw in M10 to capture the hole locations
for my faux cam locks. You can order them, but they're expensive and I
didn't want to wait. I thought this would be quick and fun to do, and
it was! The two nuts are held by my chuck to protect their threads...
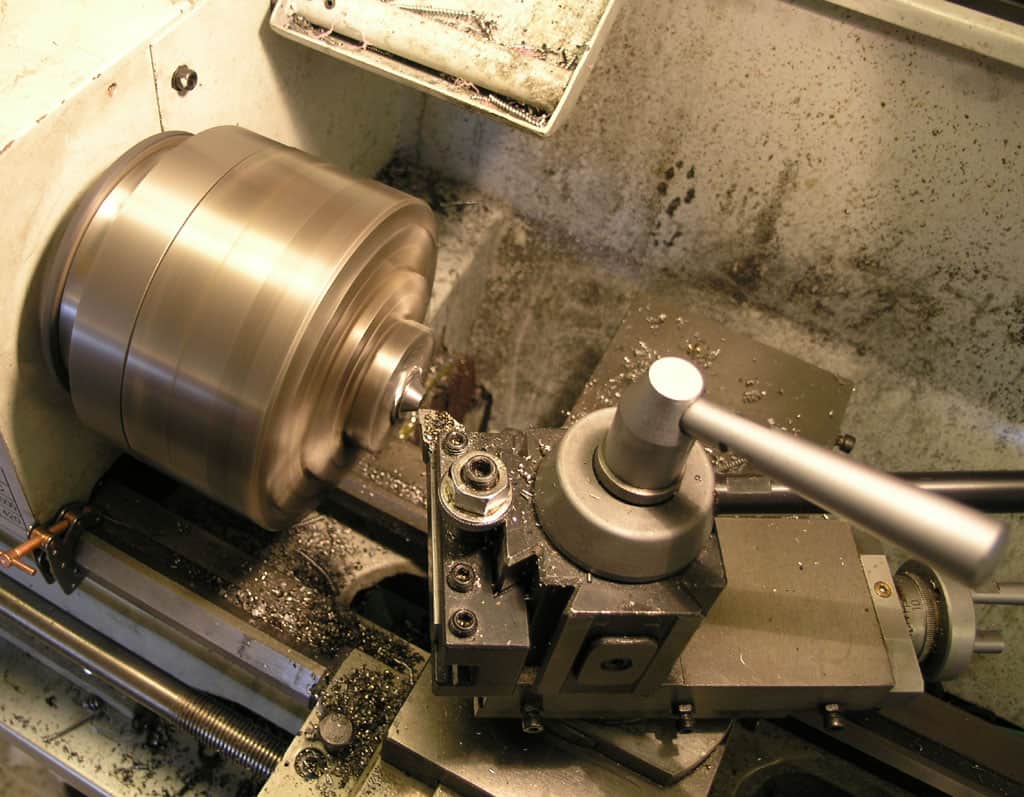
I set over the compound for a 60 degree point and started cutting...
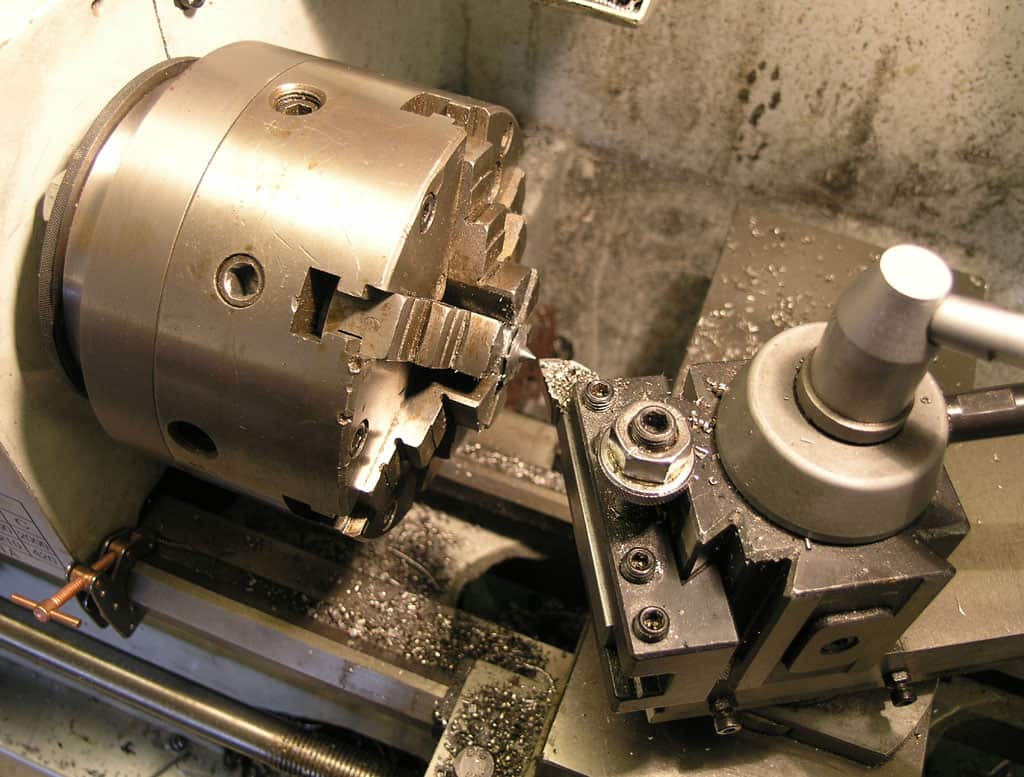
Eventually you
get to a point...
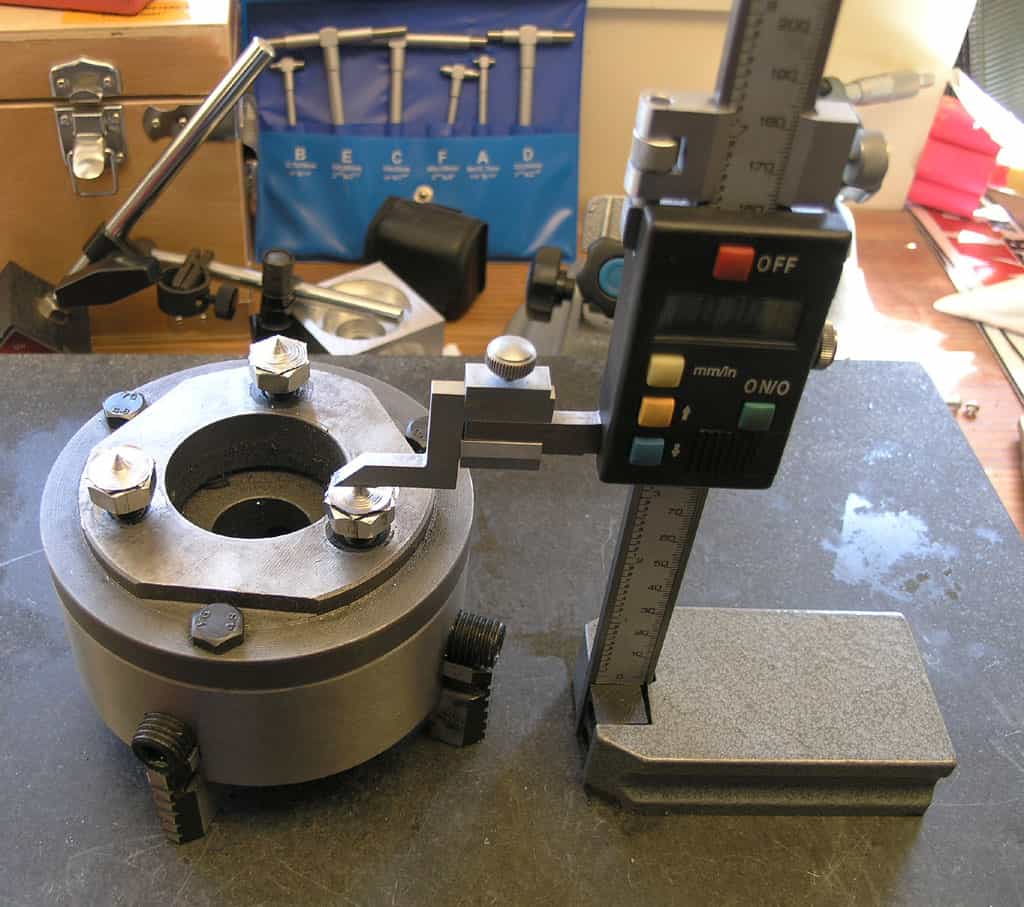
With three made,
I set them all to the same height within a thou with the surface plate
and height gage. Why? No idea, but it was quick and so I did it...
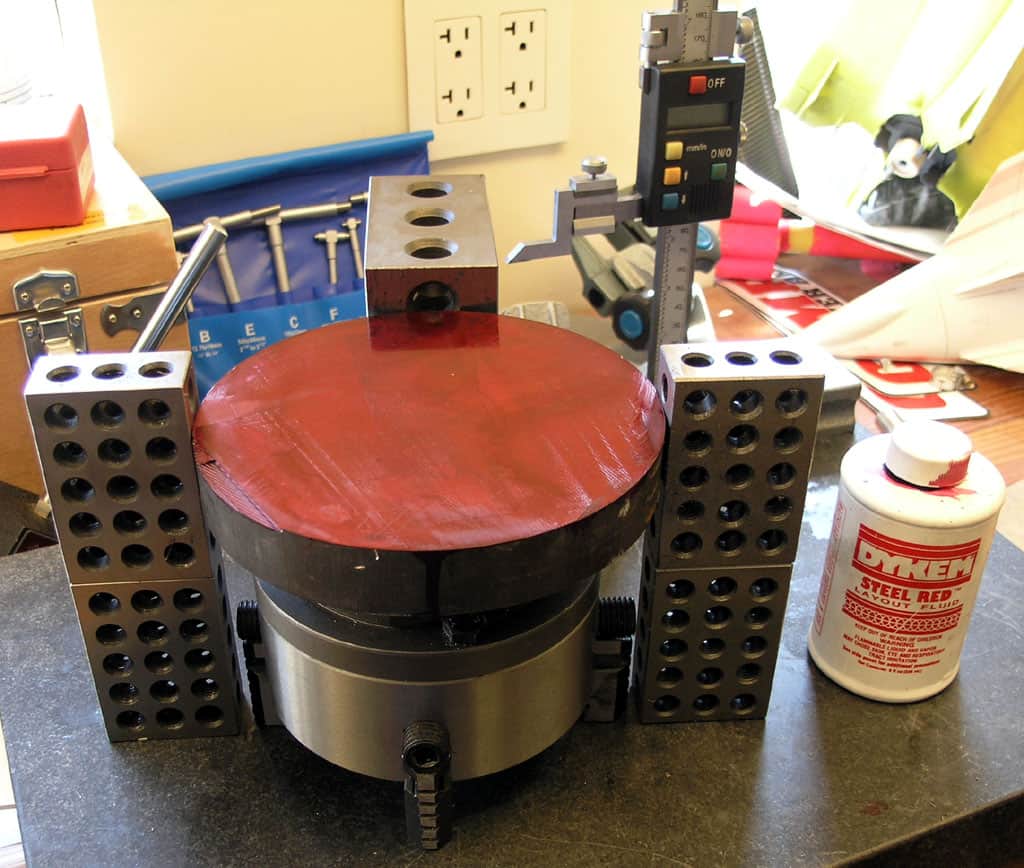
I slapped on some marking dye, and while that was drying, I used the blocks to find
where the rough middle would be. Not a precision intensive operation as
the blank is much larger than the 5C collet chuck and will be turned down anyway.
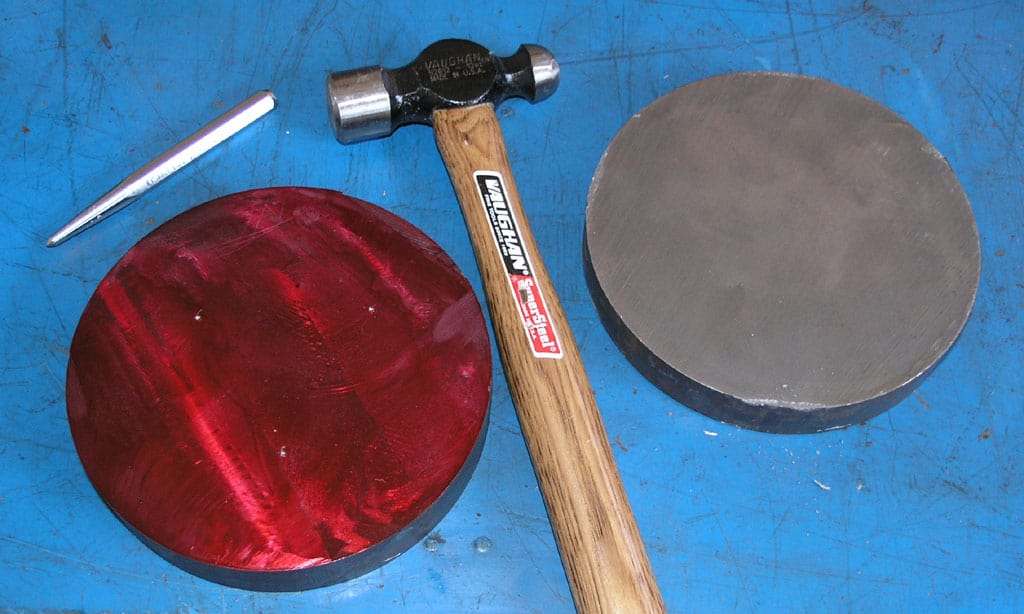
I flipped it
on the chuck, gave it a tap, then took it over to my worktable and gave
each punch mark a much harder tap. The centering isn't perfect, but it
isn't bad...
Mounting the Faux Cam Locks
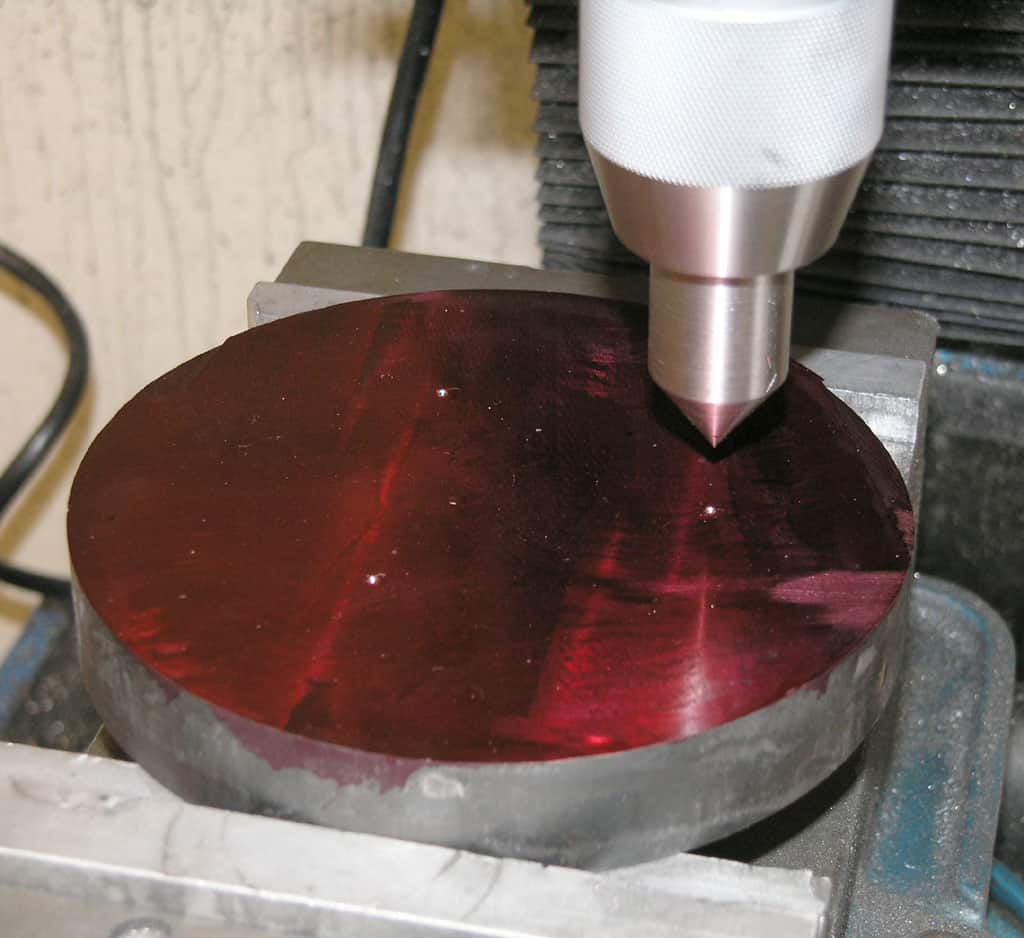
Using my centering spigot to line up on the pips.
I made the spigot one day when I was bored on the lathe. It's handy!
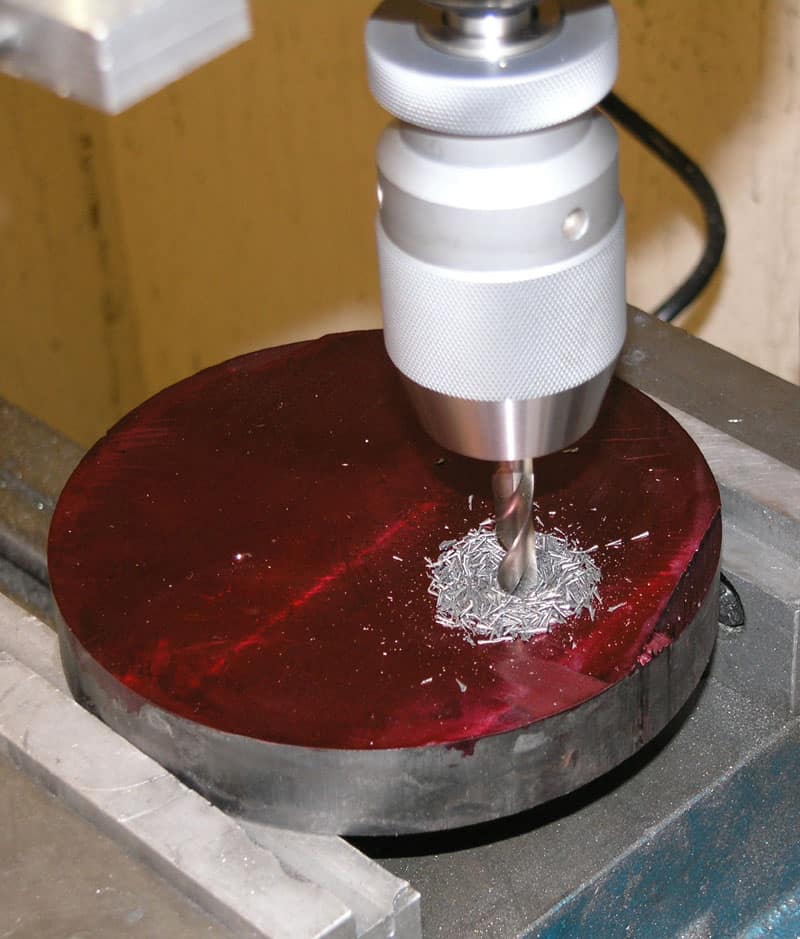
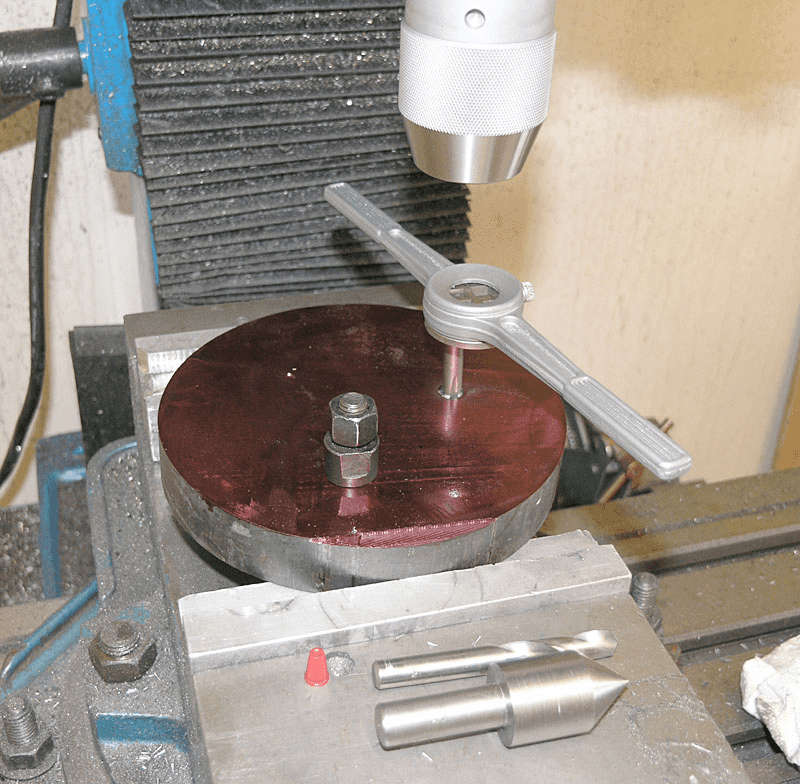
I used 1 size larger, a "T", in screw machine length for the M10 x 1.5mm holes...

I hate my crappy tap wrench, but a new tap in slightly oversized holes in cast iron goes
like a breeze...
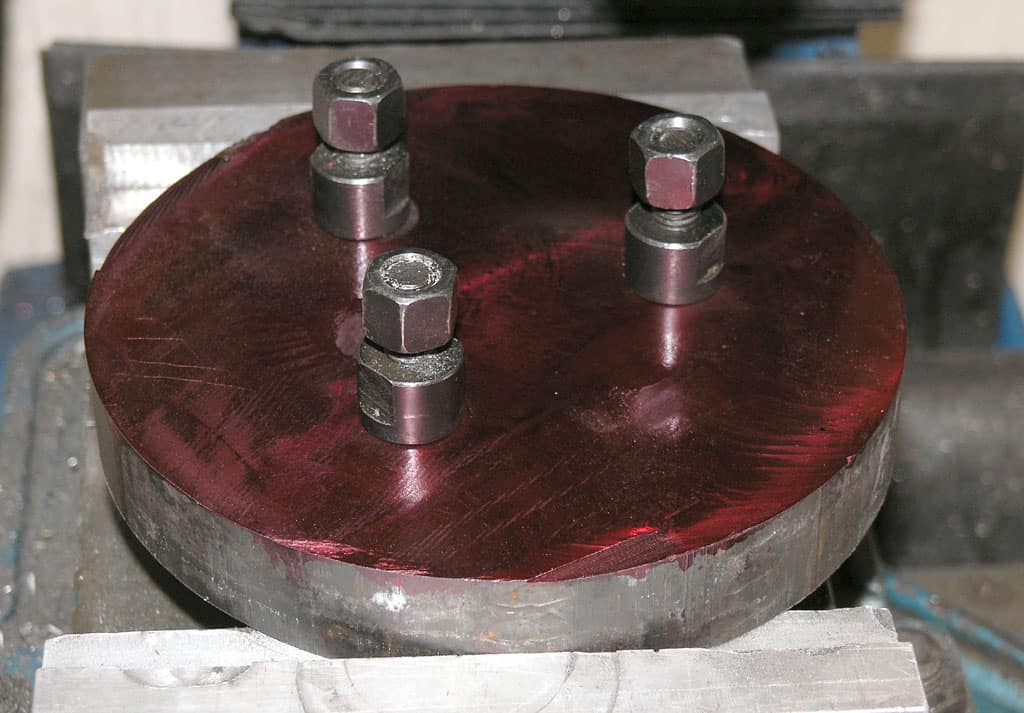
There they are all mounted! Fits great on the spindle. Now I need a center hole...
Backplate Center Bore
My next trick is going to be much harder. I need to place a bore for the spindle nose exactly dead
center of the cam locks. I came up with what is probably an overly finicky and underly (is that a word?) accurate way of approaching the problem.
Before I explain what that is, let me just say that if I had it to do over again, I would probably build a locating fixture that would sit in the spindle bore of an existing backplate and locate the new backplate. It would be a simpler and better way. For future generations, I would do it thusly:
- Build a locating plug gage. One end would be spindle bore sized and a very close fit on a finished
backplate. the other end would be a much smaller diameter to fit a hole drilled in the new backplate. - Start the new backplate faced and with a center hole drilled to fit the plug.
- When using the transfer screws, drop the backplate onto the plug pin before tapping. This would ensure
alignment of the transfer screws relative to the spindle bore. - Finish by boring out that center hold to the spindle bore diameter.
Meanwhile, since I didn't think of that before going to far down this road, here is what I did on this
backplate:
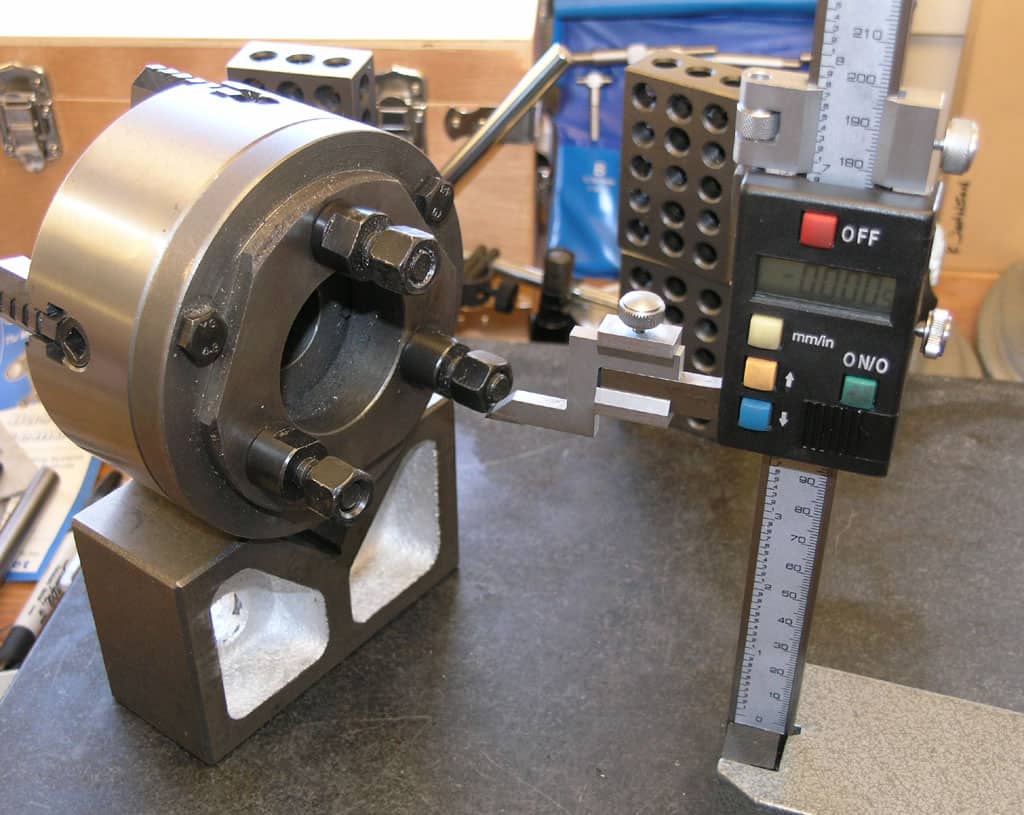
I want to use the height gage to mark out a couple of crossed lines that will locate
the center of the bore. To create a datum or reference, I will rotate
the backplate in the angle block until the two bottom cam lock barrels
are exactly level. I can tell by measuring their heights. I choose two
because an alternative would be to rotate until one cam lock is at the
lowest point. I feel measuring two will be more accurate, but that could
be wrong, it's just an intuition.
Having gotten them leveled, I measure the location of the top and bottom of the spindle
bore. In this case I used the scriber. After I had already gone much further,
I realized I could have done this more accurately by mounting a DTI to
act as a sensitive "feeler" in place of the scriber. That's
another one for future generations to ponder.
Having measured the top and bottom relative to the datum, I can now easily figure out
where center height is relative to the datum.
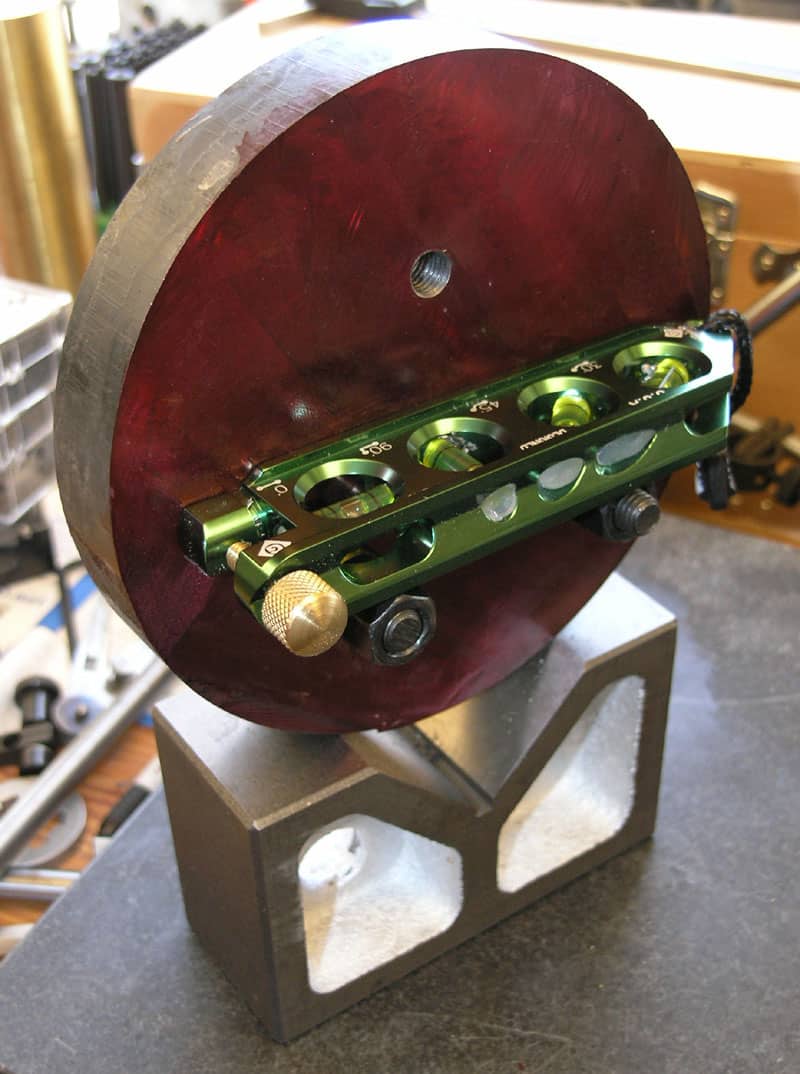

Now I want to
level two cam locks in the new backplate. I start off with a level to
get it close. I tried this three times and learned the level is accurate
to about 20 thousandths. Something to keep in mind for future uses.

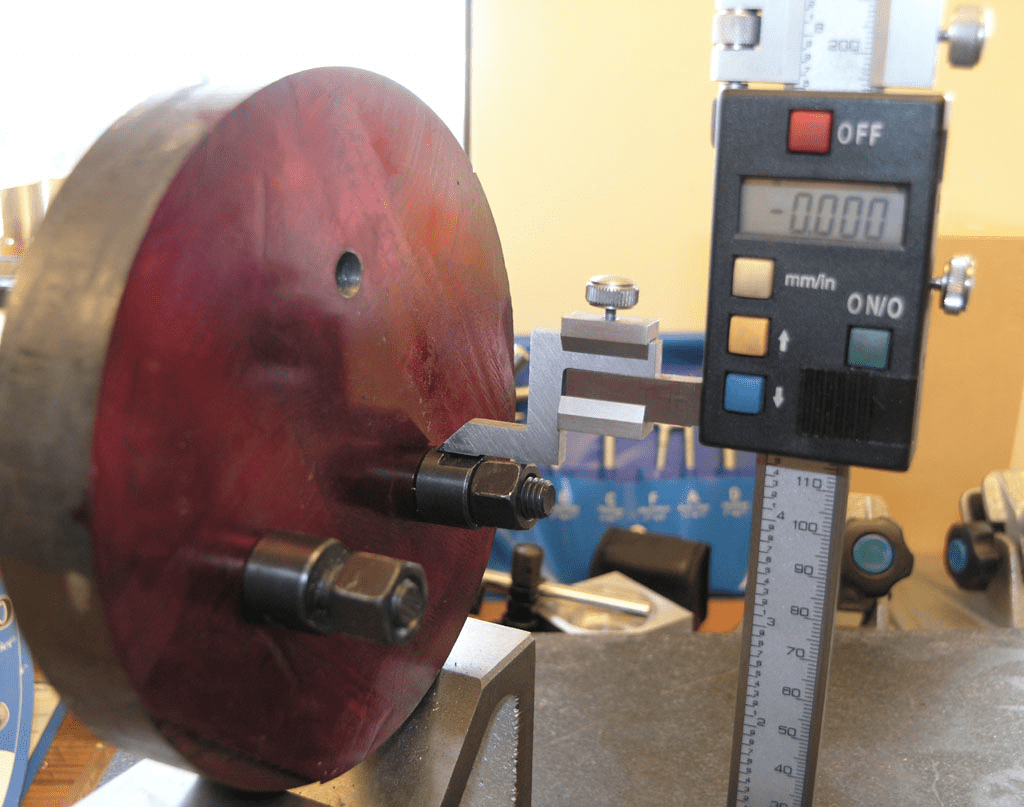
We finish up by adjusting untiil I can test height of both and the height gage says
0.000, which means there are the same height...
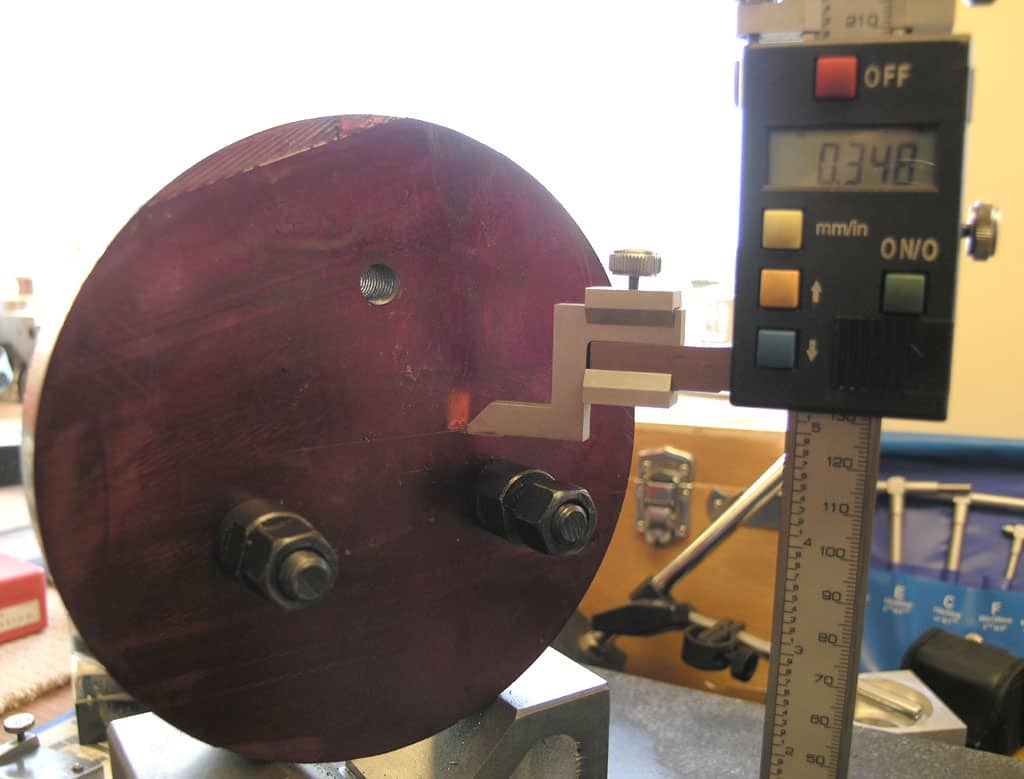

Then I move the height gage up by the amount I calculate earlier and scribe a line
that intersects the center of the bore. The line is faint, but visible
in the dye...
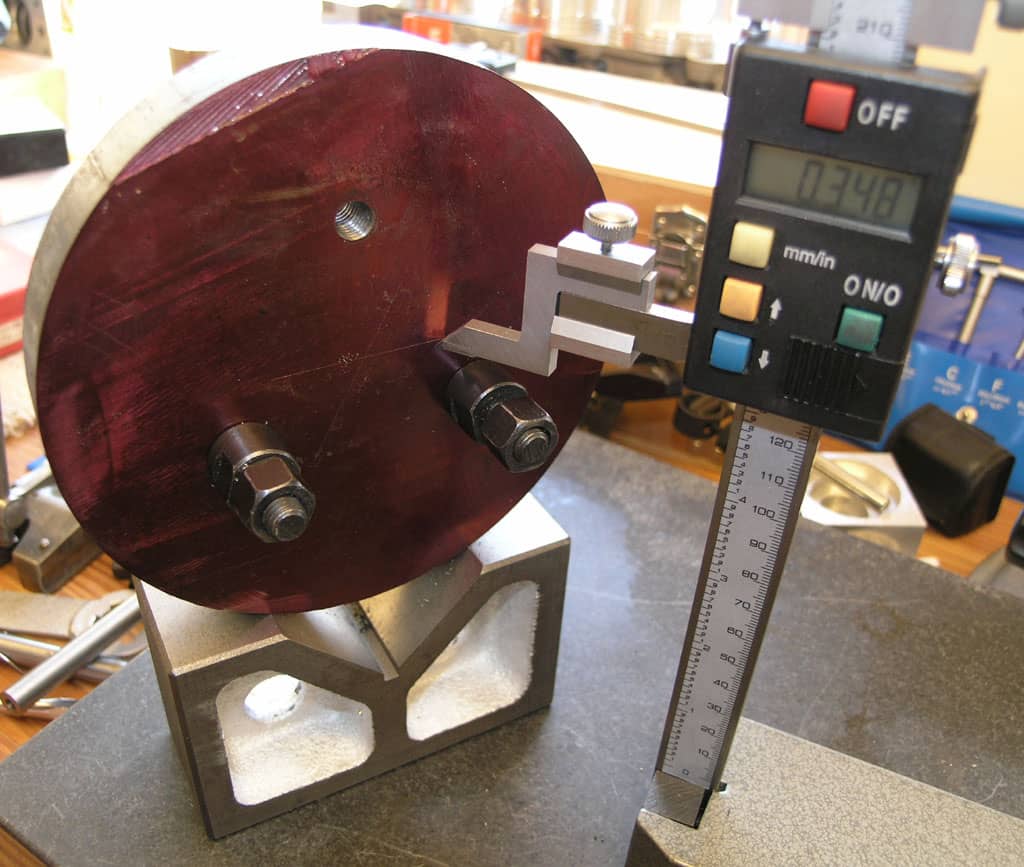
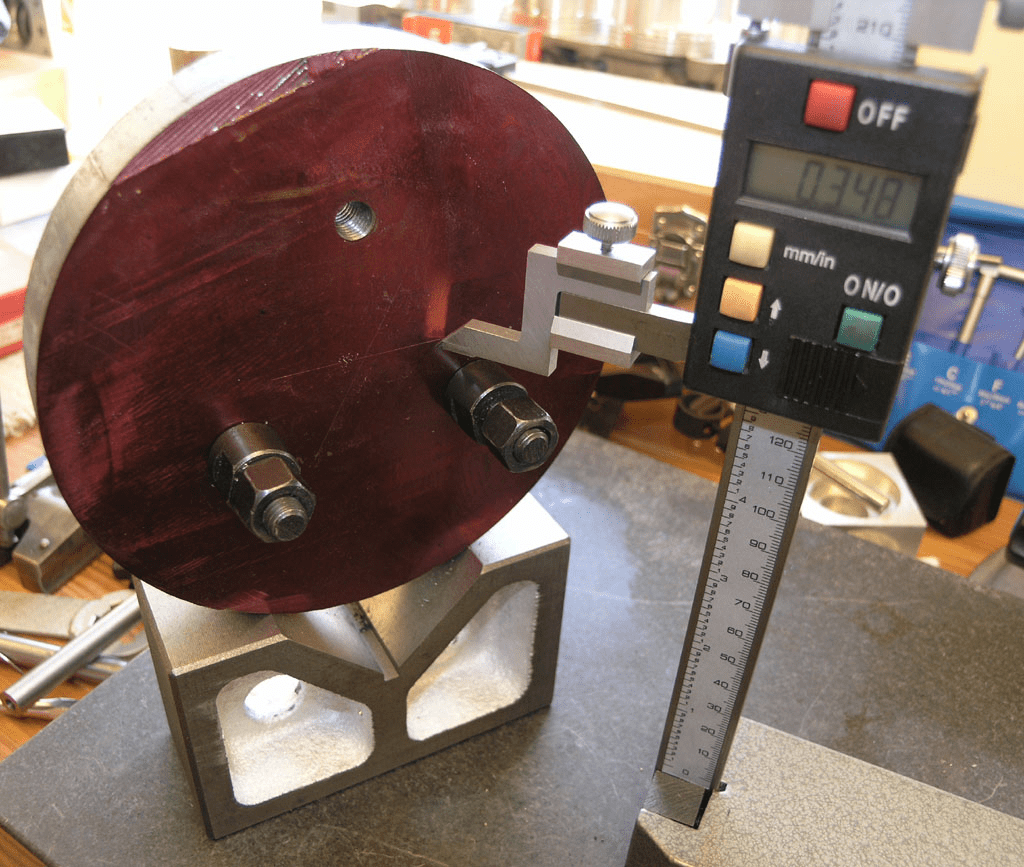
Now rotate the backplate, relevel the cam locks at bottom, move up 0.348" (whew!)
and scribe a second line. The intersection of these two marks the centerline
for the bore...
Another thought: If you have X and Y DRO on your mill, you could figure the coordinates of all these locations in a CAD drawing and just dial them up on your DRO. You can even use the dro to measure the coordinates on an existing backplate. Alas, I only have an X-axis DRO on my mill and no Y-axis, so I'll use this height gage and work more laboriously one axis at a time.

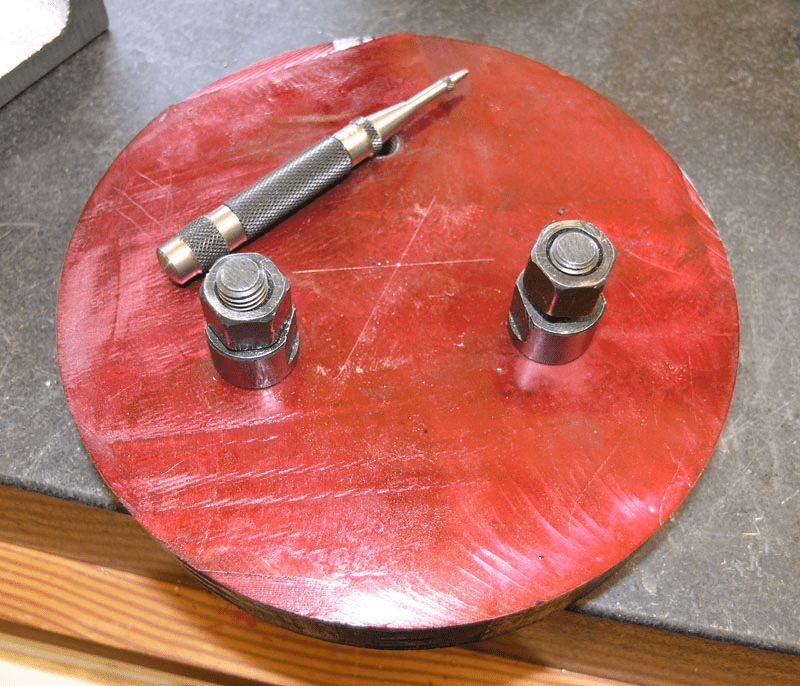
As usual, I pick out the intersect with my Starrett automatic punch, double check
it, and then hit it with the big hammer and punch. BTW, this first try
was off by about 10 thousandths when I double checked. Turns out I added
instead of subtracting when I figured the height. Remember: measure twice,
cut once! I went back and corrected the problem and got the center on
track relative to the holes, at least as measured by my digital calipers.
Boring the Spindle Nose Hole: Part 1, Roughing It
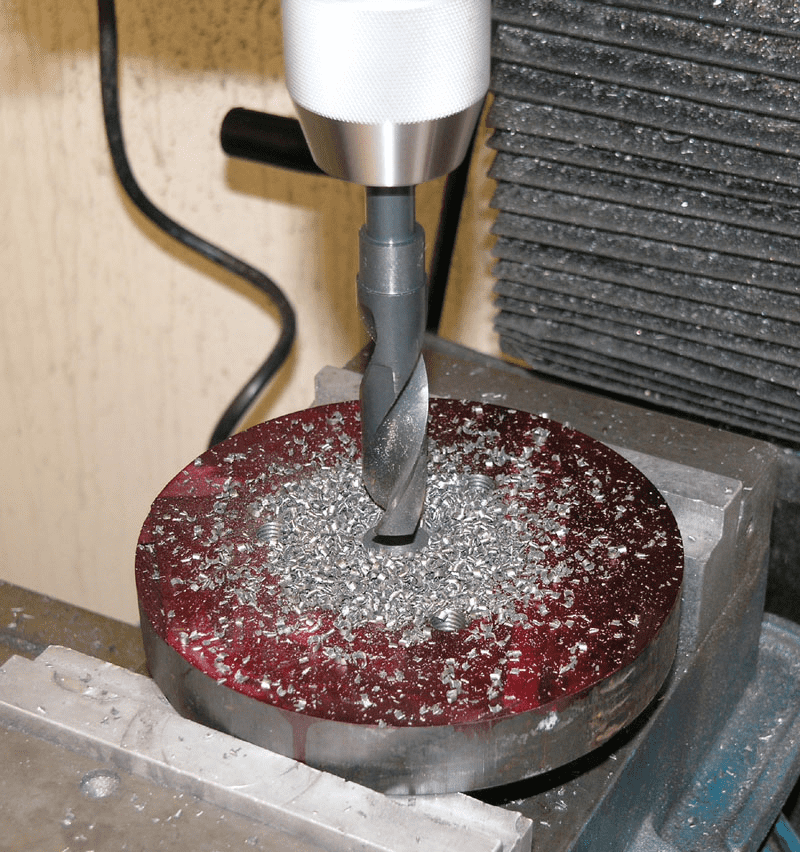
I started with a 3/8" screw machine bit, and then went to 1/2". After that,
I dug into my Silver & Deming bits and went 3/4" and then 1"...

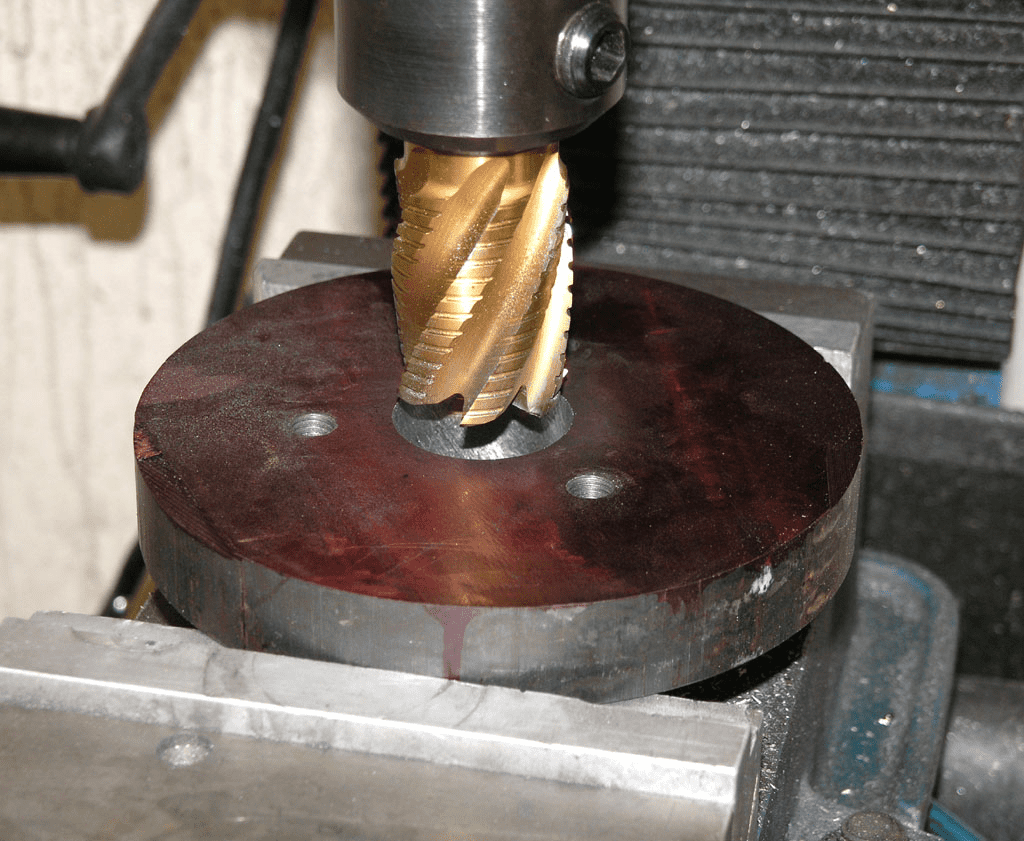
How about that
big honking corn cob? The silly thing is 1.5" and it cut much more
smoothly than my 1" Silver and Deming twist drill. The main issue
is that it needed a fair amount of feed pressure or it would chatter while
plunging.
Why all this drilling and plunging? A boring head is a slow operation. I wanted to
get the bore as large as possible to minimize the boring head work to
reach final size.
Boring the Spindle Nose Hole: Using CAD to Fix An Alignment Issue
Now that we've roughed in a center hole, it's time to set up the boring head to make a more precise bore. The eventual bore is 52mm = 2.047". Before going further, I wanted to adjust the center we're boring to to eliminate as much error as possible. The approach I've chosen is to rely on my CAD program for help. First, I measure the distance from the OD of each cam lock hole to the OD of the nascent spindle bore. Of course they were not equal. I got measurements of 0.543, 0.575, and 0.500". Things are off pretty far, it looks like!
Next, I drew up a diagram in my cad program that shows these relationships:
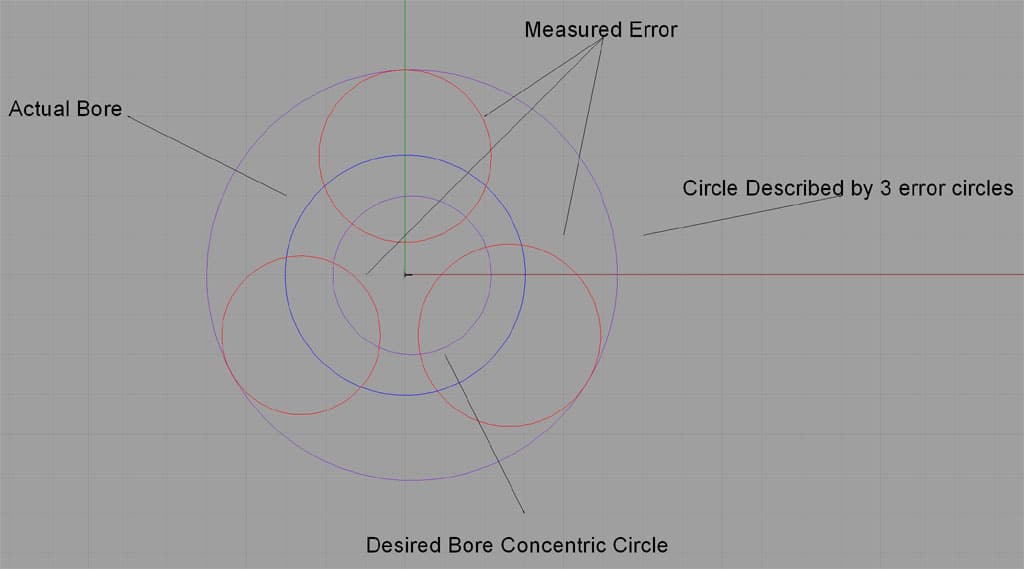
Here's how the diagram works:
- First I drew the Actual Bore at the center of the drawing.
- Next, I drew a circle for each of the errors. The center of the circle is on the radial to the cam lock bore where it intersects the actual bore, and the radius of the circle is the amount of the error: 0.543, 0.575, and 0.500". Those are the red circles on the diagram.
- Now I drew a circle describes by the points where the 3 radials intersected the far edge of the error circles. Those points are just the centers of the cam lock holes. That circle is the purple circle. The desired location of our bore (as opposed to the Actual Bore, DOH!) is at the center of that purple circle.
- I drew another smaller purple circle on the same center as the big one but closer to the actual bore circle so I could eyeball where I'm off.
Now, I did a really cool thing that CAD programs make easy. I drew a rectangle that had one corner at the center of the Actual Bore, and the other corner at the center of the Desired Bore, and I applied dimensions to it:
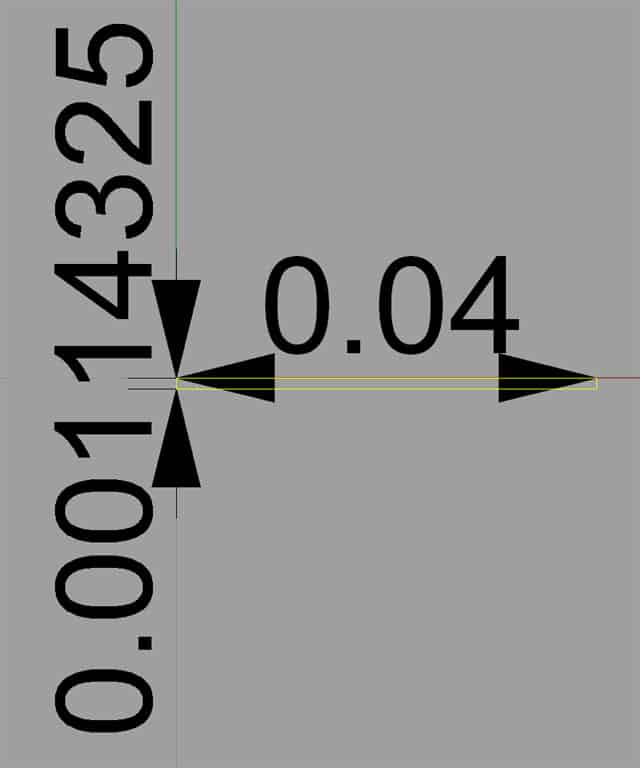
That rectangle tells me exactly what I need to do to fix the error on my Actual Bore! In this case, Y needs to move down about a thousandth (pretty darned close!) and X needs to move to the right 40 thousandths (something lousy there on my original layout or in how the milling operations worked. In fact, given that almost all the error is in X, I would be willing to bet a lot my be due to my mill head being out of tram. Having your head out of tram causes an X error if you raise or lower the head. And, I had been face milling and fly cutting since I trammed last to get the faceplate square. Doggone it: need to re-tram the head after face milling or fly cutting every single time!
Thank goodness I have this nifty CAD program to help me figure out how to recover!
Boring the Spindle Nose Hole: Getting on With the Boring!
Having stopped to figure out the error of my ways, it was time to get things going again.
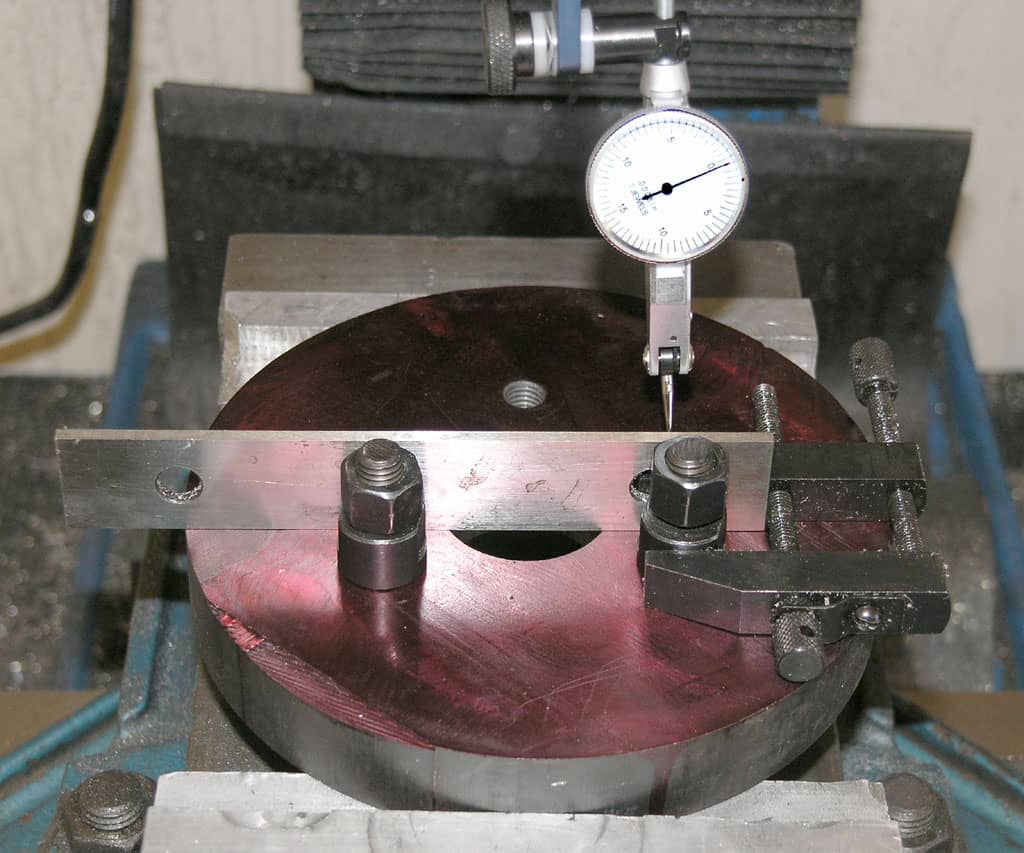
First step is that pesky "leveling" operation again. I clamp a parallel and sweep it just as you would to tram the vise jaws. Now I'm oriented to match my CAD drawing so that the correction on the X-axis can be dialed in on the handwheel...
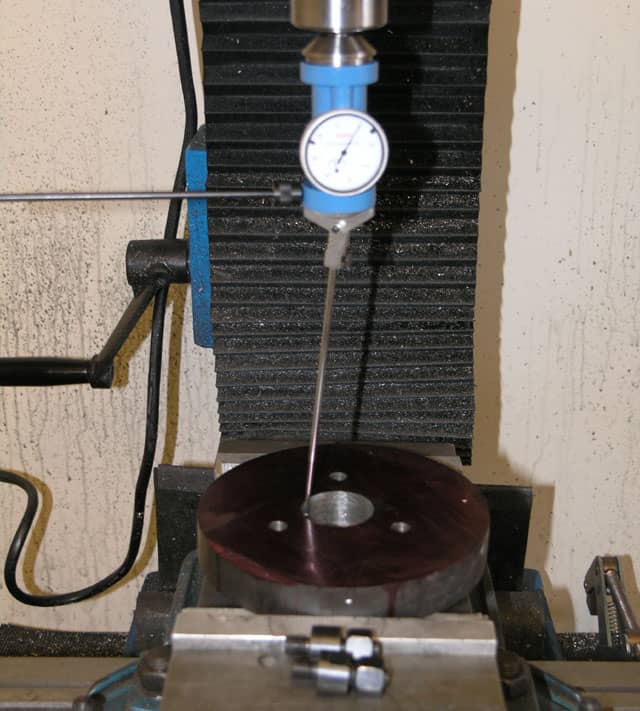
Next, I got out my Blake Coax and made sure that bore was centered under the spindle. I should've used a shorter feeler that would be closer to the boring head's actual location. Trouble is, I was thinking the boring head was in an end mill holder, and I wound up using a collet instead. After centering on the bore with the Blake I used the handwheels to adjust for the error in the bore: I move the X-axis 40 thousands and the Y-axis a smidge over 1 thousandth. When I did this, it was pure voodoo. You'll be amazed later on when I measure how well it worked out!
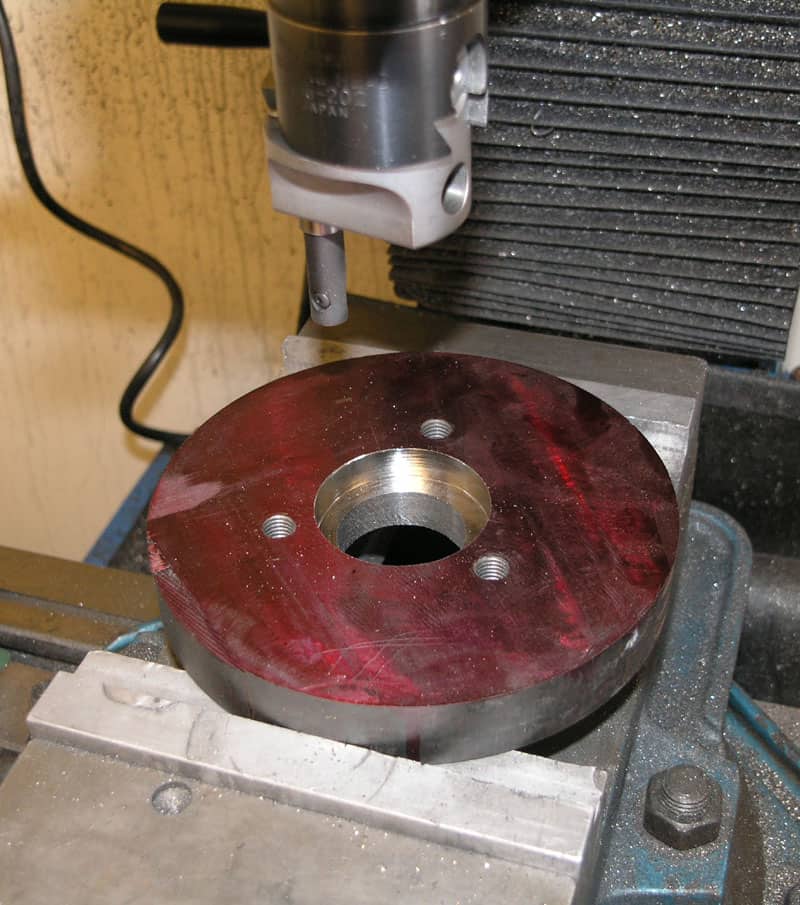
And so the boring job was done, using rough caliper measurements to check the diameter. Sadly, I do not have a big enough internal mic to do this check...
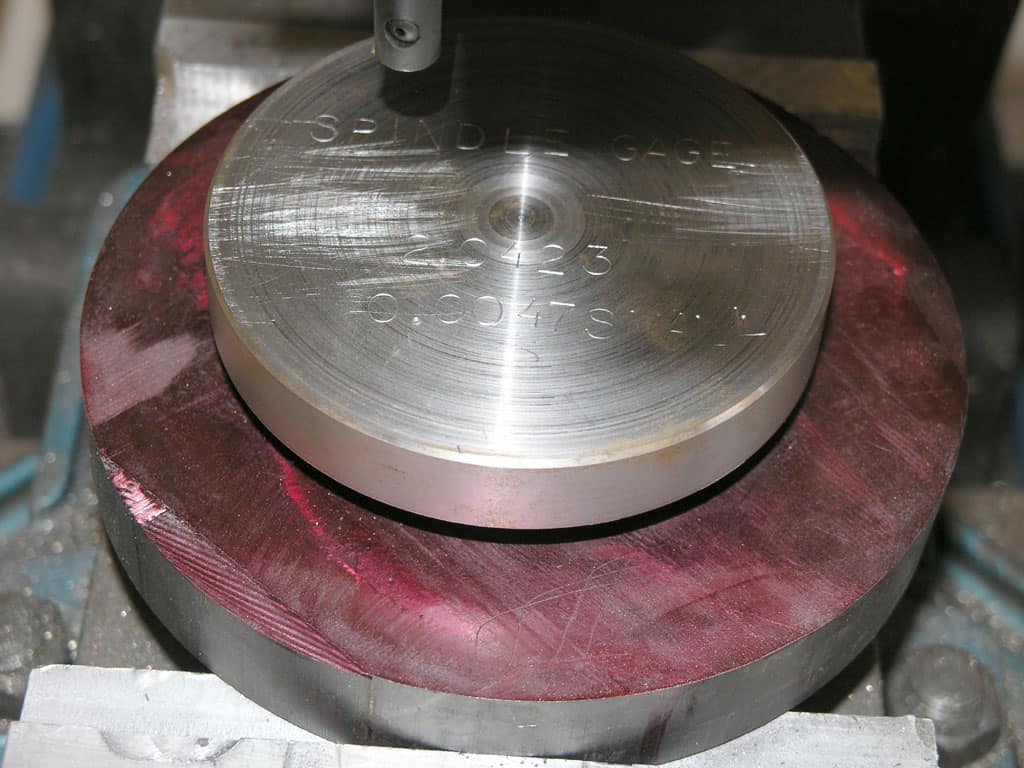
But, I do have my trusty spindle plug gage! I made this handy little goober the first time I did a faceplate. I even stamped some useful information into it, as you can see. I had forgotten it, but luckily spied it on the shelf. It's 4.7 thou too small (an error in my early days), but still handy. I can use it to tell when I'm close and then dial the last few in after the plug just fits. I added 6 thou to be sure things would fit before tearing down the seutp.

I can't tell you how pleased I was to see that big ugly cast iron potato fit perfectly the first time!
Truing the Backplate on the Lathe
Now that I can mount the backplate using the faux cam lock system the spindle was designed for, the real fun begins. I can actually use the lathe to machine this thing in such a way that it will be veyr accurate. Besides which, my lathe is easier for me to be very accurate with to this day.
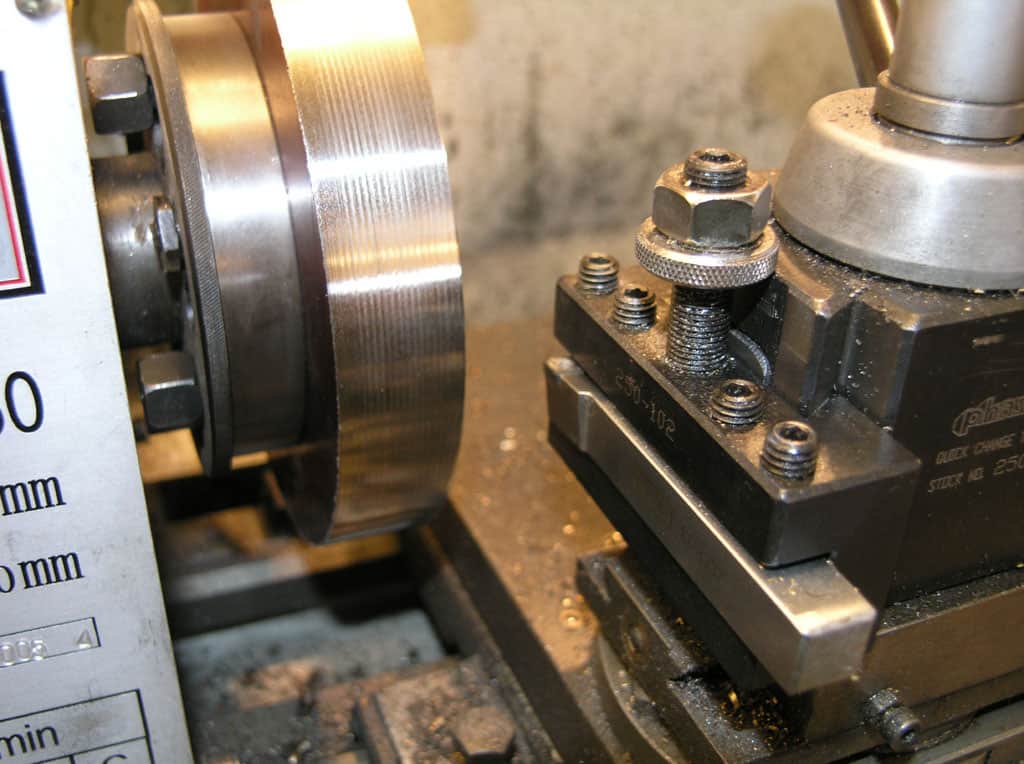
Clearances are very tight! To face, I had to put the tool holder in a kind of odd position in the holder. Should be more rigid though! That edge is not pretty because it ain't done. I just roughed it. I will make it right after the chuck is mounted as the very last step.
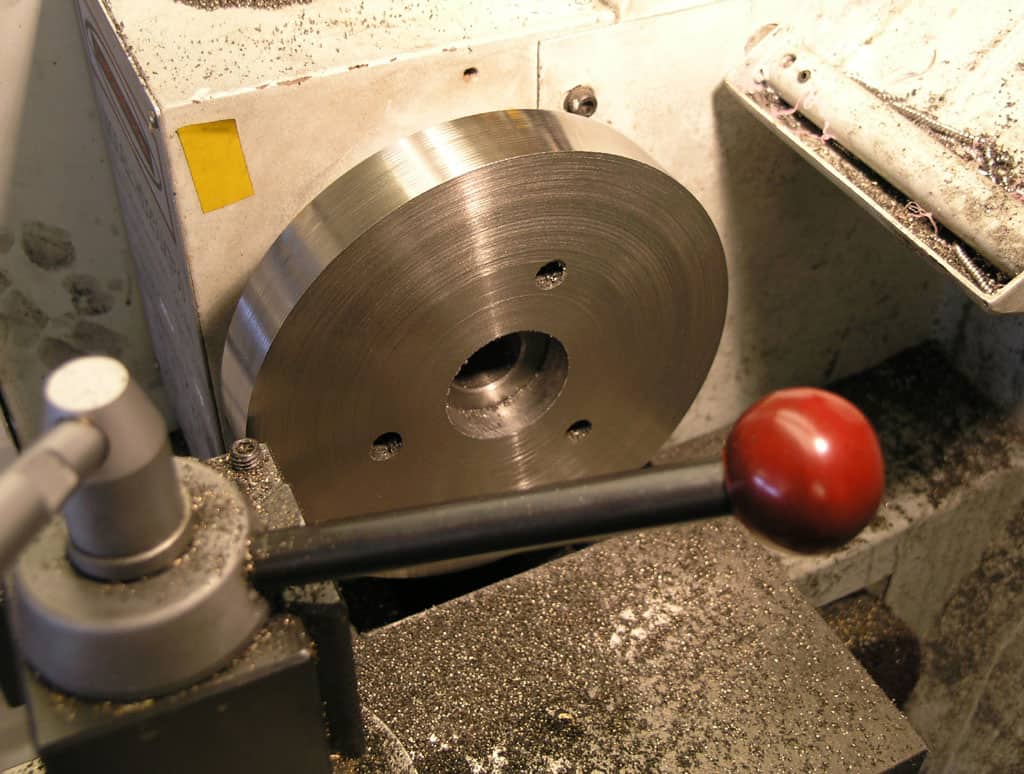
At last, after turning and facing, this thing is square on the lathe.
Now most guys would cut the spigot that fits in the chuck's recess, drill the chuck mounting holes, and call it a day. However, a collet system can be extremely accurate! Therefore, I want to go the extra 9 yards. My plan is machine a second bore for the spindle nose on this side. I will then reverse the cam locks to this side, reverse the whole backplate onto the spindle, and this side will have a much closer fit to the spindle nose because it will have been bored on the lathe in the position I want it to be concentric with. It will be interesting to see the difference in the two bores, but I expect it to be quite noticeable for two reasons. The first bore was located relative to the faux cam locks, which was not a very precise business to start with. Also, I slightly oversized the bore to make sure I could get it onto the lathe. The second bore will be made to much tighter tolerances to located that backplate exactly!
Boring a Second Spindle Nose Bore
Okay, good news and bad news on this step. First the bad news: there are no action photos! I left the camera upstairs and got absorbed in doing this boring job, so there are no pictures of the process! All is not lost. There was nothing special here, just your ordinary run of the mill lathe boring job. Relax, it'll be okay. Now the good news:
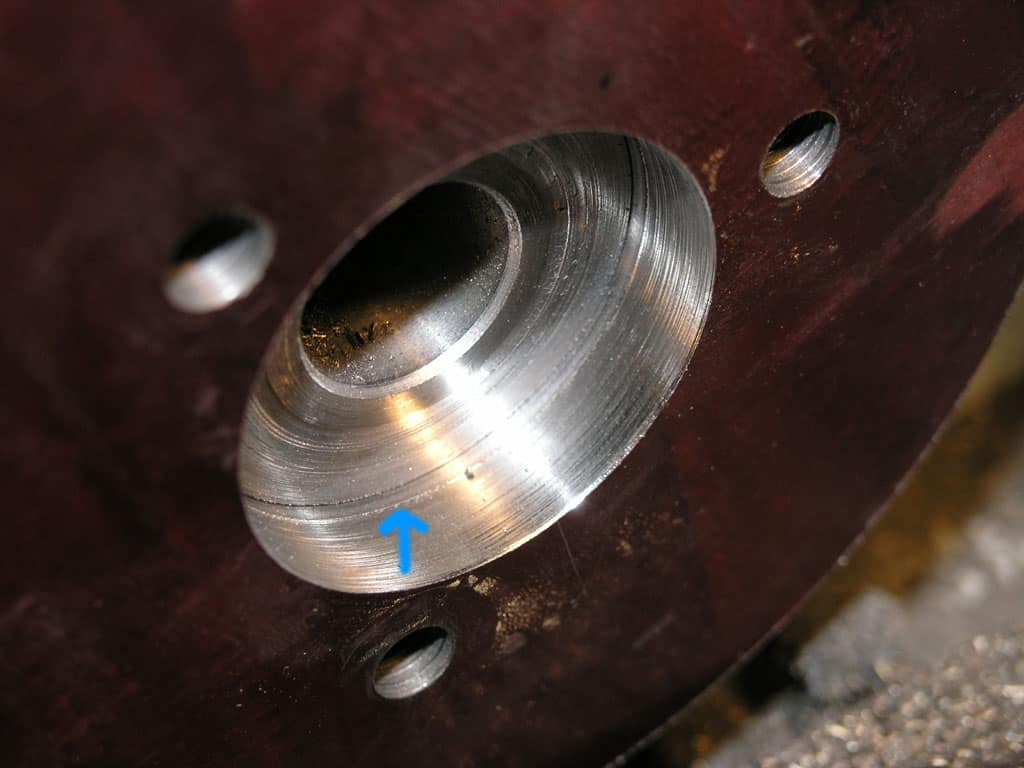
See the ridge that blue arrow points to? That's the line of demarcation between the old bore done on the mill with a boring head and the new bore done on the lathe for concentricity. Remember, the new bore is ever so slightly (a couple thou) smaller in diameter to make a snugger fit on the spindle nose. Look at how that ridge looks. It looks like the two bores are concentric within a thou or less because the ridge is completely symmetrical all the way around. I would never have believed it!
I guess it really does help to measure twice and cut once, and to own a CAD program to help you figure out how to fix your mistakes!
Making the Backplate Spigot to Fit the Chuck Back's Recess
Coming into the home stretch now fans!
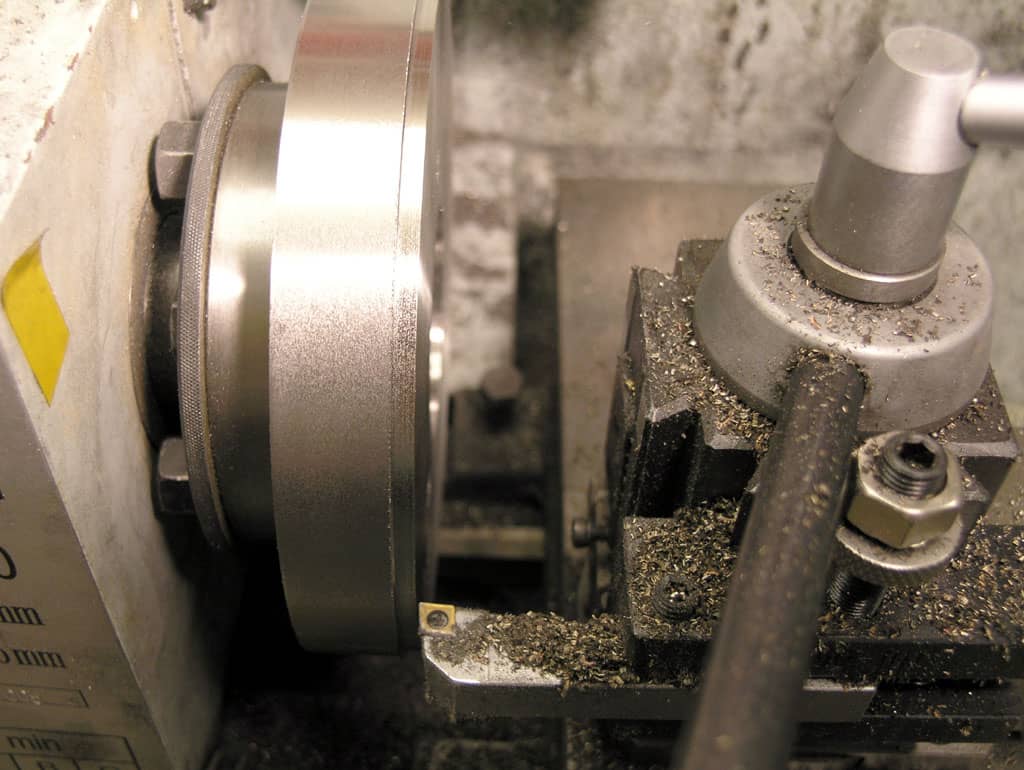
I cleaned up by facing away that marking dye as well as turning the edge down a little further. You can see there is no more phonograph lines now. BTW, the really rigid way to do this is to lock the carriage and feed with the compound. I found that way out on this long diameter (between 5 and 6") I couldn't take more than 20 thousandths depth of cut without stalling the lathe. I swapped the belt, which I haven't done in ages due to my variable speed DC motor, and that got me to 30 thousandths. I can see why folks want a lot of HP on an industrial lathe. My DC treadmill motor claims to be 1 HP, but there is no way. It doesn't even feel as strong as the Chinese 1 HP that came with the lathe. Someday it would sure be cool to slap a 2 HP motor on with a real VFD. Man this lathe would fly!
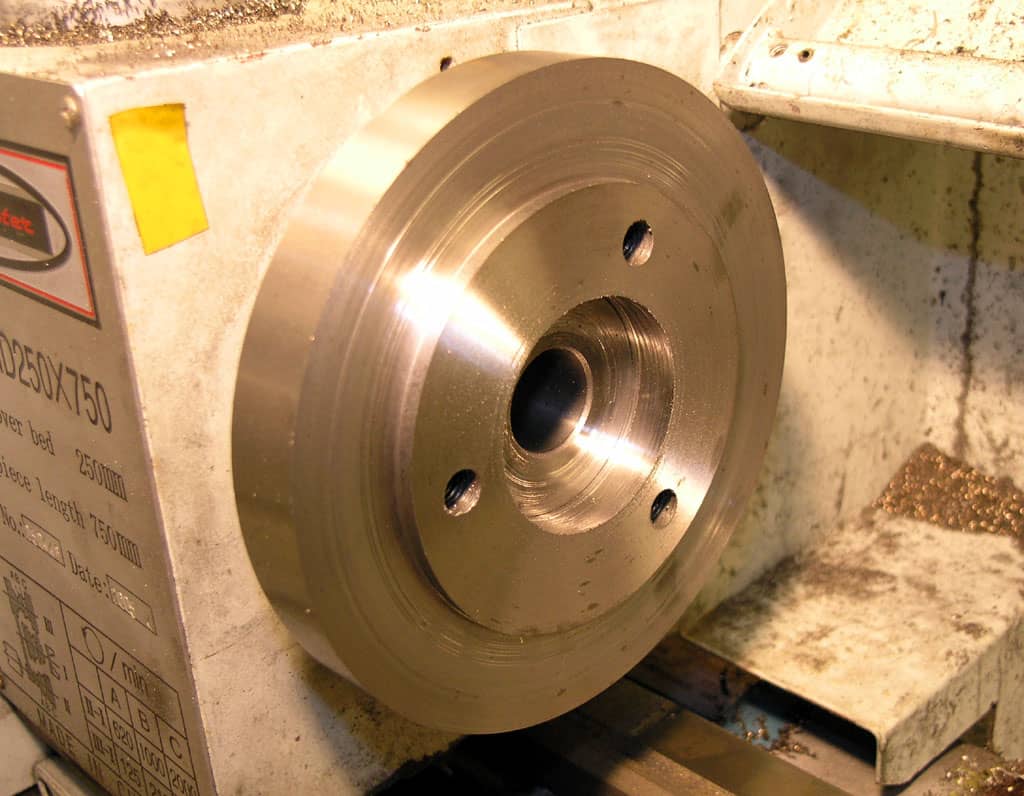
Okay, the spigot is close. It's about 60 thousandths too large still. I want to get it to almost an interference fit, within about 2 thousandths of the ID of the chuck back. This will ensure maximum precision fitting it up. I also need to decide how to drill and thread holes for the mounting bolts if I've interference fitted the chuck, so I'll need to be able to get the two apart one last time too. It's late, and I'm going to bed now!
Shrinking the Chuck onto the Backplate and Testing Accuracy
To achieve the shrink fit, I needed to machine the backplate to an extremely close fit to the chuck. In fact, as close as possible. I would then rely on heat and cold to make it possible to temporarily fit them together. When the two return to room temperature they'll be locked together.
My first step was to accurately measure the internal bore on the back of the chuck. This is not an easy task! Digital calipers are nowhere near close enough. I do not own an inside mic that is large enough for the 3.772" bore (what I eventually measured). So, I improvised. I stacked a bunch of precision objects in a line in the bore. The centerpiece was a 1-2-3 block laid right in the middle of the bore. On either side of it, precision gage blocks. Lastly, on either side of the gage blocks, I put a pin gage. The round pin gage would fit the bore nicely. After some futzing around to get all the pieces snugly fitted, I pulled them out. On paper, just looking at what the dimensions were supposed to be, I would get one number. Instead of trusting that number I measured each piece individually with a micrometer and added them all up. The difference in the "real" figure versus the "labeled" figure was 0.00065". Not too bad considering there were 5 different pieces, but I definitely wanted to use the measured value. In this case, it put my Chuck ID at 3.77259". So, I resolved to put the nose on the backplate at 3.7730". The shrink fit comes from the 4 tenths difference in the two.
Keeping my micrometer handy, I delicately turned the chuck shoulder down to as close to 3.7730" as I could get. I wound up a couple of tenths under, but I was pretty proud of the work on this little lathe. I was taking very light passes, I did not set up the compound for find feed as I was using carbide (doesn't do microfine cuts), so I had to "nail it" on a final cut that was 0.001" and a scosh. The other thing I was careful of was not to let things get too hot. I started a little 60 thousandths out from where I wanted to be, so I took some "rough" cuts in the ten thousandths range (20 on the diameter) and then one final pass for the win.
Having accomplished that, I carried chuck and backplate upstairs to the kitchen. The chuck went into the oven at 380 degrees, and the backplate went into the freezer. I brought a long my largest soft hammer for additional insurance. I let the two reach their temperature equilibriums of hot and cold for an hour. When I assembled the two over a cutting board (my wife always cringes when these things are going on in her kitchen), the chuck just plopped very nicely onto the backplate. No muss, no fuss!
I left them there to reach equilibrium for another 2 hours while we went to dinner, and then ran down to the shop to test the accuracy of the fit on the lathe. The test I decided to perform was to measure a "real world" situation. I would take 2 different sized parts requiring two different collets, insert them in the chuck, and measure the runout with a DTI on a magnetic base.
The first part was a partially completely faux camlock:
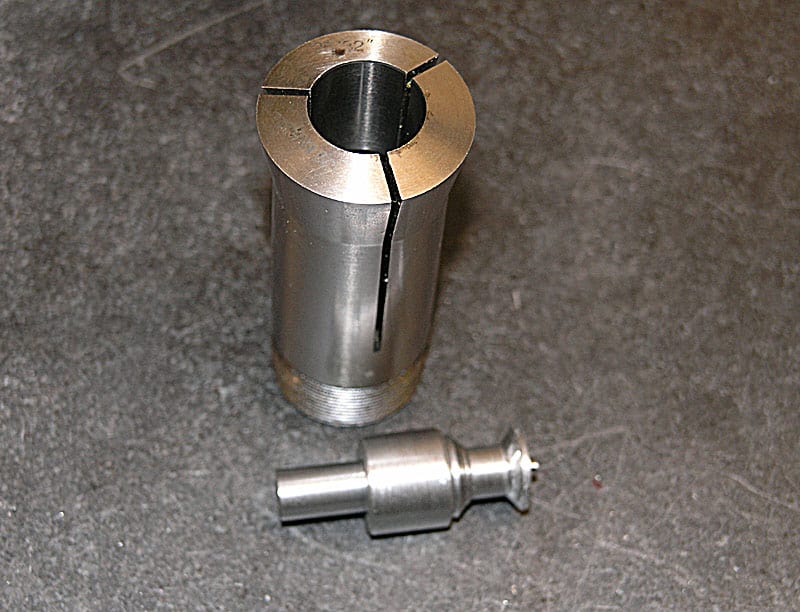
The barrel of the camlock (largest diameter) and the lefthand smaller diameter should be concentric as I made them with my 6-jaw back at the beginning of the project. Eventually I will finish, but meanwhile, I swiped the camlocks from my 4-jaw to get on with testing. The 4-jaw cares least about them because you dial it in every time anyway, so the new camlocks will be going to it.
The second "part" was a precison pin gage 0.250" in diameter. I took 3 measurements on each that involved completely removing and reinserting the part in the collet, but not removing the collet itself. And now for the bad news, as you can see in this photo of the runout being measured for the pin gage:
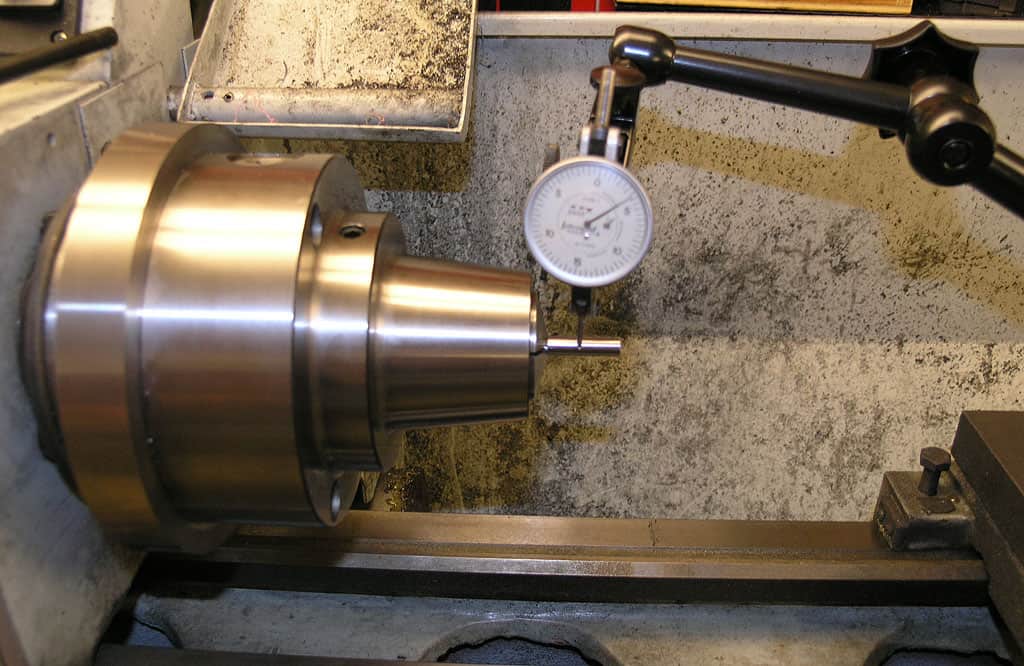
Very depressing, about 0.004" runout! I tried these measurements 3x for each part as I mentioned, and they were very repeatable. That, at least, was something. I resolved to try the tests with different positions of the camlocks in the spindle. Perhaps there was one that was better than the others? So, I used my Starrett Automatic Punch to mark the spindle and the chuck. This will be useful in future, and is something I should do with all my chucks once I find their "best position" so I can repeat that.
This procedure helped a little, but not a lot. I got the TIR down to around 0.003". It was also far better for the pin gage than for my camlock part. Rarely, I could get the pin gage down to 0.001". The camlock, OTOH, was sometimes out as much as 0.007". I went to bed thinking I would need to engineer an adjust-tru setup, which would mean a lot more work before I'd get much use out of the chuck.
The Next Morning I Figured It Out: Back to Basics
I wandered down to the shop thinking I had a lot of work ahead. Before diving in, I just wanted to try a few things. I set up the indicator to measure the runout on the taper without a collet. It was the advise of Bogstandard on the HMEM board that these tapers weren't worth much on cheap chucks. Sure enough, I had the same 0.004" runout on the taper. At least my collets appeared to be in good condition!
So I pulled the chuck off and was about to get out a gear puller so I could separate the two and start work, when I had a thought. Was my lathe's spindle nose out? Back to the DTI and I found the lathe spindle nose was around 2.5 tenths as far as I could see. Very good, and a real relief! While there I noticed some debris, and got going cleaning up the lathe. Then it hit me: what if debris was throwing off my collet chuck? Worth an investigation.
So I cleaned chuck backplate and spindle nose thoroughly. I cleaned the collets thoroughly. I got looking at my cam lock test part and noticed a ridge at the unfinished end which I ground off. I put it all back together and did the measurements again. It was much better: I was now seen 0.001 to sometimes 0.002" accuracy. The camlock was now just as repeatable as the pin gage, which was also reassuring-that ridge was throwing me off.
But it was still not good enough. Along came the lucky break. For some reason, I didn't move the DTI out of the way as I started loosening the camlock nuts. Because of this, I was able to see how much the DTI moved even before those nuts weren't tight. Hmmm, could this be helpful? So I developed a procedure for attaching the chuck. It involved installing the chuck with the nuts just a little past finger tight. I would then put the DTI in place and tighten the nuts that had the most error until the needle was back to zero. Odd, but it worked.
I remeasured everything, including the nose taper:
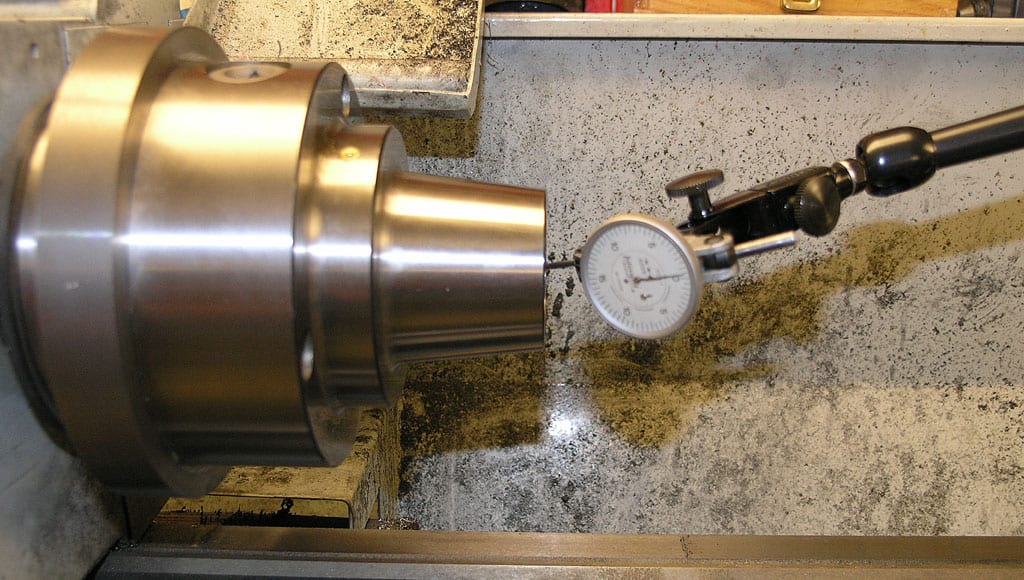
As you can see, my troubles had gone! This chuck was now accurate to 0.00025", and dead repeatable. I'm still not done, but I am so much closer!
Last step:
Drilling and Tapping the Chuck Mounting Bolts
The shrink fit might even work by itself for light work, but the better answer is to install the mounting bolts. This will be a bit tricky without removing the chuck from the backplate, but I believe I can do it.
Ball Bearing Collet Chuck Key
If you use a collet chuck much, you'll realize there is a lot of key cranking when you change collets. Not so much to change workpieces in the same collet, maybe a turn or so. I got tired of the cross bar for my chuck key falling on the floor as I would try to spin it quickly with my index finger. The knurl intended to keep the bar in place was so light as to be useless. Looking around the shop for appropriate scraps, I came upon a bag full of little skate bearings and a piece of brass stock. Not too long after I had a much more convenient way to operate my collet chuck!
Here are a couple of pix:
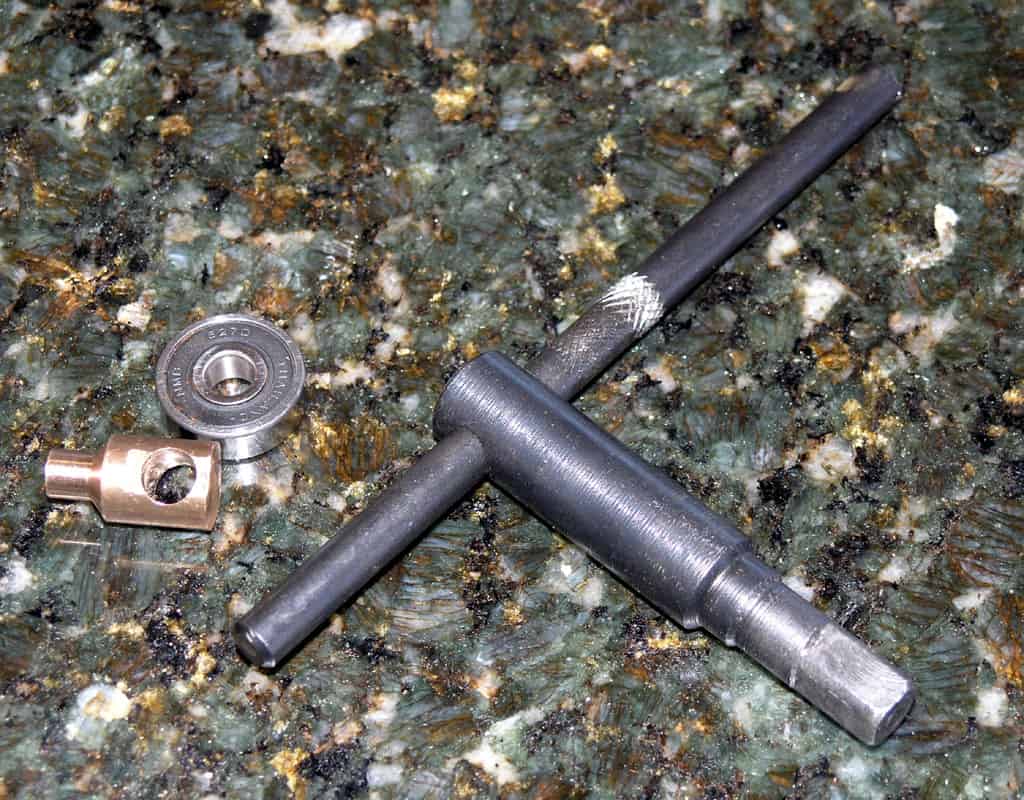
The components: I re-knurled the key to keep it from sliding out on that side. The brass piece fits the ball bearing and the chuck key cross bar on the other side..
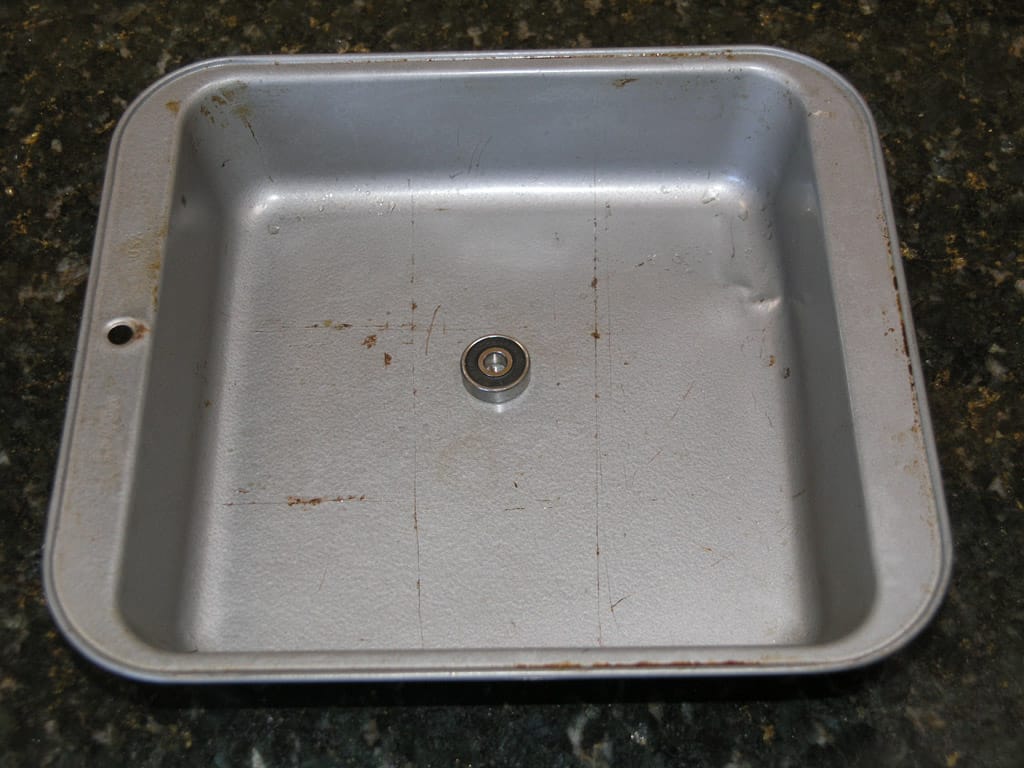
To fit the ball bearing to the brass piece I did a shrink fit. the bearing goes in the oven and the brass axle goes in a glass of ice water...
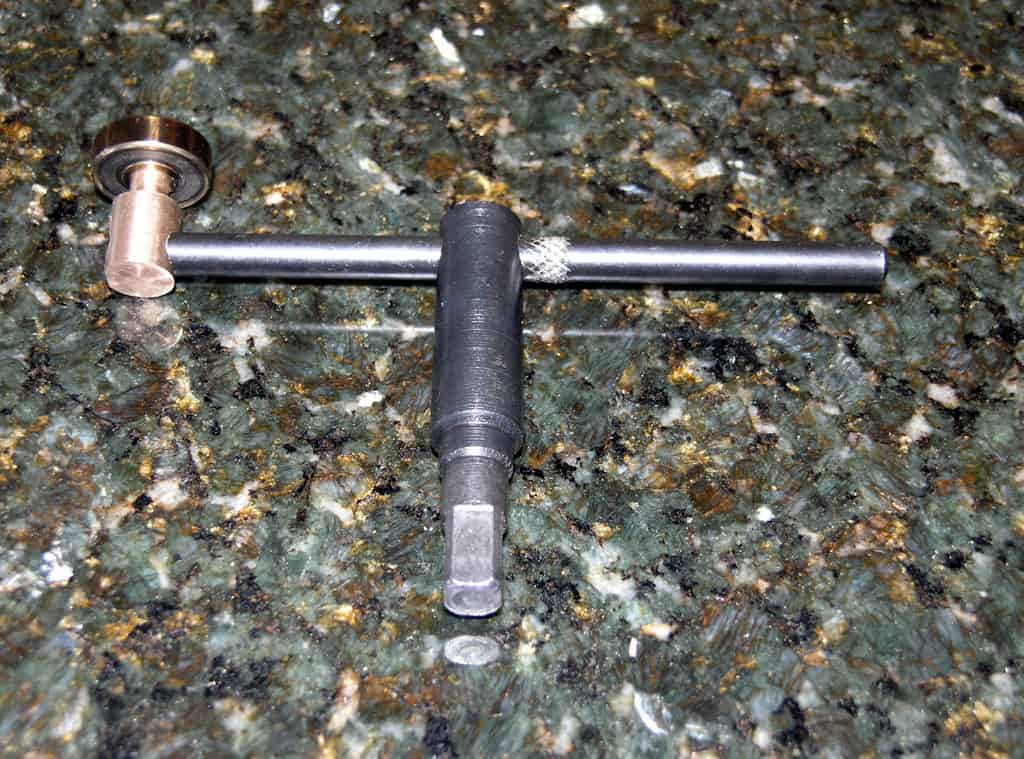
After a little while we can assemble the works and Voila! Ball bearing chuck key spinner. The bearing outer rim makes a fine knob to grasp when spinning the key...
Be the first to know about updates at CNC Cookbook
Join our newsletter to get updates on what's next at CNC Cookbook.