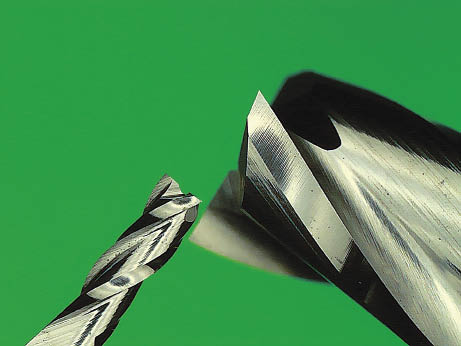
Certain questions become more apparent over time, and one topic I frequently hear about involves machinists having a difficult time with their fragile micro-mills and other small cutters breaking too often. They are looking for advice on how to prevent this issue.
The first step is to ensure you have appropriate feeds and speeds for these cutters. Cutters that are smaller than 1/8" or around 3mm inhabit a different universe than most of the cutters we're accustomed to.
The formulas and calculations used for feeds and speeds that work quite well for larger cutters require significant tweaks for smaller ones to account for these varying conditions. For instance, the geometry at these scales typically results in the rake being on the negative side for the cutters.
Our G-Wizard feeds and speeds software is designed to consider all these factors, making it highly capable at calculating the right feeds and speeds to use for your small cutters.
For best results though, you have to go beyond the feeds and speeds. Here are a few thoughts of where to look for problems when you're breaking small cutters:
1. Never reduce the spindle rpms much without reducing feedrate first. Reducing the rpms balloons the chip load, and it is chip load that breaks cutters. Too much rpm merely dulls them sooner.
2. Small hobby machines typically have more spindle runout than expensive pro-CNC's. This is a real problem when micro-milling because you should think of runout as a % of the cutter's diameter. Hence a small cutter tolerates very little runout, and the smaller the cutter, the less runout that can be tolerated. Even pro-grade CNC machines can run into this problem over time as bearings start to fail. Runout can also be made worse by your tool holder. I had a brand new ER32 collet one time that turned out to be bad. It looked perfect, but I was breaking 1/8" cutters in it right and left. I was convinced my cheap collet chuck was at fault, but I eventually tracked it down to the brand new collet. Replacing it immediately improved my results. It's pretty hard to accurately measure your runout on tiny endmills, but it is important to keep this source of trouble in mind. One last thought on runout. I mentioned it is too much chip load that breaks cutters. Runout places most of the work on just a few or even one flute depending on how the flute is oriented relative to the direction of the runout. Hence, a lot of runout, as a % of tool diameter, is increasing your chip load by that same %. If you're already close to the "edge", you'll break the cutter just as surely as dialing up more chip load by any other means would.
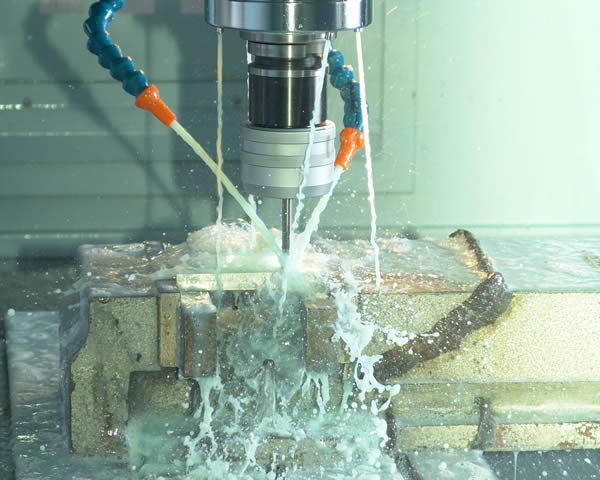
3. Probably the number one issue for hobbyists is clearing chips. I always cringe when I see a picture with a lot of chips piled around the cutter. Recutting the chips and trying to force the new chips past the pile of old ones is really hard work on your poor old cutter. Since hobbyists don't often have good flood coolant (i.e. the kind where looking in through the door of the enclosure it looks like a car wash, LOL), chips sometimes pile up even with a simple flood system. I prefer either a lot of flood (e.g. the carwash), or if I can't have that, a really strong jet of air augmented with a little mist for sticky materials like aluminum. If you train yourself to be paranoid about chips in the cutting area, you'll immediately see benefits in cutter life and surface finish.
4. Be wary of tool deflection. G-Wizard lets you calculate your deflection and even optimize cuts to hold to deflection limits. Deflection is just like runout for small cutters, and it becomes easy to forget about having too much tool stickout because the darned things are so small it seems like only a small amount protrudes.
5. G-Wizard has some specific features for small machines that are particularly germane to small cutters. If you fill out the hardware profile under Setup completely, tell it to compensate for machine weight. Just click the "Adjust" button by spindle HP to turn on that option. What this does is to "de-rate" your spindle HP from a particularly light machine like a Sherline or a Taig so that the HP relative to the weight of the machine and its envelope (total travels) is commensurate with full size CNC mills. Like tool deflection, if the machine is flexing around, that isn't helping the little cutter.
Some additional tips from Micromanufacturing.com:
6. Keep your setup and workholding as rigid as possible.
7. Don't "baby" the cutter on chip load lest you be cutting so little that the cutter is rubbing instead of cutting.
8. Use tools with an odd number of teeth, such as a 3 flute endmill. They deliver less vibration and more chip clearance.
9. Try a serrated rougher if you have a lot of material to remove, though in most cases, you'll use a regular EM for both roughing and finishing.
10. Consider HSS tools instead of carbide-they're less brittle and can "flex" a little more. This is really going to be a function of your available spindle speed. If you can't reach the full potential of carbide, then you may do better with HSS, particularly considering it's less brittle. OTOH, maybe your hobby class machine has the opposite problem-it can't go slow enough because it has a very high speed spindle. Try carbide drills for their speeds and feeds, for example.
Be the first to know about updates at CNC Cookbook
Join our newsletter to get updates on what's next at CNC Cookbook.