A considerable amount of CNC entails making precise drawings and 3D models using CAD software. However, there are moments when you may want to construct something where accuracy isn't necessarily the focus. Instead, you may be looking to build something more artistic and hand-crafted. In such cases, I often find myself more adept at modifying existing art rather than creating new pieces from scratch. It is perfectly alright, as we all have our unique strengths and limitations. I suspect some of you may be seeking to convert Clip Art or Line Art into a CAD Drawing for your CAM software to utilize in CNC projects. This article will guide you on how to produce simple Christmas Ornaments using this approach, although the method can be applicable to other projects as well.
Shortcut: Find Free DXF Artwork and skip the first two steps!
Step 1: Find Some Artwork
Google Image Search is always helpful when searching for an image to start from. Even if you plan to create your artwork from scratch, it can be an excellent inspiration. For this project, I used the search "Christmas Clip Art Creative Commons." Since I'm writing about it on my blog, I wanted Clip Art that was licensed so that it would be okay for me to use it. It didn't take long to come up with this neat piece of artwork from ClipArtLord.com:
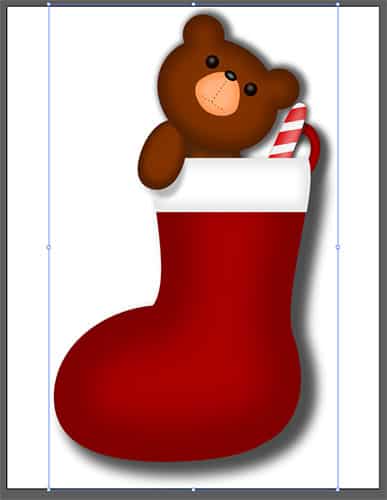
My starting point...
You want artwork that's pretty simple as this one is, because the technique we'll be using is all about lifting outlines of the key elements to create our design using CNC.
Step 2: Convert the Bitmap to Vectors
Most good drawing programs have a function to trace a bitmap and come up with vectors. I used Adobe Illustrator for the purpose, but Corel Draw, Inkscape, and others have these functions. I just loaded the bitmap, selected it (that's what the blue lines in the photo above show), and then played with the different Trace options on the toolbar until I saw a result I liked. The default is very minimal:
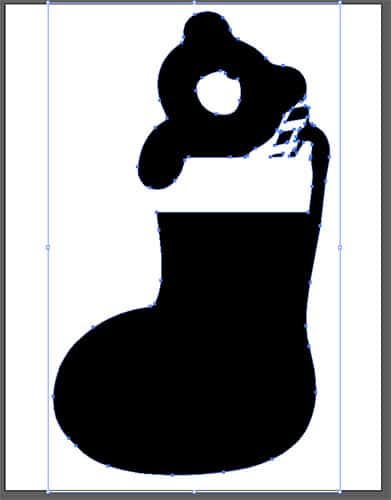
Default Trace is pretty minimal...
We could work with it, but we lose a lot of detail. I like the "6 Colors" Trace option best:
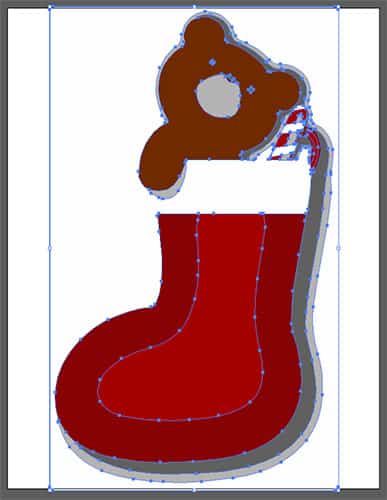
Trace shows you via colors what the Trace is and then you finish with the "Expand" command to generate vectors along the color boundaries. As you can see, the Trace options are basically deciding how much fine detail in the pixels to keep or ignore. We want just enough to capture all the features we want to have show up when we CNC the ornament.
Step 3: Convert to DXF and Import to CAD
This has taken longer to write about than to do, even if you don't really know how to use Adobe Illustrator. In the spirit of full disclosure, I just started playing with Illustrator very recently and have only used it for image tracing work and conversion of vector art to DXF. You can do it too!
Illustrator has a neat feature in its ability to export vector art to a DXF file. Just run the File Export command and you've got a DXF all ready to load into your CAD package. This one came in like this to Rhino3D:
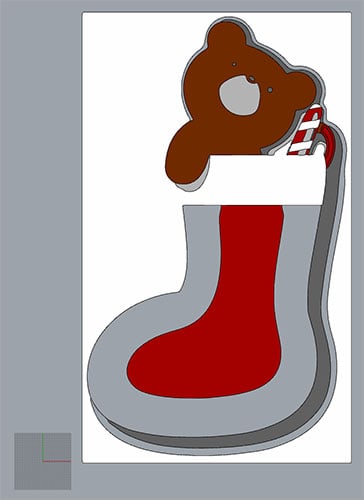
The scale is pretty borked as we see, since the grid is tiny and down at the lower left. That's easy to fix by scaling the imported DXF so it's about 2" by a little over 3"-perfect sizing for a Christmas Ornament.
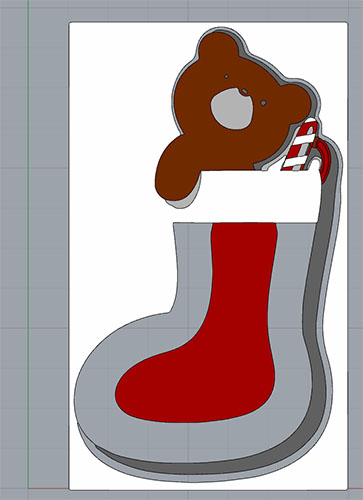
Step 4: Delete Unwanted Parts of the DXF
We've gotten things to size, but this is still not looking very much like the traditional DXF CAD drawings we're used to. There's color (hatching patterns) and probably many unwanted lines and arcs floating around in there. In Rhino, this all comes in as a solid mass, and we use the "Explode" command to take it down to component pieces.
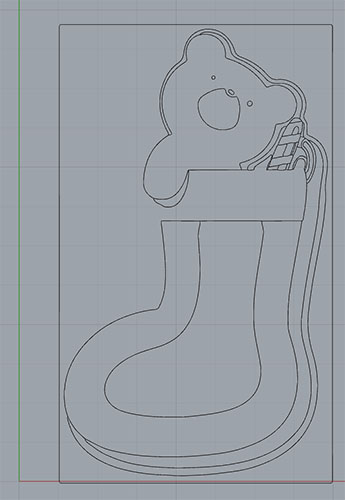
After Exploding, I selected and deleted all the colored hatch areas leaving behind just the vectors. It didn't take long, but judicious use of zoom and position to make it easier to select the small areas coupled with Undo to back out of mistakes helped a lot.
We've still got a lot more vectors than we need because the artwork had shadows and such and the vectors are just the boundaries of different colors. I'm going to just leave the outmost outlines and delete the shadow outlines next:
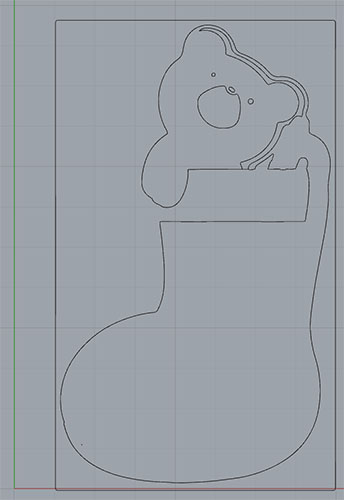
The design is much simplified and starting to look a little incomplete. We're ready to rebuild and modify the remaining parts.
Step 5: Rebuild and Modify the Remaining Parts
I'm using a feature most CAD software has to cut lines at defined points. In this image, you can see the horizontal lines I've drawn to start cutting up the outlines so I can delete more unused parts and reconstruct what I need afterward:
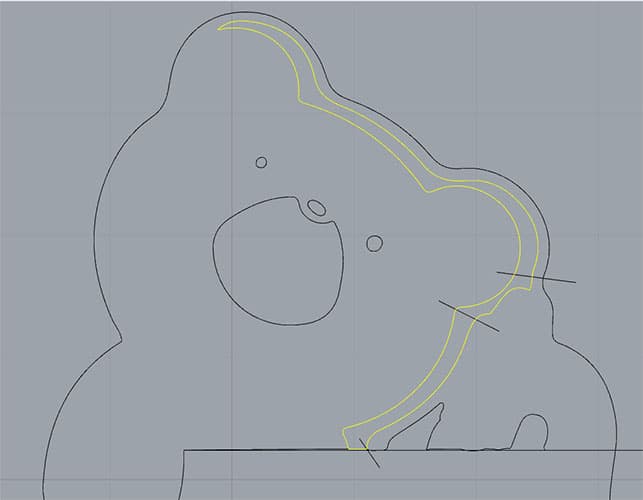
And here is the result after dividing the contours into sub-sections and deleting what I didn't want to keep:
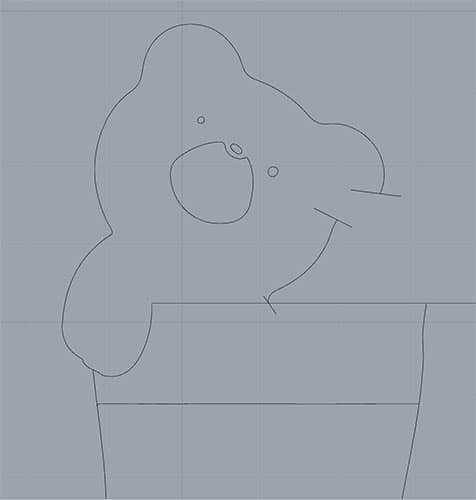
As you can see, we're getting awfully close. If your artistic talents are anything like mine, you'll find it's so much easier to delete what doesn't fit than to create it all from scratch. We do have to do a little creation to match that ear up, but that isn't so hard:
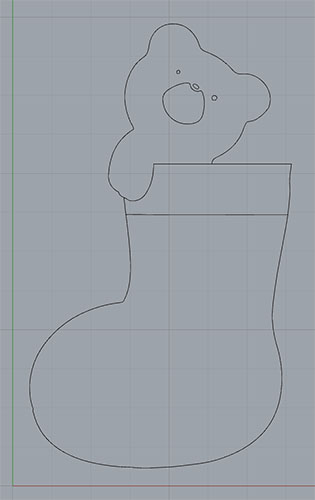
We now have some pretty clean vector artwork in DXF CAD format.
Step 6: Take the Clean Artwork and Add Lines to Define Cut Regions
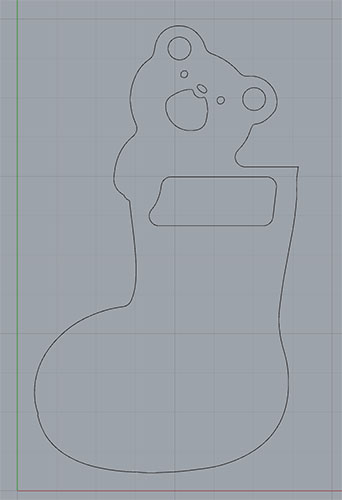
All that's left here is to define what to actually cut out and what to leave behind to create our ornament. We'll need a few more lines to define those boundaries. I like to keep the biggest masses as solid in the final work, so the stocking and the bear will be solid. The rest of the detail will be defined by cutting out areas. So, I need a few changes:
- We'll cut the outermost outline as is.
- The white band at the top of the stocking needs to be hollowed out.
- The bear's muzzle will be cut out.
- I want to move the bear's eyes and nose up a tad so the material isn't to thin around them and they're clearly visible.
- I want to add a hole at the top of the bear's ear to hang the ornament from.
- We need to fillet sharp corners with a radius that works with the size endmill we want to use. Of course if you will cut these out with a laser, they don't need a fillet.
Here is the end result of that work:
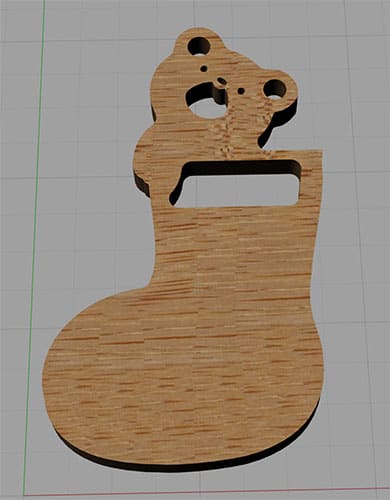
And a quick rendering:
This simple technique is not for every project, but it's quick and easy. It would be an ideal way to get the kids involved with CNC, for example. There's plenty of opportunity to make much fancier ornaments and designs. You could even just start with carving each family member's name into the foot of the stocking.
What sorts of CNC projects do you have planned for this Holiday Season? We'd love to hear from you, especially if you've got some photos to share.
Be the first to know about updates at CNC Cookbook
Join our newsletter to get updates on what's next at CNC Cookbook.