A typical assignment for beginner machinists mastering the use of a lathe includes the creation of a machinist's hammer. The resulting product often exhibits its own unique aesthetic appeal and frequently becomes a cherished, lifelong tool. For individuals unable to craft their own, these specific hammers can even be purchased.
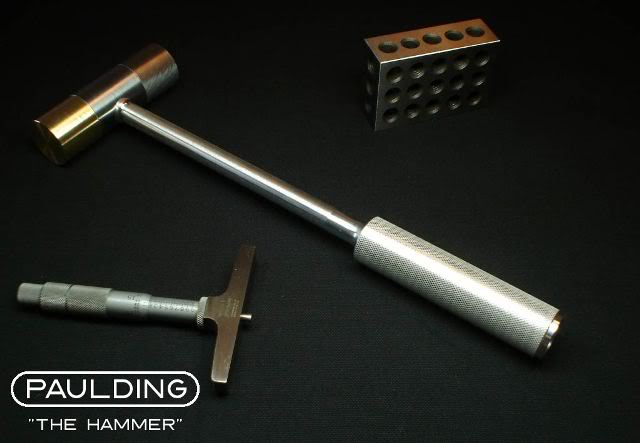
I thought a similar hammer would be a fitting project to start my experience with the Tormach CNC Lathe, so I thought I would get started doing a little design work while I wait for the lathe to arrive. I think that the Conversational Wizards Tormach provides with the LinuxCNC control for the lathe should make a hammer like this very easy to do. I've decide to call the tool the "T-Hammer" (Tormach Hammer).
My design goals for the project included:
- Plan for how to deal with parts longer than 3 or 4x diameter since the Tormach has no tail stock.
- Desire to make the hammer look good as well as be an excellent tool.
- Desire for interchangeable heads to satisfy different applications.
- Bar Stock sizes compatible with the 5C Collet Closer on the Tormach.
- Compatible with off-the-shelf o-rings. In this case 3/16" with a 3/4" ID.
Here are my initial design sketches for the project:
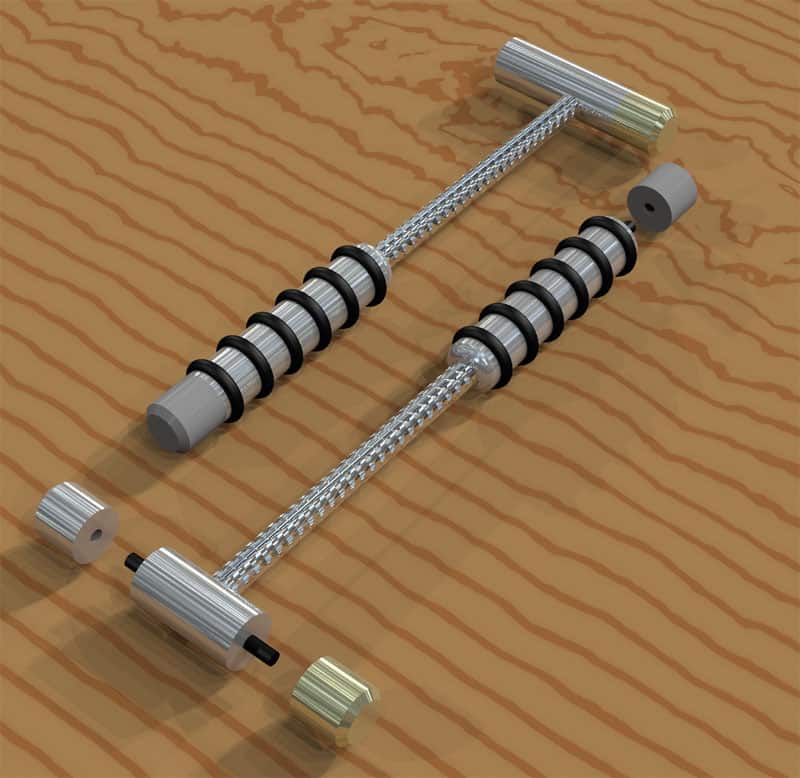
A rendering done with Rhino3D and Flamingo of the T-Hammer (Tormach Hammer)...
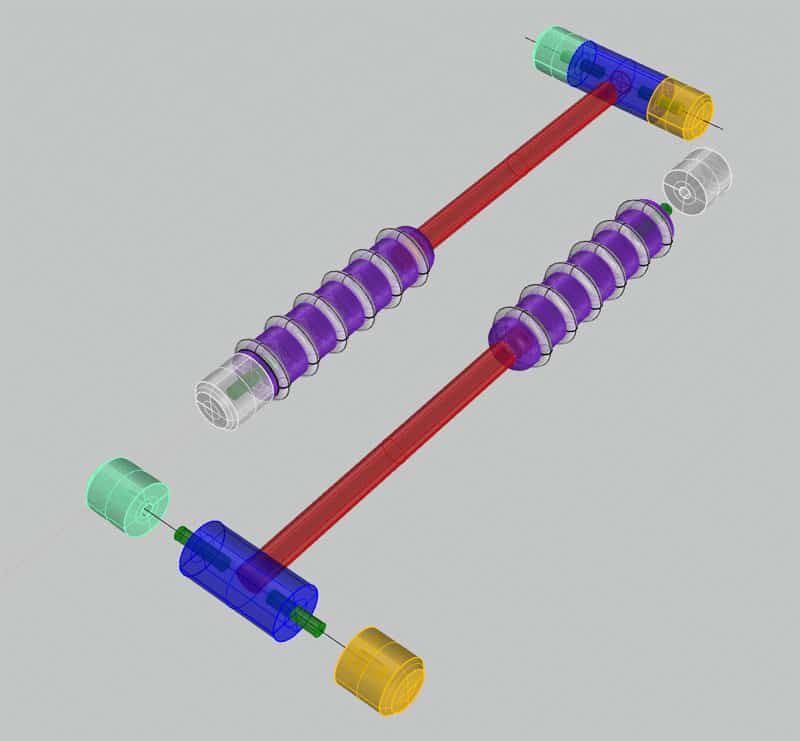
Ghost view makes the individual components of the T-Hammer more evident...
Building the T-Hammer requires making the following parts:
- Head (Dark Blue): To be made of alloy steel such as 4130. We'll need to make it a true cylinder with a hole for studs at either end and a hole for the neck in the middle. All holes will need to be threaded.
- Neck (Red): To be made of aluminum. We want a heavy head and a light handle for better feel when swinging. We can't turn the length of this long piece without a tailstock, but we can settle for a nice satin finish and thread either end by choking up on the piece in a 5C collet.
- Handle (Purple): To be made of aluminum. Semi-circular grooving is designed to hold the o-rings and we'll organize it so we can turn this piece with a flip so not much overhang. The line at the middle will be located where we're going to put an o-ring groove so it will disappear and no one will be the wiser that the piece was flipped and not turned in one operation.
- 3 Tips: One each of brass, alloy steel, and hard nylon. Each tip gets a nice chamfer on one end, and a threaded hole for the other. Tips can be interchanged and the third tip stores on the end of the handle.
In addition to the parts we'll turn on the lathe, we'll need some o-rings and studs which we'll get from McMaster-Carr or some other handy source.
I intend to make everything on the Tormach lathe except for the hole on the head the neck screws into. We'll need a milling machine for that task, though I suppose you could also use a drill press.
It'll be a little while until I receive the Tormach lathe and get it set up and tooled, but once I do, future articles will cover each part and will include step-by-step shots of how I made the part on the Tormach lathe. I don't expect it to take too long once I get rolling.
Be the first to know about updates at CNC Cookbook
Join our newsletter to get updates on what's next at CNC Cookbook.