Introduction
Digital Calipers are probably the most common machinist's tools for measuring length or thickness. There are a number of types other than digital too:
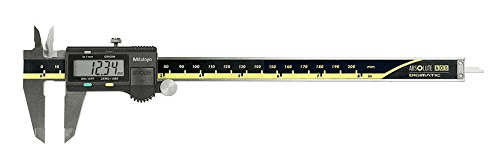
Mitutoyo Digital Caliper...
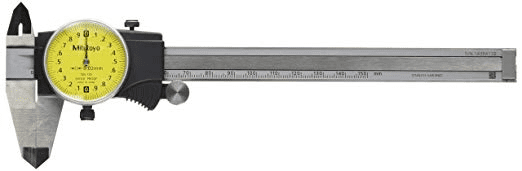
Mitutoyo Dial Caliper...
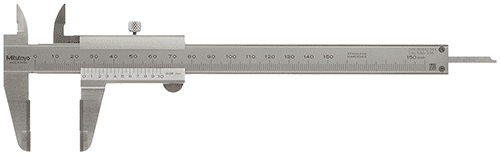
Mitutoyo Vernier Caliper...
Digital Calipers are the easiest to use and read, and so they are the most common. They're available as really cheap imports all the way up to more premium brands like Mitutoyo or Starrett. Premium Digital Calipers may have features like being coolant-proof, or they may do a better job preserving battery life for a long time.
There are also calipers that don't directly read measurements. They're strictly used for comparison or to transfer a measurement to another device:
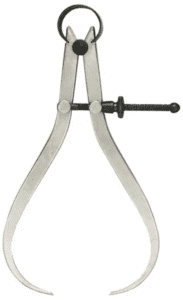
Outside Calipers are used for Outside Diameters (OD's)...
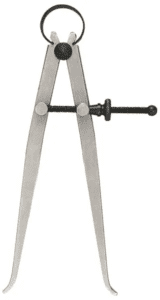
Inside Calipers are used for Inside Diameters (ID's)...
Micrometer vs Caliper Accuracy
Ordinary 6" Digital Calipers have a rated accuracy of 0.001" (accurate to a thousandth of an inch) and a resolution of 0.0005". Assume you can measure to 2 x the rated accuracy. That means calipers are good for a tolerance of 0.002" and no better. In fact, some shops limit their use to tolerances no more than 0.010". Even though the calipers can do a little better, this leaves a margin for error and creates good habits in terms of not trying to cheat anywhere close to the limits of the measuring device.
While you will see some machinists try to use them for more accurate measurements, they're not trustworthy. A micrometer should be used when more accuracy is needed than calipers can provide.
How to Use Calipers
To get the greatest accuracy from your calipers, it's important to use them properly. Let's start with a general overview of the Anatomy of a Pair of Calipers:
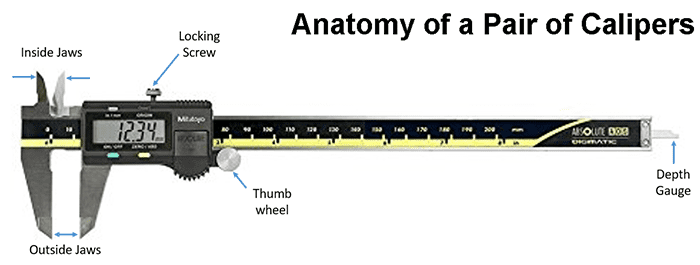
Let's start by noticing the three key measuring features:
- Outside Jaws are for Outside Diameter, Length, and Thickness measurements.
- Inside Jaws are for Inside Diameter and Cavity Length measurements.
- The Depth Gauge is ideal for determining the depth of a hole or cavity.
The Thumbwheel gives fine control over the movement of the jaws. The Locking Screw allows you to lock the jaws so they can't move.
There are various buttons on the calipers too that have the following functions:
- On/Zero: Turn on the calipers and zero. Close the jaws and zero again to start a measurement from zero.
- Inches / Millimeters: Changes the units of measurement.
- ABS Button: Temporarily sets the current position to zero.
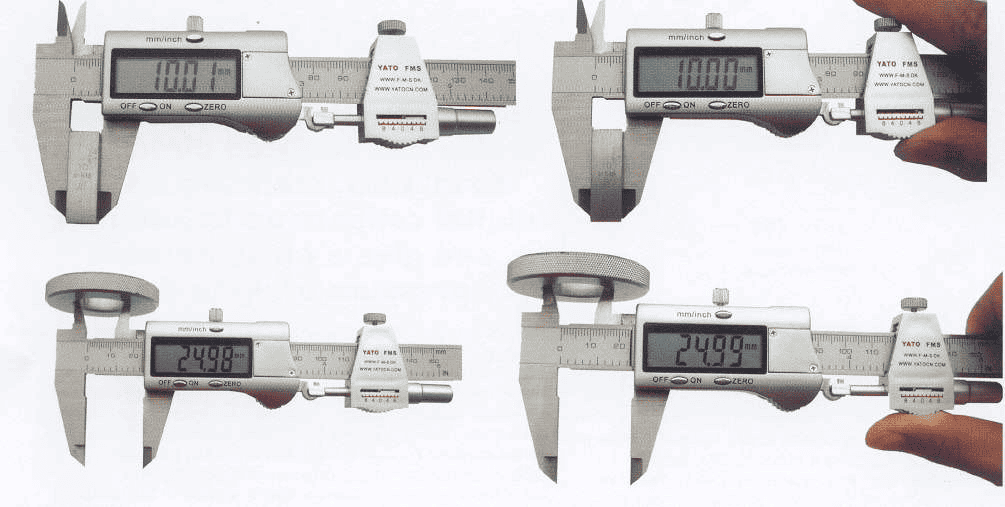
To take a measurement with digital calipers follow these steps:
- Close the jaws so they're in contact and zero the calipers.
- Select your desired units of measurement.
- Open and close the jaws a couple of times to be sure the zero is stable. Rezero as needed.
- Chose which jaws you will use (or the depth gauge).
- Dry and clean the object you're measuring.
- The trick is to make sure the length being measured is parallel to the jaw opening. Make sure it isn't cocked or tilted in any way relative to the jaws.
- Don't ever force a measurement. It's so tempting if the digital indicator is close to just press harder, to take 0.199" to 0.200", for example. But, there's flex in the calipers like anything else and forcing a measurement won't yield an accurate measurement. Use the thumbscrew to close the jaws onto the measurement using light even pressure on the thumscrew.
- After taking the measurement, it's a good idea to recheck the zero. If the jaws don't return to zero, the measurement is not reliable and should be re-done.
- Keep your calipers clean and free from chips, dust, and any other contaminants.
Best Digital Calipers
I use Calipers so much I must have 6 or 8 different pairs. Some are cheapies, but I also own some really nice ones. I grab the cheap ones if the measurement isn't critical and they're handy. I loan the cheap ones when family members and friends need to borrow a pair of calipers. But when it matters, I always go for my good calipers.
Why?
They have better feel, they're more durable, and the battery is less likely to be dead because they have better power management when they're not in use.
1st Choice: Mitutoyo Advanced Onsite Sensor Digital Caliper, 0 to 6"
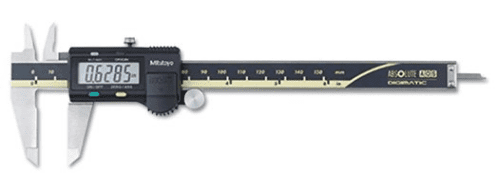
I have a couple pairs of Mitutoyo's excellent AOS (Advanced Onsite Sensor) Digital Calipers, and they have served me well.
The 6" model goes for $124.63 as I am writing this on Amazon. I also have an 8" model, which goes for $212.08. It's nice to have a ltitle more range if you need it.
2nd Choice: Starrett Digital Caliper, 0 to 6"
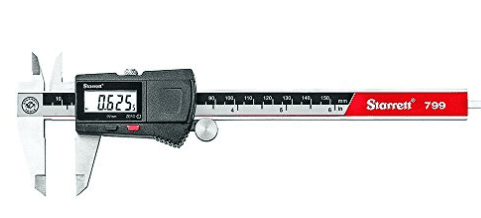
It's tough to find Calipers as good as the Mitutoyos, they're tops. But Starrett also makes quality measuring instruments, and their calipers are quite nice. I have one pair of these in the 0-6" range. They're available for $138.55 on Amazon. Right now, the Mitutoyo is a better deal, so I'd stick with it.
More Accurate Calipers? Caliper Pressure Devices
There's always someone ready to build a better mousetrap, right? Especially with a measuring instrument as popular as calipers.
Enter the Caliper Pressure Device.
I’m going to call it a “CPD” rather than spell it out every time, but the basic premise of the CPD is that the accuracy issues of a digital calipers are due to flex associated with uneven application of pressure. We all know that if we anticipate the measurement we’d like too much, we are more likely to get that measurement, even though it isn’t real or repeatable. So the CPD is a spring loaded device that applies the same relatively modest pressure every time:

The CPD can press against the caliper from either direction of travel…

There is a constant pressure spring inside the barrel
Fancier versions are available…
The CPD was available from Danish company Flexible Measuring Systems (FMK). No sign of what they cost, but I am genuinely curious how well they work, being a nut for new measuring devices. The company claims their gadget will boost the accuracy of a digital calipers from 0.02mm to 0.01mm, which ought to be enough to measure to 0.001″ reliably. Unfortunately, it looks like they've gone out of business.
Now why doesn’t some caliper manufacturer build a caliper that has a spring loaded jaw built right into the housing so you don’t have to do it as an add-on?
Well of course, someone did. At least one anyway, and that would be Starrett.
Kenneth Maxon, who runs the fascinating Max’s Little Robot Shop, wrote to tell me of some Starrett calipers he has that incorporate a precision spring-loaded device for precise positioning. He describes it thusly:
I am lucky enough to have some older starrett calipers that perform phenominally and they use a similar mechanism. Inside the head under the dial) there is a sliding spring loaded cam mechanism that moves the head by a precision amount of compression.
Most people look at the markings on the face of the dial and assume that each tick is 0.0001, however, the actual numbered ticks are 0.0001, and each individual tick is 0.00001 apart. The jaws have hardened / ground carbide inserts.
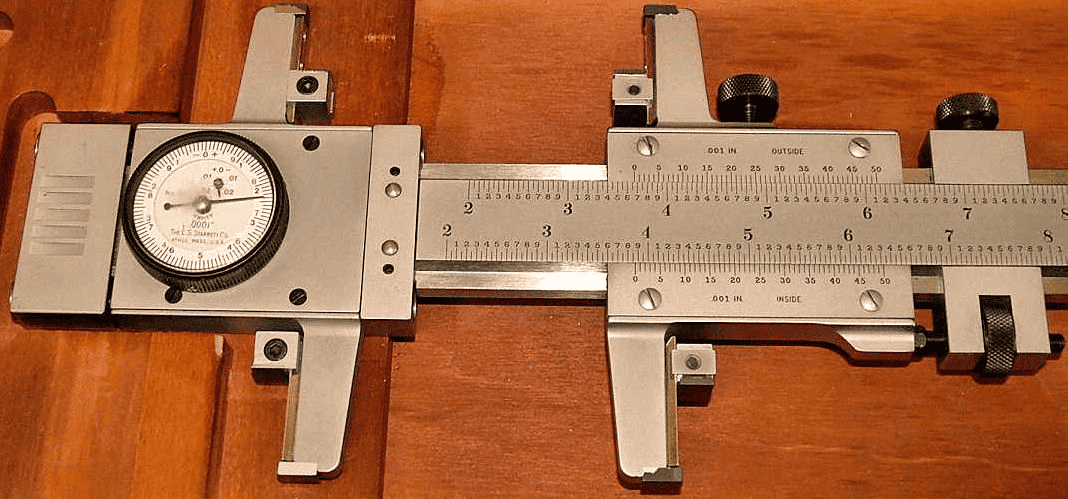
Super-precision Starrett Calipers…
The new-fangled electronic whiz bangs are cool and all, but the Old School pure mechanical approach is fascinating too. Like the audiophile stereos of yore versus today’s digital rigs, I’m not sure we are so terribly far ahead in terms of absolute performance, but we have made the high end level of performance available more uniformly and cheaply.
This article is part of our Complete Guide to Metrology
Be the first to know about updates at CNC Cookbook
Join our newsletter to get updates on what's next at CNC Cookbook.