Have you ever gotten involved or overheard a discussion about whether conventional CNC machining or 3D Printing is simpler? Usually, these debates spark from noticeably divergent viewpoints - ones that ensure the conversation will end in dispute. Essentially, the counterarguments are answering totally different questions. My favored way to reflect on this is as follows:
- It's easier to make a 3D print than to CNC a part.
- It is a lot harder to make a 3D printed part look good than a CNC'd part.
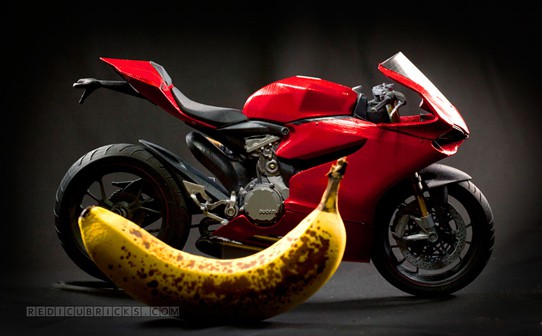
If you're satisfied with the fairly crude results that come straight off a consumer grade 3D printer, they're not bad. Miraculous really, when you consider how else you could go about getting such results. But if you have a problem with strings, oozing, visible layering, and the whole host of other things that intrude when you want your 3D printed part to look professional, it's a problem. What comes off a relatively crude CNC mill usually looks quite a bit better. The work required to get to a final polished (pardon my pun) result is much harder for 3D printing, but still very doable. You only have to look at a couple of super-high quality projects done with consumer grade 3D printers and a lot of post-print clean up to see what's possible:

Ducatti scale model 3D Printed on Consumer-Grade Ultimaker 3D Printer by Redicubricks: So cool!
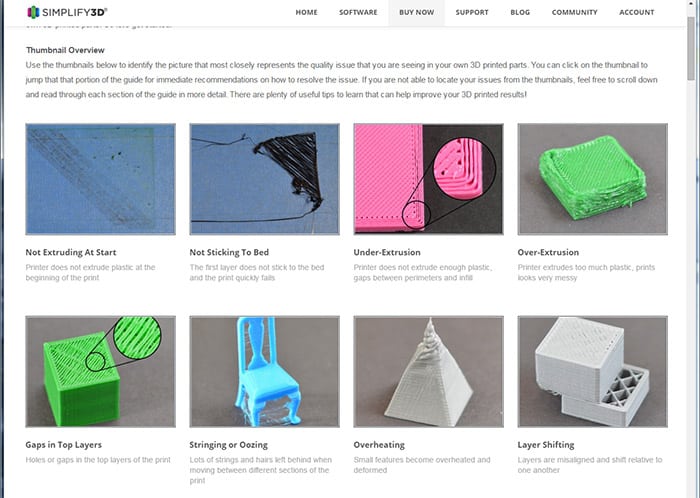
You can try everything from sanding to acetone vapor to various other techniques/ for finishing 3D prints to more acceptable quality, and the results can be spectacular. But before you go down that path, it behooves you to get your 3D Printer tuned up and producing the best results it can. Towards that end, Simplify3D has this awesome pictorial guide to Troubleshooting 3D Print Quality:

To use the guide, just track down the picture and description that matches your problem and click through to see the solution. Give it a try, it could save you a lot of post-print work if you can get your 3D Printer to produce better prints to start with.
Getting a sense from the guide of what sorts of adjustments 3D printers need will also help you to understand better that argument over whether 3D printing is easier than conventional CNC milling. Here's a little more color on that:
- Instead of CAM, 3D Printers use much simpler software called "Slicers." The Slicer takes your 3D model, usually an STL file, divides it into layers for extrusion, and then converts that to g-code that guides the plastic extruder. CAM can be fairly complex to learn and use, so this is a significant savings. There are exceptions though. The reason we offer MeshCAM is that it makes CAM just about as simple as using a Slicer. Bundling MeshCAM in to the Carbide3D Nomad printer is one of the reasons the Nomad won the "Besk Desktop CNC Mill" award from MAKE-it just makes the whole process dramatically easier.
- Fixturing is another area many beginners find hard with CNC. In the 3D Printing world, they either do without fixtures or use what are called "Supports." These are features extruded whose purpose is to serve as a temporary scaffold to hold things up. Here again, software like MeshCAM has the ability to create the equivalent for the CNC world. It can automatically create tabs that hold the part while you machine around all sides of it.
- Adjustments are much more important and a bigger deal for 3D printers than CNC machines. You may sometimes adjust backlash or do various other calibrations on CNC machines, but there's no equivalent of the many adjustments described in the Pictorial Guide above.
- Finishing, as we've discussed, is a lot more work with 3D Printers.
In the end, there is much merit to both approaches. Which one you start with should be based on the kinds of parts you want to make (plastic can be a lot more work with CNC vs 3D Printing), your skills (if you built many plastic scale models and know that work inside out, 3D printing may be straightforward), and how you want to spend your time.
Be the first to know about updates at CNC Cookbook
Join our newsletter to get updates on what's next at CNC Cookbook.