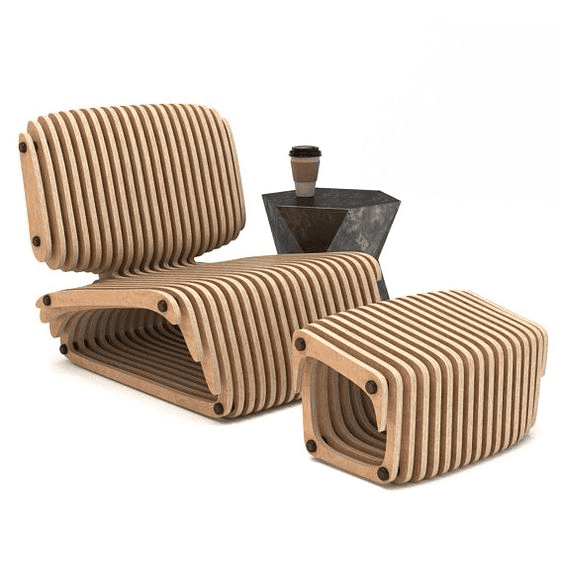
The possibilities for a CNC Chair are endless. This design is from a type of CNC Furniture called "Parametric", and the design is called the "Levigo Chair".
My CNC Chair and CNC Furniture Project
Have you ever felt the desire to construct a CNC Chair (or any other CNC Furniture) and required some CNC Furniture Plans to assist you in getting started?
In this article, I want to show you how I went about designing my own CNC Chair by creating a set of CNC Furniture Plans that fit my ideas about what I wanted. It's not as hard as you might think to come up with a design that works.
Get the 3D Models and DXF Files to Make Your Own Paw Chair
I approach most of my projects in the same way. I start with a lot of brainstorming, and the more visual it can be the better. I start by collecting photos and articles that I find inspiring. My preferred tool for this is Pinterest, and you can visit the many CNCCookbook Pinterest boards if you want to see what I mean.
When Spring began, I started thinking about what kinds of projects I wanted to do for Summer. I quickly zeroed in on a couple of things. First, I've done a ton of metal CNC projects. For this summer I wanted to focus on wood and my Shapeoko CNC Router.
Second, I wanted to make a couple of chairs and table to go on my front porch. I also wanted to create a sign rack and some signs with sayings that let our visitors know what sort of people are inside the house.
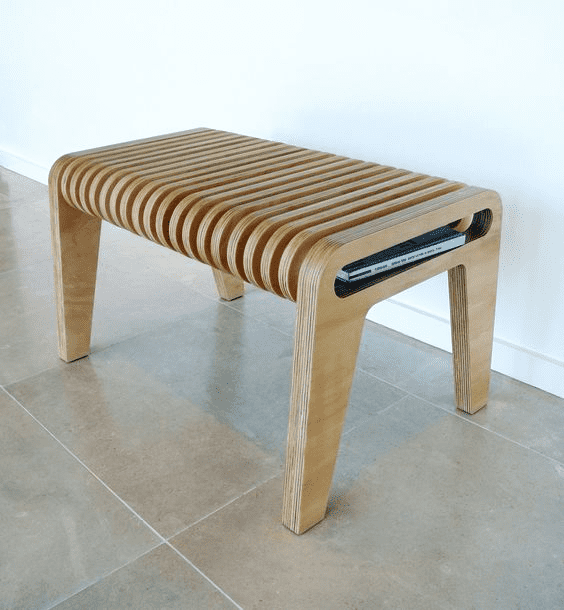
So I started in brainstorming and soon had built quite a Pinterest scrapbook of CNC Chair and CNC Furniture ideas. Here are a few of my favorite images, not necessarily all CNC Chairs:
A table to go with the parametric Levigo chair at top of the article...
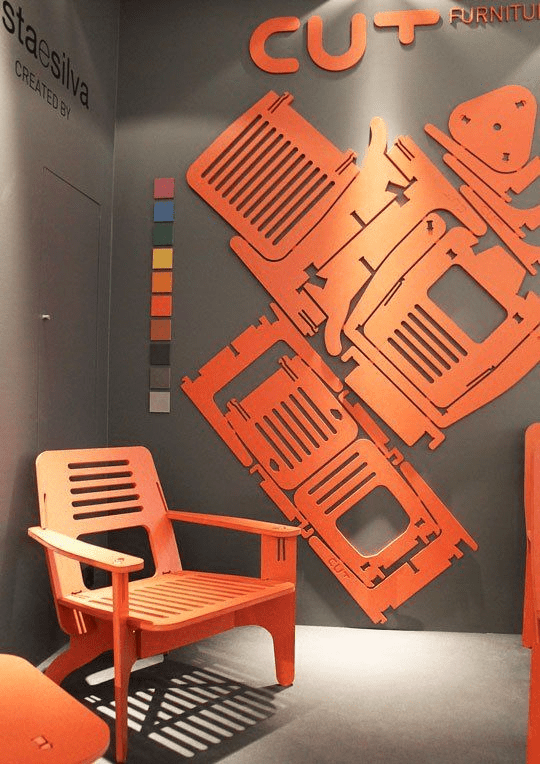
A flat pack chair...
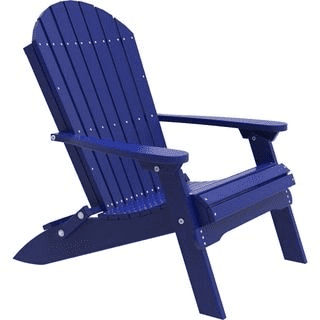
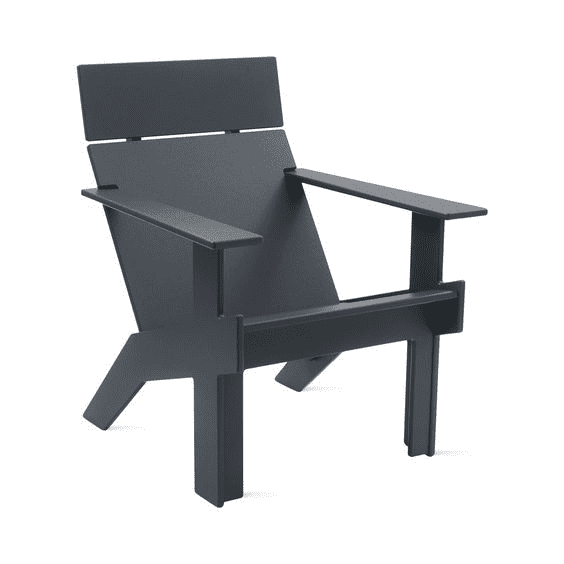
Given the way our house is decorated, I was drawn to more modern designs. Sure, I could build couple of Adirondack Chairs like this:
But this chair fits better and performs the same function:
I liked the Parametric style chairs, but eventually decided I wanted something simpler. Something more "fit tab A into slot B". Something more like the Flat Pack-style designs.
CNCCookbook doesn't leave me much time for these kinds of projects, and I wanted to actually wind up with a design I could finish before Summer ends.
Epoxy Resin added to the Design Mix
In the process of doing all this brainstorming, I also came across some gorgeous furniture work involving epoxy resin, usually on tables like this:
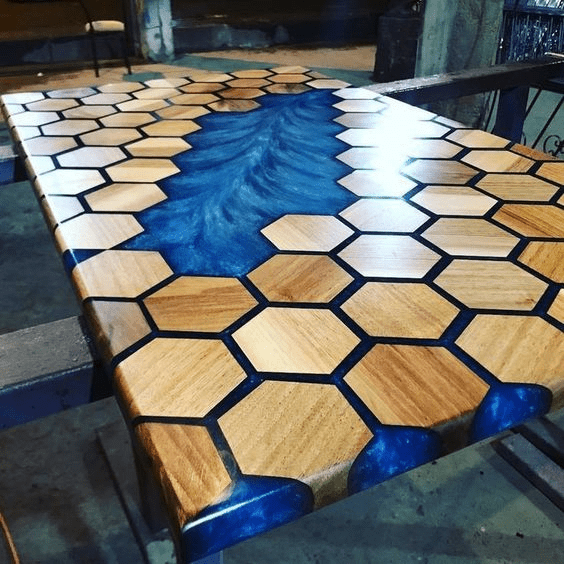
Originally, I was thinking of building something like that for the seat surface of the chair, or perhaps for the table that would go between my two chairs.
What's an Ideal Chair?
I wanted my chairs to be functional and comfortable. I have a nice spot picked out for them, and I was planning on spending a little quality time in them. So, to ensure the proper functionality, I did a little research on chair ergonomics.
It turns out there have been studies done of what the ideal dimensions are for various furniture type based on the average measurements of people's bodies.
My first design task was to lay out these ergonomics as an idealized chair:
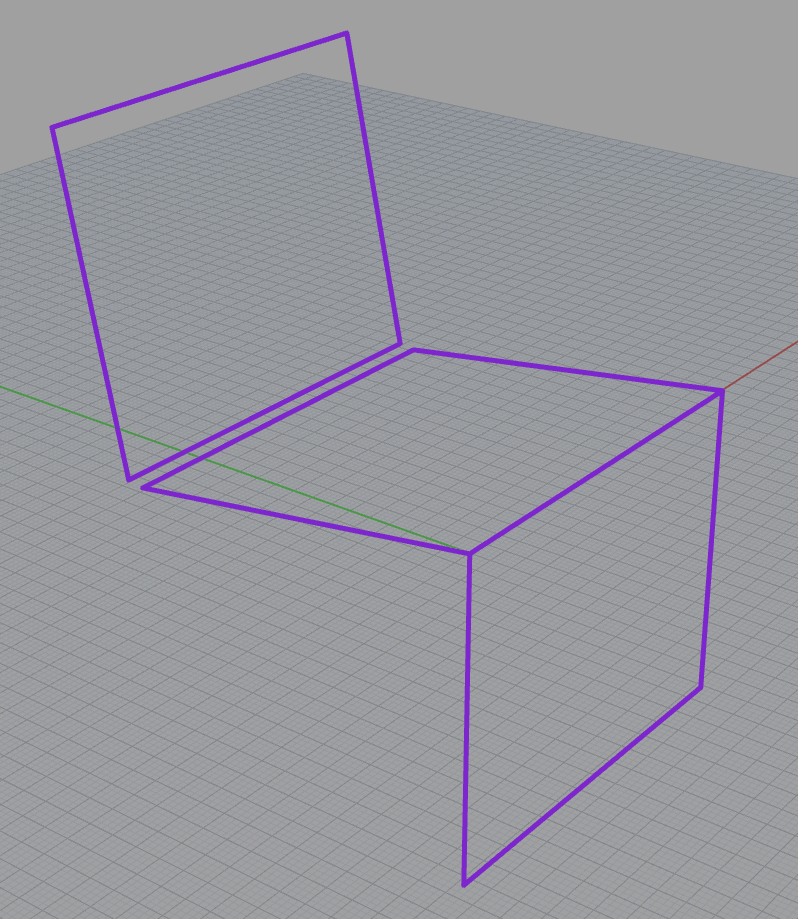
As you can see, the ergonomics specifies the angle of the seat and back, their sizes, and how far off the ground they should be. There's also information on how high the arm rests should be, but I didn't include that in this drawing.
BTW, I happen to be using Rhino3D for this design exercise. It's one of my available CAD choices, the others being Solidworks and Fusion 360. I tend to prefer Rhino3D when I don't know exactly what my shape is going to be and especially when the shape may involve lots of organic curves. I will often choose the others for mechanical parts.
I also have Aspire in-house, and it could possibly have done the job, but I'm waiting until I get started making some signs to get Aspire fired up and into the mix.
The Paw Chair: CNC Chair Design
By this time I had a lot of visual ideas from my scrapbook. I had an ergonomic schematic that spelled out the rough proportions for the chair. And I knew I wanted a sort of flat pack-style construction.
It was time to start creating the chair. The seat and back were simple. I just oriented square pieces in the correct positions as prescribed by the ergonomics. Most of the design motif for the chair would be in the form of the arms and legs, which I planned to cut from a single piece for each side.
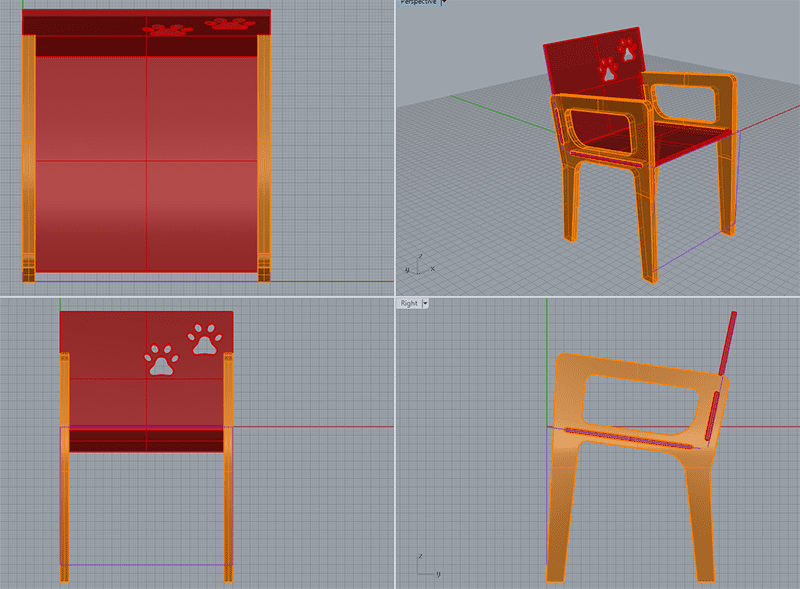
Here's what I came up with:
I'm pretty happy with how the chair came out. But what was my thought process?
Whenever I'm working on a design, I tend to look for patterns. Then I try to see which patterns fit and work well together. This design has a few patterns.
- Tapered legs. They taper from the top of the arm rest on down. This is a very common chair design pattern. I wanted the chair to be both strong, and modern, so I even exaggerated that taper to the point of slight chunkiness at the top.
- Arcs. The arcs are there to soften the bold lines of the taper. I choose their dimensions by eye, trying to make them look right on the chair. The hardest one was the arc on the lower right on the "Right" view. I may still not have it quite right, but that's where my eye felt it was most pleasing. And I just kept drawing and redrawing until it came out. Once you have over half the arcs in place, the rest follow pretty easily.
- Symmetry and Asymmetry: Things have to balance just enough, and symmetry always speaks of balance to my eye. Asymmetry creates interest, while symmetry creates balance and harmony. The big radius arc that's closest to the intersection of seat and back is exaggerated in size just to make the design more interesting. A little bit of asymmetry can do that versus making every arc exactly the same size.
Try collecting a bunch of photos of designs you like and then looking for the patterns that you like. Having these patterns helps guide your design decisions in useful ways.
What's With the Paw Prints?
Almost done. Still thinking about epoxy resin. Still wanting to give back something organic to this modern but somewhat sterile design. I had mentioned the thought of running a blue epoxy resin "river" across the seat. Making the seat of hexagons embedded in resin was another possibility. But I wanted to keep it simple.
I was collecting signs for the sign making portion of the project one day, and it suddenly came to me: Dogs!
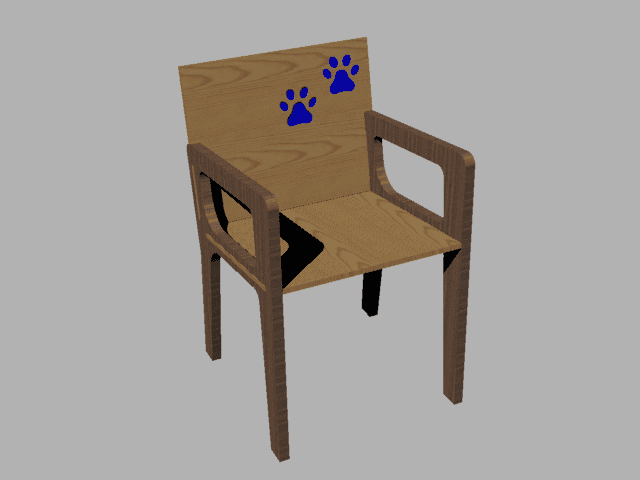
My wife and I love dogs. There are 3 that live with us. Some of the signs were definitely going to be about dogs, and naturally, some would involve paw prints. The light bulb lit and suddenly I knew the answer was to put some epoxy resin paw prints in the seat back of the chair.
Here's a rendering with the epoxy resin paw prints in place:
Next: Materials and a Proper Spoilboard
The rendering was done with the arms made of dark walnut and the seat of something lighter. I haven't decided exactly what I want to do yet about the materials. There are a lot of potential choices. The chair needs to be inexpensive and durable-it's going outdoors. I need to get over to Home Depot and look over what they have on hand.
Before I'll be ready to cut out these parts, I also need to update my Shapeoko's Spoilboard. I want a grid of threaded holes to make clamping down parts easy.
More to come in future installments.
Be the first to know about updates at CNC Cookbook
Join our newsletter to get updates on what's next at CNC Cookbook.