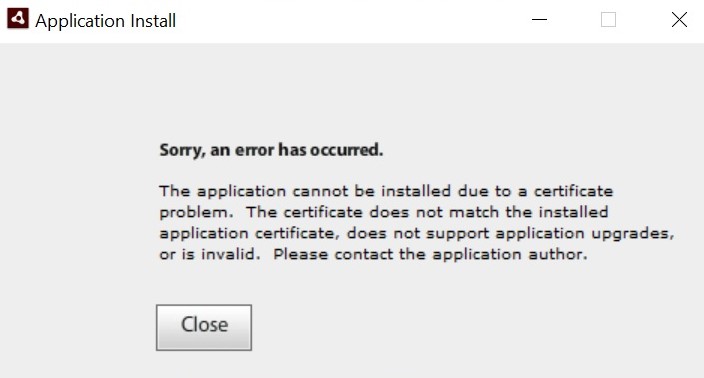
1 day by cncdivi

On December 21, 2006

Drill Press Speeder

This is a cool gadget, made by Dumore, that goes in your drill press chuck and lets you run tiny little twist bits at 20,000 rpm:

12/20/06

Gravity Operated Center Punch

I use center punches a lot, particularly as transfer punches. One of the challenges is in wielding the necessary hammer to tap the punch if your hands are already very busy holding proper alignment of about four pieces. I use a little piece of brass lathe stock as a hammer and that helps some. I bought one of the Starrett 18AA center punches that fires itself. I haven’t had a chance to use it yet, but you have to push it hard to fire the punch. It is double action, in firearms terms. It would have been so much nicer if there was a way to cock it and then fire it later with a light touch. This would make it easy to leave a punch mark with hands full. Now along comes another solution. I came across this “gravity operated center punch” while trawling the web for something entirely different:

It’s kind of like a miniature slide hammer. I might try making one on the lathe, can’t be too hard, and just see how I like it.

Even Faster R8 Toolchanges?

Since building my power drawbar, toolchanges on the mill have gotten a lot faster. One of the last remaining slow steps is lining up the key on the R8 holder with the little key pin that’s way up inside the spindle. If you happen to remember which way the one you took out was oriented, you can stick the new one in just about right and off you go. It had occurred to me that one could also put a mark of some kind on the spindle, but you’d have to bend down to find the darned mark.

Now along comes another possibility. It seems a guy had a problem with his pin and wanted to replace it. Low and behold Aaron Moss, who was the man behind IH Mills, pops up and says, don’t bother, tool changes will go faster without it. Hot diggidy! So, I read over on the Lathemaster Yahoo Group another fellow is having almost the same kind of trouble. He has figured out that if you extend the quill, a slot is exposed on ZAY mills such that you can access the bolt that acts as a pin without even removing the spindle from the head. Hot diggidy again!

I haven’t tried it yet, but if I get bored down in the shop I’m going to crank that quill down and have a look at ‘er. Sure sounds like a good idea to me!

12/14/06

New #30 Taper Mill Spindle Came Today!

I got the spindle from Industrial Hobbies and the bearings from McMaster-Carr. Nice combo. The finish on the spindle is nicer than what IH pictures on their web site. Now I’m champing at the bit to turn it into a mill head! Just have to wait until I finish my other projects though. I need to research carefully how the bearings needed to be fitted to both the spindle and the bores in the mill head I will fabricate. The bearings are SKF’s, a 7206 and 7207 angular contacts. Their specs indicate a pretty high speed is possible, so hopefully my goal of 6000-8000 rpm will be doable. I should think so in this application which is pretty lightweight.

Building the mill head will largely be a matter of fabricating a box. I need to build a box that will properly house the spindle, bolt to the existing dovetail assembly that the current head bolts to, and that will be nice and rigid. I’m thinking of making it out of some pretty substantial aluminum, perhaps some 1″ thick stock or even thicker at top and bottom. I’m thinking of aluminum because it doesn’t have the problem of internal stresses moving it after it is machined, so it will stay true. While I’m at it, I think I’ll set up this head so it gets trammed in once, and then stays put. There’s no need to have a swivel head on a CNC machine, as well as no need for a quill which just reduces the accuracy and rigidity of the head anyway.

By taking this approach, I also avoid having to turn down the shaft of my larger motor to fit the IH gearhead. I can just specify a pulley for the timing belt that fits the motor as is. I’ve started up a new page to track my notes on the belt driven head. Still lots to research and other projects to finish before I dig in!

12/13/06

A Centering Scope from a Webcam

Here’s a nice piece of software to facilitate the project. Mach 3 will also display a webcam image so you can line up, but this software has a lot more clever features around that.

How Much Torque on the Drawbar?

I found myself in a discussion of how much torque might be needed on a drawbar for a mill, and specifically, whether that torque ought to vary based on cutter shank size when using R8 collets. I just crank mine down “tight”, but I got curious about whether there was a “right” way to do this. I checked my newfound Bridgeport Mill documentation (see below, I got a CDROM version) and found that Bridgeport makes no recommendation other than to tighten with a wrench the “normal amount.” Hmmm. Well, you Google for nearly anything, so I went looking. Sure enough, there is an academic research paper out there that touches heavily on the subject. There conclusion was that more is better where spindle accuracy is concerned. They got appreciable improvement when going from 8 N/m to 26 N/m of torque. That’s basically an increase from 6 foot-pounds to 19 foot-pounds. Given that most people’s drawbar wrenches are likely less than a foot in length, you could figure that something approaching 20 lbs of pressure on the wrench might be about right.

I’ll have to adjust my impact wrench based power drawbar. Seems like its maximum torque of 90 foot pounds would be too much.

Some New Books of Interest

I am a confessed book horder and think nothing of spending far more than I should on the little bundles of wood pulp. I can’t help it, there is nothing I like better than to learn something new and a book is typically a lot more satisfying to me than the miles wide but inches deep internet. I would therefore like to report on 5 different tomes, 2 in the actual historically correct wood pulp format, and 3 others in CD-ROM format.

The Clock and Watchmaker’s Guide to Gear Making, by Robert D. Porter

This is an absolutely fantastic book in my opinion. It is crammed full of wonderful detail on how to make gears, escapements, and the other essentials needed in clock and watch making. The focus is on work being done on a small (watchmaker’s) lathe with a milling attachment. There are several useful tooling projects such as a fixture to cut a precise radius on a form cutting tool that may then be used to produce an involute gear cutter. Full details are provided on these tooling projects as well as how to make involute gear cutters of both the many fluted and fly cutter designs, right down to hardening the cutters before use. Another interesting tooling project is something he calls a “center post distancing tool” which is an aid to precisely positioning the holes needed for the gear axles relative to one another.

In addition to the tooling chapters, there are detailed worksheets that one may use to walk through the calculations needed to machine a specific gear, and there is a full project that involves building a nice looking skeleton clock from scratch. I got my copy of the book by searching for it on Amazon.

Bridgeport Manual Mills, Bridgeport CNC Mills, and Tool & Cutter Grinder Mk4 CD ROM Manuals

I got these CD’s from Mary Poppin’s Bag, which I believe is frequent HSM poster John Stevenson’s wife. I have enjoyed reading through machine tool manuals and gotten quite a lot of knowledge from them. My last experience was a Hardinge publication that taught me a tremendous amount about the 5C collet system. These CD’s come filled with Adobe Acrobat copies of the original manuals. Here are some brief remarks on each.

The Tool and Cutter Grinder CD has quite a few different documents, all very useful to one who wants to learn about these complicated little machines. There are manuals for everything from the mighty Cincinnati T&C grinders to the lowly Harbor Freight Deckel knock-off. There is also quite a lot of general information related to grinding in the machine shop ranging from selection of grinding wheels to a chapter on precision grinding from a textbook. Lastly, there is a complete set of plans for the Bonelle T&C grinder, which an HSM could make. It looks like quite a capable machine and one I’ll have to research a bit further if I decide to start building a T&C grinder.

On to the Bridgeport Manual Mill CD. These machines and their shameless clones from Asia are so ubiquitous I feel every would-be machinist needs to know something about them. Lots of interesting goodies on this CD including the original Bridgeport patent, drawings for quickchange system sold by Bridgeport, a complete set of maintenance drawings, manuals, accessory catalogs, and more. Excellent stuff!

Lastly in the CD ROM collection, I have the Bridgeport CNC Mills CD. Here you will find manuals for Boss, Series II, and R2E3 machines. These are ideal candidates for a home shop if one can be found whose mechanicals are sound, but with a bad controller. It is a relatively straightforward task to replace the controller with a PC and Mach 3 based controller and thereby restore the machine to full operation. Older CNC mills with bad controllers can be had very cheaply, and are usually not considered as valuable as a manual mill because nobody wants to expense and hassle of a controller refit. The parts haven’t been made for years in many cases.

These three CD’s are all excellent reference material for an HSM to have around.

The Home Shop Reader’s Tip Book

This is book is a compendium of reader’s tips from the popular HSM online forums. While the book has many excellent tips, I have to rate it as my least favorite of the choices here. The reason being that it is a good deal shorter than I had envisioned–at about 50 pages it is the length of one of their magazine issues. In addition, I had seen quite a few of the tips presented already. Now the latter is just my personal problem as I am a relentless collector of this information and in fairness it did all start in the bulletin board which I read religiously. I also felt it was a bit tacky to charge book prices for it and then run Grizzly ads. Nevertheless, the tips are quite valuable, and you may wish to acquire a copy for your own library if you like to have such tips at hand.

CNC Cookies

Probably 90% of what home shop machinists make seems to fall in the category of “tooling” or “model engines”. I’m always excited to find something completely unrelated to those themes, and this one is a great idea. How about custom CNC logo’d cookies?

One of the things that inspires me about Home Shop CNC is the idea that it puts the power of manufacturing in the hands of the masses. It doesn’t take a $40,000 Haas vertical machining center (and many consider Haas to be at the “bargain” end of commercial CNC!) to do interesting work. This fellow has an old Bridgeport mill he converted to CNC doing the work. Great job Vince!

I love to cook, and it would be great fun to be able to apply custom designs like this to the food. It’s easy to imagine creating a “Bob’s BBQ” branding iron for steaks, or “Kathy’s Kookies” cookie mold like Vince has done. I can see something like this going over well for special entertaining events that honor a person, accomplishment, or organization.

12/11/06

NMTB 30 Spindle for the IH Mill!

Industrial Hobbies is having a going out of business sale, and one of the things they are offering is an ISO 30 or NMTB 30 spindle for the IH Mill. At $65, how could I resist? This is a better spindle taper than the classic Bridgeport R8, and is really the preferred taper for building a toolchanger for this mill. Aaron also recommended a set of angular contact bearings from McMaster-Carr that cost another $100, so I ordered those too. What I’d really like to do is take these goodies and create a belt driven head for my mill that’s capable of higher rpm’s than the current geared head. The more rpm’s the merrier so far as I am concerned. I can always use a VFD to cut down on the rpm’s if need be.

Anyway, this will be one of those very long term projects. I had to act now to get my hands on one as they were in limited supply and he is going out of business. We’ll see what comes of it.

NMTB 30 vs R8 Comparison of Scale…

12/09/06

R8 Quick Change Tooling Systems

While reorganizing my list of individual sites, I recently came across Jeff Albro’s list of quick change tooling systems suitable for small mills. As you know if you’ve been reading along, I am currently working on a powered drawbar for my mill, which is another approach to being able to change tools rapidly in the mill. One system really suited my fancy, and that is the Mach-1 tooling system. These guys had the bright idea to just add a retention knob to an R8 shank and supply the appropriate “grabber” mechanism in place of the old threaded drawbar. I love this idea!

Seems like something an enterprising HSM could make for themselves. Given the ability to make more retention knobs and thread them into off-the-shelf R8 tooling, it would give you immediate access to the huge array of Bridgeport compatible tooling at low cost together with this great way of quickly swapping tools.

I’ll have to look at this again at a later date. For now, I am almost done with the powered drawbar and will use it for awhile to see how I like it.

12/08/06

Handmade Hacksaw

Here’s a real nice project a fellow made in his shop:

11/30/06

CNC Soccer Ball?

This was an interesting and unusual piece of work I came across. Apparently it was done for some sort of government contract:

Amazing, and nicely gold plated as well. Got to love those black budgets!

More EFI Manifolds…

I describe the 351C EFI manifold I sketched out below. Recently, I came across a fellow who is doing something similar for a BMW V8. Very cool!

Angle milling fixture is interesting. He’s gone to a lot more trouble to carve out the aluminum that isn’t doing anything.

Here they are installed on a block…

11/26/06

Gunsmithing Tools for Machinists

While I was recently in San Francisco I came across a book I hadn’t seen before that is quite good called Gunsmithing Made Easy by Bryce Towsley. Lots of pictures and the projects are interesting. The thing I liked best about it though were the tool ideas it contained. I went searching on the web for some of these tools and immediately came upon MidwayUSA, which appears to have much better prices than the old standby of gunsmiths, Brownells. Much of what I was looking for was priced better than Brownell’s at list and even more interesting, a lot of it was also on sale. Here are some of the interesting things I purchased:

Starret Automatic Center Punch: Readily available elsewhere, but I got sold on one reading the book, and MidwayUSA has them.
 
Wheeler Engineering Professional Gunsmith Screwdrivers: Much has been written about screwdrivers for gunsmiths. Suffice it to say they are very particular and don’t want to strip a bolt or mar the finish of the gun they’re working on. These special screwdrivers are supposed to be a big improvement over the average mechanic’s style screwdriver and I had to try them.
 
Forster Gunsmithing Screw Assortment: I never have enough hardware!
 
Forster Swiv-O-Ling Vise: A cool looking little vise for working on small parts.
 
Wheeler Engineering Torque Wrench Screwdriver: Another odd gadget the book sold me on–a torque wrench for driving screws to precise torque settings.

Highly recommended!

Mill Centering Device

A fellow over on the Home Shop Machinist board just post some pictures of his simple mill centering device. I use something similar I call a “positioning spud”. The advantage of his is the stepped design lets you insert it into almost any sized collet or mill holder conveniently:

Stepped Shaft Mill Centering Device…

I like his design, although I don’t think I’ll need one like his. If my Powered Drawbar project goes according to plan, it will be so easy to swap tools in the R8 spindle that I’ll just keep my spud in a mill holder ready to go at all times and use the powered drawbar to quickly effect a swap.

11/24/06

Clever Idea: Gear Indexing Jig

I thought this one was really slick. This fellow needed to cut some gear teeth into a part, but apparently only a sector, not all the way around. He made this little jig to assist:

Another fellow noted that this holds the key to fixing bad teeth in a gear. Weld them up, and then index off the good teeth on the other side of the gear.

11/22/06

Power Feed Mode in Mach 3

I recently suggested a new feature for Mach 3 that I call “Power Feed Mode.” I don’t know if Art will go for it or not, but let me explain the gist of it here.

As you may know, I’ve recently gotten a power feed attachment working for my IH Mill. I’ve really enjoyed using it, and it has added a lot to the mill. I’ve always been interested in conversational CNC, which is the ability to make the machine perform without having to write a complex g-code program beforehand. There’s always times when you need a little one off machine operation, and it often seems easier to throw the part into a manual machine than deal with CNC. Many commercial shops keep at least a manual lathe and often a mill too for just such occassions. One constantly hears CNC newcomers asking how they can keep the handwheels on their machine.

The thing is, having gotten used to my power feed, it would be so easy to make manual machinists comfortable on a CNC machine if it had a user interface similar to the power feed. A manual mill power feed is a simple device. It has a lever to control direction that keeps driving the feed in that direction until you switch the lever back to stop or hit the limit switch. There is a knob that controls the speed the axis moves as well as a button to override the knob’s current setting and move at maximum speed to do what the CNC’ers call “jogging”.

Now imagine a power feed mode in Mach 3. In addition to the Manual and Automatic screens, there would be a Power Feed screen. On it would be:

– DRO’s w/ Zeroing

– Jog: Can keep the current jog control, or just put a “jog” button onto the power feed control.

– Power Feed: Looks just like the jog control but keeps a power feed feedrate parameter.

– Feed override: Varies the power feed feedrate.

– Soft Limits: This is a feature not found in manual mills that would be very handy. The soft limit should allow the power feed to stop and start at an exact location.

– Peck Drill Function: Another thing not found in manual settings. Set a depth and hit the peck function and you get a peck cycle at the power feed feedrate.

I think this kind of thing would be hugely valuable to Mach 3 users, and would serve as an easy way for the manual machining community to get into CNC while being highly productive at every step of the way. Why would you need a manual mill or lathe if you had this functionality in Mach 3?

11/18/06

A Paintball Minigun?!??

Awesome! There’s a video of it firing on his site too.

11/17/06

Polygon Turning???

This is a wild technique I learned about just today. Using a lathe and live tooling, it is possible to cut polygonal flats on the workpiece while it is spinning in the spindle. Makes no sense, right? Well, here is a little animation that gives a simplified view of how it works:

http://video.google.com/videoplay?docid=-7831550688320827327

Making this trick work seems to be a function of synchronizing the cutter’s speed to some ratio of the spindle’s, and then using the right kind of magic cutter to pull it off. Polygon milling heads seem to have 1, 2, or 3 inserts evenly spaced on a pretty large diameter. So, refering back to the animation, the idea is that the cutter has to take a full pass on the length of the flat (which will be slightly concave), and then the next flat has to be positioned before the next cutter is tee’d up.

Let’s say we have a 3″ diameter cutter with 3 inserts, and we want to cut a hex on a 1/2″ shaft. The distance around the circumference of the cutter between inserts needs to be traveled in the same time that the spindle travels the distance between two flats. For this example, the cutter has to travel 1/3 of its circumference in the same time that the spindle travels 1/6 of it’s circumference, or the cutter must travel 2 times faster than the spindle in this example. The two have to be precisely synchronized, much as in cutting threads.

One insert and a 2:1 speed ratio gives you 2 flats on the cylinder. 2 inserts mounted 180 degrees apart gives you a square at 2:1. 3 inserts and 2:1 gives you a hexagon.

Polygon Turning, also called Polygon Milling, is faster than indexing the spindle for conventional milling, and also produces a better surface finish.

Very cool stuff!

Ford 351 Cleveland Electronic Fuel Injection

Someday, I want to create a complete fuel injection system for one of my engines. It will either be one for my 427 side oiler in my Cobra, or one for the 351C I’m building for my Hot Rod. I did some doodles in Rhino to see how one might work:

Whoa! That’s a Bad Mamma Jamma!

11/13/06

Playing With Blocks (2-4-6 Blocks, That Is)

I always look carefully when an experienced machinist is showing how he has done something. Here is the Fidgiting Widgitmaster showing how he squared a 6″ x 6″ plate in his vise using 2-4-6 blocks to lend support (they stick up out of the vise pretty far otherwise):

Squaring a plate in the vise with the aid of some 2-4-6 blocks for support…

Made we want to go buy a set of 2-4-6 blocks, although they sure aren’t cheap!

A High Tech Pen

Here is a little doodle of a pen I did in Rhino 3D. I think it would make a good beginner’s CNC project for my CNC Lathe once I get it up and running.

11/11/06

A Backyard Monorail!?!!

How cool is this, a backyard monorail!

An ambitious project, but really neat.

11/05/06

A Bigger Lathe

There always has to be a “next big tool purchase”, right? I’ve decided mine is likely to be a bigger lathe. My Lathemaster 9×30 has served me quite well, and it’s well on the way to being a little CNC lathe, but I confess to having lathe envy for something a little more beefy. I’m thinking of a machine somewhere in the 12×36 to 14×40 range, although I do sometimes fall back to Monarch 10EE and Hardinge HLV-H range. The latter are two lathes very similar in capacity to my current 9×30, but far more robust. In their time they were the ACME of super precision toolmaker’s lathes. Unfortunately, they are finicky beasts that will require restoration, and while they will be magnificent once finished, I am not entirely sure they will substitute for a lathe that truly has larger capacity. I also know somewhere in the back of my mind that one day I will purchase and retrofit a true CNC lathe, which again, would make the Hardinges and Monarchs somewhat redundant. At least that’s what I’m thinking today, and I will admit my mood changes as each new opportunity presents itself.

What sort of lathe am I looking for, you wonder? Well, therein lies the big question, and much arm chair browsing of catalogs and web articles will be needed to settle it. Ideally, I would love to find a screaming deal on an almost new Nardini or Mori Seiki. They’re wonderful well-made machines. I’ve not too much interest in the South Bends, as they require restoration, after which you have a basic meat and potatoes lathe. For me, that’s not worth the restoration effort, and I can toss a lot of older American iron into that same category. The Nardinis and Moris are recent enough that they may still be in good condition, and I might get some use from one without a load of restorative work that I have little time for (far too many projects already, you see).

Failing the Nardini or Mori, there is another rung down of better made Taiwanese lathes, sometimes new, sometimes used. Here we have Birmingham, Cadillac, Hwacheon, and similar makes. Lastly, there are varying degrees of fit and finish available on a variety of brand new Chinese lathes of the appropriate capacity. For example, Harbor Freight (generally considered bottom of the heap) has their 14×40 on sale as we speak and I have one of their 15% off coupons as well. Taken together, that gets me a brand new 14×40 for right at $2500, which seems a screaming deal. I’d have to have the machine in hand and fiddle with it a bit to tell whether it was a screaming deal or a poorly made mis-mash of parts, which is what holds me back.

In terms of cost versus quality, I have the following way of looking at these lathes:

Super Premium

Monarch, Hardinge

Super precision, best made, hard to restore, and costly. A perfect Hardinge goes for $15-25K depending. Monarchs are $8K to $10K. Restorable examples are much less, but a lot of work.
Premium

Mori Seiki, Nardini

These are extremely nice lathes that go for $4K to $6K used with tooling. They are not all that common and can be pretty worked over.
Nice Asian

Cadillac, GMC, Birmingham, Hwacheon

Old American Iron

South Bend, Logan, Clausing

The nice Asian machines are often made in Taiwan, and are copies of good designs made in Japan. They cost a bit more, but it can be worth it.

Old American Iron will make a great lathe, but takes restoration. These machines have been worked hard since the 50’s or 60’s. Would be a good choice if you find one that’s in good shape and wouldn’t need a rebuild.

Cheap Asian

Grizzly, Harbor Freight, Jet

Rock bottom prices on new machines. Probably ought not to buy a used one.

I guess I’m just going to have to chew on this one a while longer before reaching any decisions!

Aluminum Extrusion CNC Enclosure

I’ve been thinking about doing something similar for my lathe or mill:

10/26/06

A Good All-Round Steam Engine

As I was commuting home from work today, I found myself daydreaming about what sorts of things I could make with my CNC Lathe once I finish it (sometime in the next Millenium I suppose!). As so often happens, a crazy thought popped into my head, unbidden and unasked for by me: Would it be possible to create a clever model steam engine that could be entirely created on a lathe, yet would retain a lot of the aesthetics of the classic steam engine models by companies like Stuart? This was a challenging thought. After all, those engines are made from castings, and a lot of the pieces aren’t shaped anything like what we’re used to seeing on a lathe. In other words, they looked hard to make by cutting a spinning piece of metal, no matter how complex the profile that one could program with the aid of CNC. Still, this became a puzzle, and once that happens, I had to worry it to death until I made some progress. First, the ground rules for the puzzle. It must be possible to create the steam engine without recourse to milling–not even a milling attachment on the lathe. It is acceptable to do all of the normal lathe operations such as turning, facing, and boring, and clever setup on the lathe is also allowed, such as offset turning to create crank eccentrics. In addition, I decided to allow drill press to do things like drill bolt circles for the cylinder head to cylinder mating. Intriguing? I thought so.

I have by no means completed a design, but I did some doodles in Rhino that have convinced me this might make a fun project for a CNC lathe. The basic trick of it is to do interrupted cuts on pieces that were already flat before we put them into the lathe. For example, a piece of ground plate (available ground right from your favorite supplier). We spin said plate, and we can contour the long dimensions of it as we please. I first thought of this in conjunction with the main supporting beam for the cylinder. It looks like this in my Rhino doodle:

Good All-Round Steam Engine Main Beam: Entirely Turned on a Lathe…

One of the elements required by this design, which is rather like turning a rocket nozzle, is the idea of boring to create an inside contour, and in this case, doing so with an interrupted cut. I don’t know how well it would work in practice, but it sounds feasible, at least sort of. At any rate, I found the smooth curves engendered by the use of lathe were quite aesthetically pleasing to my eye. I don’t know if I’ll ever finish designing this engine, let alone building it, but it was an entertaining way to spend an hour and a half with Rhino. One of the more challenging design elements will be to come up with a suitable slide valve that can be entirely constructed on the lathe.

Here is the final doodle so far with cylinder and bearings for the crank:

10/24/06

Hurco VM-1 Upgrade

A fellow on CNCZone was talking about his plan to upgrade from an IH Mill to a Hurco VM-1. He had an early CNC conversion, and I guess there were a lot of problems with it. I’m glad I haven’t seen anything similar! Anyway, he is planning to upgrade to a Hurco VM-1 he says. I wanted to see what that was and came across this picture of its massive frame:

Hurco VM-1 Frame. Makes it clear how linear slides are used on a commercial machine…

That picture really made it clear to me just how massive a commercial CNC mill is, even a smaller, lower end one. You can see clearly the mass of the castings, how linear slides are mounted, and even some interesting detail on the counterweight system for the head (see the roller chains there).

10/24/06

Machining Thin Parts on the Lathe

Here was an interesting idea that generated quite a bit of controversy. This fellow machined the hard jaws of his 3-jawed chuck to make it easier to hold thin workpieces:

See the slight steps cut in the ends of the chuck jaws?

And here is what they’re good for…

I see this as a handy thing to do in the home shop. The fellow who wrote about it was taken to task, with posters feeling like this sort of thing had no place in a “real” machine shop and that someone would be fired for doing it. The bone of contention was machining the hard jaws. Some chucks have “top” jaws that bolt onto the hard jaws and are intended to be machined. You’ll have to decide for yourself if you like the idea of making this modification, as it is irreversible short of buying a new set of jaws. OTOH, it does look handy!

If you choose to do it, this fellow tightened the chuck on a piece of shaft that was inside the spindle (you have to cut with the jaws tightly loaded on something or it won’t be accurate in actual use), and he used an end mill in the tailstock to rough it out. He then finished the job with a carbide tipped boring bar.

10/23/06

Nifty Tailstock Taper Set Over Gizmo

I came across a fellow (called “Sidegrinder”) who made a nifty gadget for doing tapers using a tailstock set over gadget. Here’s how he did it:

The mechanism is relatively simple, as you can see. Basically, the tailstock center can be slide an adjustable distance off center. At the spindle end, a ball shaped center accomodates the workpiece rotating at the angle which creates the taper. The level is provided so that the attachment can be leveled when installed so the results are reproducible. I had read about doing this sort of thing, and once saw a guy using a boring head he’d salvaged for the offseting, but this is the first purpose-built fixture I had seen. Very nicely done, and a pretty easy project to reproduce in the home shop.

10/22/06

New Toy Lust: Electric Pallet Jack

After the delivery people left a box at the bottom of my driveway again, I have developed a new toy lust. I want an electric pallet jack. These babies are all you need to move heavy machines from point A to point B. Consider this 2 picture sequence on how to rig and move a big milling machine:

Get it up on 4×4’s with a couple of toe jacks…

Slip the electric pallet jack under it, hit the lift switch, and you are ready to roll…

I need to do some research on these things and find one that can make it up my hill with some semblance of a load, but this would sure be the cat’s meow, wouldn’t it? By the way, rigging heavy equipment is very dangerous! Make sure you know what you are doing, and remember, I don’t, so don’t listen to me about how to do it!

CNC’ing a 9×20 Lathe

This fellow, “Ron111” on CNCZone, did a very nice job on a 9×20 lathe. Took him almost no time too. I’m jealous!


Both axes are direct drive. Darned cool, eh?

Worm-Driven Ball Turning Attachment

You can find a lot of ball turning attachments for the lathe if you search the web, but this one is quite different than any I had seen before. It’s called the “Habit” radius dressing fixture. The fellow that had it was using it on a lathe, but from the name I almost wonder if it was intended as a radius dresser for grinding wheels. No matter, here is what it looks like:

Internals are a simple worm gear arrangement. The concave arrangement is called a “double enveloping worm and gear”…

It seems to me that a worm-driven arrangement like this could potentially produce a finer surface finish than the average ball turning mechanism. Something similar could be used on a mill for rounding tasks as well, although I guess a rotary table already counts as “something similar.”

South Bend Drill Press Restoration

There is no denying the appeal of good American Iron (or European either for that matter) when it comes to machine tools. As you probably know, all of my machines are Asian imports, at least at this stage. I do marvel over the fit and finish of the old tools, particularly when nicely restored. I recently came across a neat South Bend benchtop drill press that a woman named Paula restored. Here are a few snapshots:

10/15/06

Damascus Steel

Have you ever seen Damascus Steel? It’s one of the most beautiful materials I’ve yet to come across. I first saw it looking at slices of an iron meteorite at a gem and mineral store nearby, and was fascinated by the intricate banding. Rolex makes a watch face for their Daytona of the same material. But this kind of material is not limited to heavenly bodies. It can be made, even in the home shop, and people have been doing so for some time. I won’t try to deliver a coherent history in this brief note, but I did want to show you some pictures and gather up some of the links I’ve been pursuing to learn more about Damascus Steel. It turns out you can purchase billets of the stuff from a variety of sources, including eBay. It isn’t at all cheap, but you would use it to make a fancy custom knife or other decorative project. I have added some sources for Damascus billets on my suppliers page near the bottom.

Basic Damascus billet material before etching from www.knifekits.com (great site, BTW!)…

To really bring out the Damascus pattern requires an etching process that affects the different metals in the Damascus billet slightly differently. Here are some amazing etched nickel steel Damascus patterns:

Etched Damascus Nickel Billet…

Looking at the etched sample, now you can see what all the fuss is about! That sample came from Jim Ferguson’s “Twisted Nickel” site. He has made many beautiful knives and talks about how to make these billets. It’s well worth a visit to see what he’s up to.

At some point I’d like to make some knives, including some that incorporate Damascus steel as a decorative element. So much to do, so little time!

Delay On Make Timer Relay for E-Stop Circuit

I did some more planning on the driver electronics for my CNC Lathe conversion, and I think I now have the E-Stop circuit fully worked out. I won’t bore you with details here, but you can read about it on the driver electronics page if you are interested. A useful device I found for the system is called a “Delay On Make Timer Relay”. This is a 2 pole device that waits a determined amount of time once current is applied to one pole before letting the current reach the other pole. It’s an easy way to inject a time delay that can be adjustable between two components. In this case, I am using it to delay power to the spindle and step motors long enough to make sure the GRex is booted up and ready to control them properly.

10/13/06

Fixture for Machining Intake Manifolds

Not much to say about this, just a tilting table on a mill:

Injector Manifold Machining Setup

Another Brilliant John Stevenson Idea: Tailstock DRO

I recently adapted some cheap imported DRO scales to my mill, and have gotten a lot of use out of it. John Stevenson has done the same for a lathe tailstock:

Cheapy tailstock DRO: Brilliant!

I’ve seen a lot of guys put a dial indicator on the tailstock, but this seems so much more useful. For one thing, I am frequently drilling, boring, or tapping a much greater distance than the dial indicator reads very well. Yes, I can set it all up and just use the dial indicator to tell me when I’ve “touched” the right spot, but this is so much more convenient.

10/12/06

Ring Rolling On A Mill

Here’s a cool thing to do if you have a horizontal mill:

Folks comment that these mills are incredibly strong. They seem to sell cheaply and are less desireable than vertical mills. Their hogging capacities are supposed to be amazing. Makes me wonder why nobody bothers CNC’ing them?

10/9/06

CNC’d Clausing 13″ x 24″ Lathe

Ran across this cool pic of a Clausing lathe that a fellow converted to CNC:

Clausing lathe converted for CNC…

Love the bar puller and air operated collet chuck, all homebrewed.

10/5/06

First G-Code

I got OneCNC working for my lathe projects today. Posted a program to profile a pen:

Posted a program to profile a pen: Pretty cool!

Here was the original pen design in Rhino3D:

Check out the OneCNC Walkthrough page to see how I did it.

Worm Gears

Gears are a fascinating topic, and worm gears are some of the most interesting. I was recently searching around to read about making worm gears on the web and came across some nice threads. First one was on HSM and revealed the following nifty fixture for the job:

This fixture mounts to the lathe cross slide, and a single point cutter goes in the spindle. A shim under the fixture establishes the correct helix angle…

The next thread was in Practical Machinist, also very good and included a CNC fixture:

Mounted on the cross slide again. You can see the ACME single point fly cutter being used…

A side view of the indexing holder…

The finished worm wheel: sweet!

From the same thread, Hu Flung Dung employs a Haas mill with 4th axis:

Roughing with a 15 degree tapered end mill…

Fly cutter for the correct ACME shape…

By all accounts, the mill version was tough! Be sure to read the thread, many secrets documented there. Somehow I think the lathe version had to be easier.

5-Axis Machines at Home!

These are always crazy to see. Here is a fellow’s shop made 5-axis head I saw on CNCZone:

Looks easy to build, and uses a Roto-zip as its high speed spindle. I wonder how well it worked in practice? It’s not direct driven, which is good (resolution would be poor for a direct drive design I think), but not clear what the ratio is or how it works (probably timing belt drive). He says he sold it for $500 on eBay.

Of course the master at 5-axis for the home is Rainnea.

What the heck would you do with a 5-axis mill in a home shop? Well Rainnea and this fellow make jewelry, among other things. It’s amazing work, and the thought of taking one of those intricate Rhino models all the way through to finished jewelry is intriguing. The latter fellow’s mill is particularly amazing, being as how he as a 5-axis mill capable of this level of fine work that is essentially made from pipe fittings:

Pipe Fittings!

trunnion Table…

It’s 5-axis by virtue of the crossed rotary axes that are a classic trunnion table design similar to what many full scale 5-axis mills use. For comparison, here is a Haas trunnion table:

Cutting a turbing on a 5-axis trunnion table…

The pipe fitting mill (he calls it his “vise mill”) is just an amazing bit of McGyvering.

10/2/06

Up Your Organization

It’s a never ending battle to get organized and stay organized. I find that before I can have “everything in its place” I first must have a “place for everything”. Towards that end, I am always interested in the storage ideas people come up with out there. Here are just two worthwhile thoughts along these lines:

A vise grip rack…

A QCTP tool holder rack…

Along the lines of the QCTP rack, I have also seen racks for tool holders that attach to the side of a mill. All good ideas! I know I also need something to help keep up with all the loose mill cutters, as well as some sort of rack for my files. The list goes on…

10/1/06

Turned File Handles

I came across these beautiful turned file handles on the Lathemaster Yahoo Group. A fellow named Marv Stovall did them. I thought they were really nice, and immediately wanted a set for myself. This will make a good project to try my CNC Lathe on when I get done converting it.

At the same time, I’d love some kind of rack to make it easy to organize the files. You need a collection of different styles, shapes, and sizes, and it’s hard to keep them all neat. According to Guy Lautard, he knows a guy that keeps his in pipes filled with heavy cutting oil. I have found that the heavy oil works as good or better than chalk to keep files from loading up, and it would surely protect them.

BTW, I like Nicholson files. For filing on the lathe, there’s nothing like their lathe pattern file either. makes for some really smooth work.

In the meanwhile, I bought a box of cheap wooden handles off eBay for my files, which are way better than nothing. I’ve added these to my Projects Wish List for future attention.

9/24/06

Gecko Drive Mounting Bracket for CNC Lathe

After looking over what others had done to mount their Gecko drives, I decided to use some heatsink extrusion to make a bracket. I mounted the fuses in the bracket right next to the appropriate drive:

I need to put a label next to each drive so I can tell which axis is which. One more thing done building the driver electronics enclosure. The next step is to build a sub-chassis that will carry the relays and other auxilliary components needed to control the spindle and coolant.

Tapping Arms

I had occassion to drill and tap some holes on my CNC Lathe project (making a heatsink/mounting bracket for the Gecko Drives), and got to thinking about Tapping Arms:

Flexarm Tapping Arm…

These gadgets are designed for production shops so that someone can rapidly tap a whole bunch of holes. They look extremely handy and easy to use, and I’ve heard lots of good about them on Practical Machinist (the owner of the site seems to have invented the darned things!). I sure could have used one for my project! The subject comes up on Practical Machinist usually because someone can’t do rigid tapping in their CNC. Someone else usually suggests they buy a tapping arm rather than a new CNC. This is relevant to amateurs because Mach 3 doesn’t support rigid tapping at the moment. The only bad news is that they seem to cost $1200 to $5000 and up. Wow!

The interesting question is how hard would it be to make one of these gizmos? The arm itself is very simple. In a pinch, you could probably use a monitor arm designed for a PC, assuming you were willing to accept a little lower capacity and strength. What about the motor? I’m thinking an import butterfly impact wrench or something similar is about perfect. Failing that, it seems like you could adapt a Tapmatic or other tapping head to an air or electric motor. Whatever motor is used needs to be reversible. What I like about these things is they look like they would make tapping a snap and they also stay out of the way. I could imagine attaching one to the corner of the welding table and forgetting about it. Seems like a perfect small workshop project!

Nice Rail Design for Plasma and Router Tables

Skate-O-Rail!

All in all, looks like a pretty decent railing system that would be easy to build.

9/17/06

Finished the DC Power Supply for my CNC Lathe project this weekend!


9/15/06

Precision Linear Rail Support With Moglice for Gantry Machines

I’ve been doing a lot of pondering lately after reading an MIT PhD MechE’s thesis on designing and building CNC machines. To find your own copy of this 200+ page tome, Google for “Principles of Rapid Machine Design.” The fellow that wrote it is a Professor Bamberg, who injected a number of thought provoking ideas via his thesis into my consciousness as far as how to build machines that will be very accurate yet relatively inexpensive and straightforward to create for an advanced Home Shop Machinist. Once the juices got flowing, it resulted in the 5-Axis T&C grinder doodle below. I wanted to set down here another application, which I’ve been discussing with JerryFlyGuy and others over on the CNCZone, and that is how to mount linear rails on a fabricated (likely welded) substructure with precision.

The salient idea is to make the precision structure on which the rails are mounted separate from the fabricated (often welded, but could be bolted together) structure needed for support and rigidity. The magic interface between the two is a special epoxy used by machine builders called Moglice. Note that this method is also useful when attaching two parts of a machine together that require a precise orientation to one another, for instance, when getting a column square with the base of a mill, or perhaps even getting headstock of a lathe square with the bed.

In practice, one fabricates both pieces separately, and then bolts them together leaving the bolts loose enough so there is an approximately 1mm gap between the two. A system of setscrews (or leveling screws if you prefer) is used to achieve the precise alignment desired, and then Moglice is injected between the two. When it sets up, there will be a precision match between the two surfaces that retains the alignment achieved by the set screws. One can then remove the setscrews and torque down the final mounting screws against this precision surface, and all will be well.

This approach appeals to me greatly for a few reasons. First, it’s blessed by an MIT PhD, and was used in a commercial high peformance 5-Axis CNC Grinder he collaborated on–gotta love that! Second, it takes the art of precision machine construction out of the realm of laser interferometers and hand scraping and moves it closer to adjusting a 4-jaw chuck on your lathe.

Now to be sure, one does need a precision surface to mount the linear rails to–you can’t just bolt it to any old wavy piece of metal. However, that precision is straightforward to achieve with a surface grinding operation. Used surface grinders are cheap, Asian import new surface grinders are cheap, and shops with grinders one could farm the work out to are plentiful. Moreover, it is only the shoulder and the floor surface immediately under the linear rail that needs this treatment. It is concievable that with enough care, perhaps one could even achieve decent results in aluminum finished with a fly cutter and skip the surface grinding stage. It’s largely a question of the accuracy you want the machine to achieve. I would think a tenth (0.0001″) would be straightforward with surface grinding.

Let’s see how this looks in plan form:

The precision plate (blue) sits atop the structural frame (red). Linear rail mounting holes not shown for clarity.

A precision ground shoulder in the precision plate locates the linear rail straight, level, and true…

In practice, one would use a bead of silicone cement to “o-ring” the Mogliced gap so all the Moglice stayed in place until it hardened. Getting the plates straight, level, and true should not be too challenging with a tenths indicator, straightedge, and machinist’s level as your tools. All it takes is a little patience and skill with these normal tools of the trade. No finicky scraping that requires “touch” and years of experience to do well.

We apply a similar principle to mount the gantry and keep it true. The gantry uprights would have a flange at bottom accomodating the same mounting hole+set screw+Moglice port model shown here. Work step by step, use the leveling screws to get the gantry right where you want it, and inject the Moglice to lock that in.

It is a tremendous advantage that the structural framework can be built, seasoned, set up and leveled in the place it is inteded to be used all before the precision work really gets under way. I have on my list of researches to understand what is needed to season such a frame. I understand there are approaches based both on temperature and vibrational techniques. Some passage of time would also seem to be advantageous. I wouldn’t go injecting Moglice the same day I’d finished welding up said frame, for example.

9/14/06


Moglice and Sliding Bearings

Ran into a query about using Moglice to fill gaps between column and base when squaring the mill. Did a routine web search and discovered the patent application for Moglice is #4,329,238. Also came across a fabulous MIT lecture notes on sliding bearings (e.g. what we call “Ways”). It had some interesting information. Sliding bearings made with Moglice, may not require gibs, for example, because the fit is exact. Only the master need be accurately scraped, as the secondary bearing is cast in Moglice. This begs the question, if we have a precision straightedge of sufficient size, can we simply cast both sides of the bearing in Moglice, and do away with any scraping to build a precision machine tool? It would seem so.

One serious negative with Moglice is that it wears pretty quickly compared to cast iron. Provision must be made to protect the ways from contaminants.

9/3/06

It’s alive! Finally got the PC for my CNC lathe project assembled

CNC Lathe PC having Windows XP installed…

It’s a full on Athlon 64 system on a Micro-ATX motherboard. All the parts are brand new, and you can build a system like this for about $400 if you shop carefully, not including monitor, keyboard, or mouse.

Machine Table Covers

Clever idea: how about taking some sheet metal and some felt to create some table covers to make it easy to clean up when doing vise jobs?

Sheet metal table covers make cleanup easy!

Bridgeport CNC Conversion with Single Shot Oiling

Here is a great shot of a lot going on underneath a Bridgeport table:

Nice single shot oiling tubing all tied off and clamped down, “groovy” oil passage on the freshly scraped way, and a brand new HiWin ballscrew. This is a very nice Bridgeport CNC conversion

8/29/06

Ever hear of a “Maximator“? <Hint: Think Waterjets>

Apparently this type of liquid pump is exactly the sort of thing needed to drive a water jet cutter. Those beasts are way cool! If you’re not familiar with them, water jets use super high pressure (20,000 – 60,000 psi and up) streams of water to cut with. Usually, the water carries a garnet abrasive. The results are very precise and smoothly polished, so it is an extremely efficient process. The fellow that runs Anvil Bikes says he reduced his machining costs 80% when he outsourced to a water jet shop to cut his workpieces so they required less machining to finish. That’s quite a testimony! I’ve read in a number of places that rough cutting to within 0.1″ can really save on the cost to machine a part. A water jet would be the ultimate. Flow International, one of the premier supplies of these high-dollar machines, claims their machines will cut to within 0.003″. They do so without heating the part, with little lateral force, and with very little kerf, which is extremely helpful in many cases.

Just one problem with all this–water jets are expensive! They also generally take some pretty industrial support–they don’t just plug into 110V. Some folks talk about building one from time to time, but I have yet to see anything come of it. But how about this idea: There is a waterjet rig built around an air powered maximator that could be attached to your CNC mill to do water jet cutting. How about attaching one to a plasma table to really open up some possibilities? We know the tables can be built cheaply. Brand new, the 30HP version of this thing from WardJet, the M-30, supposedly costs about $35K. Now we can see how to produce a 4′ x 8′ capacity waterjet for somewhere in the neighborhood of $50K. That’s still a huge sum of money, but it’s way less than a complete new machine.

It’s interesting to watch the videos on the WardJet site. I found it particularly interesting that they use a bed of ball bearings to hold the workpiece so that the water jet doesn’t eat up the bed too quickly. The hourly costs are also interesting–not exactly cheap gadgets to run, but the productivity is awesome, so there is a good return. To learn more, I did find a really good web site that’s all about water jets.

It turns out I have a lot of things in my house that were cut with a waterjet by these guys:

Creative Cutting Service

65 Hangar Way
Watsonville, CA 95076-2476
( Monterey Bay Area )
phone: 831 728-5362 fax: 831 728-5364
email: lberk@redshift.com

Thomas Powell has done some fantastic work on his IH Mill

His photo site details all of it, but there are some choice pieces I particularly covet:

One shot oiler using Bijur manifold and orifices…

Spindle mounted flood coolant system and enclosure…

Z-Axis counterweight system using gas struts…

Power Drawbar…

8/07/06

Inexpensive DRO for the Mill

I’ve also been spending time down in the shop, getting two axes of my inexpensive DRO up and running:

X-Axis DRO…

As I mention somewhere below, the scales are quite inexpensive, and they’ll be very convenient to have in the interim before I convert to CNC. In fact, I plan to use them for a little while post CNC conversion to help me diagnose whether everything is working properly and to do some ballscrew error mapping to improve the accuracy of the machine.

I Want to Build a Pan and Box Brake

I’ll keep you posted on the mill progress, but frankly I do intend to build a few more projects using the mill manually before I dive into the conversion. For example, I need to build a pan and box brake to be able to finish the chassis work for my lathe retrofit. I love the design that appeared in “Projects in Metal”, and have the book. They come out looking great:

I’m going to build a box brake just like this one…

I’ve got all the steel for it ordered and it is sitting in my garage. Just need to finish a few other projects (especially the mill power feed), DOH!

7/21/06

A Quick Checkup on the Health of a Milling Machine

I found this description somewhere for how to do a quick checkup on the health of a mill:


Listen for excess spindle bearing noise or clatter, throughout the speed range.Put a dial indicator on the inside of the spindle taper, rotate slowly by hand and look for run out. You would like to see less than 0.001″, anywhere close to that or over means the spindle is either bent from a crash or worn or has worn bearings. If its not too bad (0.001″ to 0.003″ or so) it can be reground, but figure $300 to $500 plus some hassle for that.

Put a dial indicator on the table indicating against the side of the quill and in the middle of travel of the table (the most worn position) issue commands to move the table back and forth back to the same position. Do this for X,Y and Z. The difference shown on the indicator when moving from opposite directions will show you how much backlash each axis has. When this machine was new it probably had less than 0.001″ backlash, it would be nice to see no more than 0.0015″ or so at this point.

How much you can stand depends on how precise your planned work needs to be. My machine is at around 0.0015″ on all axises and that’s ok for what I do.


I’ll have to try that on my IH Mill one of these days and see what the measurements are. Speaking of IH, Aaron has finally gotten his web site sorted out and all the old helpful how-tos are back up there along with some significant new how-tos on how to use the mills for production work. It’s all very good information, worth a look see. One thing I noticed that I hadn’t read before was a section on squaring the mill. I just got done spending quite a lot of time tramming the mill and here’s another procedure that ought to be contemplated. It involves shimming the column base to make sure the z-axis is properly square. Good information!

Spring-Loaded Parallels Separator

How about this cool gizmo, a Kurt spring-loaded parallels separator:

Kurt spring-loaded parallels separators…

There is always some crazy little gizmo I haven’t gotten around to buying yet! I think this particular gizmo is actually made by SPI, as Penn has it in their catalog for $39.95. It seems like the sort of thing that wouldn’t be very hard to make.

7/18/06

Rotary Table Fun

I had a little fun with my new Phase II 8″ Rotary Table today:

Fan cutout done with rotary table on the mill…

I just did it by eyeball and one end hung up on the handwheel so I couldn’t do things as symmetrical as I would have liked, but all in all it turned out tolerably well. I think I’m going to like that table a whole lot too! At this stage I think I am within spitting distance of being ready to assemble the PC enclosure. Just a few more holes to drill, but hopefully I can get the PC up and running this weekend. That would be a satisfying step forward on the project.

Extremely Small CNC Machines

From the department of “I have no idea why, but they sure are cool,” I offer a series of extremely small CNC machines:

Really slick looking design. Made of MDF, 80/20 extrusions, and UHMW plastic pads so things slide. The spindle is an air powered pencil die grinder.

A closer view of the table. You can see the UHMW pads. Motors are NEMA 17–tiny!

Extremely tiny–not sure what it could even be used for. Uses stepper motors salvaged from printers and a Dremel cable drive spindle…

The Fidgiting Widgitmaster’s version is imaculate as always. He sure likes those T-slots!

7/17/06

Z-Axis for a Router

How about this for a nice little Z-axis for the router crowd:

Interesting slide design, the round rails are embedded in the aluminum and held with bolts…

Uses a RotoZip router…

This fellow (eBay seller yukonjasper) is selling these on eBay for $175 buy it now, without the Roto-Zip or stepper motor. Seems like a pretty nice deal.

Yuasa R8 Quick Change System

I came across this nifty set of Yuasa Quick Change toolholders for R8 machines (like Bridgeports and my Industrial Hobbies mill):

The Yuasa Quick Change Set…

Quick Change R8 Chuck…

A set of the holders…

Aren’t they Kewl?

I’m not sure how the holders get locked into the chuck, but they sure are cool. The seller didn’t know much about them, but thought they might have the brand name “Kwik Switch”. This set sold for about $320, and I kick myself for not stepping up to take them. Oh well. I did purchase plans to make a powered drawbar for my mill from a butterfly impact wrench. That would also speed tool changes up considerably.

7/16/06

JerryFlyGuy’s Flat Rail Installation for a Gantry Machine

Many moons ago (4/9/2006, to be precise), a fellow named “JerryFlyGuy” set out to determine how best to install a set of linear ways in as true, flat, and square a fashion as possible. Many possibilities for it were discussed in quite a long thread over at the CNCZone. At last JerryFlyGuy settled on an approach, and a very interesting one it is too. He is using a very fine wire as a continuity test to tell when the rail is straight and a little jig (laser cut) that fits over the square tubing with screws that let him tweak the rail left or right:

Straightening jig used to position the linear rail onto the square tubing…

Pliers are holding the continuity test wire while the allen head is used to tweak the rail left or right. Once it is in the correct position, Jerry then drills a mounting hole. He has started off with drill bushings to create pilot holes.

I believe once Jerry gets all of the holes drilled his next step will be to pour a Turcite like substance between “dams” to provide a flat surface to mount the linear ways on. More news as it develops.

7/8/06

Roh’lix?

An interesting alternative to the ballscrew for CNC applications is called the “Roh’lix“. They have virtually no backlash, and are much less susceptible to contamination than ballscrews. They have the ability to slip if overloaded, and I suspect this potential limits their thrust and may make them susceptible to losing steps in open loop systems. The Roh’lix runs on just a steel shaft, which are certainly available pretty cheaply. May be worth a look for certain applications. Given their low thrust capability, they are said to be excellent for CMM machines. I wonder how well they would work for a plasma table? They are also available with a quick disconnect option which would make manual positioning possible. The Roh’lix patent is 4947698. I wonder how hard it is to make them?

A similar idea is the “rolling ring” drive, which definitely looks buildable.

Making Connecting Rods for a Model Engine

I thought this was a very cool picture that explains a clever way to make connecting rods for the Model Engineer:

First turn them on the lathe, then finish with a mill. Note how the split portion already existed on the turned pistons. These are for a scale model of the DeHavilland Cirrus aircraft engine…

7/7/06

I Want a Centering Scope!

I really want a centering scope–I just think it would make it so much easier to line up precisely in the mill or even to use a 4-jaw chuck. They are expensive. I have missed out on them on eBay probably 6 or 8 times by just not being willing to bid enough. They usually go for about $120 or more. It occurs to me that it’s a bit silly this function is not handled by a webcam-like approach, and then I got to looking at the Intel digital microscopes (QX3 and QX5). Well it seems there is a great piece of shareware called miXscope that really enhances these beauties and this just might be the ticket to use one as a centering scope. There’s just the issue of mounting it accurately to make it work as such. I may look into this, or I may just deal with what a real scope costs.

Centering Scope Used to Precisely Position On Center of Part…

7/03/06

“Printing” 3D Objects in Steel

Just came across one of the coolest things I have seen in a long time. How about the ability to “print” 3D objects in steel:

Some 3D printed art by artist Bathsheba Grossman…

It’s almost like the materializers in Star Trek! Artist Grossman starts from a Rhino 3D model and the machine can directly reproduce that model from metal powder in steel or bronze. Apparently its a laser lithography technique where the laser interacts with fine metal powder that is coated with a laser-sensitive binder. That binder solidifies the object layer by layer. Once it has been fully solidified, the object is placed in an oven that has just the right temperature to weld the metal into finished product with reducing it to a melted puddle. Very cool!

Bathesda also provides a fascinating sculpture called “Little Star” that she’s put into the public domain so others can build them:

Little Star…

Little star is intended to be plasma cut from metal and then assembled with silver solder or welds. The plans she provides are for a 14″ tall model, but I would love to make one much larger. Will have to look at what my plasma table is capable of when I get it built.

6/26/06

Make a Dodecahedron on Your Lathe

In the realm of, “But why?”, I offer this fascinating fixture to be used for making dodecahedrons on a lathe:

The basic fixture…

Start with a turned version. I could see designing the fixture to work with a 4-jaw chuck as well, maybe better as it would clamp better and have no need of the socket head screw on top to hold.

Now face to cut each facet…

Isn’t that cool? Another similar thing would be the Turner’s Cube that relies on boring successively smaller holes in a cube:

Adapting a 4-jaw to hold the Turner’s Cube…

A finished Turner’s Cube: Absolutely Mesmorizing, Ain’t It?

Digitizing a Quarter

Have you ever wondered about those digitizing probes you can put on a CNC machine? I came across an article on using one to scan a quarter that provides a great introduction to them. This particular article is by the DeskCNC people who are using their software together with an IMServices scanning probe. Basically, the hot glued a quarter to a metal plate and went at it:

Quarter hot glued to plate and scanning probe approacing…

The process involved scanning an area slightly under 1″ square and required 3.5 hours to produce a 3D model involving 95,000 points scanned. The result is pretty impressively detailed:

The scanned 3D model…

Check out these IMServices guys. Their prices seem very reasonable, especially given the quality of the results and what looks like a very slick piece of software to automate the probing. I suppose you could also haunt eBay looking for Rennishaw probes, but you’d have to figure out to interface one if you got it. I doubt you’ll find one much cheaper than IMServices offer, and the condition will likely be undertermined given it’s eBay.

6/25/06

Miscellaneous Milling Activity

Okay, there is a lot going on in this picture of interest:

A right angle mill head with arbor and saw saves a facing + parting off lathe step in manufacturing Delrin ACME nuts. Note the stop on the mill so he can just keep feeding them in as each one is cut. This is some more Widgitmaster workmanship.

Here is what he is trying to make. A CNC lathe with a powered drill on the cross slide would make short work of this job too! See my notes below on adding an encoder to the DC spindle motor of my lathe to make it a servo and allow precise indexing.

SPI Table Stops

SPI makes these little mill table stops with a 5/8″ T-Nut on the bottom. It can be extended up and down, left or right. Also very nifty!

6/24/06

Big Brass Knobs for My Mill

Wait, what did you think I meant! Last night I made a “couple of big brass ones” for my milling machine gib locks:

My new milling machine gib lock…

Designing an Optical Limit Switch

I also did some thinking and drew up a design for a limit switch based on some slotted optical switches I bought a while back on eBay:

An optical limit switch…

6/17/06

Tramming Jack

I came across this interesting concept recently, a “tramming jack”:

Tramming Jack…

Let me try to explain what’s going on here. This fellow is using the little machinist’s jack together with the big square frame he welded up to make fine adjustments to the tram of his mill head. The jack gives him a fine adjustment screw for the task. I thought this was an interesting alternative to hammer thumping while the locking screws are half tightened, which is how I learned to do it. Perhaps one could fabricate a more elegant approach using a fine screw secured to the head and the mill table. Imagine a sort of turnbuckle arrangement. OTOH, maybe it would just be very inconvenient compared to the hammer. I’ll have to give it some thought.

6/14/06

A Chip Compactor for the Shop

There is an interesting discussion over on the CNCZone about building a chip compactor with a 30 ton hydraulic ram to make recycling chips easier. The idea is to compress them into “pucks” so they take less space and so the coolant can be forced out for recycling. I drew up a quick Rhino rendering to try to visualize what they were talking about:

A chip compactor…

In the drawing above, red is the compression chamber, ram enters from above. Purple is a gate at the bottom that opens so the puck can drop through. The series of holes in the green base plate allows coolant to run out a separate path for recycling.

6/10/06

Heat Treating Oven

I have been interested in heat treating metals for a long time, and finally sat down to do a little web research on how to build a heat treat furnace. Industrial PID controllers are readily available on eBay cheap, and the rest of the materials required are not expensive either. If you wanted to buy a heat treating oven, you should look at units made by Paragon Kilns. The knife making community seems to swear by these units. Depending on the model you choose, they run from $1200-ish to as much as $4000:

A Paragon Heat Treating Oven…

I’ll probably try to build one for fun, so I’m adding something like this to my “someday” project wish list:

Home-built Heat Treat Oven…

In fact, I’ve added quite a few things to that wish list page recently.

6/5/06

Interesting Shop Made Tools

Some interesting amateur-built tooling:

Tubing bender…

Graver sharpening jig, also called a “Barlow’s Wheel”…

Ball Turning Attachment for Lathe…

5/30/06

Mill Vise Caddy

First, a nifty accessory for moving your vise on and off your mill table:

It’s so nicely made, isn’t it? You clamp the vice jaws onto the thing and you can lift the vise off and swing it out of the way. It almost seems to me like something slightly more general would let you keep a bunch of vises, rotary tables, and other goodies on a shelf behind the mill and bring them on and off as needed. You can by one already made from SPI (via MSC or other dealer) which calls the product a “Mill Vise Caddy.” Cost, $339. I’d say it’s well worth making one, and have added it to my project list.

Shop Made CNC Hydraulic Tubing Bender

Second, may I present one of the most impressive projects I’ve yet seen? This fellow chip has made an NC-controlled hydraulic tubing bender from scratch. He’s a MechE student at Cal Poly, and it is just the coolest project ever.

Wow! NC-controlled Tubing Bender…

I wish I could say I was adding this one to my project list, but truthfully, it looks too ambitious for me at the moment. Maybe someday when I have more time and experience I will revisit. Meanwhile, I just enjoy reading the thread he’s written.

Mirror Fixtures for Small Production Runs

Onward to some less ambitious, but still interesting findings. Here is a clever idea for small production runs:

Flip fixture is at top, half machined parts in middle, finished parts at bottom…

The idea is a special fixture to make it easier to machine the back side of a bunch of parts. The parts are laid out 6 to a piece of metal. First you mill out the top half. Then you flip the piece over, dropping it into the “flip” fixture on the vice. It is a precise negative image of the parts, which holds them in place, and allows you to machine the backside of said parts. When done, you dump the finished parts out of the flip fixture and go again. Neat, eh?

Mill Tramming Bar

Okay, here is another super simple idea that would be an easy project. It’s a tramming bar for a mill:

Tramming Bar…

Dead simple to make, and easy to use too. Just need to make sure the shaft fits a common collet size.

5/22/06

Awesome Shop Made 5C Collet Chuck

From the category of Amazing Stuff, I present this 5C collet chuck that a fellow from Practical Machinist named “j king” made. It uses a planetary gearset from a transmission to gear down the handwheel in a compact way and tighten the thread on the collet. The handwheel is nicer than the keyed 5C chuck I’ve got (and which I still need to make a backplate for!). Other detail notes: there is an O-ring to keep the handwheel from rattling, and there is a sleeve pressed into the small gear. Since the transmission gears are hardened, the sleeve was necessary to allow threading for the 5C collet. It is brazed into place. The workmanship and sheer beauty of it is amazing:

The component parts. Note there is a gear barely visible in the righthand part, and the little gear in the middle is threaded for the 5C collet…

Here is a better view of the gear mounted in the chuck…

The D1-3 backplate, also a beauty…

Handwheel looks CNC’d, but was done manually…

Threaded for the 5C collet…

Thrust bearing inside to keep from over tightening…

Here it is assembled and ready for use…

Looks like he’s using that thing on a Monarch 10EE lathe, another really nice piece of work!

Cooling Box for Air Hardening Steel

Okay, my last note is a quickie. I came across this nifty cooling box for air hardening steel:

Cooling Box for Air Hardening Steel…

It’s just a simple rack with a box fan sitting on top of it directing air down through a grate. This would be great if you were doing some kind of small manufacturing run of parts made of air hardened steel. It’s useless for annealing, as you need to cool very slowly in that case–the cooling rate is very critical. The book says 40°F/h from 1600-1650. That’s 20-24 hours at a steady rate to still be 200°F. The non-magnetic point being 1425°F appears to be too low to anneal. H-13 is one air hardening steel. To heat treat, heat it until it is non-magnetic. Wrapping the part in foil is preferred if you have a forge or furnace in which to do the heating. Cool it down in air. Reheat to 1100 degrees F to temper, which should leave it a nice plum color. D2 and D7 are two other air hardening steels.

5/16/06

Make Your Own Flex Couplers

This just in: you can make your own flex couplers:

I’m not saying its cost effective,this one can be bought for $10, but I like the idea of designs that incorporate a flex coupler into some other part. Check the rotary table conversion down below to see what I mean. The style pictured above looks straightforward to cut with my DeWalt Multicutter carbide saw. Or you could use a slitting saw. Probably want some sort of hardened steel to make sure it is springy. I like this idea because I think you can simplify your design by incorporating the flex coupler into another part rather than having to come up with an independent coupler. This approach can also result in a more compact design.

5/14/06

QCTP Holder Rack

Here’s another project I’ve got to build some day soon. What a clever way to save space and organize your QCTP tooling for the lathe:


4/30/06

I’ve been remiss in my blogging, so I have a lot of catching up to do here. Bear with me, as this may be a long passage today.

Thing of Beauty: Tree 325 Milling Machine

In the Department of Someday I Want One, I firmly place the Tree 325 milling machine. Many fine authorities swear this machine is way better than the average Bridgeport in terms of precision or rigidity, and you can tell with one look that there’s plenty of beef there to back that up:

A Tree 325: Someday I Want One!

These Tree mills appear to sell for somewhere in the $4000 to $10,000 range depending on what condition they are in. A sweet deal would be to find one that’s mechanically sound but with a blown controller. Switch that bad boy over to a PC-based control running Mach and you would be in bidness!

High Speed Machining With An Air Spindle

High Speed Machining: This is a big buzzword these days. It focuses on higher spindle speeds. To after aluminum you need well over 10K. Most spindles in machines I can get my hands on won’t touch that. How about a nice retrofit air spindle that is removable? Check it out:

30,000 rpm air spindle

Just the ticket for super high speeds for engraving or 3D profiling in aluminum. This one is made by MacroTechnologies. They have another model that mounts to the spindle directly rather than being in a toolholder like this. Slick!


Rail Mounting Precision for CNC Plasma and Router Tables

The reason for the laser measurement thoughts mentioned above is my planning for a CNC plasma/router table. This table will be built using linear slides. You have to mount the slides on a flat surface as they are not strong enough to avoid flexing if mounted to something not so flat. In fact, they are typically designed to be mounted on a surface that has been milled or ground flat both under the rail, and along a ridge that one side of the rail butts up to. There are a number of threads and thoughts on how to go about creating such a flat surface of sufficient size for one of these large machines. One such advocates using a grinder and precision level and claims an accuracy of 0.001″ in a day’s work. Another uses a moglice-style approach wherein metal impregnated expoxy is used to create a flat surface on which to mount linear rails. The resultant Madvac Kayak Router is a very impressive piece of work. Here is the CNCZone thread on the Madvac as well, FWIW. There is a lengthy thread on CNCZone that covers this approach in good detail as well, though it was for a work-in-progress as I write this. Lastly, Bosch Rexroth has an article that provides a pretty detailed introduction to how to mount linear slides, but the link keeps moving, so I have given up offering it.

Linear slides want a flat surface and an “edge” to keep them properly aligned…

After studying all of this material, I have so far concluded that my Y and Z axes pose little problem. I have purchased a commercial Z-axis from eBay that I believe will serve very well. I have a piece of 3/4″ thick aluminum that I will machine for the gantry cross piece. I would expect it to be rigid and relatively light. I intend to use my Industrial Hobbies mill to create the kind of rail mounting surface (i.e. with a flat bottom and an “edge” along one side of the rail) used on commercial machines. That just leaves my X-Axis which is more challenging. The current plan is to build it out of a framework of 4″ square tubing with 1/4″ walls. In this case I’m wondering if a couple of suitable pieces of thick aluminum can be machined and then bolted to the surface of the square tubing with suitable shims to avoid stressing it too much. The rail would then bolt to that piece. More thought is needed!

Build a Fighter Jet With Your CNC Router

Along the way studying these various intricate threads, there are always side trips and distractions. If you’ve ever wondered what someone might do with a fancy CNC router, how about building molds to create radio controlled jet aircraft:

Molds created by a CNC router for a radio-controlled fighter jet. Cool, eh?

The Ultimate Yo Yo

While cruising Practical Machinist I came across one of the coolest “fun” CNC projects I had seen in a long time. This fellow’s goal is to manufacture the ultimate YoYo:

The CNC’d YoYo…

Of course I had to do a quick Rhino drawing of it just for fun myself:

4/12/06

Adjustable Welding Table

A really nice welding table with adjustable work height:

Fully extended–note the hydraulic struts to hold the weight of that massive table…

Retracted for seated welding…

Machinery Lifting and Moving Dollies

How about this fellow’s machinery lifting dollies:

4/11/06

Veritas Optical Center Punch

Here’s an interesting new tool I came across:

Veritas Optical Center Punch ($31.50)

It’s a nifty little tool that let’s you precisely align your center punch on the correct spot before giving it a tap with your hammer. I like it, but I wonder at it’s usefulness in the wake of CNC? More and more the thought comes to me that many tools are suddenly no longer necessary if you are doing everything with a CNC. When I actually get all of my machines converted, I’ll have to delve back into the subject and see how true it relaly is.

4/9/06

Converting a Rotary Table to a 4th Axis for CNC

Here’s a nice project I saw written up recently. It’s a stepper conversion for a rotary table so you can add a 4th axis to your CNC mill. This fellow is manufacturing these things and is an amazing machinist. Check it out:

Rotary Table Stepper Conversion

There are a couple of features to the design I really like. Firstly, note how the shaft adapter is actually a machined part of the Oldham-style coupler. Why hook a coupler up twice? Much better design than what I’m doing on my lathe. I’ll have to convert once I get my mill going and can machine that tab. The second is the stepper mounting bracket. The tophat-shaped cylinder has a flange on it. The square flange has a milled recess that catches on the round part’s flange. Now, when we bolt on the stepper, it is basically a matter of sandwiching the cylinder’s flange between the stepper and the square flange. This let’s the motor be rotated to any orientation and is a very simple piece to manufacture.

4/6/06

ESAB Plasma Cutter

BTW, speaking of plasma tables, I got my big ESAB plasma cutter running this last weekend:

My brother cuts with hot plasma…

That ESAB Powercut 1500 cuts likes dream! So does the De Walt Multicutter cold saw sitting in the background. Anyway, the thing we both noticed is that this cutter has so much power, you can hardly move it along fast enough manually. Hence the need for a plasma table. The other idea that struck (where am I going to put a plasma table?), was to build a welding shop on top of the car lift you see in the picture. It’s the only way I’ve got room for it at present, and I am not using the lift much for cars.

Put a Welding Shop on a Car Lift

The idea would lay out something like this:

As you can see, there would be room for a decent sized 1/2″ plate welding table, the 2 welders and plasma cutter, a smallish plasma table (4 feet x 4 feet), and a spot to put the DeWalt saw with room to saw pretty long stock. When not in use, push a button and the hole thing goes up into the ceiling and out of the way. I can park a car under it with ease. The idea has potential!

4/2/06

Lost Wax Casting Steam Engine Parts

I was purusing a new discussion board and came across an interesting article on lost wax casting for a scale steam engine project. Wow! This guys parts really come out looking nice. He’s using a CNC to machine acrylic which is then used as a wax mold for the casting process. Here are some photos:

The acrylic mold for the wax…

Wax injector injects molten wax into the mold under pressure…

Vacuum chamber and flasks for lost wax casting…

Finished stack for a Shay steam locomotive…


Like what you read on CNCCookbook?

Join 100,000+ CNC'ers!  Get our latest blog posts delivered straight to your email inbox once a week for free. Plus, we’ll give you access to some great CNC reference materials including:

  • Our Big List of over 200 CNC Tips and Techniques
  • Our Free GCode Programming Basics Course
  • And more!

Just enter your name and email address below:

Full Name
Email *
100% Privacy: We will never Spam you!

5/5 - (3 votes)