|
|
|
|
|
|
|
Do you want to be a better CNC'er in 37 Seconds? Get Better Tool Life, Surface Finish, and Material Removal Rates Fast. It's that easy. You can install and get results now. |
March 2006 And Earlier CNC Blog Archive
3/30/06: Whoa! Long time no blog! Progress has not been as slow as this would seem to imply, but it hasn't exactly been rapid either. I got one version of the cross slide motor mount completed. It's not quite right, so I'll need to machine a second part. The piece works something like this:

It's the shaft adapter that I am having to machine over again. Actually, I will probably just make a spacer. Currently, it did not come out quite long enough to properly capture the bearing. You can see what's going on a little better if I take away the motor bracket itself:

Beyond making the spacer, I need to bore the coupler for a slightly larger than 1/4" shaft on the lathe side and I need to track down a longer metric allen head bolt. Actually, not all that much left to do.
In news on another front, I laid out my chassis that will contain the DC power supply and Gecko's. The second chassis is intended to contain the PC electronics. I want to keep them apart so the noise from the steppers doesn't glitch the computer. I still have some more lay out to do on the PC chassis, plus I need to decide what to do about the PC breakout interface. As I mention immediately below, my game plan had been to use the new GRex from GeckoDrive. That last post was over a month ago and so far as I can see, the GRex is not all that much closer to being a reality with the Mach software. Art had been saying he wanted to be done end of March, but we're now talking end of April. Maybe. For mills only, lathes to follow. There are notes that say things like backlash compensation is a month away, so I'm not too sure what state of "doneness" I can expect in a month. Meanwhile, the Gecko site will only sell you a GRex if you call them up, which gives the distinct impression they view it as a prototype as well.
I think the bottom line is that it'll probably be July before the thing is ready for prime time. Based on that, I'm back to thinking I need a ModIO board and a keyboard emulator board to go with the Campbell parallel board I already have. I hope I'll be able to use GRex when I get ready to CNC my IH Mill.
Speaking of the mill, I've been admiring Tormach's new stand for their mills. It really looks sharp and seems like it has a good plan for coolant control. Based on that, plus the fact that a pal of mine knows a great sheet metal guy, I drew up some plans to make something similar for my IH Mill:

I'm envisioning creating a welded base underneath using some 1/4" steel plate and square steel tubing. Eventually I will also build a splash box around the table, again, like the Tormach arrangement. I think these two will handle flood coolant just fine and will give the mill a more professional appearance. I'll get the sheet metal guy to make up the drip pan and splash gaurd and I'll weld together the lower base. Speaking of welding, I have been needing a project at home anyway. I've got my 220V circuits installed at last and it's time to play with my Tig Welder, Plasma Cutter, and soon to be arriving Mig Welder (yep, another deal I couldn't pass up came along, sigh...):

2/20/06: My brother came over again today and we had another big blast of progress. Things always go a lot faster with him in the shop. He keeps me from wasting too much time I guess. We finished mounting a stepper to the Z-axis (leadscrew):

While I was futzing around down in the shop I set up my dial indicator and measured the cross slide backlash. It was 0.0015", which I took to be pretty darned good for a Chinese lathe. My initial plan for CNC is to skip the ballscrews and see how it goes, so we'll see how bad that backlash turns out to be.
As I write this I'm waiting for the GeckoDrive site to start working again so I can order a GRex. That single component will make wiring up my control panel straightforward. It replaces a parallel combo breakout board from Campbell Designs, a Hohman ModIO, and an iPac keyboard emulator. It will do all of that for less money as well as being better integrated and more compact. The only downside is they're still debugging Mach IV for the GRex, but Art assures me on the sight that this is 3 or 4 months at most. At the rate I'm moving, I don't see that as a problem.
2/19/06: My brother David and I laid out and mounted controls on the control panel today. Woohoo! Really looks cool:

I used Rhino to layout the holes.
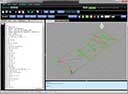
2/16/06: Installed my brand new copy of OneCNC Lathe Express and Mill Advantage today. Oh my gosh I have not seen such slick software in quite a while, and I am in the software business so I know! First, the visual quality of the thing is just incredibly plush. It's just filled with delightful eye candy in the user interface. Second, the commands are laid out in a very simple and well thought out way. I did the simple tutorial for the lathe software and it was completely mind boggling. The potential there is just amazing. With that said, the complexity is also very very high. This is not the fault of OneCNC. On the contrary, I think they have tremendously simplified what is just an extremely difficult area, which is defining toolpaths for CNC machine tools. It's just that I personally have got a whole lot to learn before that stuff becomes second nature to me.
Note to self--I need to pick up a USB hub to make room for their dongle.
I added a "Rhino Tips" page so others can see the little things I've learned as I picked up this new tool.
2/15/06: An insanely good idea for how to use big industrial toolholders easily found on eBay on your small AXA series QCTP:

Just mill a dovetail slot in dat sucka! Just too sweet!
2/14/06: I got my official copy of Rhino 3D today! No more rationing my 25 saves or whatever the number was on the evaluation copy. Now I need to get busy with the hard task of learning to be proficient with the tool. The tutorials are extremely helpful, but I also need to get busy doing drawings for various parts so I can learn how to apply what I learn in the tutorials. Incidentally, I got the software from an outfit called "ez-router" that was recommended to me by Bob Campbell. They sure did have the best price I could find anywhere. Thanks to Bob and the ez-router folks!
Here is the first drawing I did:

Lathe Chuck Backplate...
2/12/06: If you really want to understand how to build accurate machine tools, there are two books you want to have:
Foundations Of Mechanical Accuracy, by Moore.
Machine Tool Reconditioning, by Connely
Both are very hard to find and expensive, but they contain the gold on this topic. The Connely book is considered THE tome on scraping, while Moore's book was written by the founder of Moore tools and concerns the creation of machine tools accurate to the millionths of an inch. Both are also very expensive if you can find them at all.
Interesting article on using kilns for heat treatment.
I purchased 2 power supply rectifier boards from Ajax CNC. I really like the way the just bolt to the top of the filter capacitor:

AjaxCNC Power Supply Board...
They come assembled and will work fine with the capacitors I got on eBay. This will make for a more compact installation in my cabinet as well as cleaning up some point-to-point wiring I would have to make for the power supply. At $29 apiece, they seemed a good deal. Tormach has a similar card that adds fuses but does not bolt to the capacitor and they want $79 for theirs, so I thought this one was a decent deal.
2/11/06: I ran across something that really got me thinking. I'm planning to build a smoker one of these days as well as hot rods, and I had been thinking about some kind of an A-Frame to help lift heavy things around the shop. The thing I came across is a really slick A-Frame that is portable and can be knocked down. Check it out:

Using the A-Frame to Move a Big Mill...

A little closer look...

Closeup of the I-Beam "Head"...
Supposedly this guy's company paid $3500 each for several of these frames. They're custom welded up and made of aluminum so they're easier to move around. The outside tube dia 3.5" The inside tube dia 3" Both 1/4" thick. 55" tall plus the 6" tall head that holds the I beam, with 6" hole spacing for adjustment. The base is 3" angle 36" long Each leg weighs 39# The I beam is 3X5" structural aluminum 10' long but they also have 6, 10, and 15' lengths. It will go over 9' tall but I would not trust it with much weight at that height. That mill has to weigh well over 1000 lbs. One fellow commented that you can buy the adjustable supports at a building supply to use as house supports. A lot of good information is available from Bushman on these Gantry Cranes. Of course Harbor Freight has a 2 ton gantry crane, but it isn't aluminum and isn't nearly as slick to assemble disassemble. OTOH, it's pretty darned cheap!
What a cool idea this A-Frame is! Now if only my aluminum welding with the Tig were a little better! I also came across this idea for an overhead railing system to use with the workshop for heavy chucks or rotary tables: http://www.homemetalshopclub.org/projects/crane/crane.html. Looks pretty slick!
Speaking of which, I finally got an electrician out to install some 220V circuits to run my mill, Tig, and Plasma Cutter. Eventually I'll get it all together! Lest ye think I'm ignoring the CNC lathe project, I also found time today to assemble some custom buttons for the lathe's control panel. They're pretty cool looking! I got them from Happ Controls which sells them as replacements for slot machines. As such they are completely bulletproof.
I found an awesome article on powder coating in the home shop which I shall have to try some day.
2/9/06: Ran across a fellow who has a cool site on CNC conversions, and noticed he had an interesting procedure for referencing the tool off the lathe chuck. I really like this idea and will check into it when my conversion is further along. His site includes some improved Mach 3 panels as well to work with this procedure. There was a great thread on the Home Shop Machinist board about setting tool heights for lathes that has pictures of some of the homemade tools these folks are using for the purpose. I have a little tool that has a level and a v-notch that I got off eBay.
2/5/06: Broke down and bought a set of NEMA 23 motor mounts from eBay today. They were just too good to pass up for $25 apiece--much nicer than I'll be able to make for some time.

Nema 23 Motor Mounts...
2/4/06: I got a bunch more goodies in the mail today. OneCNC arrived--hooray! I need to install it and play a bit over the weekend. The packaging is a bit anti-climactic given the cost, but this is normal for software. My firm, Callidus, sells software that costs millions of dollars and it doesn't come in a solid gold presentation case! I also received my second set of step motors. These are NEMA 23's but with 400 oz in. They were brand new motors manufactured for MiniTech mills (a very good brand) and cost $50 apiece. I may use one on the leadscrew if I decide the original motors aren't strong enough. Anyway, they were about the strongest NEMA 23's I had yet seen so I figured I'd latch onto them. I also got my Micronor MPG's from Rogers Machine. Boy are these things sweet! Silky smooth feel of Swiss-made precision. I'm so glad I splurged on these rather than trying to make an MPG from an encoder. There's other odds and ends floating around, but I'm still not quite complete. My order for pushbuttons from Happ Controls wound up on backorder-DOH! I also have a lengthy "Honey-Do" list for the weekend. I'm hoping to blast through it and maybe start to mount components in the NEMA enclosure.
I've been going through the Rhino 3D tutorials (still haven't received the "official" version I bought cheap, so I am conserving my 25 saves). The tutorials for the program are very good, and I am enjoying using it more and more. I can see why people really like Rhino as it is easy to use and understand. The basic concepts behind solid modelling are a little arcane, but that isn't Rhino's fault and the tutorials do a good job of showing you a lot of that.
I've about decided one of my first "real" CNC projects for the lathe needs to be construction of another backplate. I've got a nice 5C collet chuck I bought from Lathemaster, and I'd really like to put it to work. I've been fiddling with drawing it up in Rhino as a good learning experience and have found it to be pretty straightforward. I haven't saved the drawing yet, so I start from scratch each evening and go a little further. I need the repeated drill to hone my Rhino skills!
1/31/06: I've been reading about some novel uses for lasers in the workshop. I mentioned below the ScanZ program. Another simpler application uses a device sold by Sears called a "LaserTrac" to project a crosshairs on your mill table or drill press showing exactly where the spindle is centered. I need to rig up one of those as well as investigate their use when centering work in a 4-jaw lathe chuck! Only problem is that the consensus seems to be the device is not very precision oriented.
I was reading somewhere else about a device for measuring the accuracy of CNC machines and calibrating their compensation called a "Renishaw Ballbar." The thing is fabulously expensive, but it has got me wondering what amateurs can do to achieve our equivalent result. My thought is that there should be something similar to the test videos used by home theater enthusiasts. Imagine a "reference g-code program". You run it on your CNC machine and out pops a part. You then measure various points on the part with your micrometers and what not to learn what's "off" on your machine. Presumably you could measure all kinds of things with such a standardized test case. I wonder if any such thing exists?
How to polish aluminum: Here is another great forum thread I've noted for future analysis. Lots of nifty secrets on how to get production quality finishes on aluminum using everything from chemicals to bead blasting to vibratory polishing.
A 5-Axis Benchtop Mill: I just scratch my head in wonder. The custom made mill and the resultant work products are really cool!
1/30/06: I'm collecting machine accuracy and adjustment threads so that one day I can gather up all that great advice and write it down in a coherent plan of action for those that want to tune up their machines. This is a good thread on checking the accuracy of the ways and adjusting leadscrew parallelism.
One of these days I need to check out AutoEditCNC, a "smart" text editor for working on g-codes.
Cool item for today: How about a 3D scanner that uses a laser and a digicam to scan something placed on your CNC mill table? This idea is based on some software called ScanZ that is really cool. The guy uses a laser line generator, available cheaply as a tool for hanging picture frames, and a digicam. The laser generates a high contrast line that follows the contours of the 3D object. He takes a series of these photos, moving the laser line by a fixed amount each time. His software then builds a complete 3D model by processing those high contrast laser lines. What a great idea!
Good People: One thing I have discovered in my Internet travels is that there are so many good people involved with this CNC thing. The knowledge and talent is staggering, but their willingness to give of their time freely goes above and beyond most any other hobby I've ever seen. Just yesterday I had two great experiences in this respect. First, I contacted Roger's Machine to inquire about their MPG's. I had a great discussion and wound up buying two. Then I happened to hear from Bob Campbell of Campbell Designs because I had signed up for the Yahoo Visual Mill group. He was able to vector me on to an outfit selling Rhino 3D at a fantastic price so I promptly ordered one of those. His email to me was dated 4am, so I don't know when he sleeps! Numerous other folks have responded to my cold email inquiries about this thing or that. I will tell you that I will pay more to deal with great folks like this because their help to me is priceless.
1/27/06: Came across another new CAM program called Dolphin. Recommended by John Stephenson on PracticalMachinist board for lathes. Read more about BobCAD on the same board. They absolutely loathe it there. That program seems to have a terrible reputation for some reason. I guess I'll steer clear of it! Also discovered there is a Metal Supermarket near San Jose airport--very close to where I work!
Another web discovery--Iscar Multimaster insert mills. Carbide mills with inserts for precision milling. Very highly recommended. Now I just need to figure out what they cost! Another high performance insert cutter is the Shear-hog. I'm picking these up reading the user support board for OneCNC.
One of my challenges at present is understanding the different versions of the CAD CAM programs. They all seem to have a bunch of versions increasing in price quite steeply. Being able to target the lowest end version you can live with means considerable savings. It isn't always easy to choose. Some vendors, like OneCNC, provide a comparison chart to help.
I came across a USB keypad that is programmable and might be useful for a custom CNC panel. It's pretty basic, and I understand that Mach works better with a PS2 than a USB keyboard. At $85 its also not very cheap.
Other miscellaney:
- Unicam, a Brazillian product that looks great and is used for both mill and lathe.
- Minitech: Super high-quality small CNC mills. This is one of the outfits 5Bears studied before designing his mill.
1/26/06: I'm still scrounging parts here. Ordered a 2HP VFD for the new mill motor from an outfit on eBay called www.driveswarehouse.com. These guys have good prices and are easy to deal with. I decided to go with Neutrik Speakon connectors for the step motors. These are available cheap on eBay, they look easy to assemble (compared to special crimpers and stuff needed for amp), and they are weatherproof (hence hopefully coolant proof!). They're heavy duty rubber coated connectors used for professional music applications like rock concerts. I got some panel mount female connectors and a pair of 5' 14 AWG 4 conductor cables, which should be perfect for my two lathe axes. I also got my combo breakout board and Gecko drives in the mail today. Boy those Gecko's sure are slick! It's no wonder they're doing a business. Lastly, I ordered the components for a Micro-ATX form factor PC from NewEgg. I got an Asus K8V-MX motherboard, a cpu, some memory, a DVD drive, and a power supply. It was about $450 or so for the PC components.
1/22/06: Today I'm trying to understand the trade-offs between ground and rolled ballscrews. Of course some folks will tell you there is no comparison, go for the ground. Others seem to feel that with leadscrew compensation (which Mach has), rolled ballscrews are fine. The issue also seems to be linked to usage. I have the impression that a mill doing detailed 3D profiles (e.g. carving really intricate stuff) has to have ground ballscrews whereas my lathe may not benefit. On the lathe there is no analog to the complex 3D milling chore, and direction seldom reverses.
If using rolled ballnuts, many recommend a double ballnut with preload (wavy washer) between the nuts. Industrial Hobbies has a tip on their site showing how to do this.
1/20/06: Got some excellent CNC goodies in the mail today. First is a pair of arcade-style joysticks that I got on eBay for $20. I plan to set one of these up on the lathe control panel for fast slewing. It has 4 microswitches which I will set up for the Mach 3 Shift+Arrow fast jog commands. Second is a set of 3 Kerk anti-backlash leadscrews. These are small and were very cheap at $9 apiece. I really wanted to just see and potentially experiment with them. If they look like the real deal I may use one for the cross slide in my lathe to reduce the backlash. The sure are smooth and low friction just playing with them by hand!
I also ordered a pair of Gecko
drives today and a Combo breakout board from Campbell designs. I ordered
the Gecko 202's because they have short circuit protection and are said
to be more "beginner proofed." Lastly, I ordered a new motor
for my mill, the Leeson 2-1.5hp-kw 3425rpm #192074 that Industrial Hobbies
recommends. I have a line on a Variable Frequency Drive for it as well,
but didn't pull the trigger yet.
All told, spent a fair amount of bucks between the Gecko's, combo board, and mill motor.
Last night I was cruising the web for something and came across the most intriguing little Penguin Robots that were made with a CNC machine:

There's a movie of them walking if you click through the link. These are just too cool!
One thing I've been looking at off an on is how to do the cabling to the stepper motors. The leadscrew motor is fixed, so no biggie, but the cross slide motor moves. One of the "pro" methods is to use an Igus Chain:

Igus Chain Cable Manager
These chains are readily available and have been used for CNC cable routing applications. The best application I've seen is for routing the cables down to a moving Z-Axis head on a mill, but it's also a possibility for the lathe. Another solution is to just use a coiled telephone-style cord. I think the latter may be better as I worry about swarf gumming up the Igus Chain.
Miscellaney:
Amazing thread on backlash, ballscrews, and bearings for a Bridgeport CNC retrofit.
Amazing shop for light manufacturing, all built by 1 guy.
Same guy does a nice VFD mount on his mill.
1/18/06: I got to wondering about what comes upstream of Mach in a lathe CNC system. In other words, if I am not using the Mach Wizards or writing g-code by hand, what software would I use to develop the g-codes? It seems that the mill world is much better served than lathes. I did manage to find some software, the trick will be balancing function and cost. Here are some notes and thoughts:
MasterCAM Lathe: Looks really slick. Available cheap to students but you have to be enrolled in an accredited program and the license times out in 9 months. Looks really painful for the rest of us.
Vector CAD/CAM: Claimed to do lathe, but their site links don't work for lathe. Can be had cheap. Not much info available.
ACE: Shareware that will convert lines and arcs in a DXF file to a toolpath. Sounds like it works great for milling. Not sure if it could be used for cutting profiles or not.
SurfCAM Lathe: Very cool looking package with 3D modelling and profiling. You have to purchase software maintenance. Given this and the fact that nobody quotes prices, you have to contact their dealers, fight through sales people, yada, yada, I would assume it is expensive.
EZCAM EZTurn-Express: $995 (at least they'll quote a price!). You can get a combo deal with EZMill for $1495. Looks pretty comprehensive, but not cheap!
ShopCAM: $795 to $995. It looks pretty nice. Definitely a step up from Kipware.
CAMSoft: $1995
OneCNC: $???. Rumor has it the program is $1500, which is Visual Mill territory. Waiting on a price quote. This one seems really highly regarded and could be the best of the lot. It sure looks impressive. It's probably too much! Many have said it beats MasterCAM and VisualMill (yep, I know VisualMill isn't for lathes!). Everyone raves about OneCNC.
TurboCadCam: $995. Not bad! I need to do more research. It works with Mach and supports lathes. Full version of TurboCAD included. Could be this kills many birds with one stone. Some users report a steep learning curve, but every question I read on CNCZone the guy eventually got help and got it to work. There does seem to be a suspicion that OneCNC is an upgrade from it, however.
Rhino: Everyone loves this solid modeling program. It is the CAD part, not the CAM, though they make a CAM module too. Rhino can be purchased from $600 to $900 roughly. If you are a student you can purchase it for roughly $200 at www.journeyed.com, or www.data-switch.net.
AutoCode: A CAM companion for AutoDesk that supports lathes and mills. Need to research more.
Miscellaneous Tidbits:
Enhanced Mach 3 Lathe and Mill Screens
1/14/06: Built a page of panels and pendants found all over the Internet so I can see what all the possibilities are before designing a panel for my lathe.
1/13/06: Back from vaca. I did a ton of reading. I'm pretty convinced I want the Campbell Designs Combo Breakout Board. It isn't cheap, but it combines a number of functions I'm sure I will want. I have to decide for the additional inputs whether I want to go ModBus (i.e. USB) or use a second parallel port. I'm likely to take the USB route as I believe this is what Art, Mach's chief developer, is using. Lastly, I note that the IPAC is a really slick device to allow you to take up to 56 additional button inputs and convert them to virtual keyboard presses. I think that for example this is a way to use a 4 position arcade joystick to deliver rapid slewing as well as a number of other functions. X-Arcade has a real nice arcade-type joystick 2 for $19.95. I can probably find one on eBay too.
12/27/05: Drew up some preliminary plans for how to mount the steppers to the shafts.
12/26/05: One of the great difficulties in performing manual machining on a CNC-converted machine is ball screws are not suitable for manual work. They have so little friction that they will not hold their positions without a powered up stepper or servo to keep them locked in place. Some machinists have fashioned friction locks to try to compensate, but there is another alternative: high performance leadscrews made by Kerk. Another alternative are these anti-backlash nuts from Dumpster CNC. Once you start looking for these nuts there seem to be a lot of them around. Their makers swear by them and measured backlash seems to be light. This is not the conventional wisdom, but I like to understand all of the alternatives. One thing I notice is that for a mill's Z-axis, the thinking seems to be that a nice leadscrew works well enough because all the weight of the head cancels out the backlash. That's a good things for me because my Industrial Hobbies mill head weighs 200 lbs and has so much travel that a ballscrew would be very expensive for it! Even so that's a lot of weight so probably a counterweight will be in order when I get ready to CNC the mill.
I also went down and partially disassembled the lathe to measure the shafts for couplers. McMaster Carr has helical beam couplers that will work out well for the project.
12/25/06: I came across some new products from a company called PMDX that look really well done today. These guys make several intriguing products, but I especially liked their PMDX-135 Power Preparation Module and PMDX-131 Breakout/Motherboard. The PMDX-135 Power Preparation Module is basically everything you need for the step motor (or servo motor) power supply except the transformer. This even includes the recommended fuses. The board is compact, assembled, and even includes circuits to drain back EMF. The boards are $119, which is more than you'd pay to just slap together a bridge rectifier and capacitors, but this device sure is slick. The PMDX-131 Breakout/Motherboard is even niftier. It is designed so that the Gecko drives attach to it directly. They would be bolted down for heatsink purposes and this think hovers directly above with a direct connection to their appropriate leads built right in. No hand wiring to the Geckos, shortest possible wiring runs, again, very slick design. I think these little boards would really streamline the stepper infrastructure piece and leave a lot more room to manuever in the NEMA enclosure.
The second thing I've gotten interested in is Micro-ATX form factor PC's. These little boards are available very cheaply from NewEgg (they had one for under $40!). They have a parallel port and all the other usual connections, plus they accept a couple of PCI cards should expansion (i.e. for a second parallel port to deal with that Rogers encoder board!) be needed.
12/23/05: As I write this the other members of the Yahoo E-Leadscrew Group have really got up a head of steam. John D. is able to synchronize a stepper to a dc motor simulated spindle, and change the ratios in the software to simulate driving a leadscrew for particular threads. Paul Kelly has shown a couple photos of his "2 knobs and a button" design for an ELS that look quite intriguing. I am hopeful we will be ready to pass from prototype to figuring out producting sometime in the next month or so. Meanwhile, since there are so many variables at the controller end, I have been focusing on doing research about CNC (especially conversational CNC) and on setting to work to create the power supply and other stepper infrastructure that will be needed in any case.
I have ordered a good set of basic parts to begin the power supply, having found a nice toroidal transformer (recommended by Bob Campbell in some board or other), bridge rectifier, and large filter caps. With help from Dave Mucha on the E-Leadscrew board, I think I now understand the power requirements of my step motors much better.
While waiting for these simple parts to arrive, I'm starting to think about how I want to do the enclosure. A lot of the very professional looking CNC conversions are using NEMA-style enclosures. They look right at home next to a machine and have dust sealing features and so forth. I would mount the power supply, Gecko drives, breakout board, and probably a few other odds and ends in the enclosure. I will probably order one of these pretty shortly.
On the CNC research front, I have become captivated with the idea of Manual Pulse Generators (handwheels connected to encoders and abbreviated "MPG") after reading a discussion of how easy they are to create on the Yahoo CAD CAM EDM DRO board. It very simply to generate step and direction pulses from an encoder using a single chip. Pick up a cheap rotary encoder ($19) from US Digital, connect to a chip they sell (LS7184, $3.05), and you've got the step and direction. If the encoder resolution is the same as your step motor's (e.g. 200 per rev in my case), you have a nice 1:1 match between the two and the ratio will feel identical to a directly connected manual handwheel. Another fellow points out that you can even direct connect to the encoder for even simpler step/direction:
Actually, an encoder is already step/direction, as long as you don't spin it too fast (which you can't by hand ;) ) Just connect phase A to the direction input, and phase B to the step input. If it runs backwards, switch the two wires. Here's why it works. This is the pattern of phase signals from an encoder (note that they always specify whether it's for clockwise or counterclockwise rotation in the datashets): A B 0 0 0 1 1 1 1 0 The stepper drive will only be looking for one edge of the step signal - let's pick the negative-going edge. If you apply the sequence above (dir=A, step=B) to the drive, then it'll see a 1 on DIR when the negative step edge appears. If you spin it backwards, you get the reverse sequence: A B 1 0 1 1 0 1 0 0 Now, every time the step pulse goes to 0, there's a 0 on the DIR pin. The disadvantage is that you get only one pulse per full cycle - there's no "resolution multiplication" that we're used to. Oh - and the speed limit is due to changing the direction line during a step. With 1000 CPR encoders, you'd have to spin it at about 12000 RPM to have a problem ;)
I dug around and found a video of a Centroid CNC lathe with dual handwheels. I like the idea of the center joystick for fast traverse, and the natural mounting position. On Hardinge lathe conversions they keep the handwheels in the stock position but connected to encoders and not the leadscrews. The operator certainly looked very natural using them. BTW, there is a video of the lathe making a part that is very cool as well. I found a number of good links relating to the MPG's and achieving more natural interfaces to CNC controlled machines:
Euchner makes MPG's and has a nice pdf paper that tells all about them.
Advanced CNC Service has an MPG for $102.
Anaheim Automation makes pulser boards and joystick controllers.
Electromate has an MPG for $130.
Machinemate has one for $100.
While digging around through all of this I found an amazing article on an extremely intricate custom CNC control panel an amateur has made. It is a very ambitious project and he hasn't even bought the machine yet! Nevertheless, it has been inspirational to see what is possible.
After looking through all of this, it seems clear I need yet another page to organize thoughts about CNC control. There just isn't enough time in the day!
The list bit of CNC investigation I have been wondering about is the whole issue of backlash and closed loop control. Just adding an encoder to the steppers is a pretty weak excuse for closed loop. It will detect missed steps, but it will have nothing to say about backlash, which can be a serious issue in CNC applications. It is so serious that most CNC'ers lust after expensive ground ballscrews because they don't have much backlash. There are three problems with the ballscrew approach. First, they are expensive. That has not stopped me before, so let's keep talking. Second, once you convert to ballscrews, all hope of manual handwheel operation is gone except for MPG's. There is simply not enough friction left in the system and the tool will push back on the ballscrews and move them. Doh! Lastly, and this is the most difficult obstacle, it is very hard to find room for ballscrews on the lathe, especially the cross slide. By their nature, ballscrews are pretty bulky.
My thought is that if I can use some DRO-style glass scales, these would give the faithful position information regardless of ballscrews. There are some mysteries about this. First, while I have found articles that suggest Mach can read DRO scales, they have little to say about the impact on dealing with backlash. I need to understand better what happens here, and may simply have to contact the creators or post on their board to see the result. Second, interfacing the scales is not so straightforward. There is a special board by Rogers Machine that claims to do it and connect via a second parallel port. Turns out that board is built by the same guy that builds Campbell Designs popular breakout board, which is intriguing. Need to do more research on this! I posted a question to the Mach support group. I also need to decide what to do about my Shumatech DRO. If I can really connect the DRO scales to Mach and benefit, I think I'll go ahead and build the DRO and get it all connected. I can always sell it to someone if I move up to Mach.
Somewhere in the midst of all this I found an inexpensive 12" ELO LCD touch panel on eBay and bought it. The thing is supposed to be liquid-proof, which seemed like a good idea for a machine tool application. Sniffing around the Mach Wikipedia, there is an article on hooking up touchscreens to Mach. They mention an onscreen keyboard software product which might also be useful to know about for various purposes.
Another thing I notice in all of this is that the guys with MPG's also want an analog spindle speed override. Presumably this lets them deal with chatter and so forth in real time. It looks to me like their setups toggle in an optional trim pot that centers around the value driven by the CNC software. It is mentioned that while this could also be done in software, its nice that the knob "remembers" its position
I found an awesome page that details how to use your parallel port to "talk" to things. This is the standard way all the CNC stuff connects using breakout boards.
|
Do you want to be a better CNC'er in 37 Seconds? Get Better Tool Life, Surface Finish, and Material Removal Rates Fast. It's that easy. You can install and get results now.

|
||||||||||||||||||
| ||||||||||||||||||